48
Het aanzetten en de keuze van de functies
DE ELEKTRISCHE AANSLUITING
Alvorens de stekker in het stopcontact te
steken dient men te controleren dat:
• De netspanning overeenkomt met de
waarde aangegeven in de technische
gegevens;
• Het stopcontact en het elektriciteitsnet
van dien aard zijn dat ze de vereiste bela-
sting kunnen verdragen;
• lHet stopcontact van het geschikte type is
voor de stekker, indien dit niet het geval is
het stopcontact vervangen.
• Het stopcontact geaard is. De fabrikant
stelt zich niet aansprakelijk indien deze vei-
ligheidsnorm niet in acht genomen wordt.
7
De vervanging van de voedingskabel mag
alleen door geautoriseerd personeel wor-
den uitgevoerd.
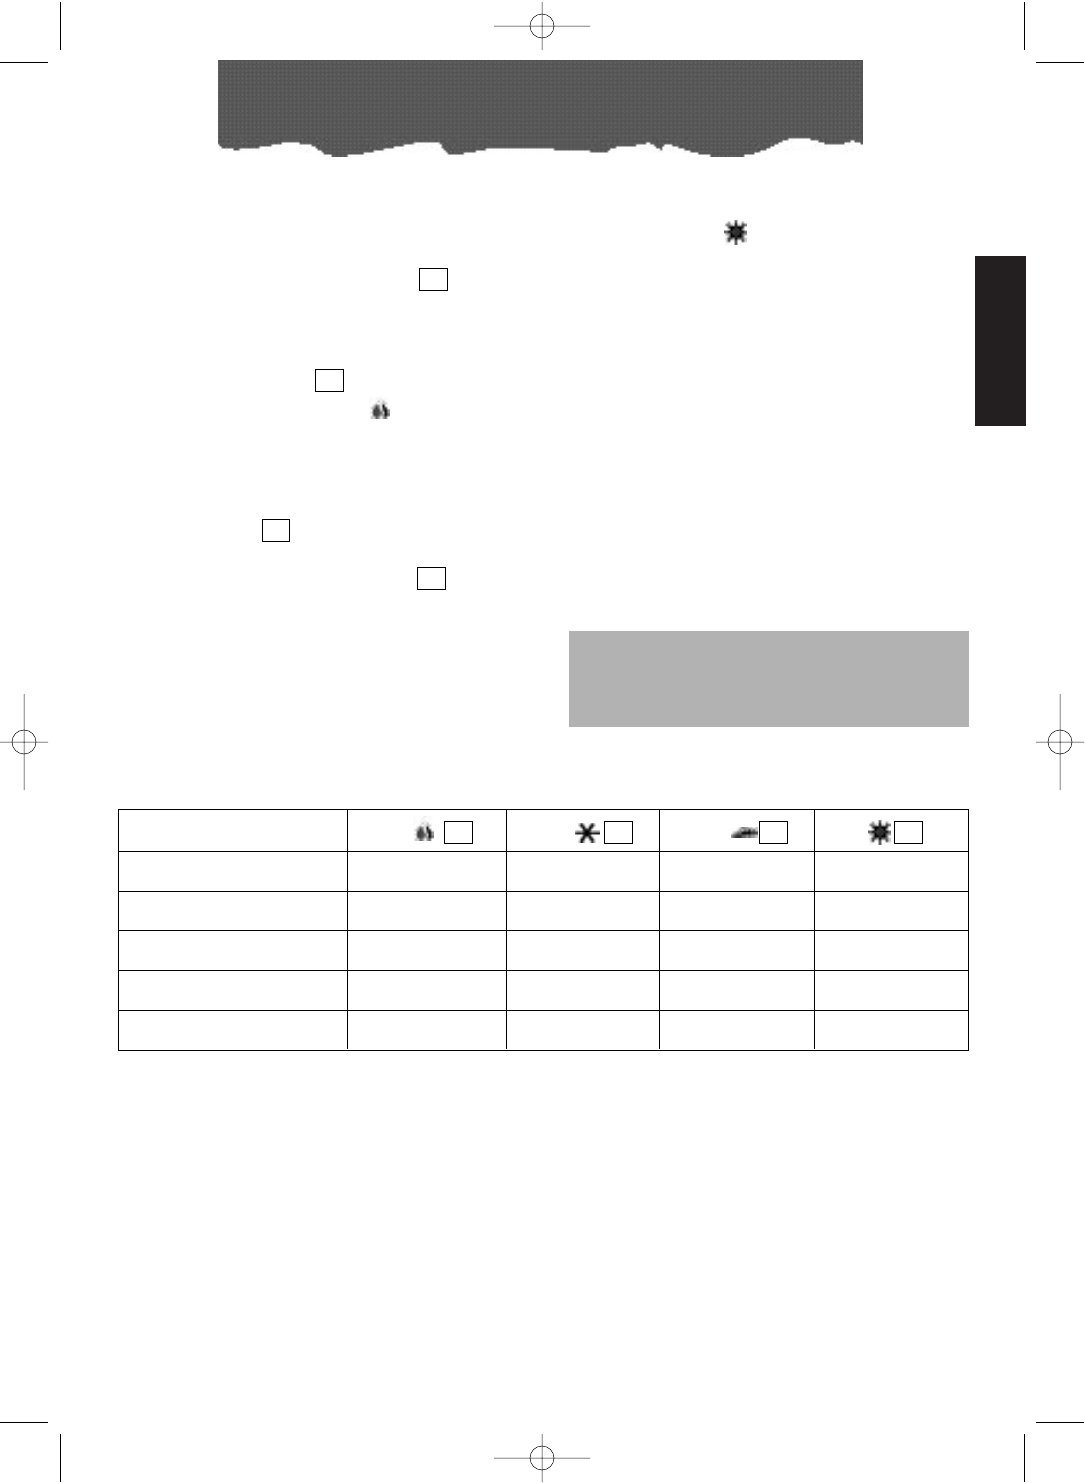
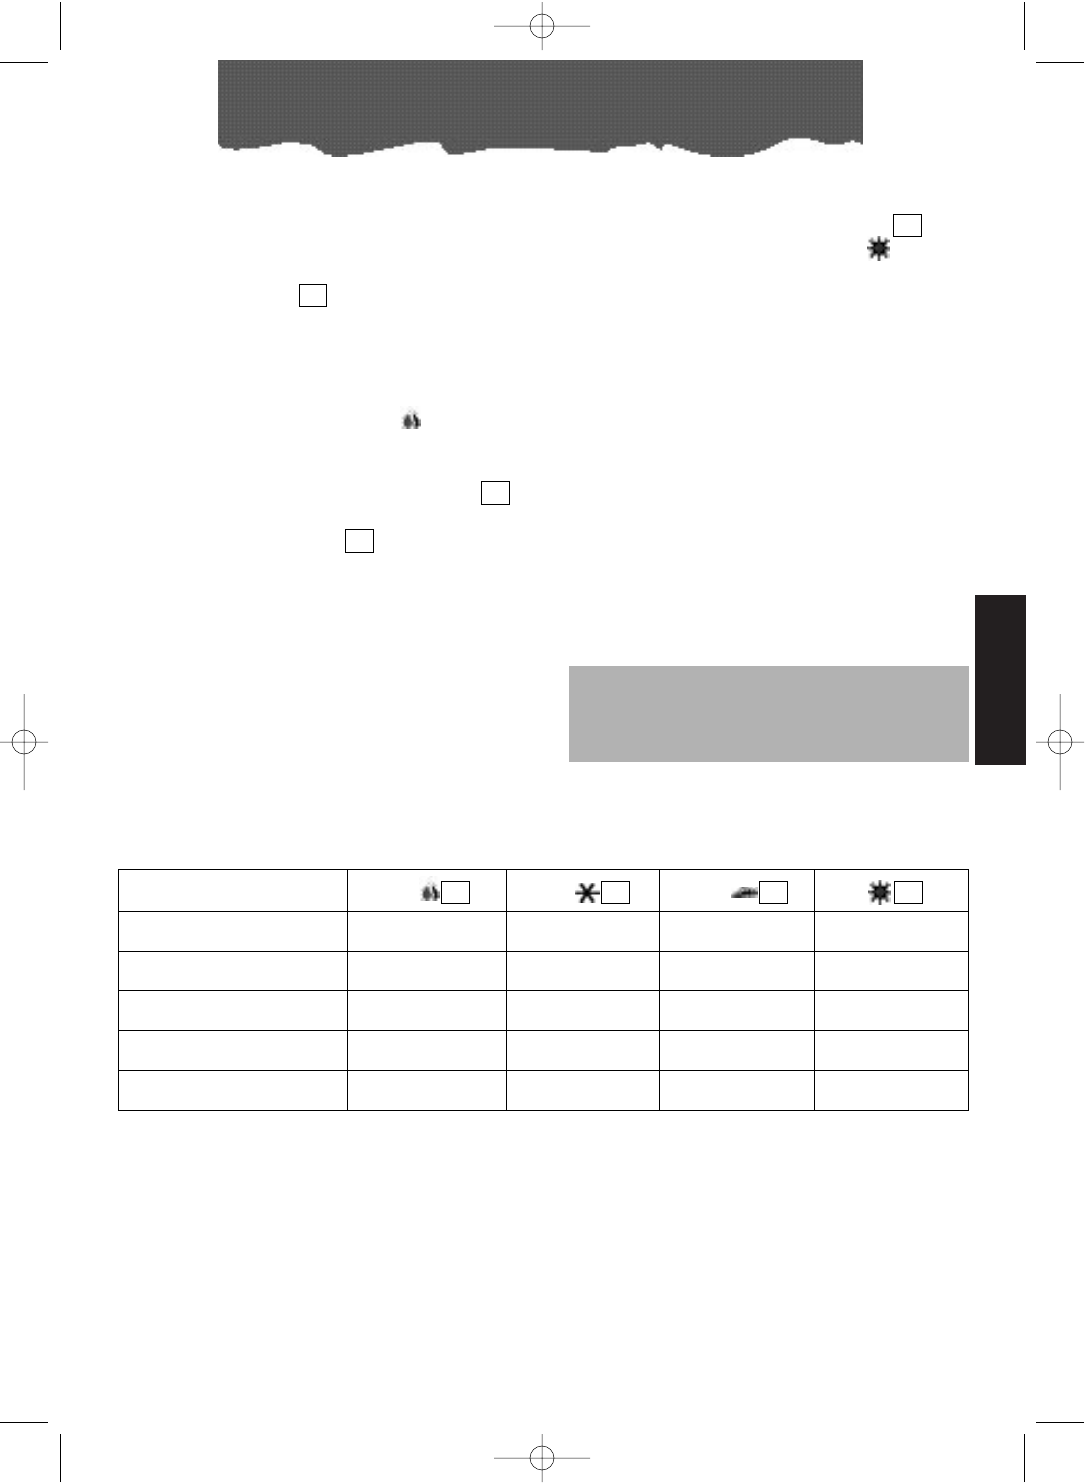
HOE TE KLIMATISEREN
Indien de airconditioner afstaat, staat de
functiekeuzeknop op stand "●". Om het
apparaat te laten functioneren in de functie
klimatisering, als volgt te werk gaan:
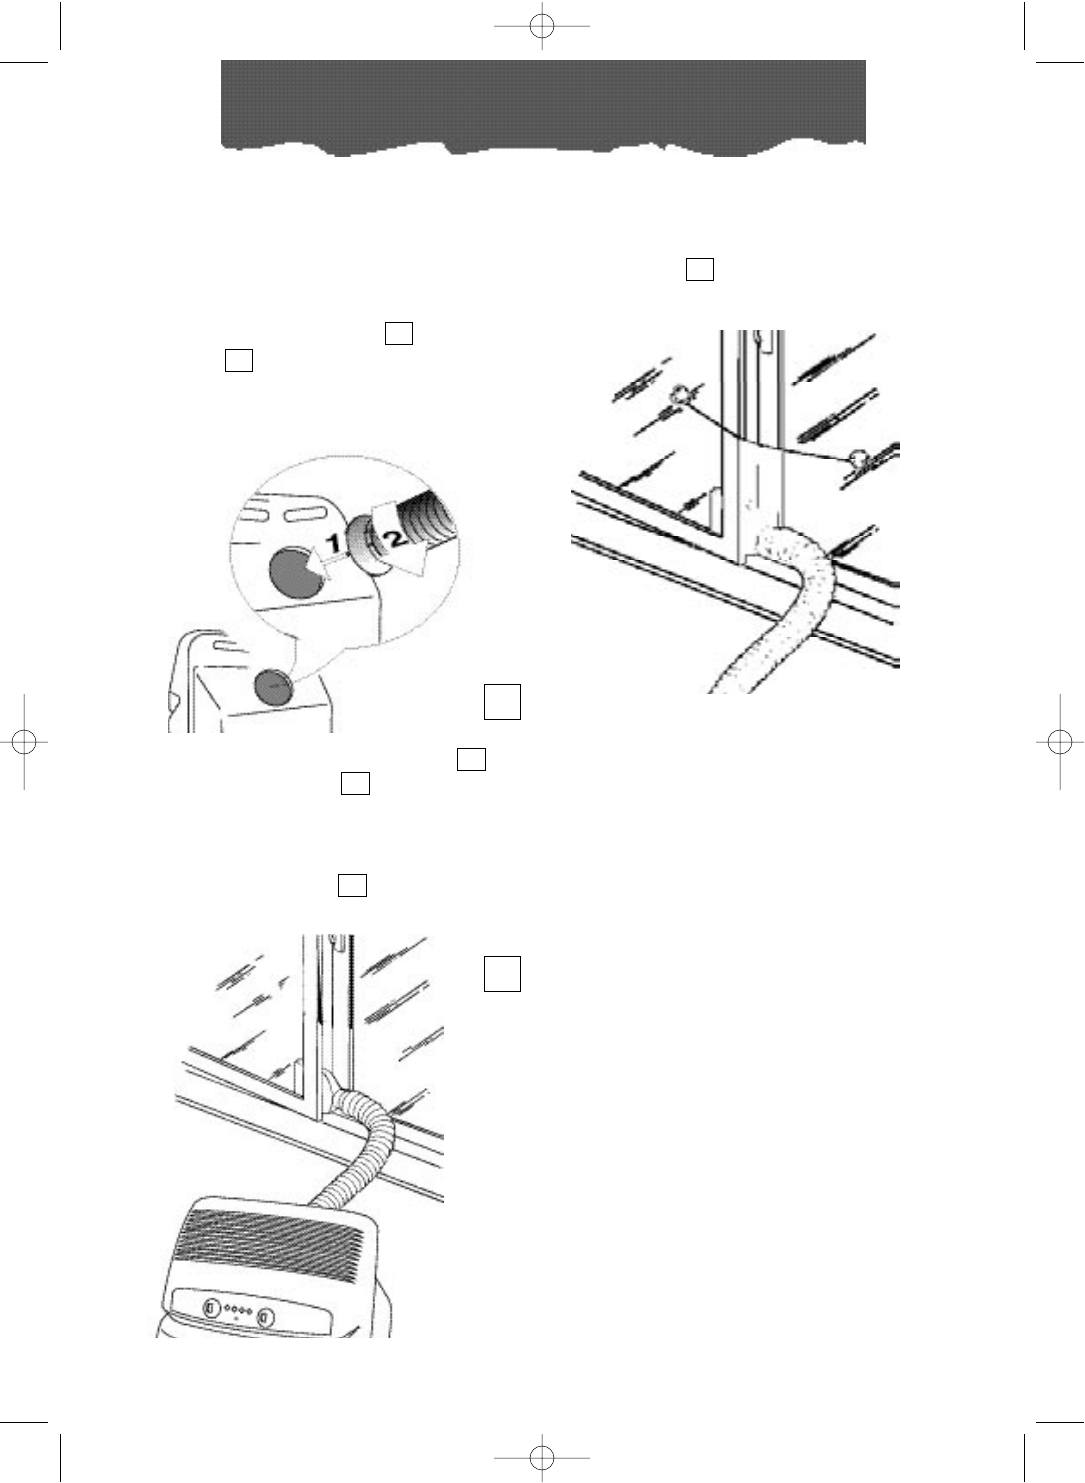
1. De functiekeuzeknop met de wijzers van de
klok mee draaien,
•Door het symbool van het grote kristal
in overeenstemming met het referen-
tieteken te zetten, zal het apparaat in de
functie klimatisering met maximale venti-
latiesnelheid functioneren.
• Door het symbool van het kleine kristal
in overeenstemming met het referen-
tieteken te zetten, zal het apparaat in de
functie klimatisering met minimale ventila-
tiesnelheid functioneren.
2. Nu kunt u de gewenste temperatuur instel-
len door de thermostaatknop te draaien.
Opmerking:
De temperatuur is niet aangegeven in gra-
den. Wij raden daarom aan de thermo-
staatknop op de maximale koude stand te
zetten, wanneer de temperatuur in de ruimte
het gewenste niveau van comfort bereikt
heeft, kunt u de thermostaatknop langzaam
kloksgewijs draaien totdat de thermostaat in
werking treed en de functionering onder-
breekt. Op deze manier zult u het apparaat
geprogrammeerd hebben op de juiste tem-
peratuur die automatisch door de thermo-
staat in stand gehouden zal worden, waar-
mee tegelijkertijd een aanzienlijke energiebe-
sparing verkregen wordt. Iedere keer als de
airconditioner de ingestelde temperatuur
bereikt, zal het apparaat doorgaan met
functioneren met alleen de ventilatie functie.
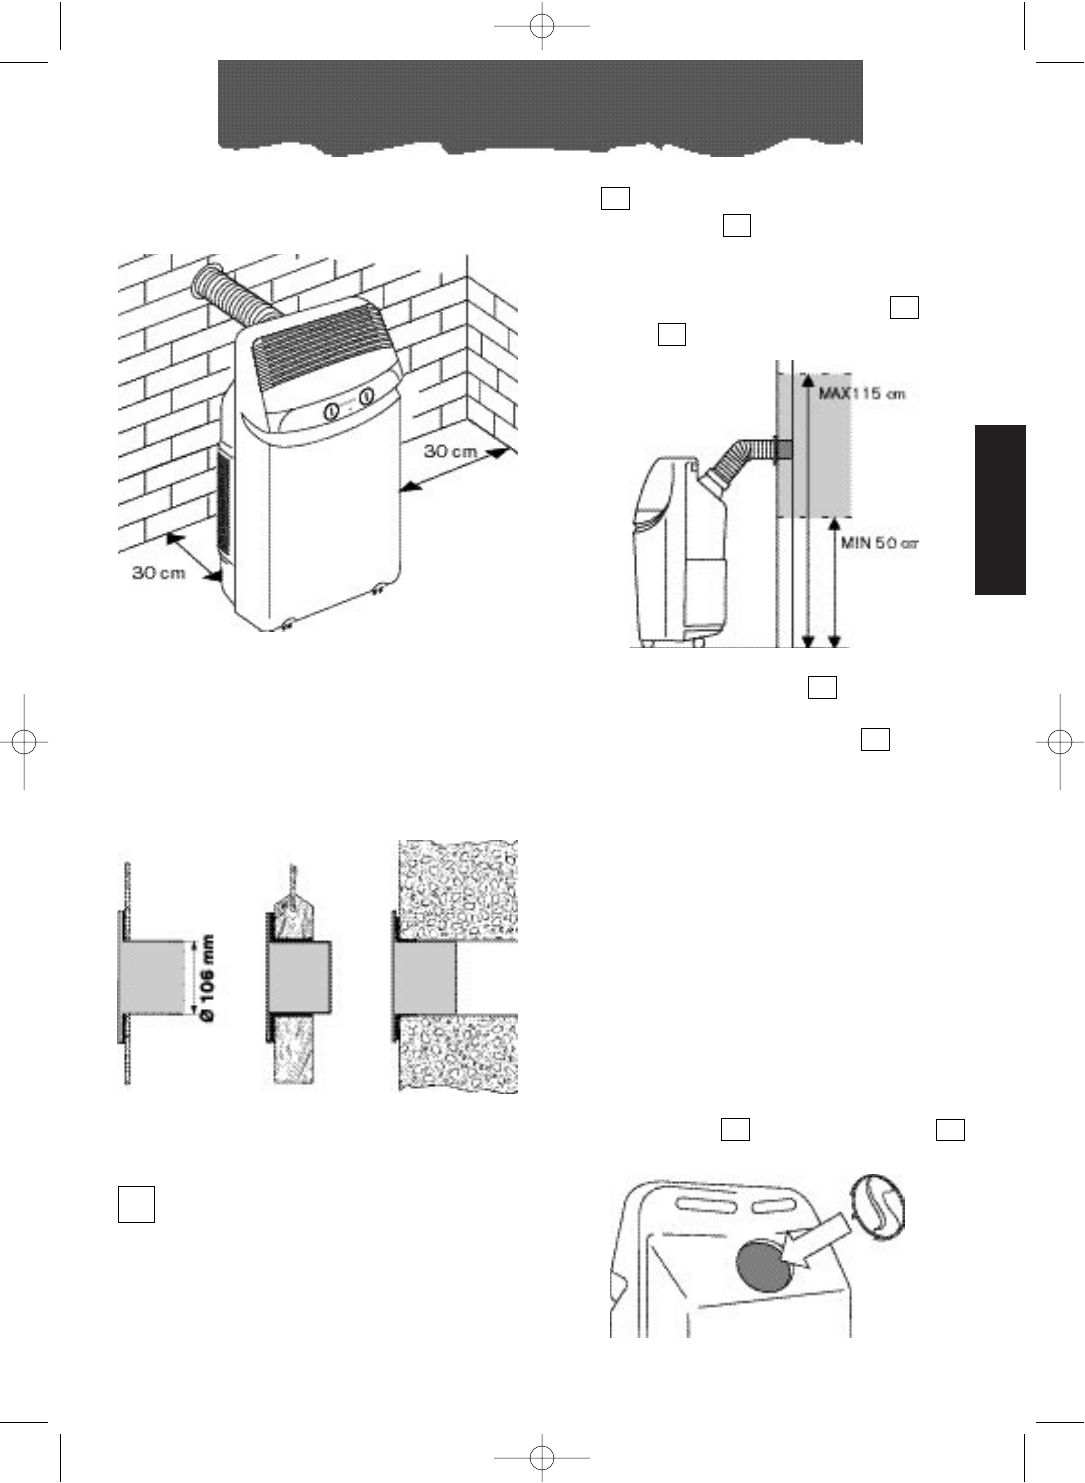
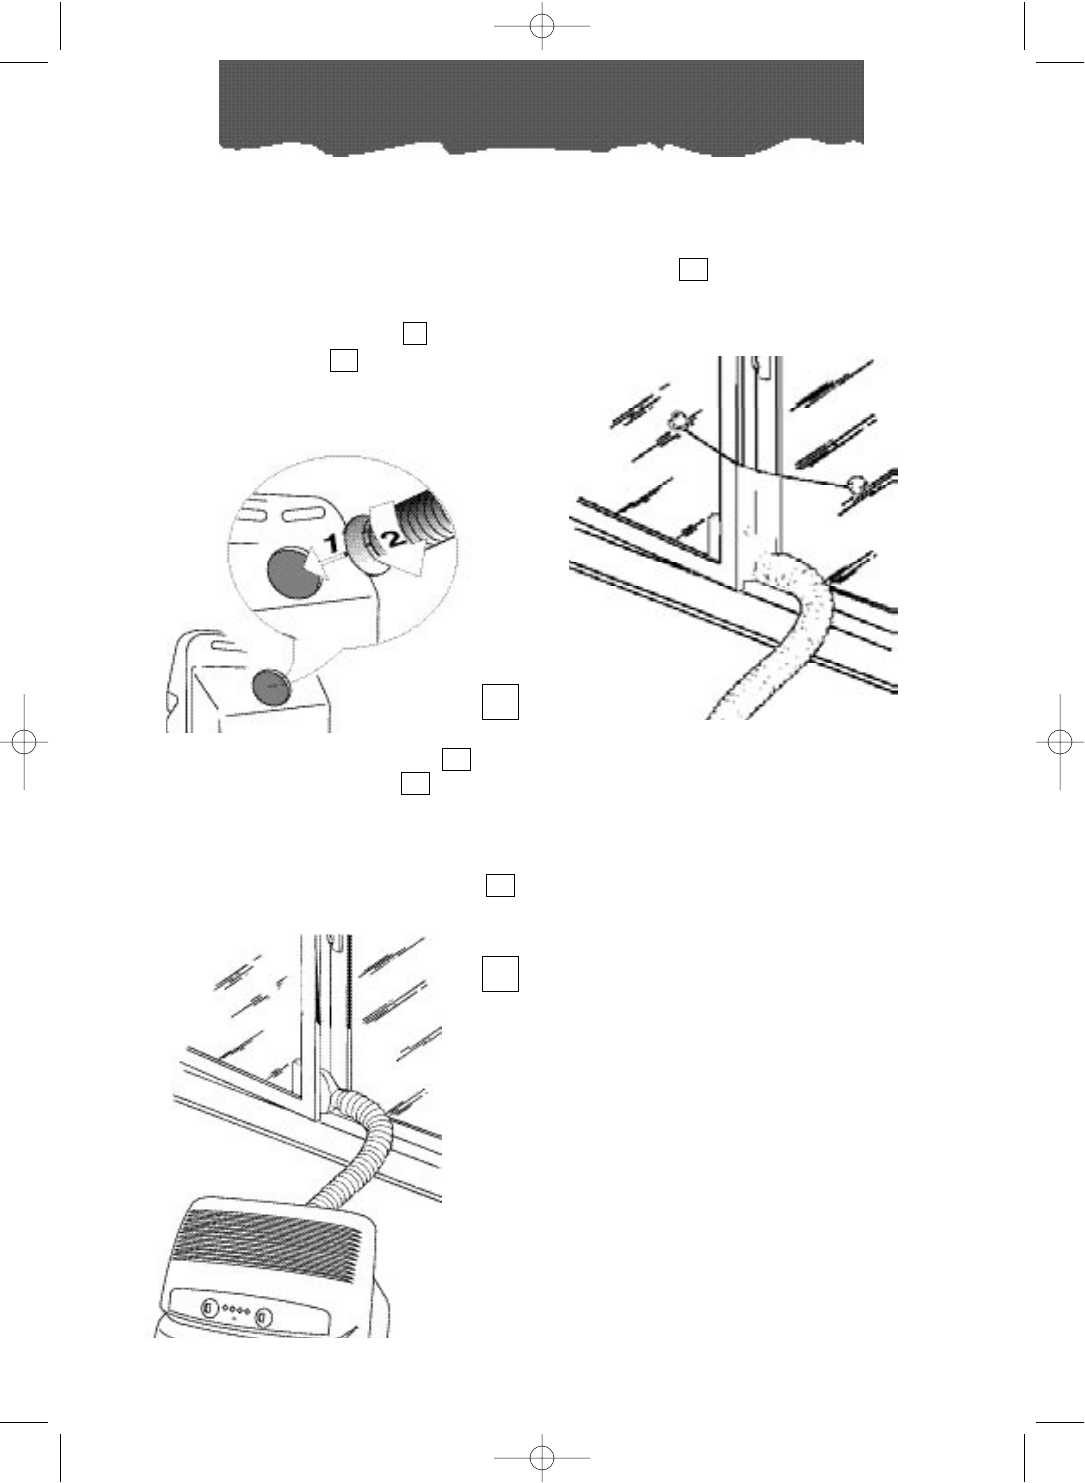
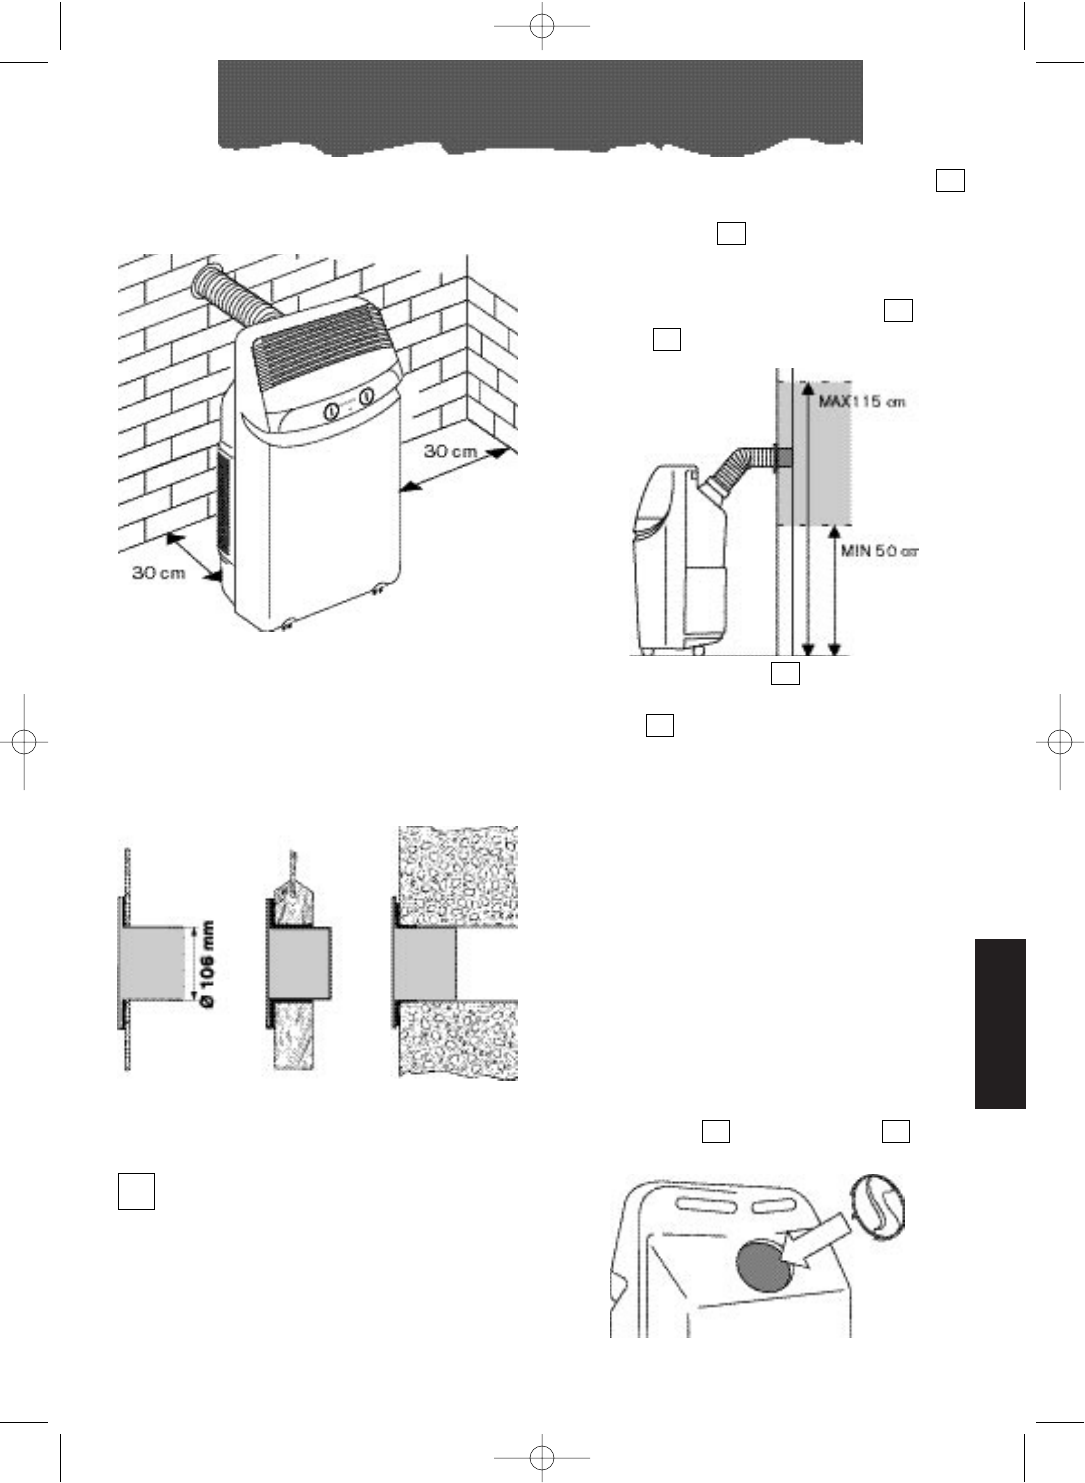
Opmerking: het duurt 3-5 min. voordat er
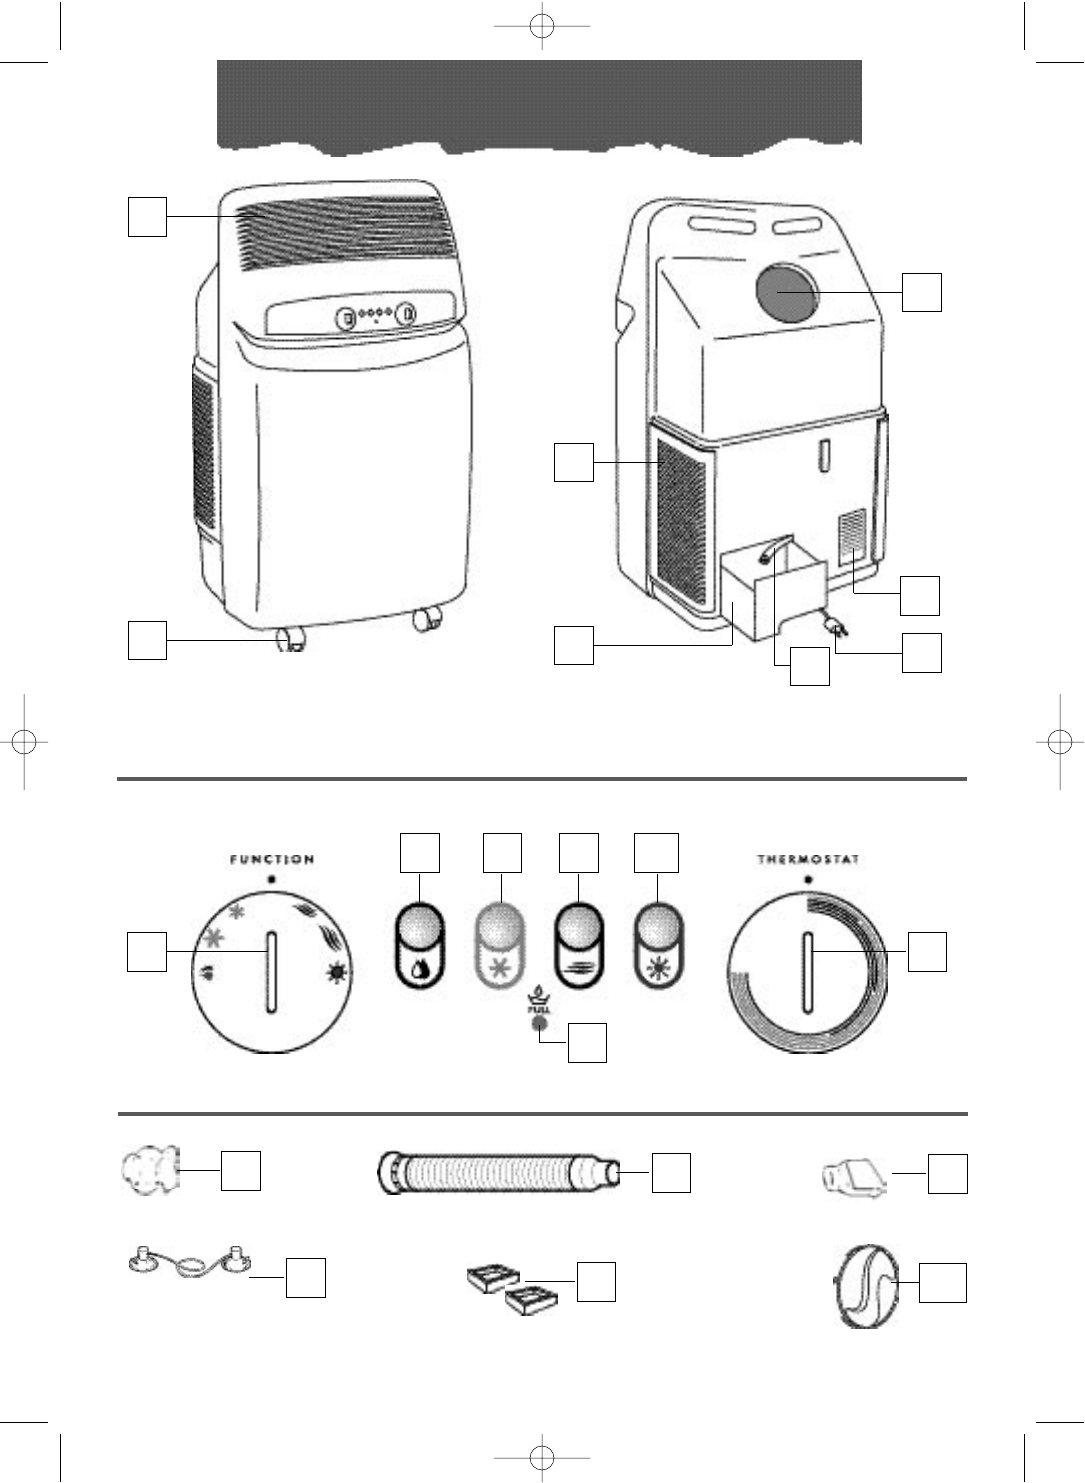
koude lucht uit rooster 1 komt.
15
9
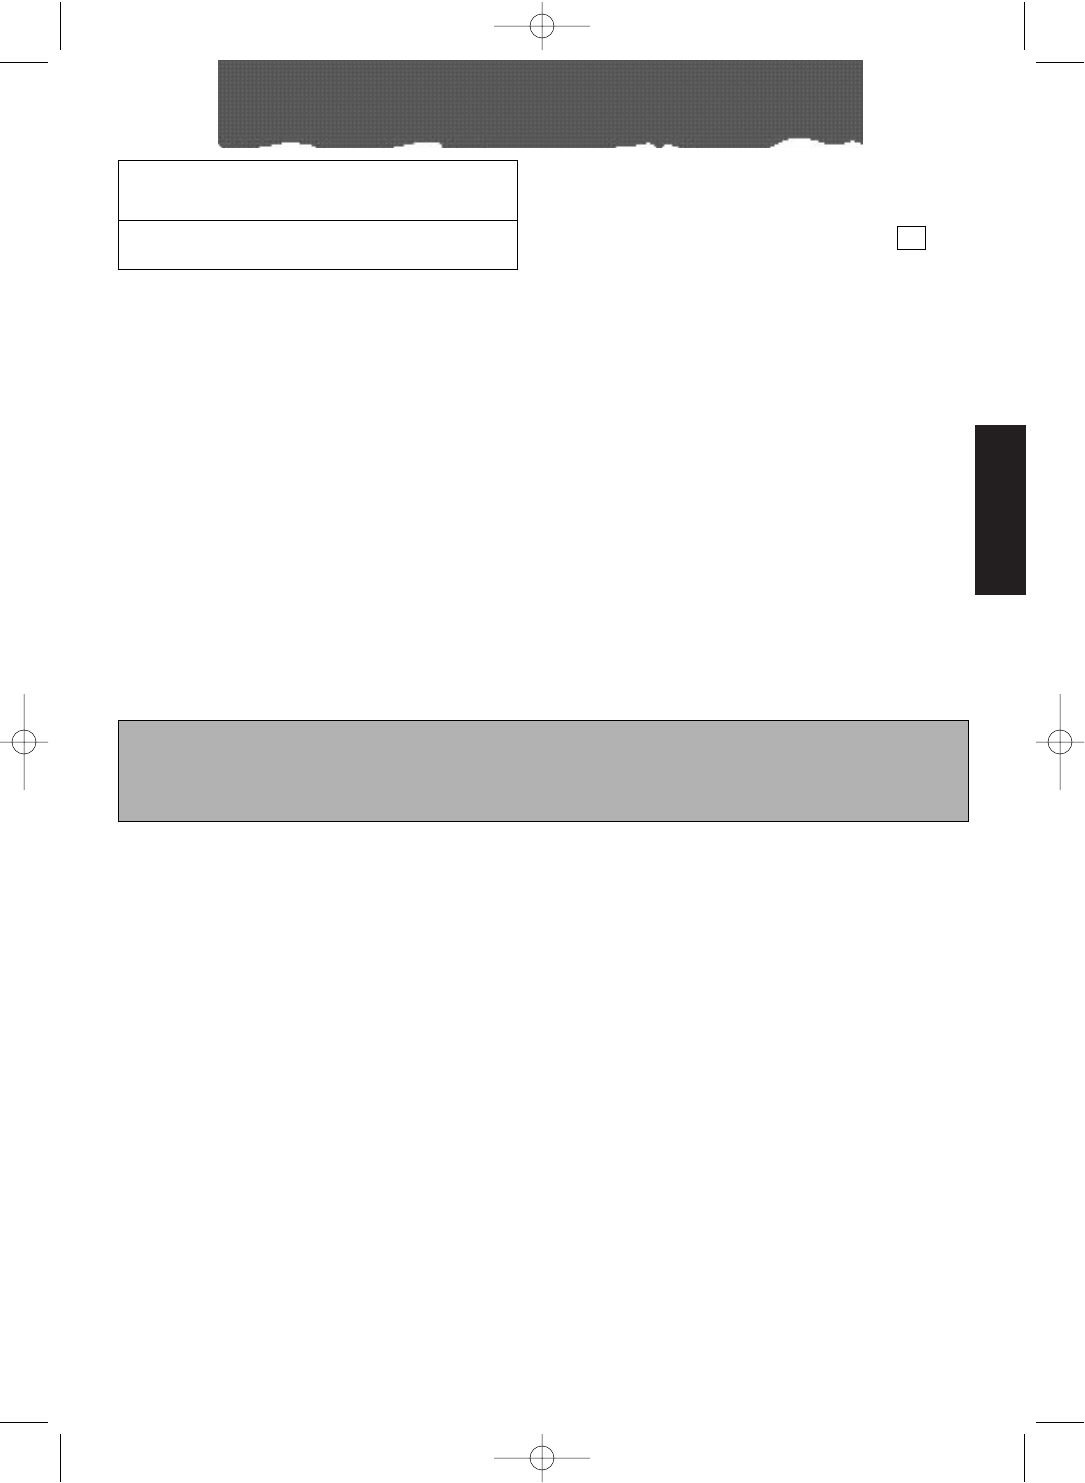
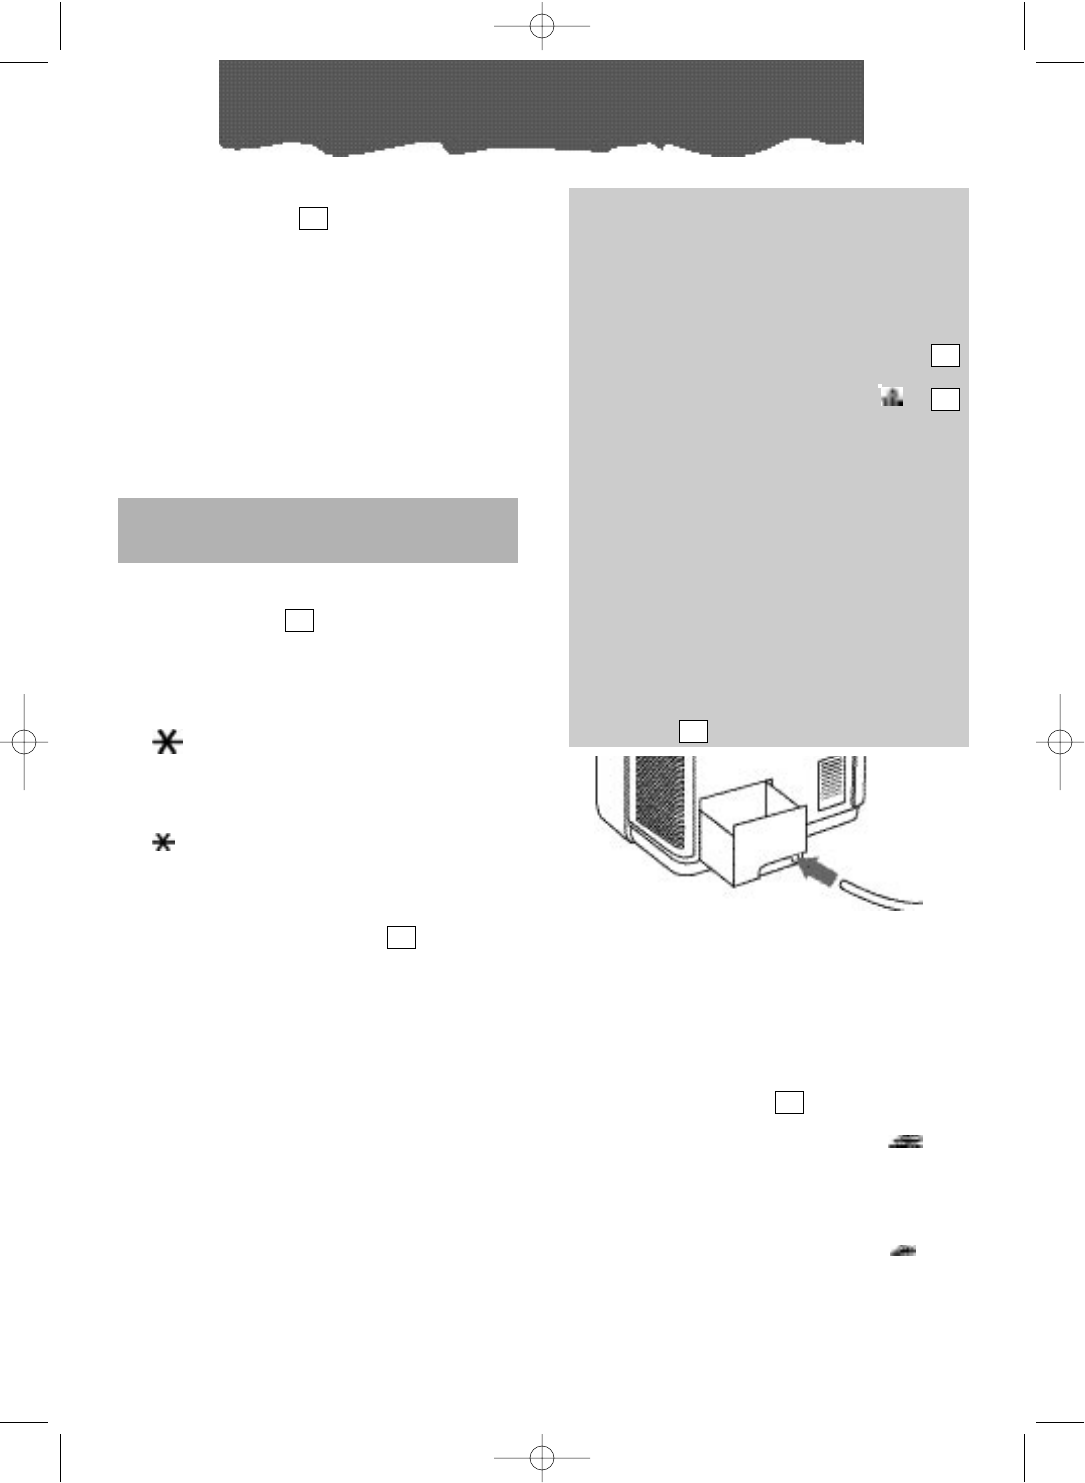
DIT APPARAAT MAAKT GEBRUIK VAN EEN
EXCLUSIEF SYSTEEM VAN HERCIRCULERING
VAN CONDENS OM HET TEVEEL AAN VOCHTI-
GHEID TE VERWERKEN. ONDER NORMALE
OMSTANDIGHEDEN WORDT DE CONDENS
AUTOMATISCH VERWERKT. BIJ EEN HOGE
VOCHTIGHEIDSGRAAD KAN ER EEN TEVEEL
AAN CONDENS IN DE OPVANGBKJE
KOMEN HETGEEN AANGEGEVEN WORDT
DOORDAT HET CONTROLELAMPJE
GAAT BRANDEN IN DIT GEVAL IS HET VOL-
DOENDE DE OPVANGBKJE TE LEGEN.
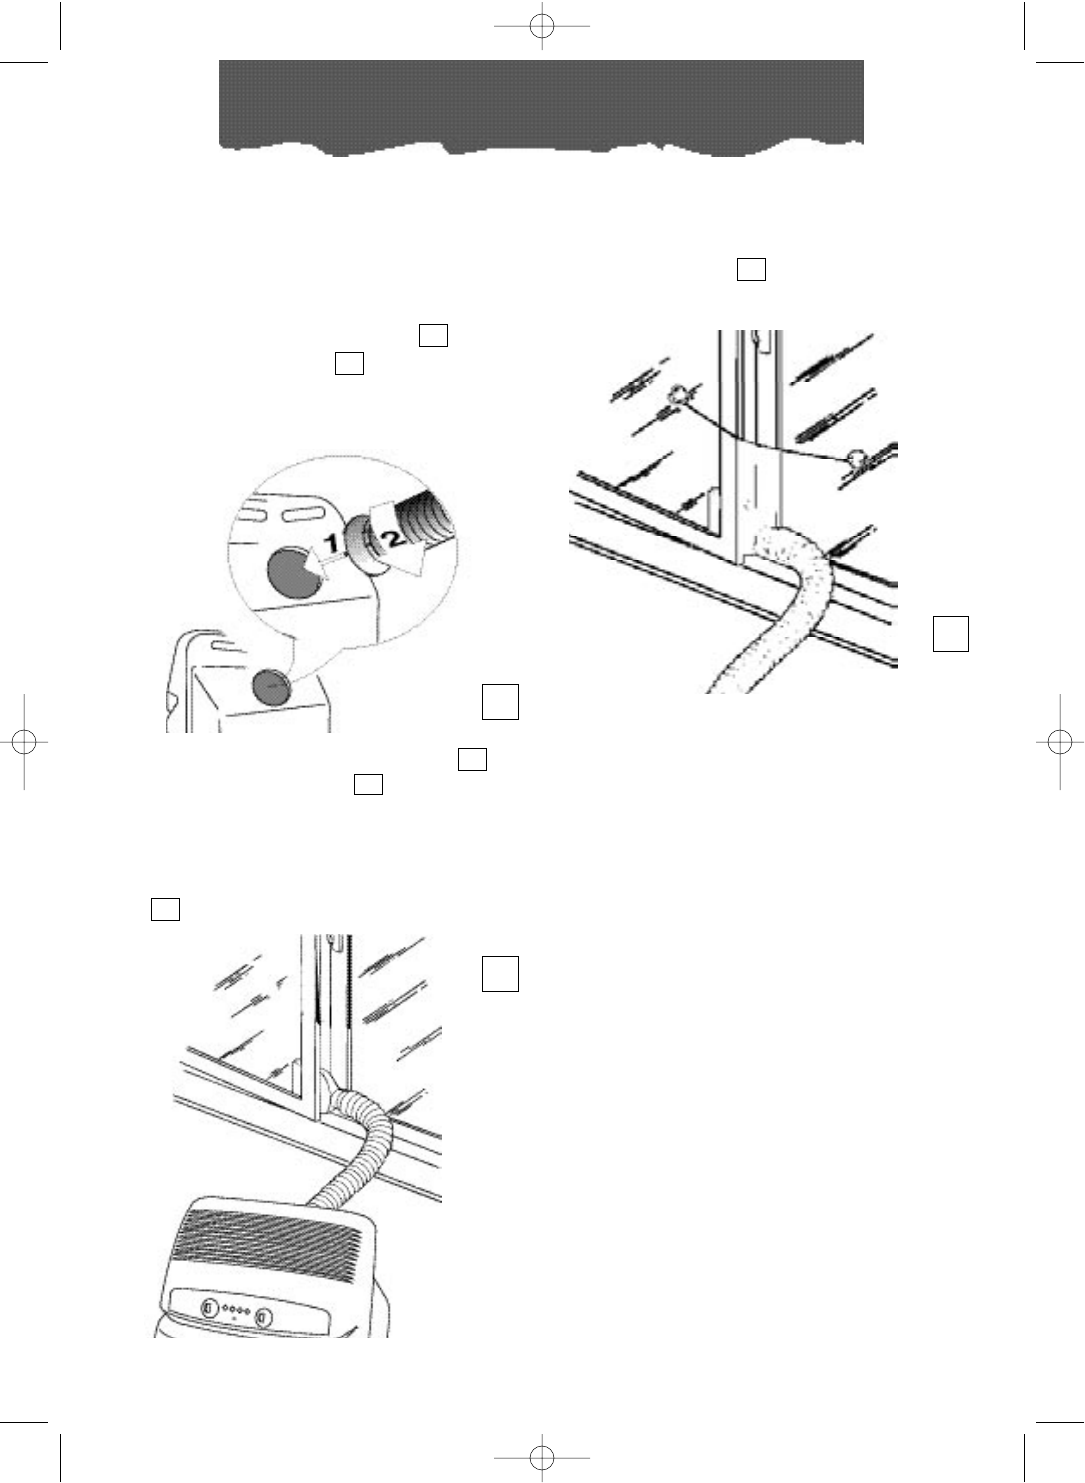
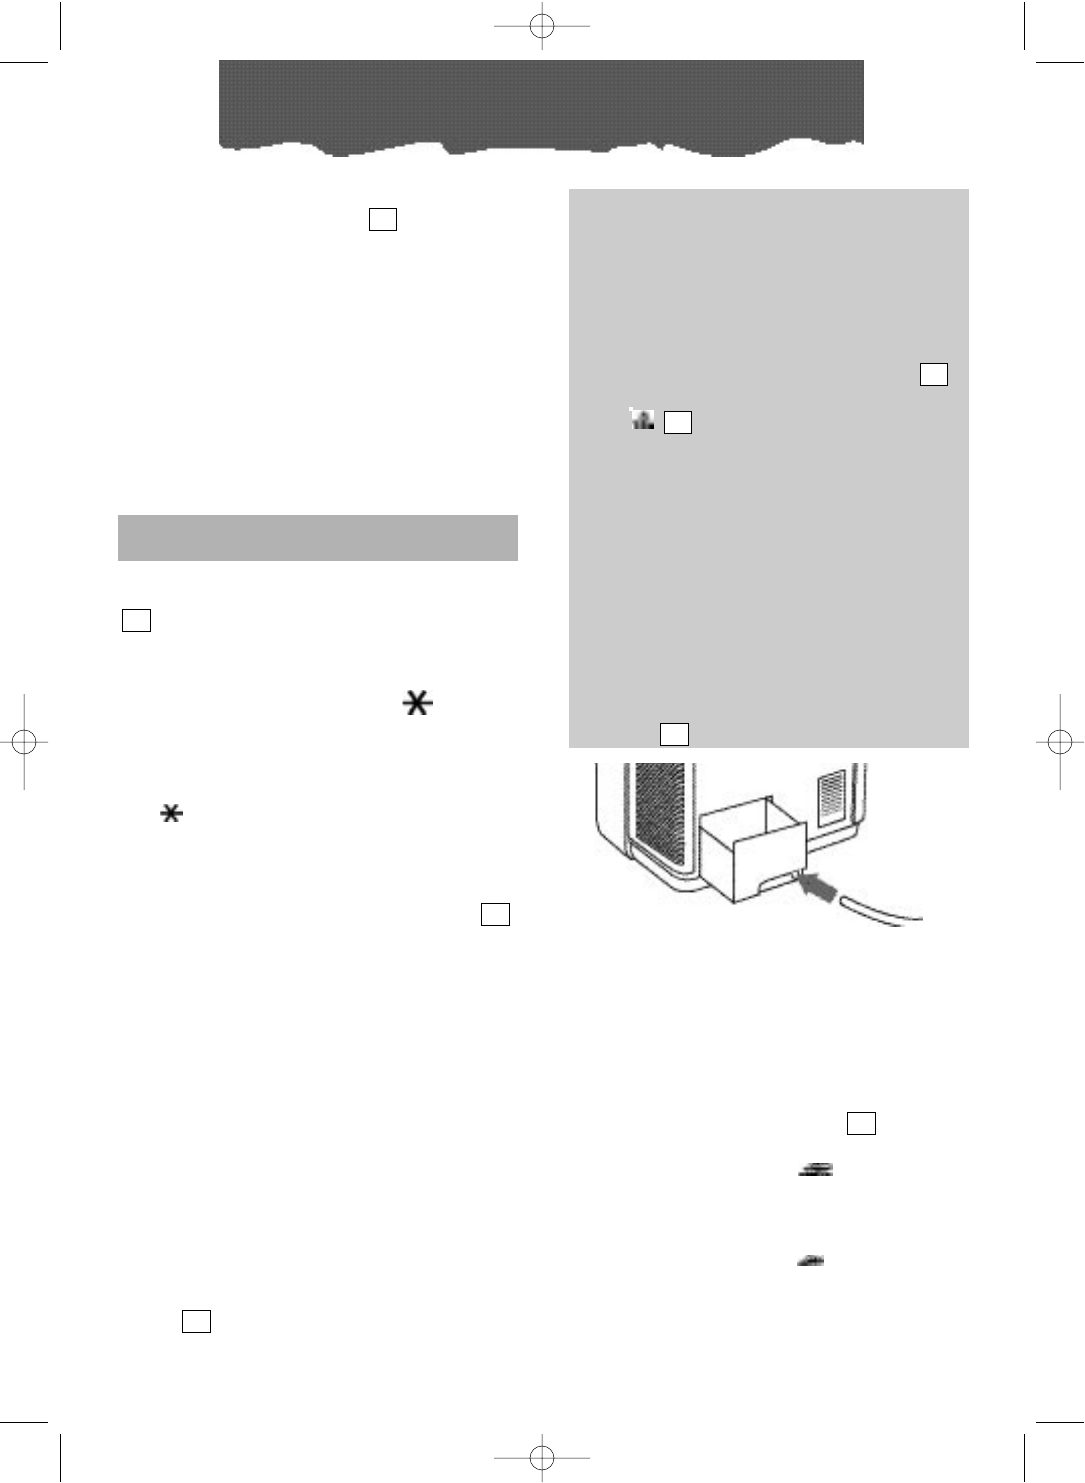
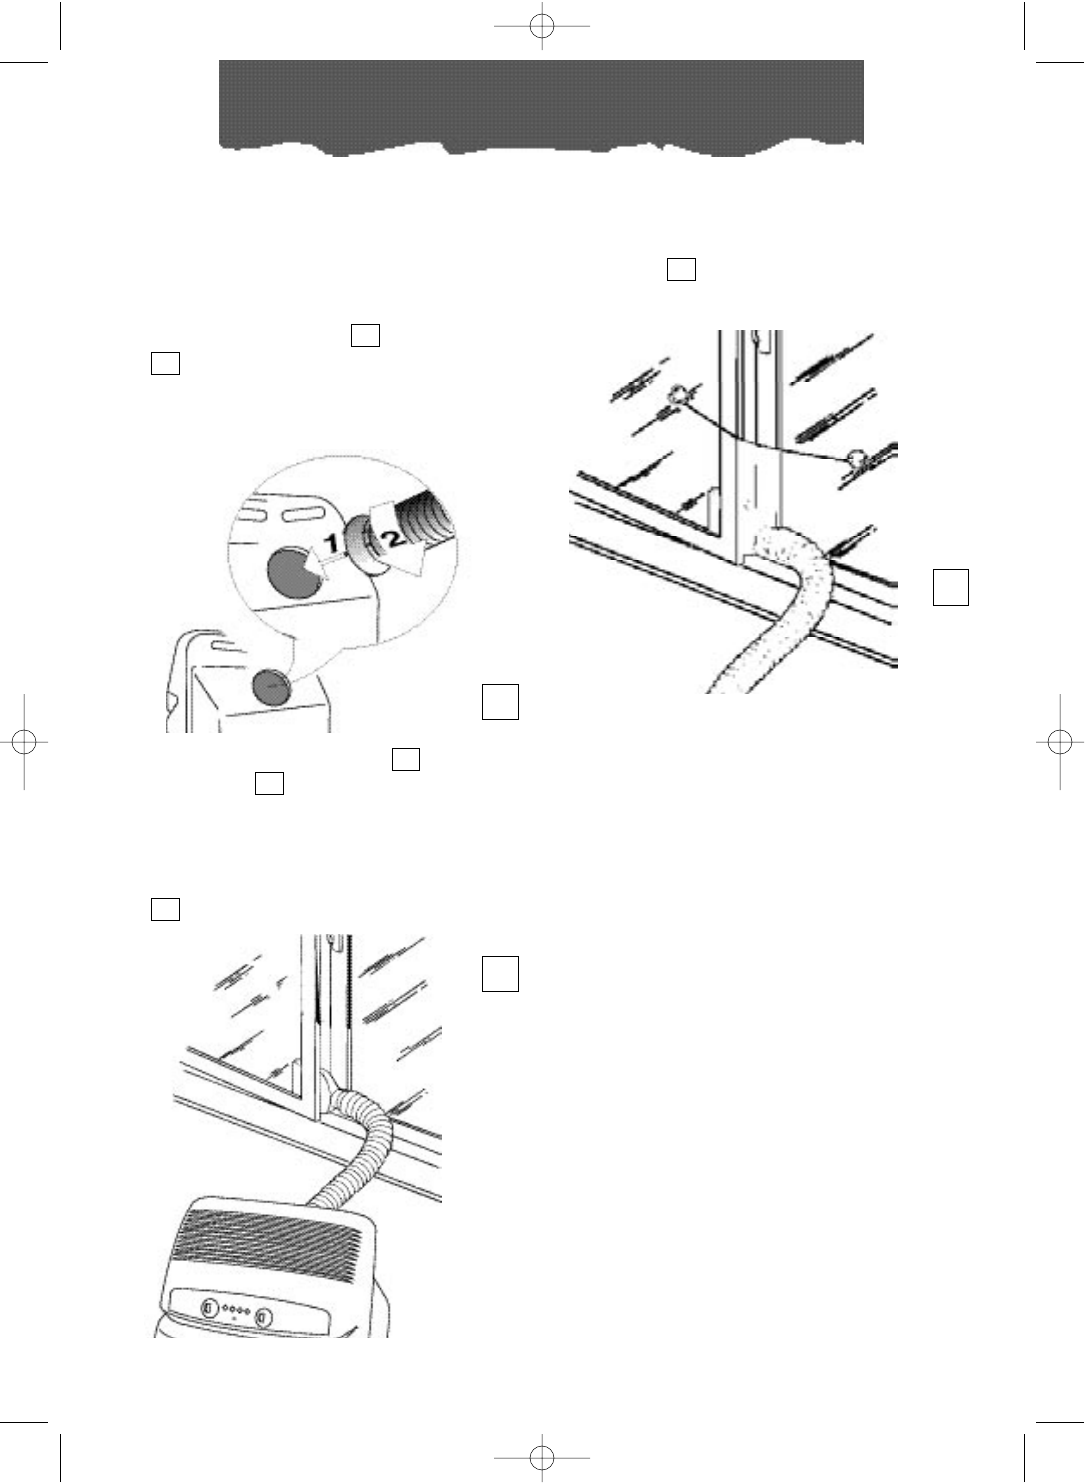
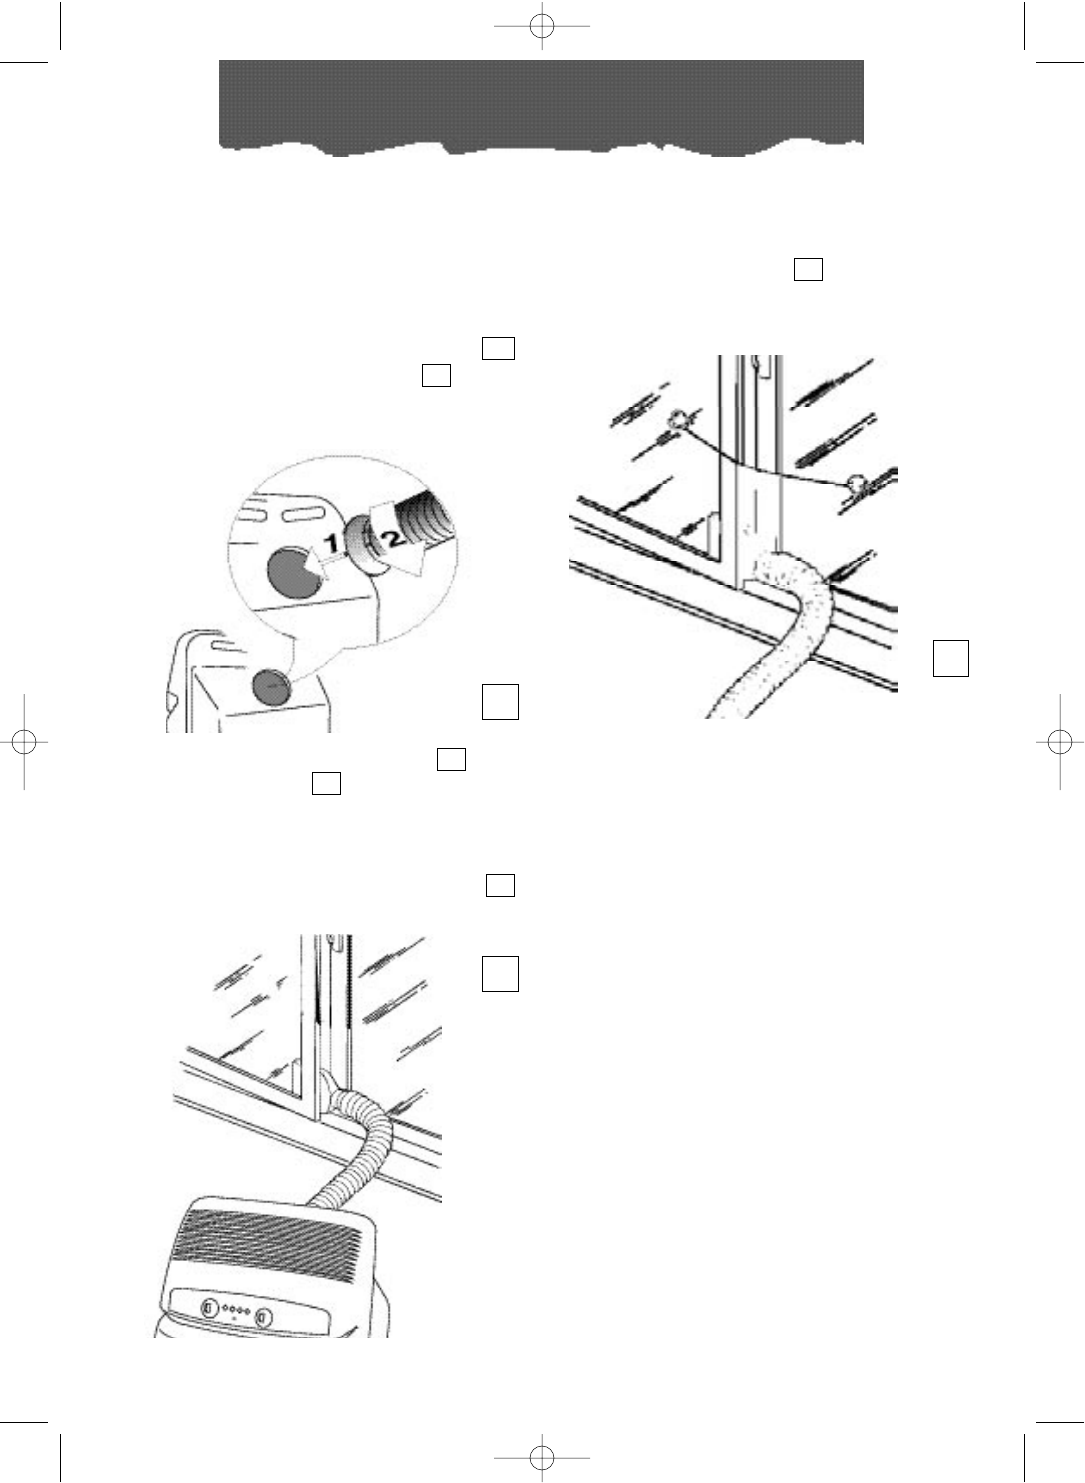
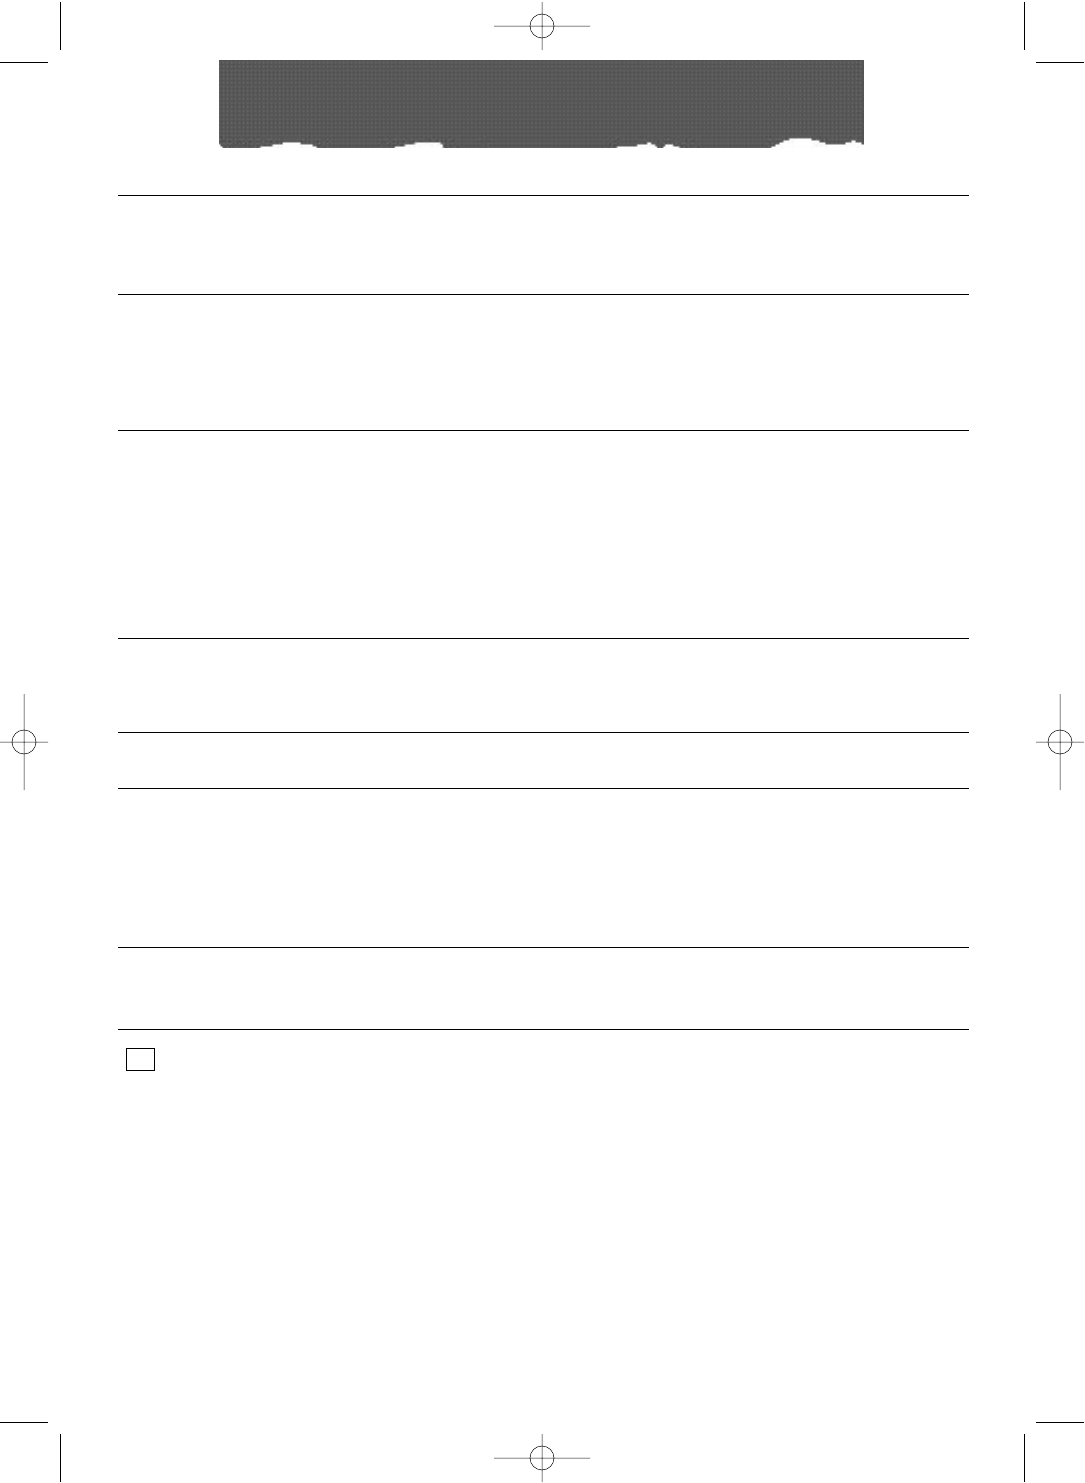
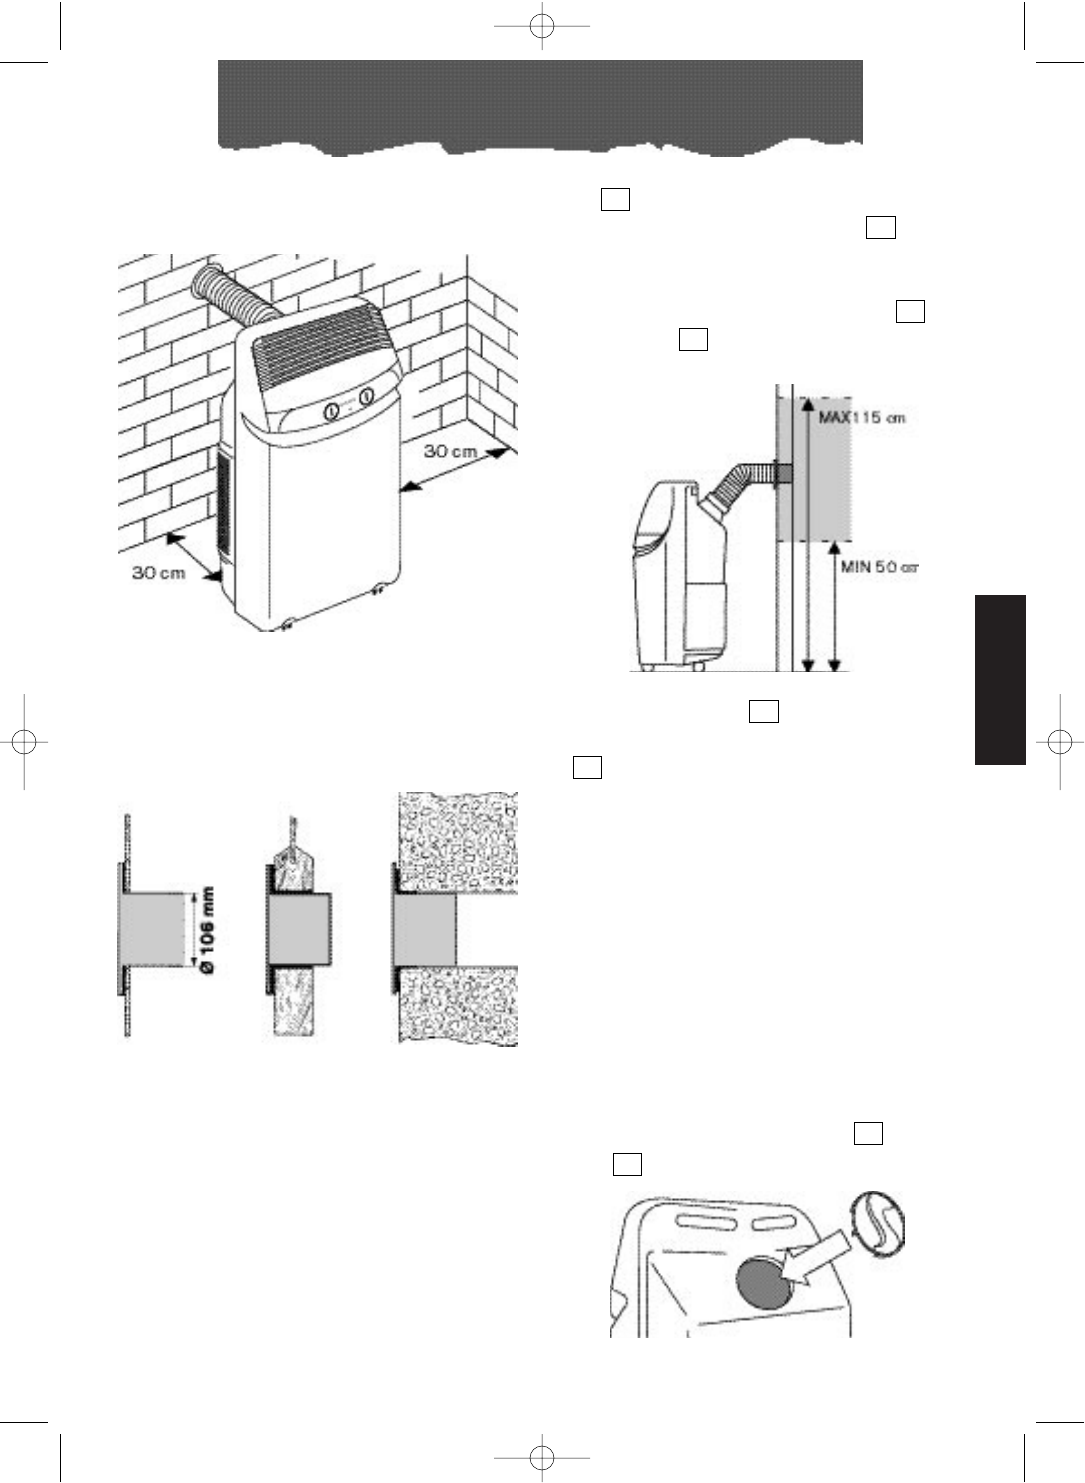
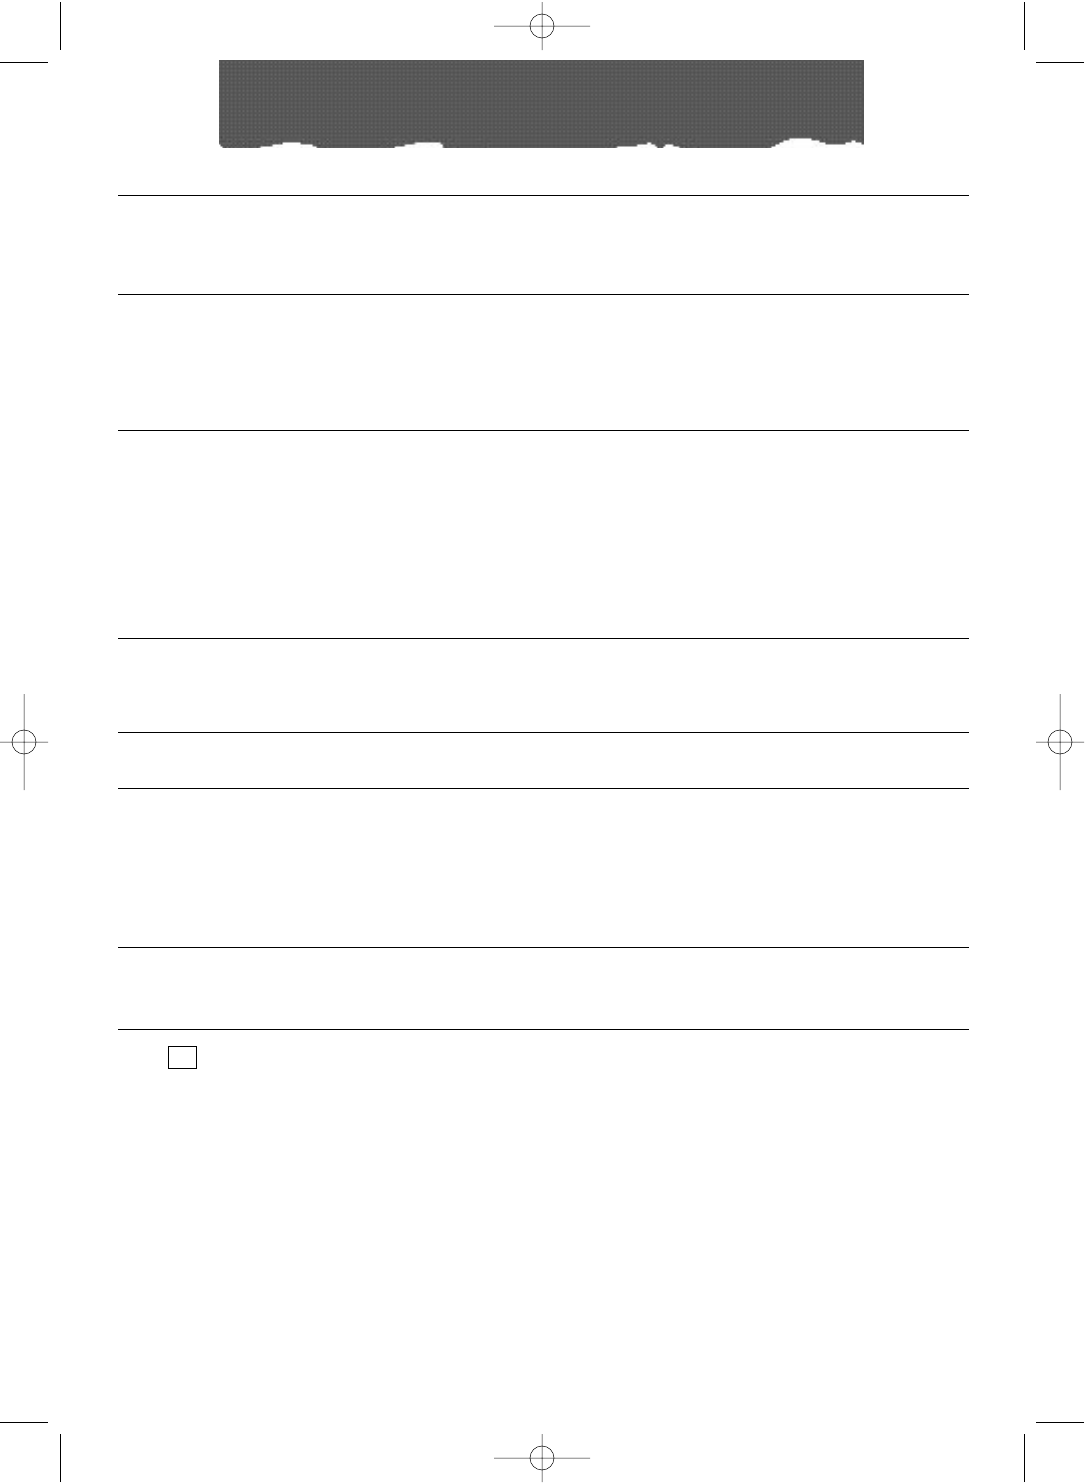
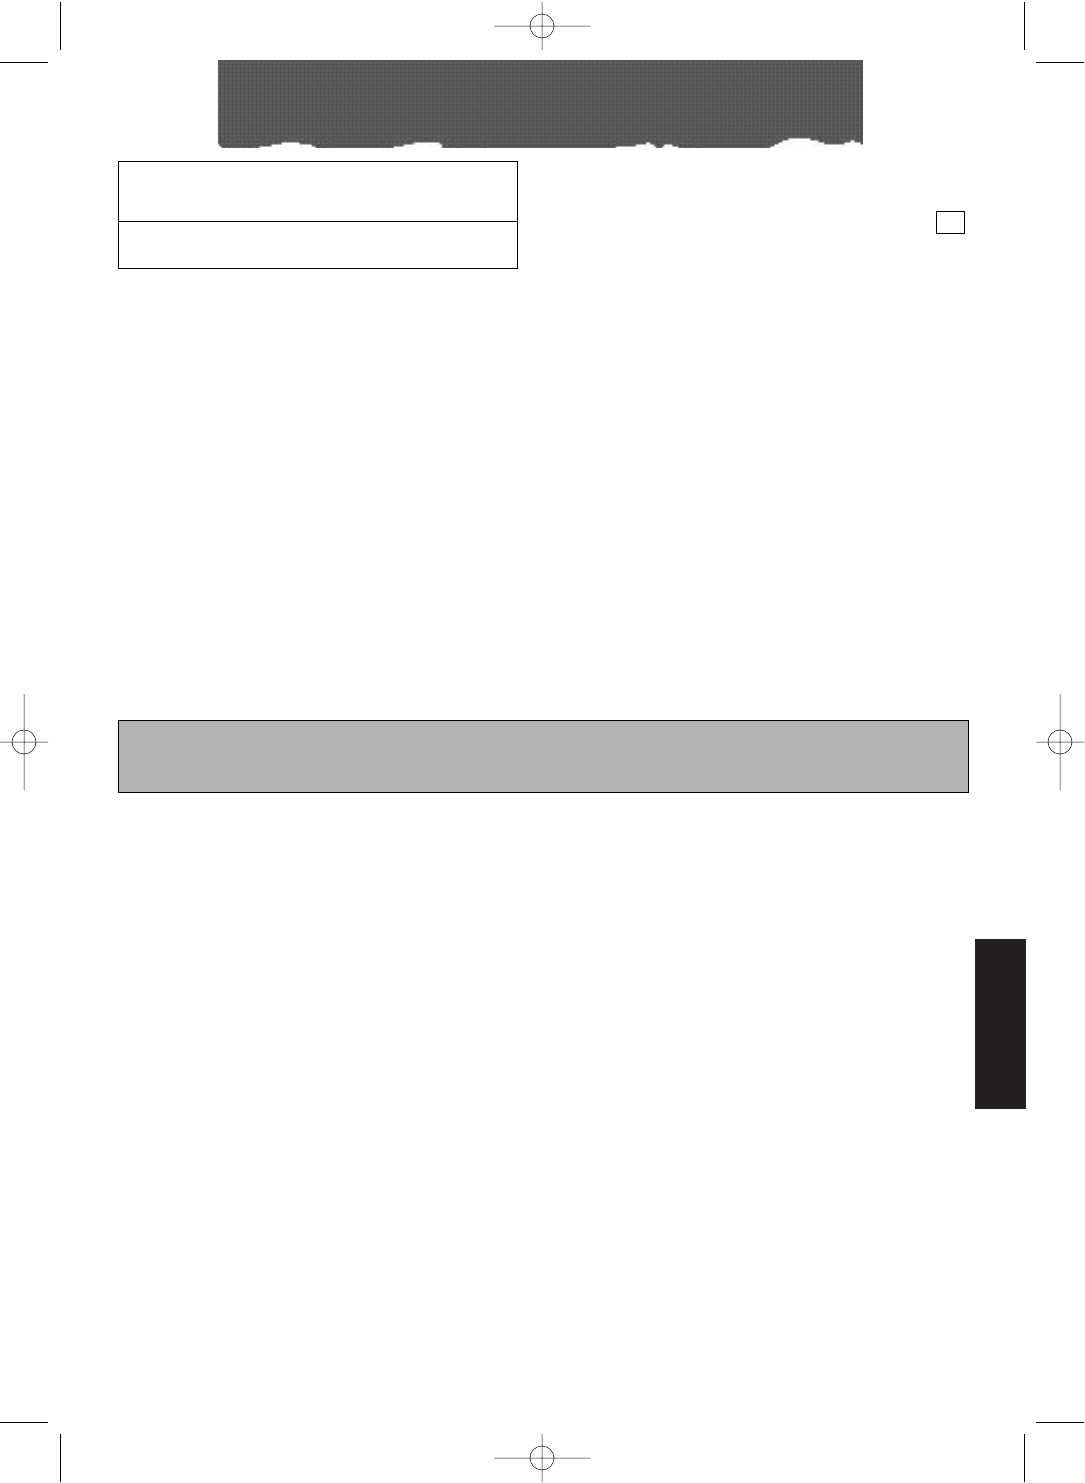
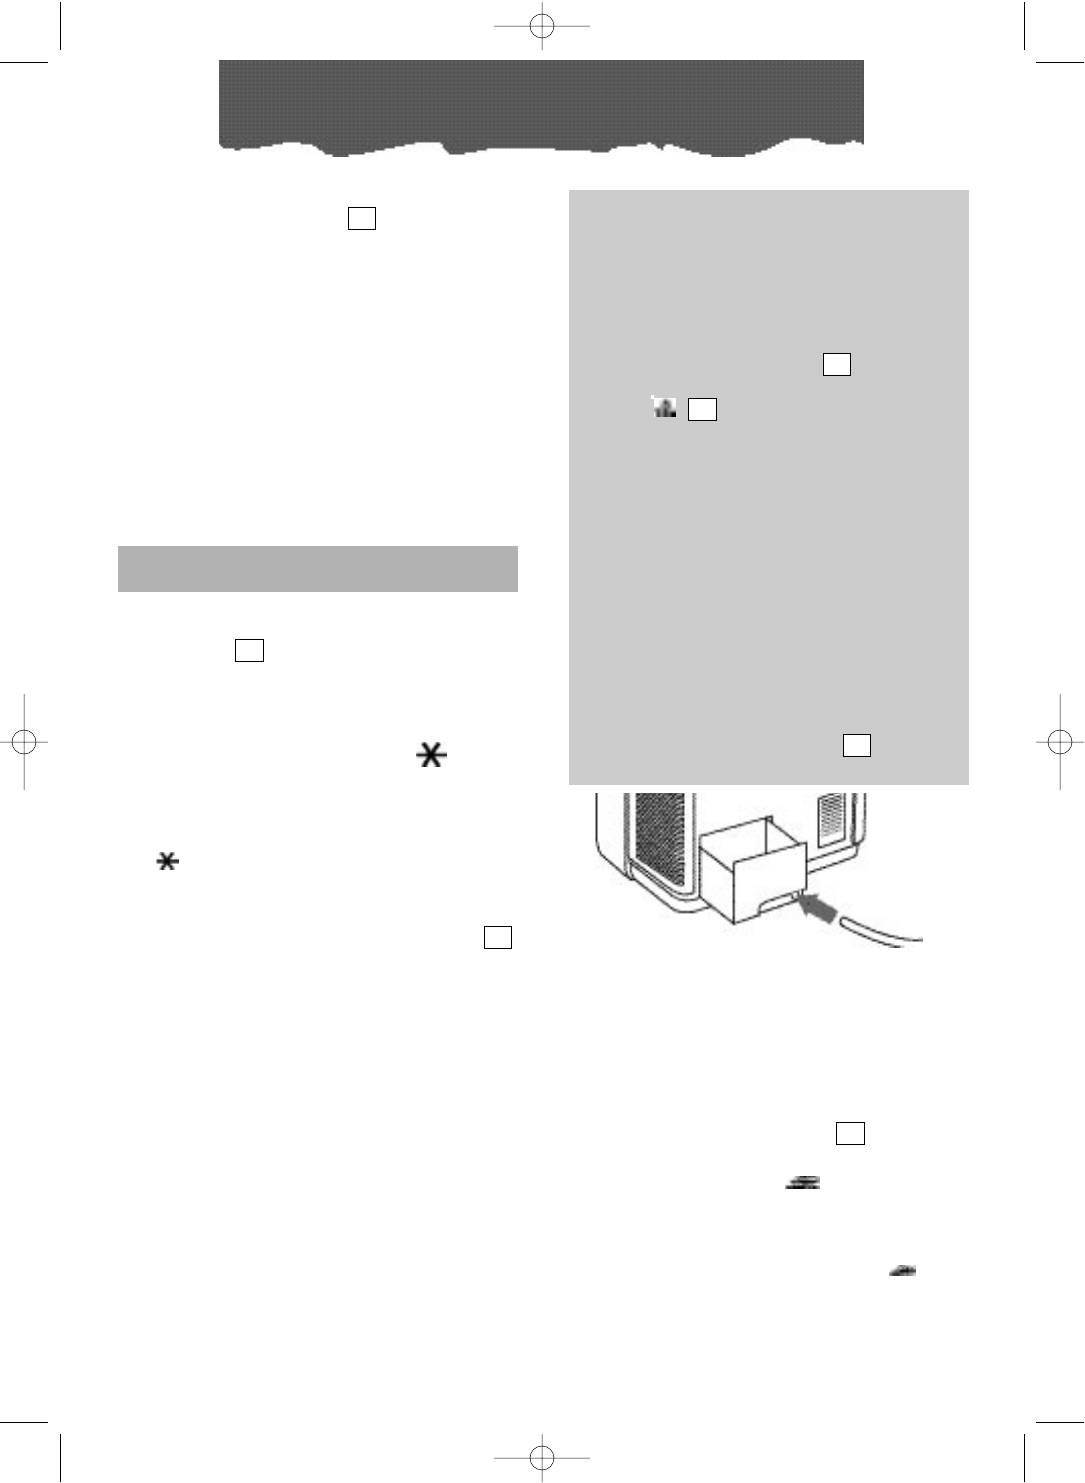
UITSLUITEND VOOR ENKELE MODELLEN:
ALS HET PROBLEEM TERUGKEERT VANWEGE EEN
HOGE VOCHTIGHEID KUNT U HET OVERTOLLIGE
WATER RECHTSTREEKS AFVOEREN IN EEN PUTJE,
DOOR GEBRUIK TE MAKEN VAN EEN RUBBEREN
SLANG MET EEN BINNENDIAMETER VAN 12 MM,
DIE IN DE DAARVOOR BESTEMDE OPENING
GESTOKEN MOET WORDEN, NADAT DE DOP IS
WEGGEHAALD. (zie figuur).
LET EROP DAT DE OPVANGBKJE GOED OP ZIJN
PLAATS TERUGGEZET WORDEN ANDERS BLIJFT
HET LAMPJE BRANDEN.
14
14
5
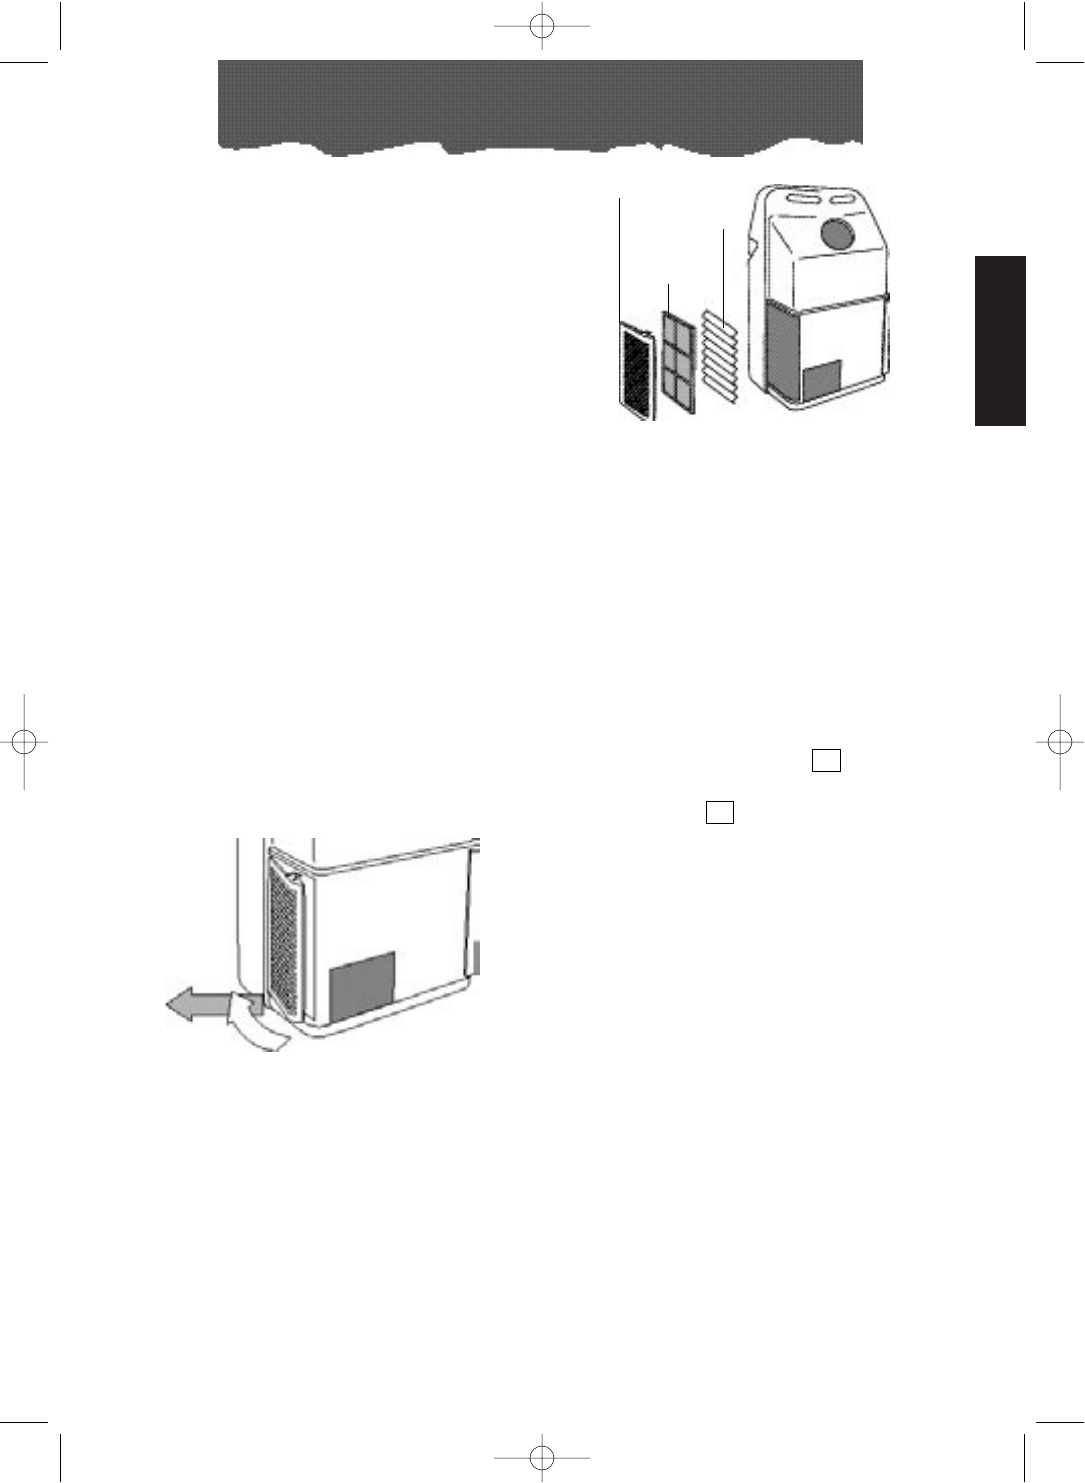
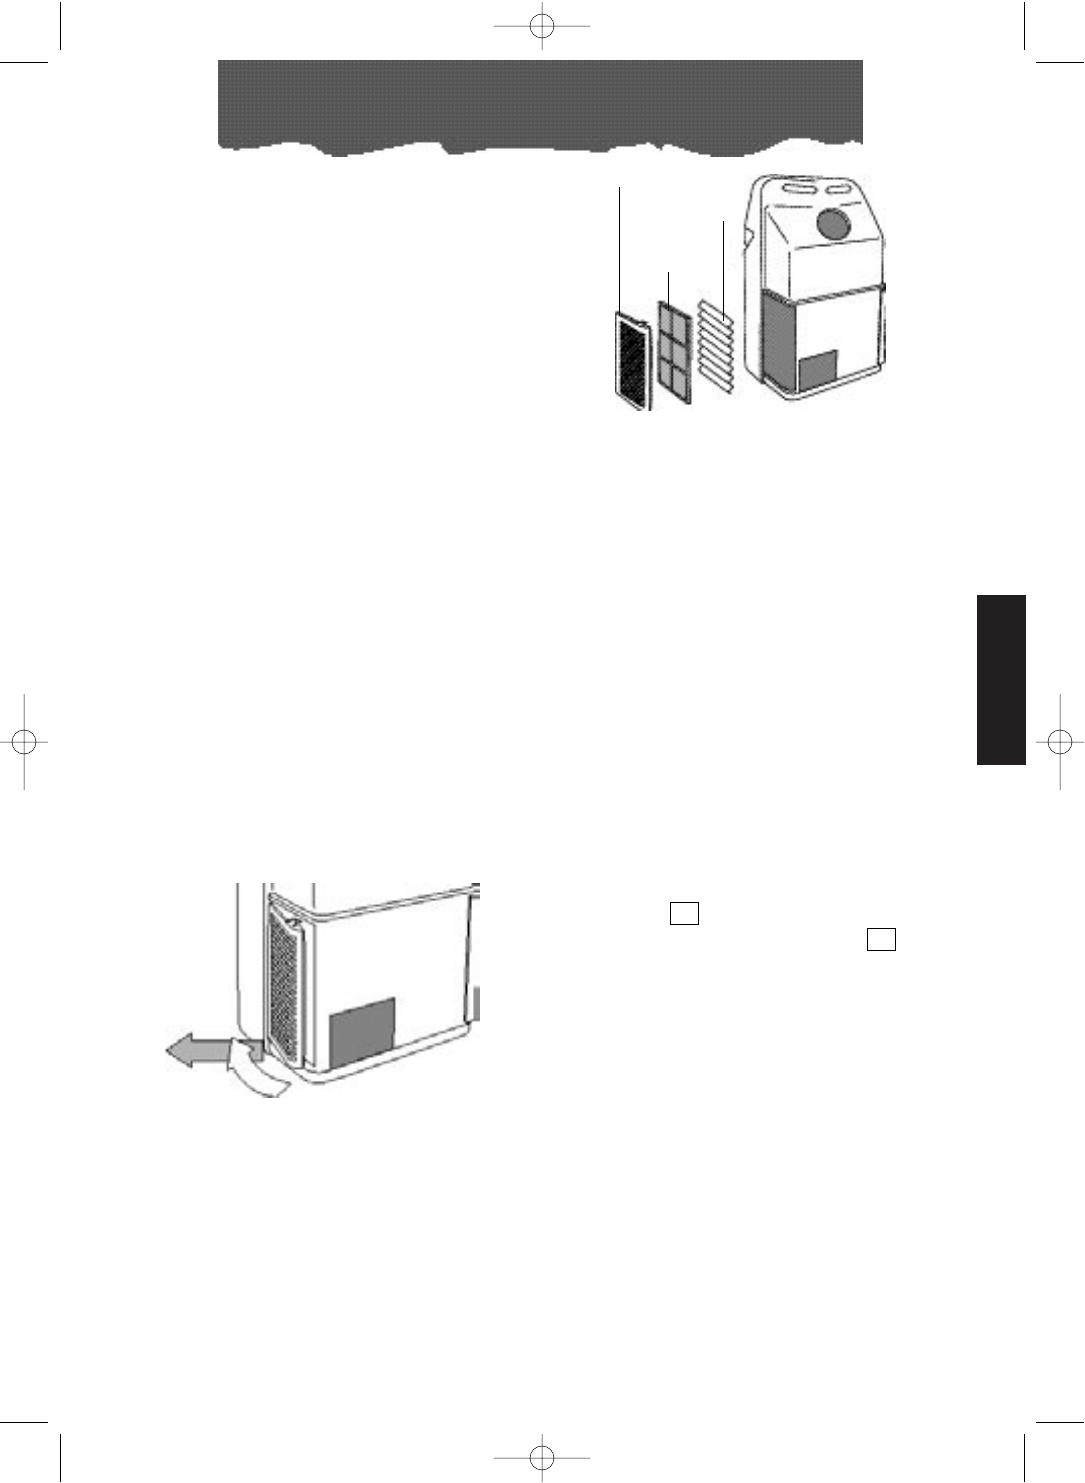
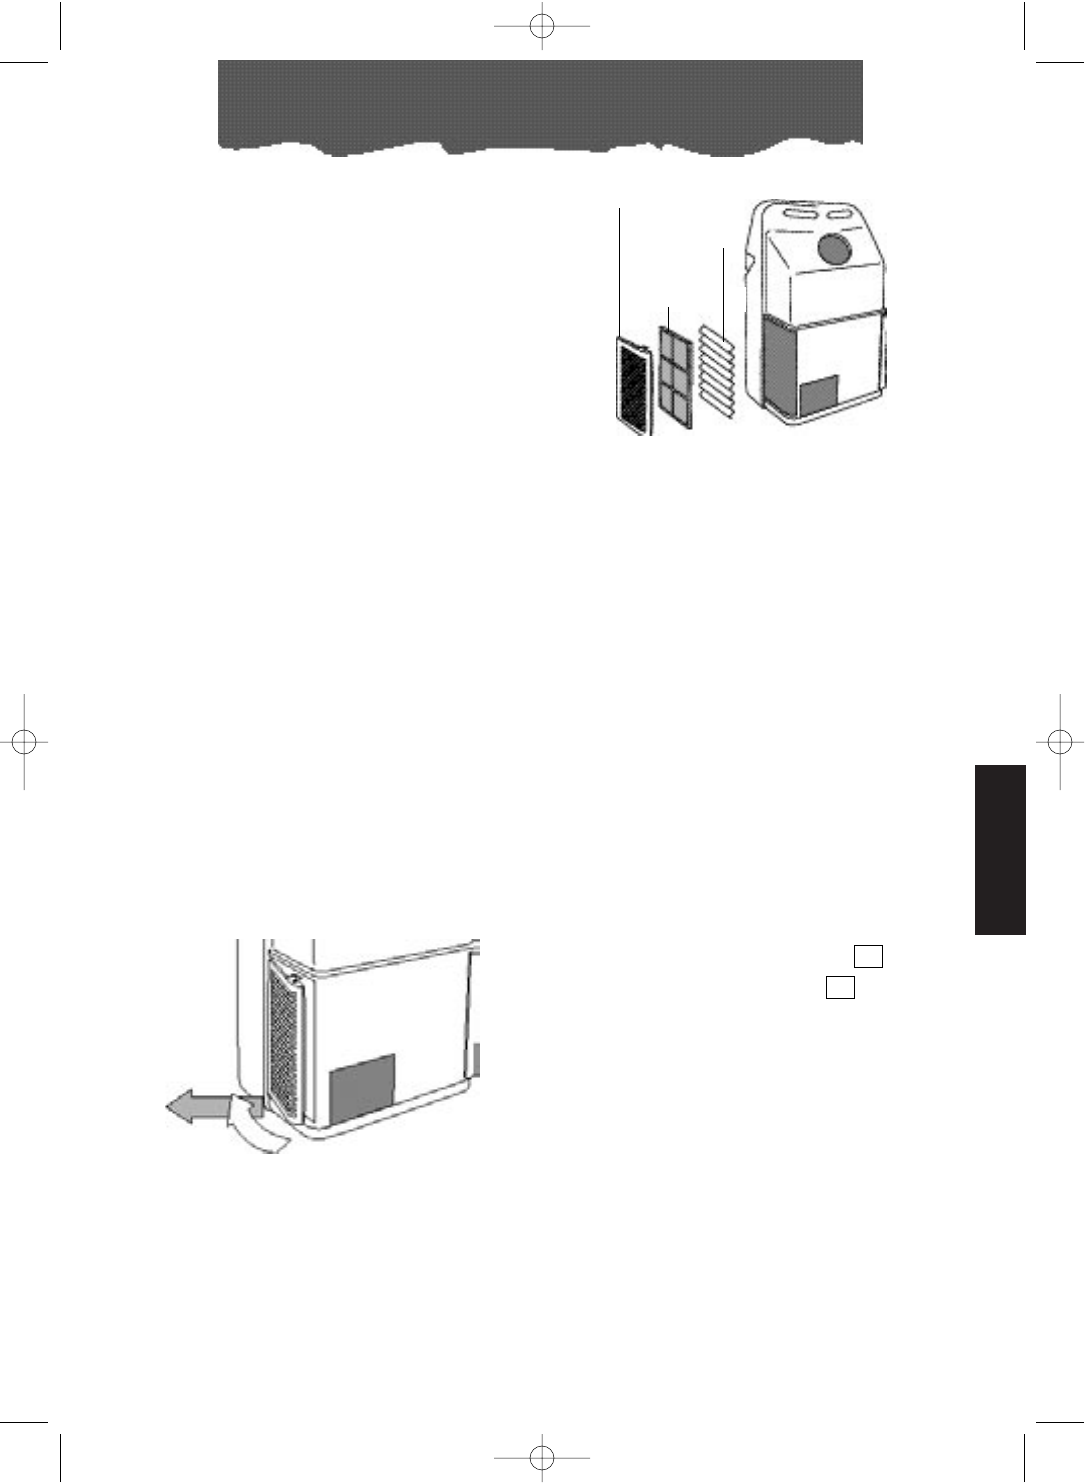
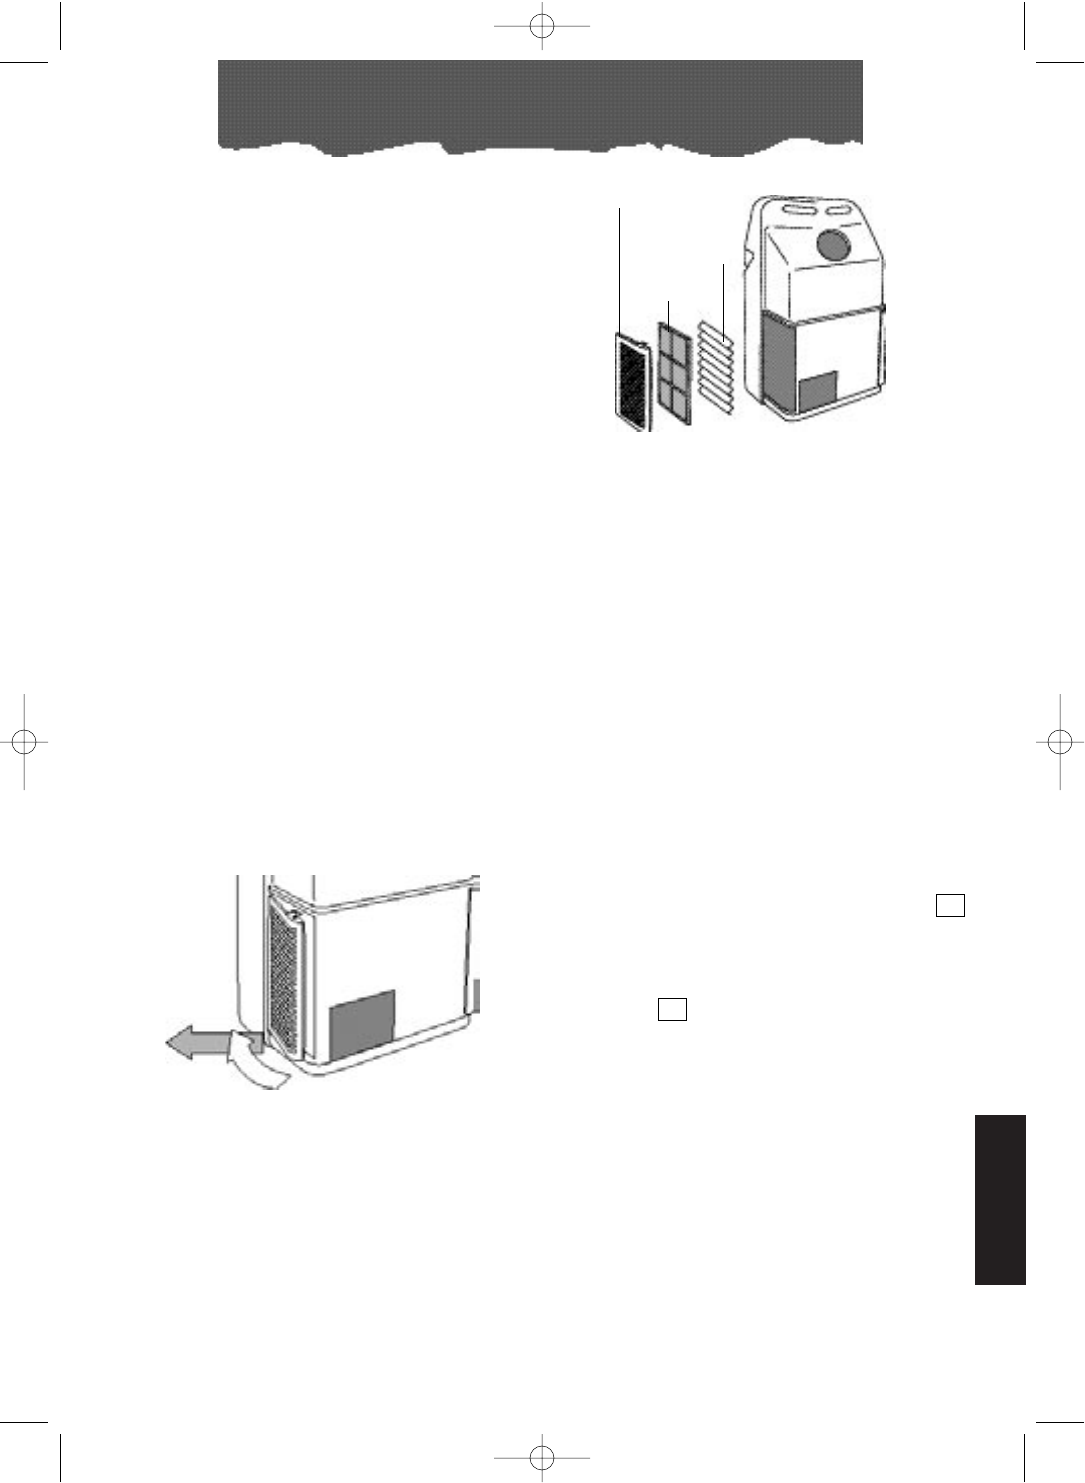
Hoe de lucht te zuiveren
Uw airconditioner is voorzien van een speciaal
elektrostatisch filter met een zeer hoog rende-
ment; is namelijk in staat zzer kleine deeltjes te
vangen (tot 0,3 micron, oftewel gelijk aan 0,3
duizendste deel van een millimeter). Het appa-
raat kan dus ook gebruik worden voor het zui-
veren van de lucht.
De functiekeuzeknop tegen de wijzers
van de klok in draaien:
•Door het symbool van het grote i n
overeenstemming met het referentie-
teken te zetten, zal het apparaat in de
functie klimatisering met maximale venti-
latiesnelheid functioneren.
• Door het symbool van het kleine i n
overeenstemming met het referentie-
teken te zetten, zal het apparaat in de
functie klimatisering met minimale ventila-
tiesnelheid functioneren.
9