133662
19
Verklein
Vergroot
Pagina terug
1/31
Pagina verder
OPERATION
18
1. Insert the attached
AC plug into a 2-
pronged 220V~ 240V
AC outlet.
Plug into 220V AC Outlet
AC Outlet
and Plug
NOTES:
Never connect the AC line cord plug to other than the speci-
fied voltage (220V~240V).
• Use the attached power cord only.
If the outlet is a 3-pronged type or other, have an electrician
install a new outlet.
The new air conditioner system should be on it’s own 220V
circuit. Contact your local electrical installer for installation.
CONNECTING THE AC CORD
The outdoor unit is connected to the indoor unit through the AC connecting wire or connection cord. To connect the
indoor unit to AC, follow the procedures below:
BATTERY PRECAUTIONS
The precautions below should be followed when using batteries in this device:
1. Use only the size and type of batteries specified.
2. Be sure to follow the correct polarity when installing the batteries as indicated in the battery compartment.
Reversed batteries may cause damage to the device.
3. Do not mix different types of batteries together (e.g. Alkaline and Carbon-zinc) or old batteries with fresh ones.
4. If the device is not to be used for a long period of time, remove the batteries to prevent damage or injury from pos-
sible battery leakage.
5. Do not try to recharge batteries not intended to be recharged; they can overheat and rupture. (Follow battery manu-
facturer’s directions).
HOW TO INSTALL BATTERIES
To install the batteries, follow the procedures below:
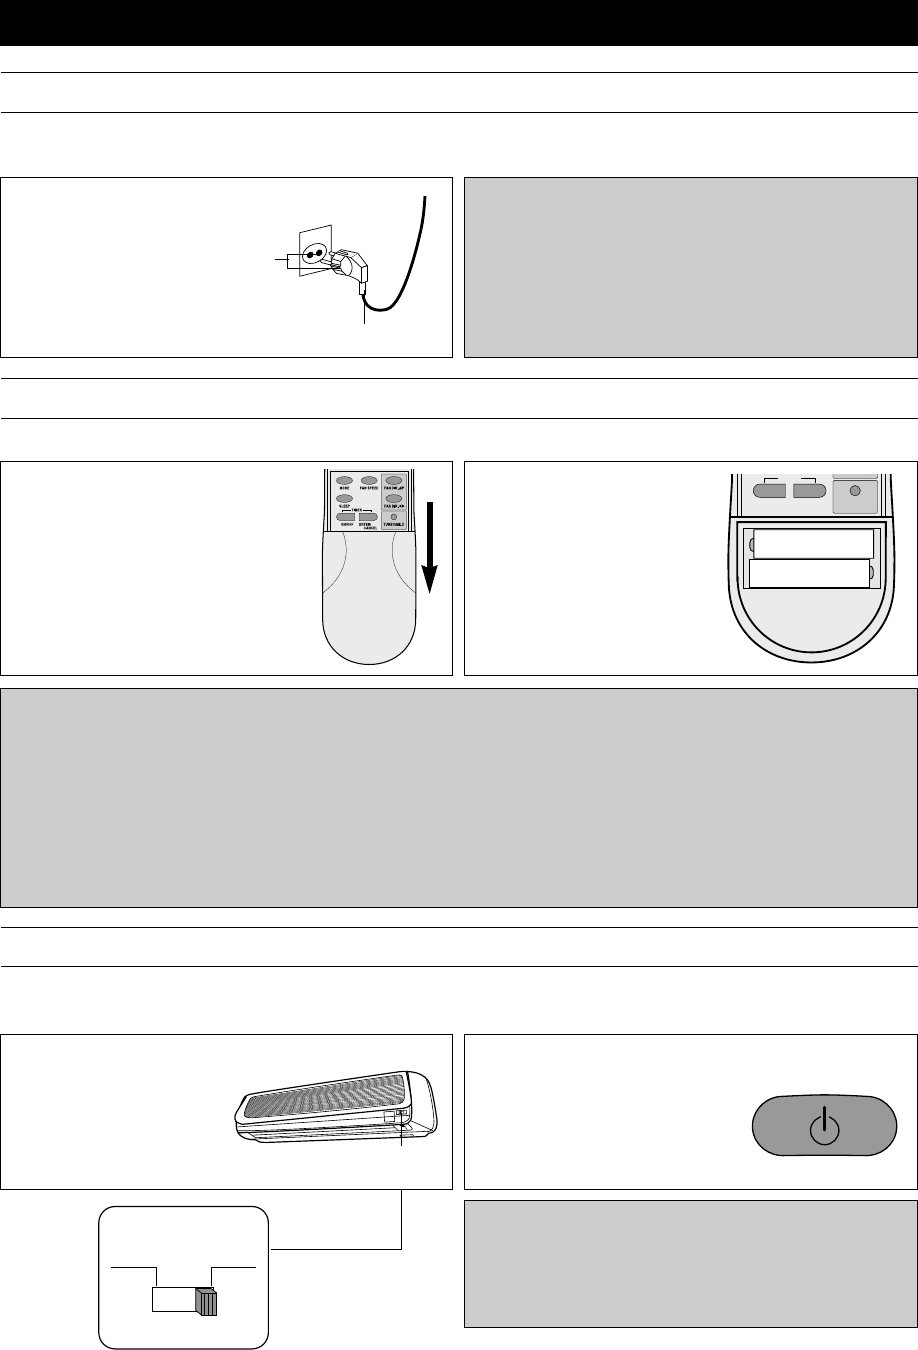
Plug into 220V~240V AC Outlet.
1. Slide down the cover to access
most of the remote buttons.
Slide down further to access the
battery compartment.
2. Insert two “AAA” size
Alkaline batteries following
the polarity diagram below.
S
ON/OFF
TIMER
ENTER/
CANCEL
TURBO/MILD
+
+
1. Open the indoor unit’s cover and make sure the EMER-
GENCY/REMOTE switch
is set to the REMOTE
position; this will allow the
unit to operate with the
remote controller.
TEST/EMERGENCY/REMOTE Switch
2. Press the ON/OFF button on the remote controller to turn
on the unit. The On LED will light on the indoor unit and
“ON” will light in the remote display.
To select the various modes and
settings, read the following pages.
SETTING THE UNIT FOR REMOTE OPERATION
After the unit is fully connected and plugged in, it can be turned on. To turn the unit on and set it for remote operation,
follow the procedures below:
THREE MINUTE COMPRESSOR DELAY
After turning the indoor unit on and setting it for air condi-
tioner operation, the compressor (outdoor unit) will not
come on for three minutes. This is a feature that will protect
the compressor from damage due to quick start and stops.
EMERGENCY
REMOTE
EMERGENCY/REMOTE Switch
19

Hulp nodig? Stel uw vraag in het forum

Spelregels

Misbruik melden

Gebruikershandleiding.com neemt misbruik van zijn services uitermate serieus. U kunt hieronder aangeven waarom deze vraag ongepast is. Wij controleren de vraag en zonodig wordt deze verwijderd.

Product:

Bijvoorbeeld antisemitische inhoud, racistische inhoud, of materiaal dat gewelddadige fysieke handelingen tot gevolg kan hebben.

Bijvoorbeeld een creditcardnummer, een persoonlijk identificatienummer, of een geheim adres. E-mailadressen en volledige namen worden niet als privégegevens beschouwd.

Spelregels forum

Om tot zinvolle vragen te komen hanteren wij de volgende spelregels:

Belangrijk! Als er een antwoord wordt gegeven op uw vraag, dan is het voor de gever van het antwoord nuttig om te weten als u er wel (of niet) mee geholpen bent! Wij vragen u dus ook te reageren op een antwoord.

Belangrijk! Antwoorden worden ook per e-mail naar abonnees gestuurd. Laat uw emailadres achter op deze site, zodat u op de hoogte blijft. U krijgt dan ook andere vragen en antwoorden te zien.

Abonneren

Abonneer u voor het ontvangen van emails voor uw Daewoo dsb 181 lh bij:


U ontvangt een email met instructies om u voor één of beide opties in te schrijven.


Ontvang uw handleiding per email

Vul uw emailadres in en ontvang de handleiding van Daewoo dsb 181 lh in de taal/talen: Engels als bijlage per email.

De handleiding is 0,74 mb groot.


U ontvangt de handleiding per email binnen enkele minuten. Als u geen email heeft ontvangen, dan heeft u waarschijnlijk een verkeerd emailadres ingevuld of is uw mailbox te vol. Daarnaast kan het zijn dat uw internetprovider een maximum heeft aan de grootte per email. Omdat hier een handleiding wordt meegestuurd, kan het voorkomen dat de email groter is dan toegestaan bij uw provider.

Stel vragen via chat aan uw handleiding

Stel uw vraag over deze PDF

loading

Uw handleiding is per email verstuurd. Controleer uw email

Als u niet binnen een kwartier uw email met handleiding ontvangen heeft, kan het zijn dat u een verkeerd emailadres heeft ingevuld of dat uw emailprovider een maximum grootte per email heeft ingesteld die kleiner is dan de grootte van de handleiding.

Er is een email naar u verstuurd om uw inschrijving definitief te maken.

Controleer uw email en volg de aanwijzingen op om uw inschrijving definitief te maken

U heeft geen emailadres opgegeven

Als u de handleiding per email wilt ontvangen, vul dan een geldig emailadres in.

Uw vraag is op deze pagina toegevoegd

Wilt u een email ontvangen bij een antwoord en/of nieuwe vragen? Vul dan hier uw emailadres in.


Info