


-
Ik zet de oven op 180 graden of meer, hij blijft op voorverwarmen staan
Reageer op deze vraag Misbruik melden
Bereikt het aantal graden niet
Wat te doen Gesteld op 19-5-2020 om 18:29-
Hoi,
Waardeer dit antwoord (3) Misbruik melden
Gelijkaardige vraag. Ik warm de oven voor en tijdens het voorverwarmen krijg ik regelmatig error 3.. heel warm wordt de oven niet meer..
help! Geantwoord op 17-6-2020 om 21:06
-
-
Hoe warm je balletjes in tomatensaus op zonder dat het ontploft of verbrand? Gesteld op 17-1-2020 om 15:37
Reageer op deze vraag Misbruik melden -
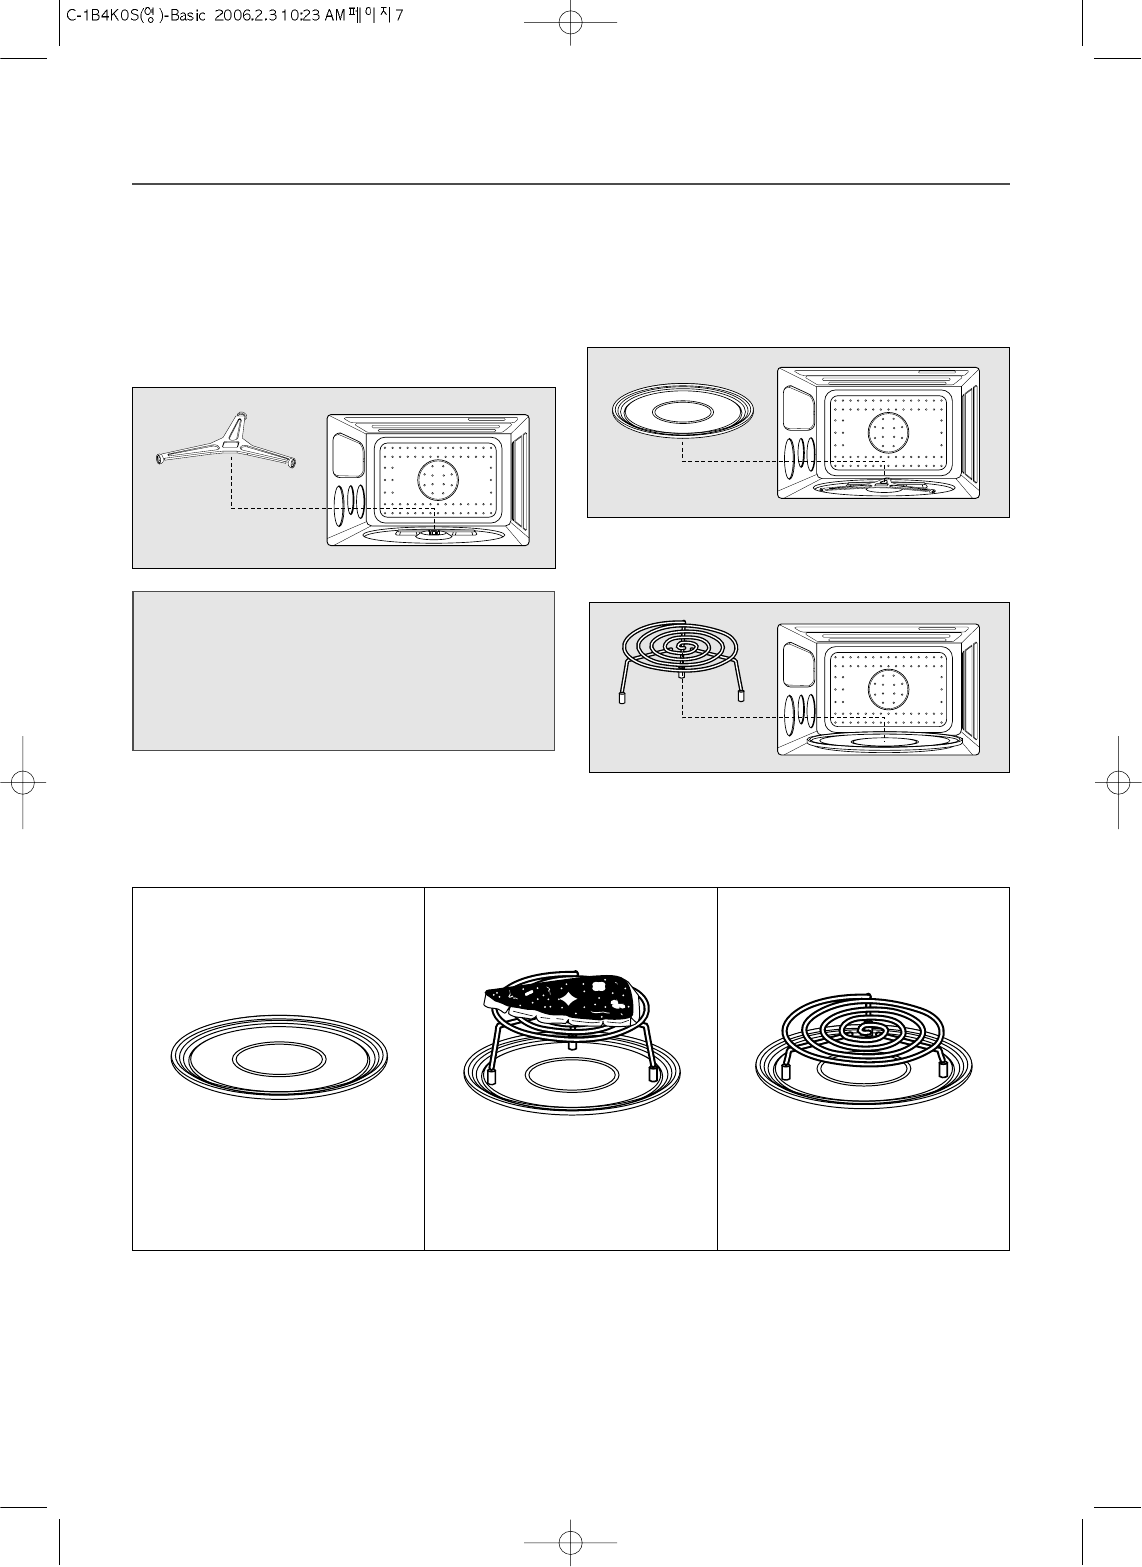
Hoe gebruik ik de onderste grill. Moet ik dan eerst iets weghalen?
Reageer op deze vraag Misbruik melden
Gesteld op 8-6-2015 om 19:17-
Ja, je moet eerst de bovenste grill eruit halen. Geantwoord op 22-11-2015 om 13:06
Waardeer dit antwoord Misbruik melden
-
-
Mevr/men
Reageer op deze vraag Misbruik melden
Ik heb een daewoo combi edition 1 zonder gebruiks aanwijzing
Ik heb op u site gezeten en kan geen gebruiks aanwijzing vinden
Zou u mij aub eraan kunnen helpen
Gesteld op 14-9-2014 om 13:00-
ik heb een daewoo combi edition 1b4ka zonder gebruiks aanwijzing ,die zou ik willen Geantwoord op 10-11-2014 om 10:17
Waardeer dit antwoord Misbruik melden
-
-
de magnatron word niet warm hoe kan dit komen Gesteld op 24-8-2014 om 18:53
Reageer op deze vraag Misbruik melden-
Dit gebeurd vaker als de stekker niet in het stopcontact zit. Geantwoord op 22-11-2015 om 13:07
Waardeer dit antwoord Misbruik melden
-
-
Is het mogelijk om het lampje te vervangen als het kapot is? Gesteld op 26-4-2014 om 06:28
Reageer op deze vraag Misbruik melden-
Jazeker dat kan goed. gewoon oude kapotte lampje eruit halen en een nieuwe goede
Waardeer dit antwoord (14) Misbruik melden
lamp er weer inzetten. Geantwoord op 22-11-2015 om 13:00
-
-
op wat voor knoppen moet je lasagne gaar krijgen
Reageer op deze vraag Misbruik melden
Gesteld op 9-4-2014 om 14:33-
De lasagne wordt prima als je het via de speciale lasagne-knoppen eerst voorverwarmd en daarna op halve kracht laat garen. Geantwoord op 22-11-2015 om 13:04
Waardeer dit antwoord Misbruik melden
-
-
Hebt u ook een hollandse vertaling van de handleiding KOC 1B4K ?
Reageer op deze vraag Misbruik melden
Ik zal u zeer dankbaar zijn.
Groeten Ruud. Gesteld op 8-4-2013 om 17:00-
Sorry Ruud, maar die heb ik weggegooid toen ik de Daewoo magnetron weg heb gedaan.
Waardeer dit antwoord Misbruik melden
Geantwoord op 8-4-2013 om 19:00
-
-
Ha die Ruud,
Waardeer dit antwoord Misbruik melden
Nou, ik zou zeggen, begin dan maarvast mij dankbaar te zijn, want ik heb toendertijd de Daewoo magnetraon 1B4 Kaan mijn zoon gegeven (omdat een lampje stuk is)
Hij gebruikt hem alle dagen (overigens zonder licht) en raad eens.......
Hij heeft de Nederlandse handleiding gevonden.
Tevens is ie ook Frans, maar dat terzijde.
Dus deze handleiding is ter jouwer bechikking, want onze zoon hoeft de deze handleiding niet.
Met vriendelijke groet,
Piet Smit
tel 06 - 25 1 25 600 Geantwoord op 10-4-2013 om 11:58 -
Dag Ruud,
Waardeer dit antwoord (1) Misbruik melden
Nou mail ik je fatsoenlijk en jij neemt niet eens de moeite om te antwoorden.
Dat vind ik onfatsoenlijk en niet bepaald netjes.
We zijn nu 10 maand verder en ik ben dan ook niet meer van plan jou de handleiding ter beschikking te stellen.
Geantwoord op 18-12-2013 om 15:30 -
mijn lapies zijn stuk waar kan ik die kopen, en niet graag via omweg, kan het in winkel?? dank u Gesteld op 18-6-2011 om 14:48
Reageer op deze vraag Misbruik melden-
Ik wil ook graag 2 lampjes voor deze magnetron kopen, maar dat valt niet mee !
Waardeer dit antwoord Misbruik melden
Inderdaad bij een zaak in Amerika kosten ze 1.50 per stuk maar ze willen dan
28.50 voor de verzendkosten hebben. Dat vind ik grenzen aan misdaad ja toch?
Piet Geantwoord op 18-6-2011 om 18:34
-
-
Heb je ergens wat kunnen vinden? DIe van mij zijn nl ook stuk...
Waardeer dit antwoord Misbruik melden
Geantwoord op 6-9-2011 om 19:09 -
Ik,heb de lampjes besteld bij Ventex in Wormerveer 075 6220111.Het zijn twee lampjes van 120V,die in serie geplaatst zijn,voor de Deawoo KOC-1B4K.John.
Waardeer dit antwoord Misbruik melden
Ik weet niet of die Fa.nog bestaat. Geantwoord op 27-1-2012 om 23:46 -
Wie heeft voor mij een kopie handleiding Daewoo KOC 1B4KA Magnetronoven combi??
Reageer op deze vraag Misbruik melden
Deze is zoekgeraakt bij verhuizing,reacties graag op
jonnypronk@casema.nl Gesteld op 13-12-2010 om 15:04-
hoi.heb je al een handleiding voor de deawoo koc-1b4ka Geantwoord op 11-9-2013 om 12:18
Waardeer dit antwoord Misbruik melden
-
-
in onze magnetron is het lampje stuk!
Reageer op deze vraag Misbruik melden
hoe kunnen we dit zelf vervangen?
graag zo spoedig mogelijk bericht terug.
gr.h.wattenberg Gesteld op 23-9-2010 om 20:40-
Heeft u al lampjes gevonden..? electro@zonnet.nl Geantwoord op 3-6-2012 om 17:08
Waardeer dit antwoord (3) Misbruik melden
-
-
Wij hebben een Daywoo magnetron, KOC 1 B4KA.
Reageer op deze vraag Misbruik melden
Van deze magnetron zijn de 2 haloggenlampjes defect.
op de lampjes staat niets vermeld van welk type of hoeveel watt deze lampjes zijn.
Dus wie kan mij vertellen welk type en hoeveel watt halogeenlampjes in de magnetron horen ?
Groetjes,Nico Gesteld op 22-6-2010 om 20:19-
Hallo,
Waardeer dit antwoord Misbruik melden
Wij zitten nu met hetzelfde probleem,zou u mij kunnen doorgeven op welke manier deze lampjes te vervangen zijn?
Ik zie geen openingen o.i.d. hiervoor ?
Graag bericht terug
Bij voorbaat dank !
Afz. H.W. e-mail; mini84@kpnmail.nl Geantwoord op 26-9-2010 om 11:02
-
-
De lampjes van de binnenverlichting (twee stuks) zijn in serie geschakeld. Dus als er één lampje defect is, branden ze geen van beiden. De lampjes vervangen is een hele toer.!!!!!Je moet zowat de héle magnetron slopen om erbij te komen.
Waardeer dit antwoord (1) Misbruik melden
De lampjes zijn van het type halogeen. (DAEWOO Art. Nr. 3513602600)
HG 120 Volt-20 Watt. (De lampjes zijn 120 Volt omdat ze in serie geschakeld zijn.) De lampjes moet je één voor één vervangen om er achter te komen wélke van de twee defect is.
Succes en groeten,
Sjef van Iersel. Geantwoord op 23-11-2010 om 21:20 -
ik kan u helaas geen antwoord op de vraag geven maar heb zelf een verzoek aan u.
Waardeer dit antwoord Misbruik melden
mijn tante is met de verhuizing de handleiding kwijtgeraakt en deze is niet verkrijgbaar bij winkel of fabriek is het mogelijk dat u mij een kopie hiervan toestuurt tegen betaling.
mvg mevr J Pronk Geantwoord op 24-11-2010 om 19:15 -
ik heb u geprobeerd te bellen via het door u aangegeven telefoon nummer 0184-434160 maar die is niet in gebruik! ik heb namelijk een probleem met mijn combi magnetron KOC 1B4K die blijft error 3 aangeven en de oven werkt niet! bvb dank Gesteld op 8-3-2010 om 11:38
Reageer op deze vraag Misbruik melden-
Ik heb nu hetzelfde probleem. Weet u inmiddels de oplossing, dan hoor ik die graag. BVD Geantwoord op 30-9-2010 om 18:08
Waardeer dit antwoord Misbruik melden
-
-
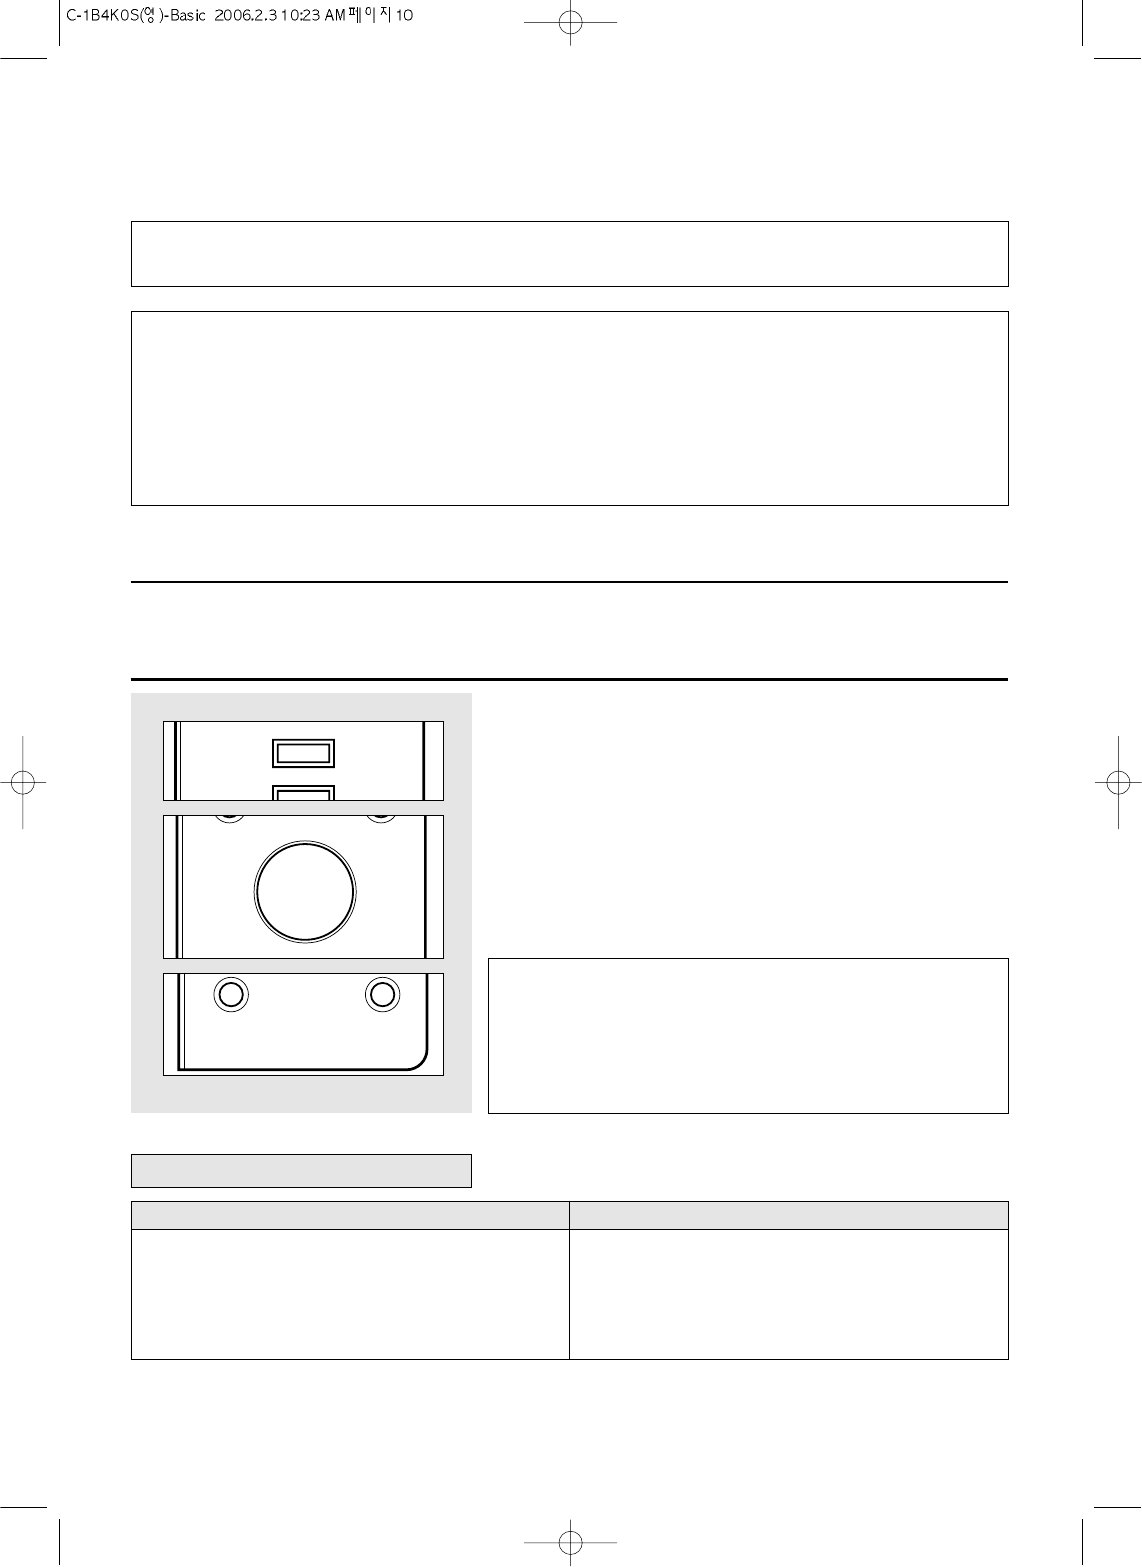
Waar zit verlichtingslampje microwave DAEWOO KOC1B4K, zodat ik dit kan vervangen? Gesteld op 3-2-2010 om 13:50
Reageer op deze vraag Misbruik melden-
Als je de deksel van de magnetron afschroeft, zit het links/boven, verscholen onder een dekseltje.
Waardeer dit antwoord (1) Misbruik melden
Het zijn n.l. 2 halogeen lampjes van 120 volt bij 20 watt. Geantwoord op 13-12-2010 om 16:33
-
-
De lampjes bestel je gewoon via Ebay ergens in Amerika, kosten ze maar 1,50 euro per stuk,
Waardeer dit antwoord (1) Misbruik melden
wel beide vervangen ze staan en serie...
bij de Handyman werd er 17 euro voor gevraagt 120v-20W halogeen !!! succes Geantwoord op 27-12-2010 om 16:32 -
Hebt u het adres in Amerika waar ik de lampjes voor $ 1.50 kan kopen?
Waardeer dit antwoord Misbruik melden
Ik heb dit al geprobeerd, maar bij deze leverancier vragen ze wel $28.50 verzendkosten.
Dat schiet dus niet op.
Is er iemand die mij het adres van de leverancier kan geven die dus wel voordelig levert?
Dan ben ik weer helemaal blij Geantwoord op 9-3-2011 om 21:44
