Technical Support .....................................................87
4D-Link DIR-655 User Manual
Section 1 - Product Overview
• D-Link DIR-655 Xtreme N
™
Router
• 3 Detachable Antennas
• Power Adapter
• CAT5 Ethernet Cable
• CD-ROM with Installation Wizard, User Manual,
and Special Offers
System Requirements
• Ethernet-based Cable or DSL Modem
• Computers with Windows
®
, Macintosh
®
, or Linux-based operating systems with an installed Ethernet
adapter
• Internet Explorer Version 6.0,
Mozilla 1.7.12 (5.0), or Firefox 1.5 and above (for conguration)
• Installation Wizard requires Windows
®
XP with Service Pack 2
Product Overview
Package Contents
Note: Using a power supply with a different voltage rating than the one included
with the DIR-655 will cause damage and void the warranty for this product.
5D-Link DIR-655 User Manual
Section 1 - Product Overview
Introduction
TOTAL PERFORMANCE
Combines award winning router features and Draft 802.11n wireless technology to provide the best wireless performance
TOTAL SECURITY
The most complete set of security features including Active Firewall and WPA2 to protect your network against outside
intruders
TOTAL COVERAGE
Provides greater wireless signal rates even at farther distances for best-in-class Whole Home Coverage.
ULTIMATE PERFORMANCE
The D-Link Xtreme N™ Router (DIR-655) is a draft 802.11n compliant device that delivers real world performance of up to
650% faster than an 802.11g wireless connection (also faster than a 100Mbps wired Ethernet connection). Create a secure
wireless network to share photos, les, music, video, printers, and network storage throughout your home. Connect the Xtreme
N™ Router to a cable or DSL modem and share your high-speed Internet access with everyone on the network. In addition,
this Router includes a Quality of Service (QoS) engine that keeps digital phone calls (VoIP) and online gaming smooth and
responsive, providing a better Internet experience.
EXTENDED WHOLE HOME COVERAGE
Powered by Xtreme N™ technology, this high performance router provides superior Whole Home Coverage while reducing dead
spots. The Xtreme N™ Router is designed for use in bigger homes and for users who demand higher performance networking.
Add a Xtreme N™ notebook or desktop adapter and stay connected to your network from virtually anywhere in your home.
TOTAL NETWORK SECURITY
The Xtreme N™ Router supports all of the latest wireless security features to prevent unauthorized access, be it from over the
wireless network or from the Internet. Support for WPA and WEP standards ensure that you’ll be able to use the best possible
encryption method, regardless of your client devices. In addition, this Xtreme N™ Router utilizes dual active rewalls (SPI and
NAT) to prevent potential attacks from across the Internet.
* Maximum wireless signal rate derived from IEEE Standard 802.11g and Draft 802.11n specications. Actual data throughput will vary. Network conditions and
environmental factors, including volume of network trafc, building materials and construction, and network overhead, lower actual data throughput rate. Environmental
conditions will adversely affect wireless signal range.
6D-Link DIR-655 User Manual
Section 1 - Product Overview
• Faster Wireless Networking - The DIR-655 provides up to 300Mbps* wireless connection with other
802.11n wireless clients. This capability allows users to participate in real-time activities online, such as
video streaming, online gaming, and real-time audio. The performance of this 802.11n wireless router
gives you the freedom of wireless networking at speeds 650% faster than 802.11g.
• Compatible with 802.11b and 802.11g Devices
- The DIR-655 is still fully compatible with the IEEE
802.11b standard, so it can connect with existing 802.11b PCI, USB and Cardbus adapters.
• Advanced Firewall Features
- The Web-based user interface displays a number of advanced network
management features including:
• Content Filtering- Easily applied content ltering based on MAC Address, URL, and/or
Domain Name.
• Filter Scheduling - These lters can be scheduled to be active on certain days or for a
duration of hours or minutes.
• Secure Multiple/Concurrent Sessions - The DIR-655 can pass through VPN sessions. It
supports multiple and concurrent IPSec and PPTP sessions, so users behind the DIR-655
can securely access corporate networks.
• User-friendly Setup Wizard - Through its easy-to-use Web-based user interface, the DIR-655 lets you
control what information is accessible to those on the wireless network, whether from the Internet or from
your company’s server. Congure your router to your specic settings within minutes.
* Maximum wireless signal rate derived from IEEE Standard 802.11g and Draft 802.11n specications. Actual data throughput will vary. Network conditions and
environmental factors, including volume of network trafc, building materials and construction, and network overhead, lower actual data throughput rate. Environmental
conditions will adversely affect wireless signal range.
Features
7D-Link DIR-655 User Manual
Section 1 - Product Overview
Hardware Overview
Connections
USB
Connect a USB 1.1 or 2.0 ash
drive to congure the wireless
settings using WCN.
Reset
Pressing the Reset button restores the router to
its original factory default settings.
LAN Ports (1-4)
Connect Ethernet devices such as
computers, switches, and hubs.
Internet Port
The auto MDI/MDIX Internet port is
the connection for the Ethernet cable
to the cable or DSL modem.
Power Receptor
Receptor for the supplied power
adapter.
8D-Link DIR-655 User Manual
Section 1 - Product Overview
Hardware Overview
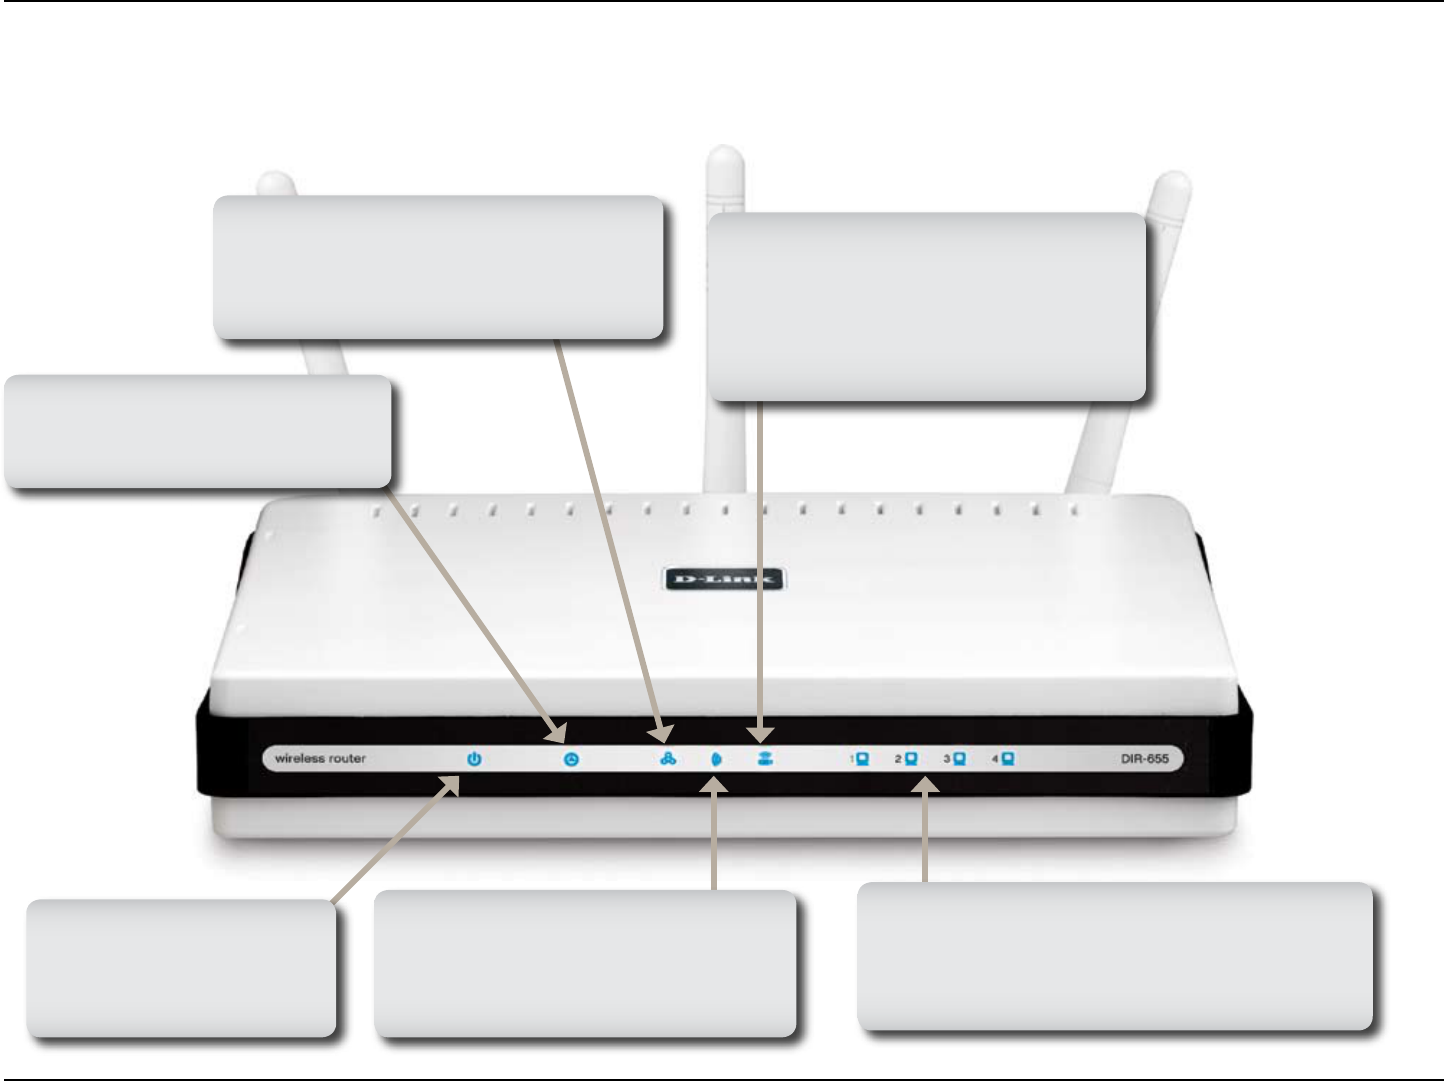
LEDs
WLAN LED
A solid light indicates that the wireless
segment is ready. This LED blinks
during wireless data transmission.
Status LED
A blinking light indicates that the
DIR-655 is ready.
Internet LED
A solid light indicates connection on the
Internet port. This LED blinks during
data transmission.
Power LED
A solid light indicates a
proper connection to the
power supply.
Local Network LEDs
A solid light indicates a connection to an
Ethernet-enabled computer on ports 1-4.
This LED blinks during data transmission.
WCN LED
Insert a USB ash drive with WCN
information. The LED will blink 3 times
if it successfully transfers the wireless
settings.
9D-Link DIR-655 User Manual
Section 2 - Installation
Before you Begin
Installation
This section will walk you through the installation process. Placement of the router is very important. Do not place the
router in an enclosed area such as a closet, cabinet, or in the attic or garage.
Please congure the router with the computer that was last connected directly to your modem. Also, you can only use
the Ethernet port on your modem. If you were using the USB connection before using the router, then you must turn off
your modem, disconnect the USB cable and connect an Ethernet cable to the Internet port on the router, and then turn
the modem back on. In some cases, you may need to call your ISP to change connection types (USB to Ethernet).
If you have DSL and are connecting via PPPoE, make sure you disable or uninstall any PPPoE software such as
WinPoet, Broadjump, or Enternet 300 from your computer or you will not be able to connect to the Internet.
10D-Link DIR-655 User Manual
Section 2 - Installation
Wireless Installation Considerations
The D-Link wireless router lets you access your network using a wireless connection from virtually anywhere within
the operating range of your wireless network. Keep in mind, however, that the number, thickness and location of
walls, ceilings, or other objects that the wireless signals must pass through, may limit the range. Typical ranges vary
depending on the types of materials and background RF (radio frequency) noise in your home or business. The key
to maximizing wireless range is to follow these basic guidelines:
1. Keep the number of walls and ceilings between the D-Link router and other network devices to a
minimum - each wall or ceiling can reduce your adapter’s range from 3-90 feet (1-30 meters.) Position
your devices so that the number of walls or ceilings is minimized.
2. Be aware of the direct line between network devices. A wall that is 1.5 feet thick (.5 meters), at a
45-degree angle appears to be almost 3 feet (1 meter) thick. At a 2-degree angle it looks over 42 feet
(14 meters) thick! Position devices so that the signal will travel straight through a wall or ceiling (instead
of at an angle) for better reception.
3. Building Materials make a difference. A solid metal door or aluminum studs may have a negative effect on
range. Try to position access points, wireless routers, and computers so that the signal passes through
drywall or open doorways. Materials and objects such as glass, steel, metal, walls with insulation, water
(sh tanks), mirrors, le cabinets, brick, and concrete will degrade your wireless signal.
4. Keep your product away (at least 3-6 feet or 1-2 meters) from electrical devices or appliances that
generate RF noise.
5. If you are using 2.4GHz cordless phones or X-10 (wireless products such as ceiling fans, lights, and
home security systems), your wireless connection may degrade dramatically or drop completely. Make
sure your 2.4GHz phone base is as far away from your wireless devices as possible. The base transmits
a signal even if the phone in not in use.
11D-Link DIR-655 User Manual
Section 2 - Installation
The EBR-2310 includes a Quick Router Setup Wizard CD. Follow the simple steps below to run the Setup Wizard to
guide you quickly through the installation process.
Insert the Quick Router Setup Wizard CD in the CD-ROM drive. The step-by-step instructions that follow are shown
in Windows
®
XP. The steps and screens are similar for the other Windows operating systems.
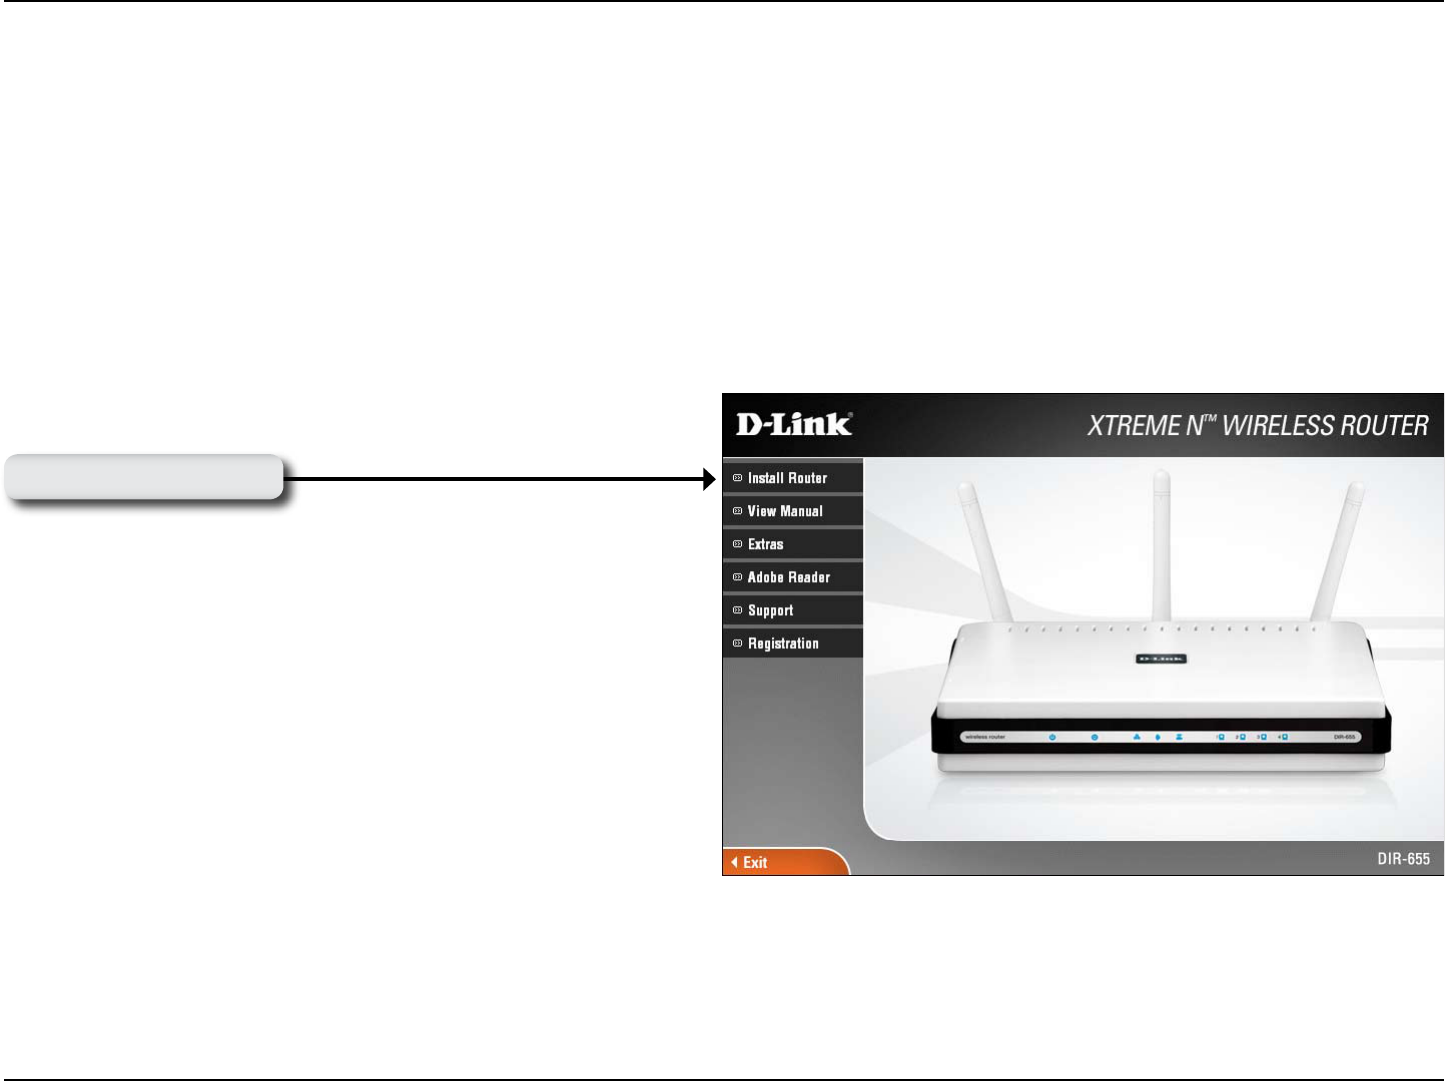
If the CD Autorun function does not automatically start on your computer, go to Start > Run. In the run box type
“D:\DIR655.exe” (where D: represents the drive letter of your CD-ROM drive).
When the autorun screen appears, click Install Router.
Getting Started
Click Install Router
Note: It is reccomended to write down the SSID and Security Key, followed by the login password on the provided CD
holder.
13D-Link DIR-655 User Manual
Section 3 - Configuration
Setup Wizard
You may click Setup Wizard to quickly congure your router.
If you want to enter your settings without running the wizard, click
Manual Conguration and skip to page 19.
Click Launch Internet Connection Setup Wizard to begin.
If you want to congure your wireless settings, click Launch Wireless
Security Setup Wizard and skip to page 62.
14D-Link DIR-655 User Manual
Section 3 - Configuration
Click Next to continue.
Create a new password and then click Next to continue.
Select your time zone from the drop-down menu and then click Next
to continue.
Select the type of Internet connection you use and then click Next
to continue.
30D-Link DIR-655 User Manual
Section 3 - Configuration
The DIR-655 can be congured as a virtual server so that remote users accessing Web or FTP services via the public
IP address can be automatically redirected to local servers in the LAN (Local Area Network).
The DIR-655 rewall feature lters out unrecognized packets to protect your LAN network so all computers networked
with the DIR-655 are invisible to the outside world. If you wish, you can make some of the LAN computers accessible
from the Internet by enabling Virtual Server. Depending on the requested service, the DIR-655 redirects the external
service request to the appropriate server within the LAN network.
The DIR-655 is also capable of port-redirection meaning incoming trafc to a particular port may be redirected to a
different port on the server computer.
Each virtual service that is created will be listed at the bottom of the screen in the Virtual Servers List. There are
pre-dened virtual services already in the table. You may use them by enabling them and assigning the server IP to
use that particular virtual service.
For a list of ports for common applications, please visit http://support.dlink.com/faq/view.asp?prod_id=1191.
Virtual Server
31D-Link DIR-655 User Manual
Section 3 - Configuration
This will allow you to open a single port. If you would like to open a range of ports, refer to page 33.
Enter a name for the rule or select an application
from the drop-down menu. Select an application
and click << to populate the elds.
Enter the IP address of the computer on your
local network that you want to allow the incoming
service to. If your computer is receiving an IP
address automatically from the router (DHCP),
you computer will be listed in the “Computer
Name” drop-down menu. Select your computer
and click <<.
Enter the port that you want to open next to Private
Port and Public Port. The private and public ports
are usually the same. The public port is the port
seen from the Internet side, and the private port
is the port being used by the application on the
computer within your local network.
Select TCP, UDP, or Both from the drop-down
menu.
Select Allow All(most common) or a created
Inbound lter. You may create your own inbound
lters in the Advanced > Inbound Filter page.
The schedule of time when the Virtual Server
Rule will be enabled. The schedule may be set
to Always, which will allow the particular service
to always be enabled. You can create your own
times in the Tools > Schedules section.
Name:
IP Address:
Private Port/
Public Port:
Protocol Type:
Inbound Filter:
Schedule:
34D-Link DIR-655 User Manual
Section 3 - Configuration
QoS Engine
This option is disabled by default. Enable this
option for better performance and experience with
online games and other interactive applications,
such as VoIP.
This option should be enabled when you have a
slow Internet uplink. It helps to reduce the impact
that large low priority network packets can have
on more urgent ones.
This option is enabled by default when the QoS
Engine option is enabled. This option will allow
your router to automatically determine the uplink
speed of your Internet connection.
This displays the detected uplink speed.
The speed at which data can be transferred from the router to your ISP. This is determined by your ISP. ISP’s often speed
as a download/upload pair. For example, 1.5Mbits/284Kbits. Using this example, you would enter 284. Alternatively you can
test your uplink speed with a service such as www.dslreports.com.
By default, the router automatically determines whether the underlying connection is an xDSL/Frame-relay network or some
other connection type (such as cable modem or Ethernet), and it displays the result as Detected xDSL or Frame Relay Network.
If you have an unusual network connection in which you are actually connected via xDSL but for which you congure either
“Static” or “DHCP” in the Internet settings, setting this option to xDSL or Other Frame Relay Network ensures that the router
will recognize that it needs to shape trafc slightly differently in order to give the best performance. Choosing xDSL or Other
Frame Relay Network causes the measured uplink speed to be reported slightly lower than before on such connections, but
gives much better results.
When Connection Type is set to automatic, the automatically detected connection type is displayed here.
Enable
StreamEngine:
Dynamic
Fragmentation:
Automatic Uplink
Speed:
Measured Uplink
Speed:
Manual Uplink
Speed:
Connection Type:
Detected xDSL:
The QoS Engine option helps improve your network gaming performance by prioritizing applications. By default the
QoS Engine settings are disabled and application priority is not classied automatically.
35D-Link DIR-655 User Manual
Section 3 - Configuration
Network Filters
Select Turn MAC Filtering Off, allow MAC
addresses listed below, or deny MAC addresses
listed below from the drop-down menu.
Enter the MAC address you would like to
lter.
To nd the MAC address on a computer, please
refer to the Networking Basics section in this
manual.
Select a DHCP client from the drop-down menu
and click << to copy that MAC Address.
Configure MAC
Filtering:
MAC Address:
DHCP Client:
Use MAC (Media Access Control) Filters to allow or deny LAN (Local Area Network) computers by their MAC addresses
from accessing the Network. You can either manually add a MAC address or select the MAC address from the list of
clients that are currently connected to the Broadband Router.
36D-Link DIR-655 User Manual
Section 3 - Configuration
Access Control
Click the Add Policy button to start the Access
Control Wizard.
Add Policy:
The Access Control section allows you to control access in and out of your network. Use this feature as Parental
Controls to only grant access to approved sites, limit web access based on time or dates, and/or block access from
applications like P2P utilities or games.
Click Next to continue with the wizard.
Access Control Wizard
37D-Link DIR-655 User Manual
Section 3 - Configuration
Enter a name for the policy and then click Next to continue.
Access Control Wizard (continued)
Select a schedule (I.E. Always) from the drop-down menu
and then click Next to continue.
Enter the following information and then click Nextto
continue.
• Address Type - Select IP address, MAC address, or
Other Machines.
• IP Address - Enter the IP address of the computer
you want to apply the rule to.
38D-Link DIR-655 User Manual
Section 3 - Configuration
Select the ltering method and then click Next to continue.
Access Control Wizard (continued)
Enter the rule:
Enable - Check to enable the rule.
Name - Enter a name for your rule.
Dest IP Start - Enter the starting IP address.
Dest IP End - Enter the ending IP address.
Protocol - Select the protocol.
Dest Port Start - Enter the starting port number.
Dest Port End - Enter the ending port number.
To enable web logging, click Enable.
Click Save to save the access control rule.
39D-Link DIR-655 User Manual
Section 3 - Configuration
Enter the keywords or URLs that you want to
block (or allow). Any URL with the keyword in
it will be blocked.
Website URL/
Domain:
Website Filters are used to deny LAN computers from accessing specic web sites by the URL or domain. A URL is a
specially formatted text string that denes a location on the Internet. If any part of the URL contains the blocked word,
the site will not be accessible and the web page will not display. To use this feature, enter the text string to be blocked
and click Save Settings. The text to be blocked will appear in the list. To delete the text, click Clear the List Below.
Website Filters
44D-Link DIR-655 User Manual
Section 3 - Configuration
WISH Settings
WISH is short for Wireless Intelligent Stream Handling, a technology developed to enhance your experience of using
a wireless network by prioritizing the trafc of different applications.
Enable this option if you want to allow WISH to
prioritize your trafc.
Enable WISH:
Allows the router to recognize HTTP transfers
for many common audio and video streams
and prioritize them above other trafc. Such
streams are frequently used by digital media
players.
HTTP:
Enables the router to recognize certain
audio and video streams generated by a
Windows Media Center PC and to prioritize
these above other trafc. Such streams are
used by systems known as Windows Media
Extenders, such as the Xbox 360.
Windows Media
Center:
When enabled, this option causes the
router to automatically attempt to prioritize
trafc streams that it doesn’t otherwise
recognize, based on the behaviour
that the streams exhibit. This acts to
deprioritize streams that exhibit bulk
transfer characteristics, such as file
transfers, while leaving interactive trafc,
such as gaming or VoIP, running at a
Automatic:
WISH Rules:
A WISH Rule identies a specic message ow and assigns a priority to that ow. For most applications, the priority
classiers ensure the right priorities and specic WISH Rules are not required.
WISH supports overlaps between rules. If more than one rule matches for a specic message ow, the rule with the highest
priority will be used.
45D-Link DIR-655 User Manual
Section 3 - Configuration
Create a name for the rule that is meaningful
to you.
Name:
The priority of the message ow is entered
here. The four priorities are dened as:
BK: Background (least urgent)
BE: Best Effort.
VI: Video
VO: Voice (most urgent)
Priority:
The protocol used by the messages.
Protocol:
The rule applies to a ow of messages for which one computer’s IP address falls within the range set here.
Host IP Range:
The rule applies to a ow of messages for which host’s port number is within the range set here.
Host Port Range:
46D-Link DIR-655 User Manual
Section 3 - Configuration
UPnP
Internet Ping Block
Internet Port Speed
Multicast Streams
To use the Universal Plug and Play (UPnP
™
)
feature click on Enabled. UPNP provides
compatibility with networking equipment, software
and peripherals.
Unchecking the box will not allow the DIR-655 to
respond to pings. Blocking the Ping may provide
some extra security from hackers. Check the box
to allow the Internet port to be “pinged”.
You may set the port speed of the Internet port
to 10Mbps, 100Mbps, or auto. Some older cable
or DSL modems may require you to set the port
speed to 10Mbps.
Check the box to allow multicast trafc to pass
through the router from the Internet.
UPnP Settings:
Internet Ping:
Internet Port
Speed:
Multicast
streams:
Advanced Network Settings
48D-Link DIR-655 User Manual
Section 3 - Configuration
Time Settings
Select the Time Zone from the drop-down
menu.
To select Daylight Saving time manually, select
enabled or disabled, and enter a start date and
an end date for daylight saving time.
NTP is short for Network Time Protocol. NTP
synchronizes computer clock times in a network
of computers. Check this box to use a NTP
server. This will only connect to a server on the
Internet, not a local server.
Enter the NTP server or select one from the
drop-down menu.
To manually input the time, enter the values
in these elds for the Year, Month, Day, Hour,
Minute, and Second and then click Set Time.
You can also click Copy Your Computer’s
Time Settings.
Time Zone:
Daylight Saving:
Enable NTP
Server:
NTP Server Used:
Manual:
The Time Conguration option allows you to congure, update, and maintain the correct time on the internal system
clock. From this section you can set the time zone that you are in and set the Time Server. Daylight Saving can also
be congured to automatically adjust the time when needed.
49D-Link DIR-655 User Manual
Section 3 - Configuration
SysLog
The Broadband Router keeps a running log of events and activities occurring on the Router. You may send these logs
to a SysLog server on your network.
Enable Logging to
SysLog Server:
SysLog Server IP
Address:
Check this box to send the router logs to a
SysLog Server.
The address of the SysLog server that will be
used to send the logs. You may also select
your computer from the drop-down menu (only
if receiving an IP address from the router via
DHCP).
60D-Link DIR-655 User Manual
Section 3 - Configuration
Support
61D-Link DIR-655 User Manual
Section 4 - Security
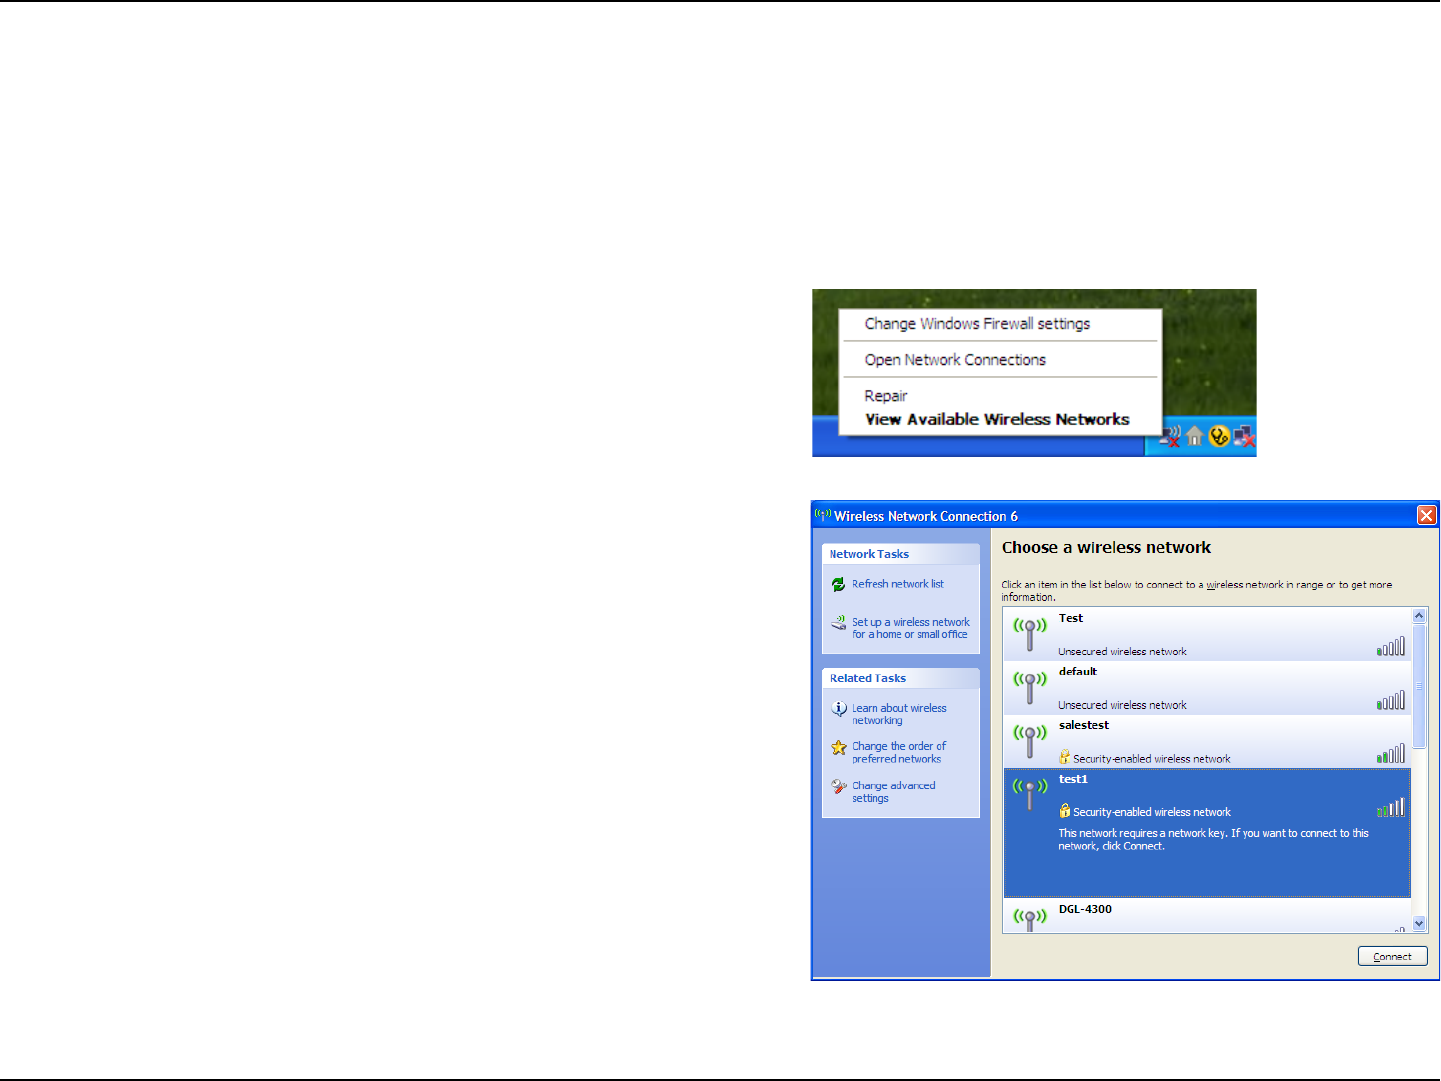
Wireless Security
This section will show you the different levels of security you can use to protect your data from intruders. The
Gebruikershandleiding.com neemt misbruik van zijn services uitermate serieus. U kunt hieronder aangeven waarom deze vraag ongepast is. Wij controleren de vraag en zonodig wordt deze verwijderd.
Product:
Spelregels forum
Om tot zinvolle vragen te komen hanteren wij de volgende spelregels:
lees eerst de handleiding door;
controleer of uw vraag al eerder door iemand anders is gesteld;
probeer uw vraag zo duidelijk mogelijk te stellen;
heeft u een probleem en al geprobeerd om dit op te lossen, vermeld dit erbij aub;
heeft u een oplossing gekregen van een bezoeker dan horen wij dat graag in dit forum;
wilt u een reactie geven op een vraag of antwoord, gebruik dan niet dit formulier maar klik op de knop 'reageer op deze vraag';
uw vraag wordt direct op de website gezet; vermijd daarom persoonlijke gegevens in te vullen;
Belangrijk! Als er een antwoord wordt gegeven op uw vraag, dan is het voor de gever van het antwoord nuttig om te weten als u er wel (of niet) mee geholpen bent! Wij vragen u dus ook te reageren op een antwoord.
Belangrijk! Antwoorden worden ook per e-mail naar abonnees gestuurd. Laat uw emailadres achter op deze site, zodat u op de hoogte blijft. U krijgt dan ook andere vragen en antwoorden te zien.
Abonneren
Abonneer u voor het ontvangen van emails voor uw D-Link dir 655 wireless router dwa 140 wireless adapter bij:
nieuwe vragen en antwoorden
nieuwe handleidingen
U ontvangt een email met instructies om u voor één of beide opties in te schrijven.
Ontvang uw handleiding per email
Vul uw emailadres in en ontvang de handleiding van D-Link dir 655 wireless router dwa 140 wireless adapter in de taal/talen: Engels als bijlage per email.
De handleiding is 3,84 mb groot.
U ontvangt de handleiding per email binnen enkele minuten. Als u geen email heeft ontvangen, dan heeft u waarschijnlijk een verkeerd emailadres ingevuld of is uw mailbox te vol. Daarnaast kan het zijn dat uw internetprovider een maximum heeft aan de grootte per email. Omdat hier een handleiding wordt meegestuurd, kan het voorkomen dat de email groter is dan toegestaan bij uw provider.
Stel vragen via chat aan uw handleiding
Stel uw vraag over deze PDF
Andere handleiding(en) van D-Link dir 655 wireless router dwa 140 wireless adapter
Uw handleiding is per email verstuurd. Controleer uw email
Als u niet binnen een kwartier uw email met handleiding ontvangen heeft, kan het zijn dat u een verkeerd emailadres heeft ingevuld of dat uw emailprovider een maximum grootte per email heeft ingesteld die kleiner is dan de grootte van de handleiding.
Er is een email naar u verstuurd om uw inschrijving definitief te maken.
Controleer uw email en volg de aanwijzingen op om uw inschrijving definitief te maken
U heeft geen emailadres opgegeven
Als u de handleiding per email wilt ontvangen, vul dan een geldig emailadres in.
Uw vraag is op deze pagina toegevoegd
Wilt u een email ontvangen bij een antwoord en/of nieuwe vragen? Vul dan hier uw emailadres in.