100880
8
Verklein
Vergroot
Pagina terug
1/20
Pagina verder
8
• Setting Self-timer
Your camera is designed with a self-timer function which will allow you to take pictures with the 10 second
built-in timer. Self-timer function is only applied to next picture. Please place the camera on a flat surface
or use a tripod (not included) for the Self-timer function.
1. Turn on the camera.
2. Press Menu button once to enter Self-timer mode.
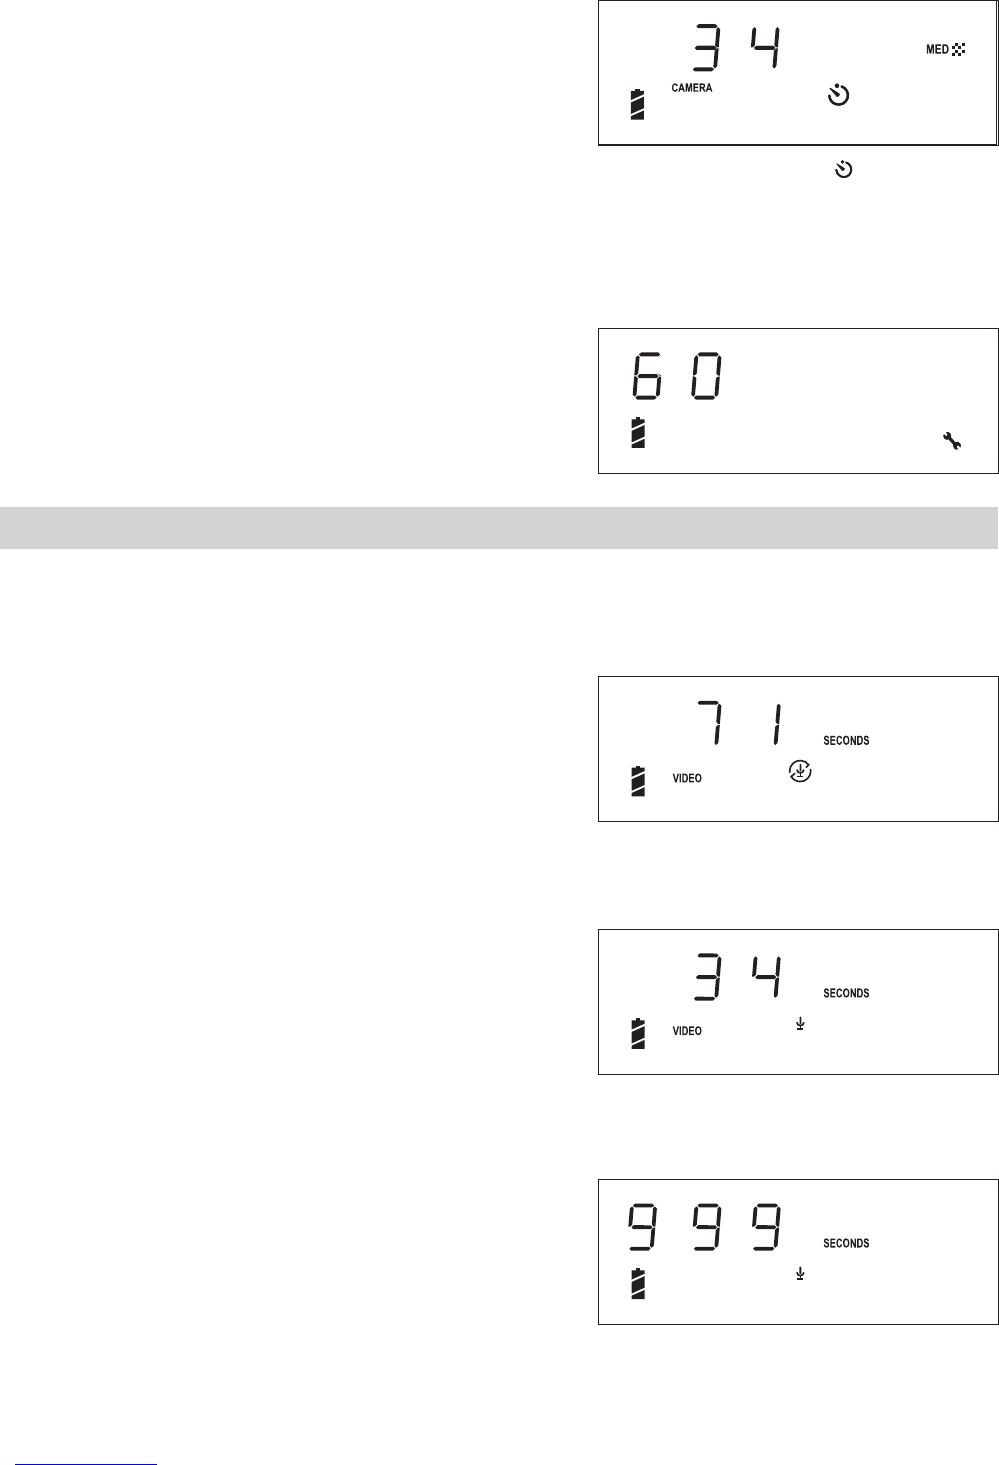
Press the Shutter button to perform self-timer. When self-timer is activated, the icon
and Self-timer
LED blink slowly with a sound on the Status LCD for the first 7 seconds, then blinks quickly for the last 3
seconds before the picture is taken.
• Setting Frequency
In order to take a better indoor picture, the camera needs to be set to suit the lighting frequency, for US,
set the frequency to 60Hz, for Europe, set the frequency to 50Hz.
1. Turn on the camera.
2. Press Menu button eight times, you can see “50” or
“60” will show on the Status LCD.
3. Press the Shutter to select the frequency.
4. Press Menu button to exit.
4 Recording Audio and Video Clips
You can choose to record video clips with or without audio. When recording a video clip, the resolution is set
to 320x240 pixel. You can record video clips for up to approximately 1 minute by using the internal memory.
You can use the SMC card to increase the audio/video recording time. The Status LCD shows the length of
audio/video clips (in seconds) can be recorded.
• Recording Video Clips without Audio
1. Turn on the camera.
2. Press Menu button twice to enter the video mode.
Press the Shutter button to start recording a video clip, the video clip counter (in seconds) appears on the
LCD screen. If you want to stop, press the Shutter button again. The length of video clips can record will
be decreased.
• Recording Video Clips with Audio
1. Turn on the camera.
2. Press Menu button three times to enter the video with
audio mode.
Press the Shutter button to start recording a video clip with audio, the video clip counter (in seconds)
appears on the LCD screen. If you want to stop, press the Shutter button again. The length of video clips
can record will be decreased.
• Recording Audio Clips
1. Turn on the camera.
2. Press Menu button four times to enter the audio mode.
Press the Shutter button to start recording an audio clip, the audio clip counter (in seconds) appears on LCD
screen. If you want to stop, press the Shutter button again.
Downloaded from www.Manualslib.com manuals search engine
8

Hulp nodig? Stel uw vraag in het forum

Spelregels

Misbruik melden

Gebruikershandleiding.com neemt misbruik van zijn services uitermate serieus. U kunt hieronder aangeven waarom deze vraag ongepast is. Wij controleren de vraag en zonodig wordt deze verwijderd.

Product:

Bijvoorbeeld antisemitische inhoud, racistische inhoud, of materiaal dat gewelddadige fysieke handelingen tot gevolg kan hebben.

Bijvoorbeeld een creditcardnummer, een persoonlijk identificatienummer, of een geheim adres. E-mailadressen en volledige namen worden niet als privégegevens beschouwd.

Spelregels forum

Om tot zinvolle vragen te komen hanteren wij de volgende spelregels:

Belangrijk! Als er een antwoord wordt gegeven op uw vraag, dan is het voor de gever van het antwoord nuttig om te weten als u er wel (of niet) mee geholpen bent! Wij vragen u dus ook te reageren op een antwoord.

Belangrijk! Antwoorden worden ook per e-mail naar abonnees gestuurd. Laat uw emailadres achter op deze site, zodat u op de hoogte blijft. U krijgt dan ook andere vragen en antwoorden te zien.

Abonneren

Abonneer u voor het ontvangen van emails voor uw Cool-Icam AQUA 1300 bij:


U ontvangt een email met instructies om u voor één of beide opties in te schrijven.


Ontvang uw handleiding per email

Vul uw emailadres in en ontvang de handleiding van Cool-Icam AQUA 1300 in de taal/talen: Engels als bijlage per email.

De handleiding is 1,67 mb groot.


U ontvangt de handleiding per email binnen enkele minuten. Als u geen email heeft ontvangen, dan heeft u waarschijnlijk een verkeerd emailadres ingevuld of is uw mailbox te vol. Daarnaast kan het zijn dat uw internetprovider een maximum heeft aan de grootte per email. Omdat hier een handleiding wordt meegestuurd, kan het voorkomen dat de email groter is dan toegestaan bij uw provider.

Stel vragen via chat aan uw handleiding

Stel uw vraag over deze PDF

loading

Uw handleiding is per email verstuurd. Controleer uw email

Als u niet binnen een kwartier uw email met handleiding ontvangen heeft, kan het zijn dat u een verkeerd emailadres heeft ingevuld of dat uw emailprovider een maximum grootte per email heeft ingesteld die kleiner is dan de grootte van de handleiding.

Er is een email naar u verstuurd om uw inschrijving definitief te maken.

Controleer uw email en volg de aanwijzingen op om uw inschrijving definitief te maken

U heeft geen emailadres opgegeven

Als u de handleiding per email wilt ontvangen, vul dan een geldig emailadres in.

Uw vraag is op deze pagina toegevoegd

Wilt u een email ontvangen bij een antwoord en/of nieuwe vragen? Vul dan hier uw emailadres in.


Info