100840
49
Verklein
Vergroot
Pagina terug
1/61
Pagina verder
48
CONNECTING THE CAMERA TO THE COMPUTER
En
CONNECTING THE CAMERA
T
T
O THE COMPUTER
O THE COMPUTER
Note for Windows 98 and 98SE users: Do not connect the camera to your computer before the camera
drivers and Microsoft DirectX 9 installation is completed.
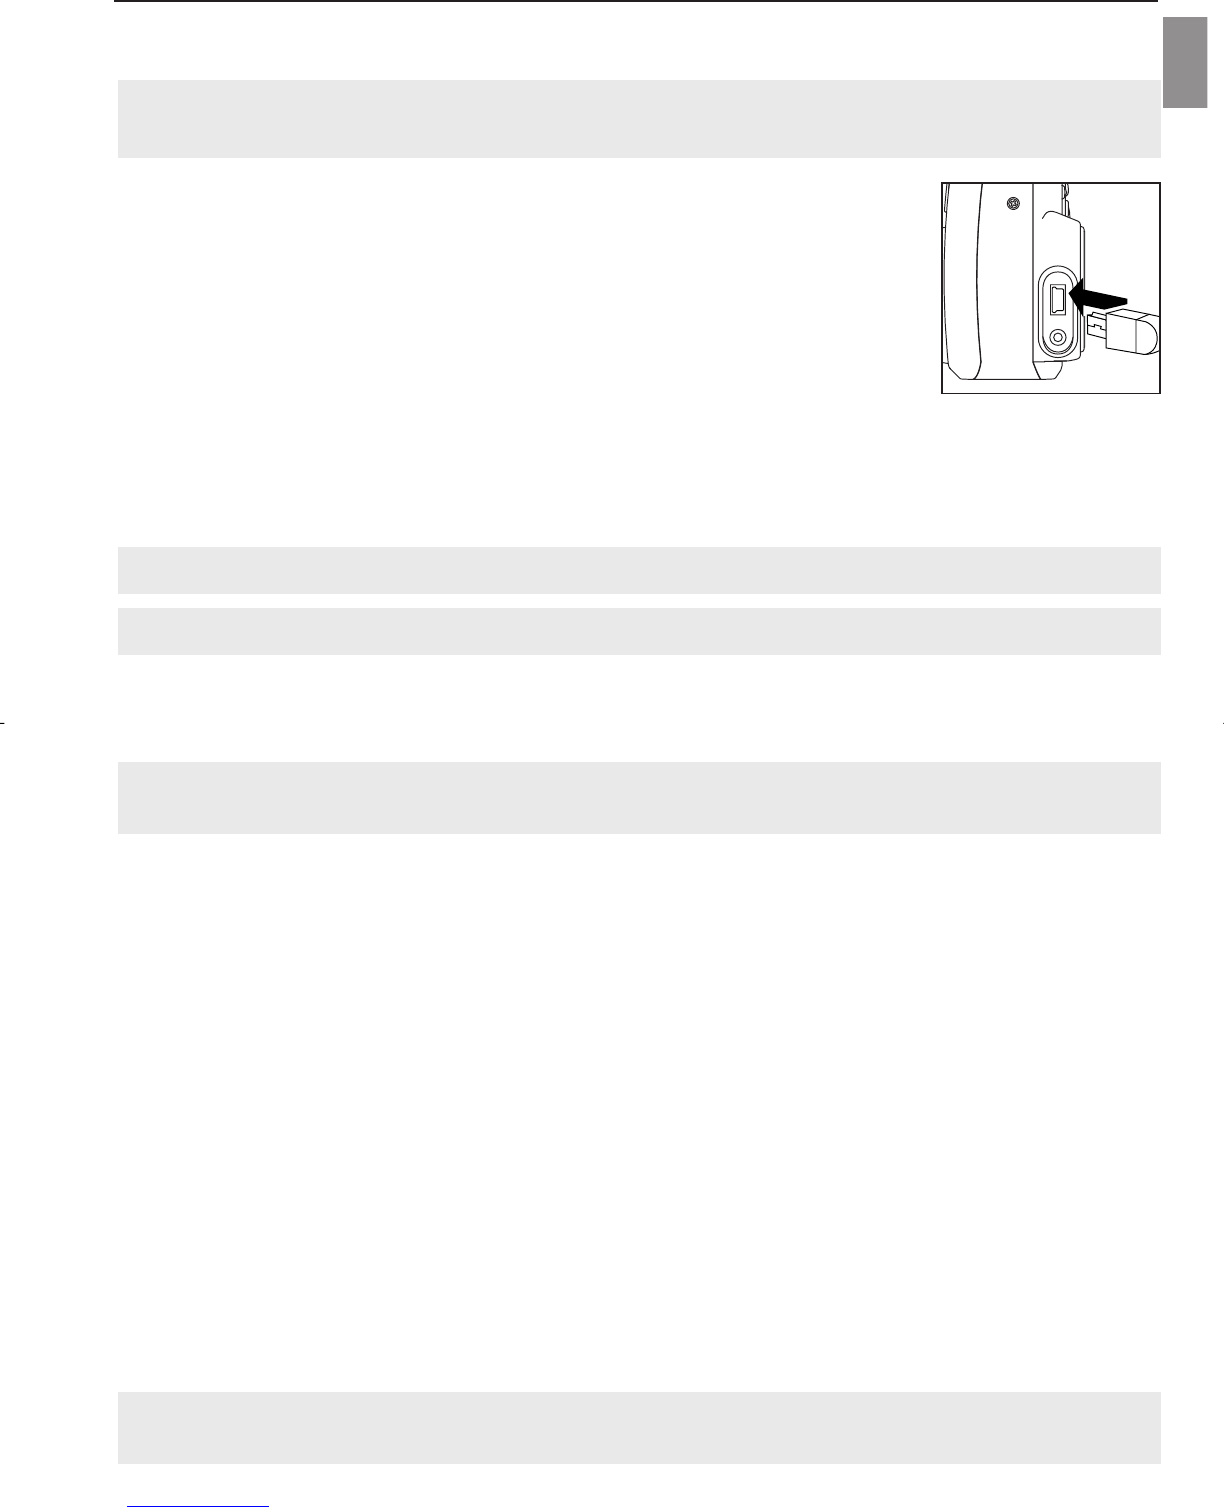
1. Power the camera on.
2. Connect the camera to the computer with the Mini-USB cable provided.
Plug the larger end of the Mini-USB cable that is included with the camera into
your PC’s USB port. (Please refer to your computer’s documentation for more
information on the location of the USB port.)
Plug the small end of the Mini-USB cable into the USB port located in the
Cable Connection panel on the side of the camera.
3. When the camera is connected to the computer for the first time, the camera
USB Mass Storage driver installation will begin. Please follow the on-screen
instructions to complete the installation.
DOWNLOADING PICTURES AND VIDEO CLIPS ONTO YOUR COMPUTER
Note: Windows 98/98SE users must install the camera driver first. (Page 41)
Note: Windows 2000 users must install DirectX 9 to view video clips on the computer. (Page 43)
Downloading files from the camera:
Internal memory: Do not insert the memory card.
Memory Card: Insert the memory card.
Caution: Do not attempt to open the battery/memory door to insert or remove the memory card and/or
batteries when the camera is connected to the computer.
FOR WINDOWS USERS
Downloading Pictures and Video Clips onto your computer:
1. Connect the camera to the computer.
2. Double-click on My Computer.
3. Double-click Removable Disk.
4. Double-click DCIM.
5. Double-click 100_4360.
The stored pictures (JPEG) and video clips (AVI) stored in the memory card will be displayed.
6. Click and drag the files into a directory in your computer to save them.
•To select all files, click Edit > Select all.
FOR MACINTOSH USERS
1. Connect the camera to the computer.
After a few moments, the external hard drive will appear on the desktop.
2. Double-click the “untitled” removable drive that is on your desktop.
3. Double-click DCIM.
4. Double-click 100_4360.
The stored pictures (JPEG) and video clips (AVI) stored in the memory card will be displayed.
5. Drag and drop the image you want to save in the computer.
•To select all files, click Edit > Select all.
Note: You may also transfer the stored pictures and video clips on your memory card onto your computer
by using a memory card reader. (sold separately)
DZ4360 UGuide-E(512883-01) 2003:11:17 5:36 PM Page 48
Downloaded from www.Manualslib.com manuals search engine
49

Hulp nodig? Stel uw vraag in het forum

Spelregels
1

Forum

Concord-EYE-Q-4360-Z

Zoeken resetten

Misbruik melden

Gebruikershandleiding.com neemt misbruik van zijn services uitermate serieus. U kunt hieronder aangeven waarom deze vraag ongepast is. Wij controleren de vraag en zonodig wordt deze verwijderd.

Product:

Bijvoorbeeld antisemitische inhoud, racistische inhoud, of materiaal dat gewelddadige fysieke handelingen tot gevolg kan hebben.

Bijvoorbeeld een creditcardnummer, een persoonlijk identificatienummer, of een geheim adres. E-mailadressen en volledige namen worden niet als privégegevens beschouwd.

Spelregels forum

Om tot zinvolle vragen te komen hanteren wij de volgende spelregels:

Belangrijk! Als er een antwoord wordt gegeven op uw vraag, dan is het voor de gever van het antwoord nuttig om te weten als u er wel (of niet) mee geholpen bent! Wij vragen u dus ook te reageren op een antwoord.

Belangrijk! Antwoorden worden ook per e-mail naar abonnees gestuurd. Laat uw emailadres achter op deze site, zodat u op de hoogte blijft. U krijgt dan ook andere vragen en antwoorden te zien.

Abonneren

Abonneer u voor het ontvangen van emails voor uw Concord EYE Q 4360 Z bij:


U ontvangt een email met instructies om u voor één of beide opties in te schrijven.


Ontvang uw handleiding per email

Vul uw emailadres in en ontvang de handleiding van Concord EYE Q 4360 Z in de taal/talen: Engels als bijlage per email.

De handleiding is 4,45 mb groot.


U ontvangt de handleiding per email binnen enkele minuten. Als u geen email heeft ontvangen, dan heeft u waarschijnlijk een verkeerd emailadres ingevuld of is uw mailbox te vol. Daarnaast kan het zijn dat uw internetprovider een maximum heeft aan de grootte per email. Omdat hier een handleiding wordt meegestuurd, kan het voorkomen dat de email groter is dan toegestaan bij uw provider.

Uw handleiding is per email verstuurd. Controleer uw email

Als u niet binnen een kwartier uw email met handleiding ontvangen heeft, kan het zijn dat u een verkeerd emailadres heeft ingevuld of dat uw emailprovider een maximum grootte per email heeft ingesteld die kleiner is dan de grootte van de handleiding.

Er is een email naar u verstuurd om uw inschrijving definitief te maken.

Controleer uw email en volg de aanwijzingen op om uw inschrijving definitief te maken

U heeft geen emailadres opgegeven

Als u de handleiding per email wilt ontvangen, vul dan een geldig emailadres in.

Uw vraag is op deze pagina toegevoegd

Wilt u een email ontvangen bij een antwoord en/of nieuwe vragen? Vul dan hier uw emailadres in.


Info