DC4062-5062 UG(514173-00)-E 1115/31/04, 9:54:46 AM
1
En
CONGRATULATIONS
Congratulations on the purchase of your new camera. Your camera has
been carefully engineered and manufactured to give you dependable
operation. Read this manual before operating the camera to become
more familiar with it.
This manual has been written and formatted with depth and detail so
that you can easily follow the instructions to maximize the features of
your camera.
ENGLISH
1
DC4062-5062 UG(514173-00)-E 15/31/04, 9:55:04 AM
2
En
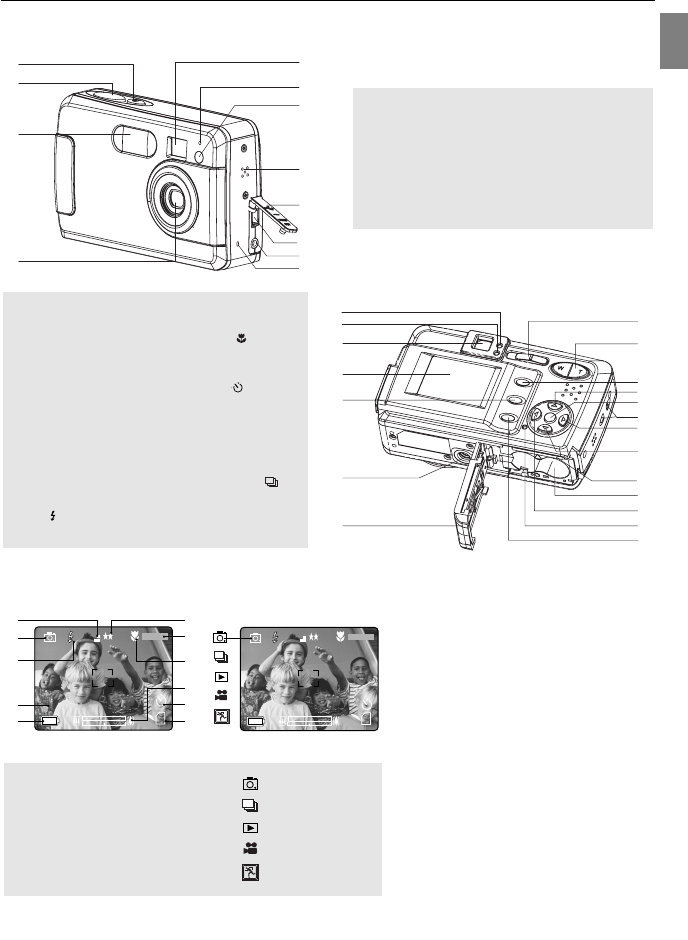
13. Flash Ready LED
14. Auto-Focus LED
15. Viewfinder
16. LCD
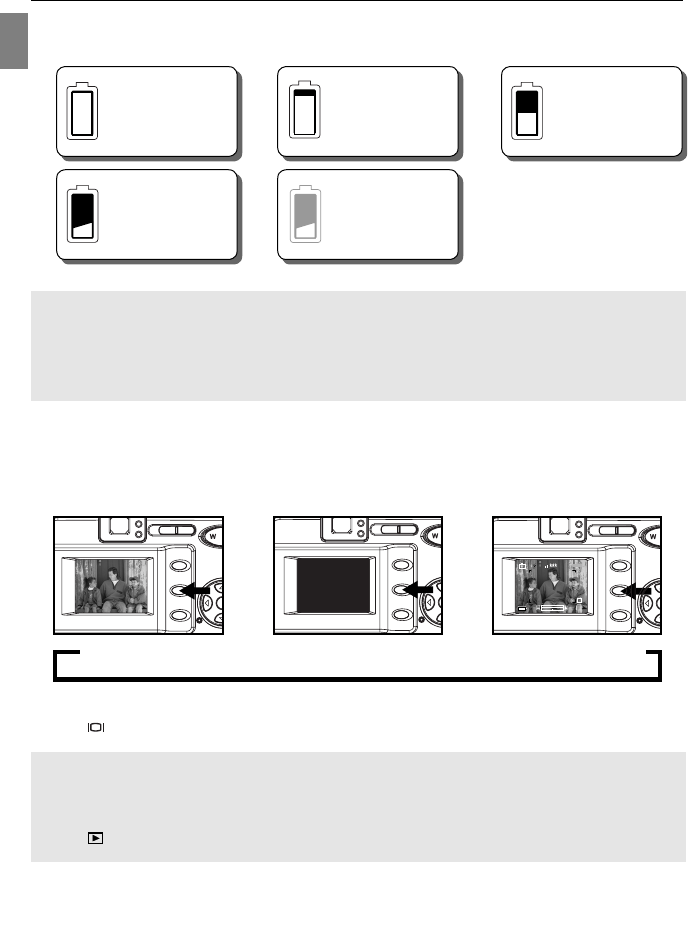
17. LCD On / Off Button
18. Tripod Socket
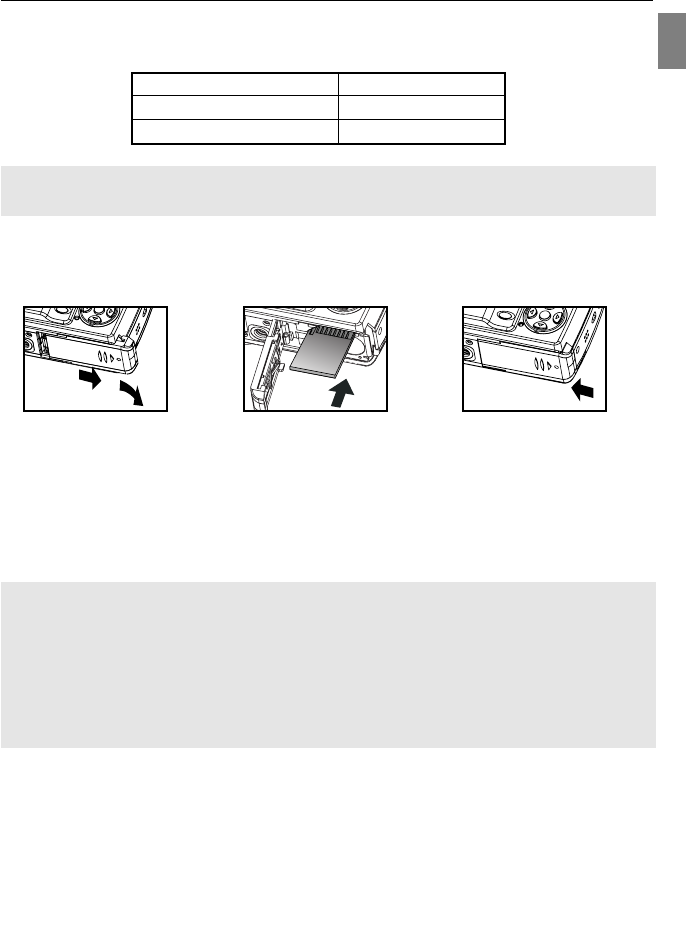
19. Battery/Memory
Card Door
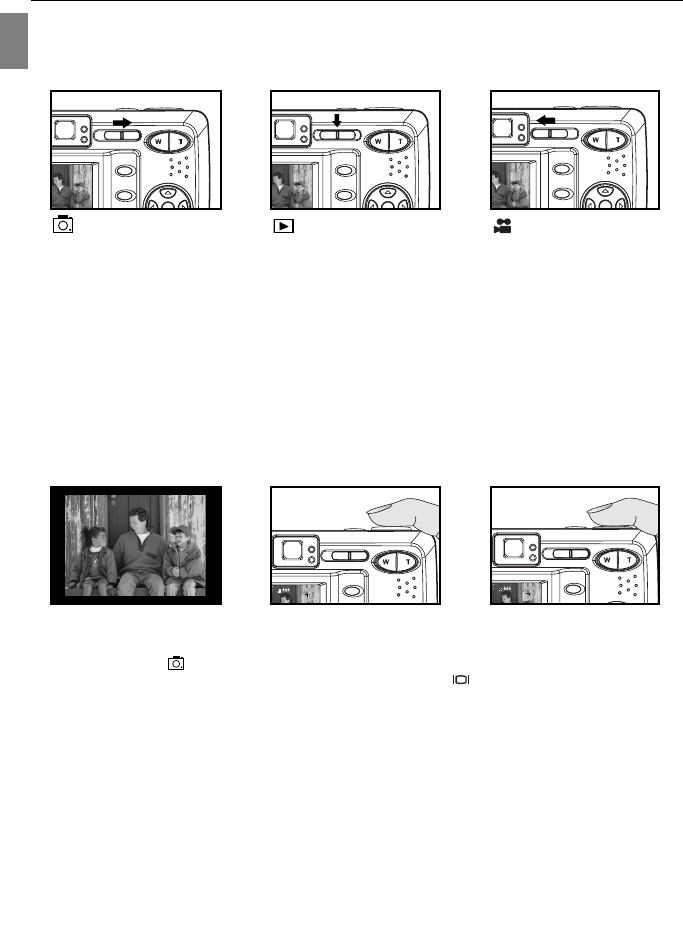
20. Mode Switch
21. Thumbnail/Wide /
Tele Zoom Button
22. MENU Button
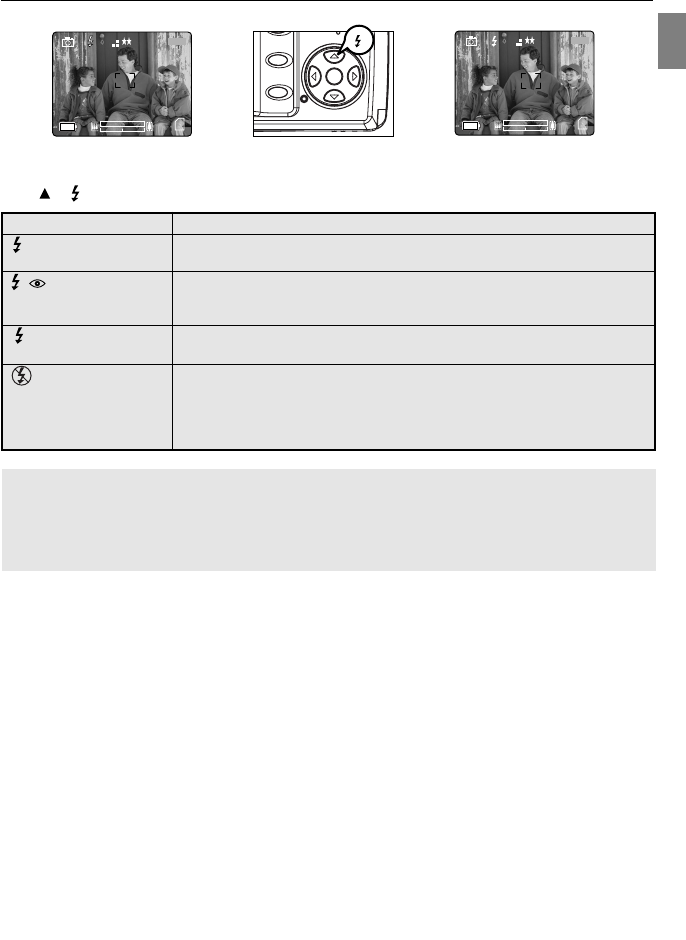
23. Move up / Flash
( ) Button
24. OK Button
25. Wrist Strap Holder
26. Move to right /
Macro ( )
Button
27. Move down / Self-
Timer ( ) Button
28. Memory Card Slot
29. Battery
Compartment
30. Move to left /
Continuous
Shot Button ( )
31. Reset Button
32. Delete Button
CAMERA OVERVIEW
Top/Front
A
AWB
15
6
8
9
10
2
3
7
11
12
4
A
AWB
A
AWB
21
22
23
25
26
27
28
29
30
31
32
24
13
14
15
18
19
20
16
17
A
AWB
LCD ICONS
A
AWB
F
H
J
K
A
B
C
D
E
I
G
A
AWB
3
M
0001/0014
A
AWB
: Single Shot
: Continuous Shot
: Review
: Video Clips
: Sport
A
AWB
1. Power Button
2. Shutter Button
3. Flash
4. Lens / Lens Door
5. Viewfinder
6. Flash Sensor
7. Red-eye
Reduction LED /
Self-Timer LED /
AF Assist Light
8. Speaker
9. Port Cover
10. Mini-USB port
11. TV-Out port
12. Microphone
A.Resolution
B.Camera Mode
C. Flash / Scene
Selection
D. White Balance
E.Battery Level
F. Image Quality
G.Frame Counter
H. Macro
I. Zoom Bar
J. Self-Timer
K.Memory Card
CAMERA OVERVIEW
Camera Features
• 4.0 Megapixels, 2272 x 1704 Resolution
(Concord Eye-Q 4062 AF)
5.0 Megapixels, 2560 x 1920 Resolution
(Concord Eye-Q 5062 AF)
• 1.5” Color LCD (Concord Eye-Q 4062 AF)
1.8” Color LCD (Concord Eye-Q 5062 AF)
• 6x Digital Zoom
• AVI Movie with Sound
• 7 Preset Scenes
• Macro Mode
• Continuous Shooting Mode
• Self-Timer
• Multi-area Auto Focus and Center Spot Auto
Focus /AF Assist Light
• 16MB Internal Memory, SD Card Slot
• Compatible with Windows® 98/98SE/2000/ME/
XP and Mac OS 9.0, 9.1, 9.2 & X 10.1
A
AWB
3
M
0001/0014
A
AWB
Bottom/Back
DC4062-5062 UG(514173-00)-E 25/31/04, 9:55:04 AM
3
En
3
TABLE OF CONTENTS
CAMERA OVERVIEW........................................................................................................................................... 2
Camera Features............................................................................................................................................ 2
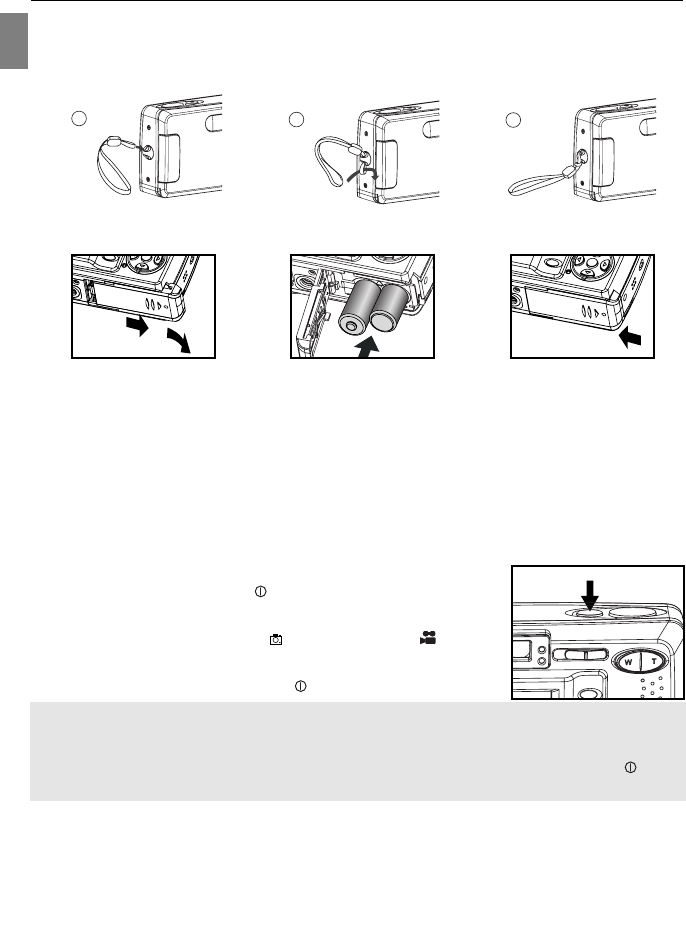
Attaching the Wrist Strap................................................................................................................................ 5
Loading the Batteries .....................................................................................................................................5
Turning the Camera On and Off..................................................................................................................... 5
Removing the Protective Plastic Film............................................................................................................. 5
Setting the Language, Date and Time............................................................................................................ 6
Checking the Battery Level............................................................................................................................ 7
Turning the LCD On and Off .......................................................................................................................... 7
Internal Memory / Inserting the Memory Card ...............................................................................................8
Setting the Camera’s Operational Mode........................................................................................................ 9
TAKING A PICTURE.............................................................................................................................................. 9
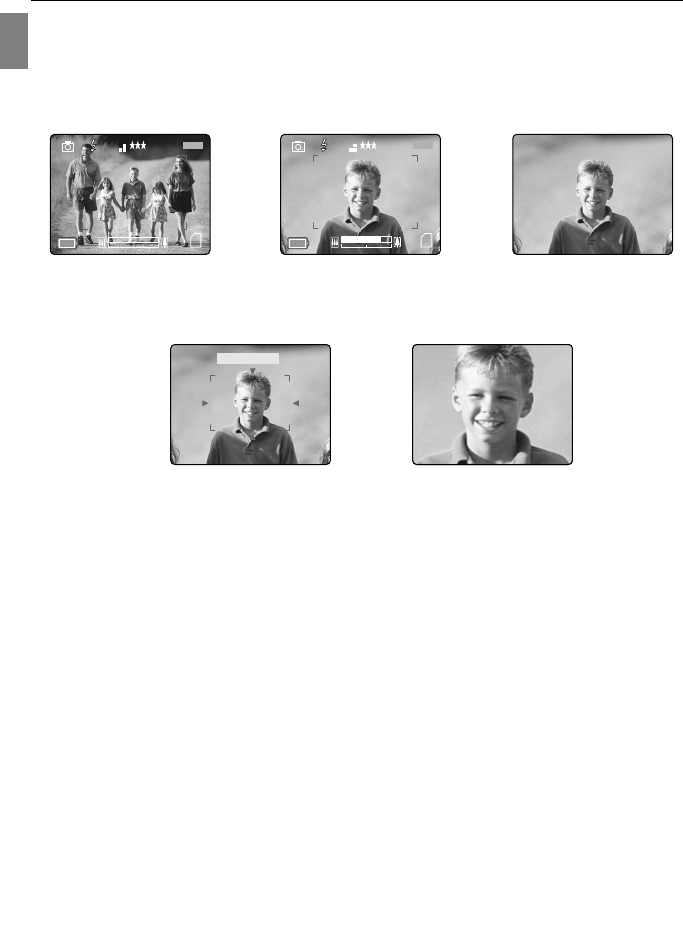
Taking Pictures with the viewfinder................................................................................................................ 9
Taking Pictures with the LCD ...................................................................................................................... 10
Using the Auto Focus Lock ...........................................................................................................................11
Setting the Flash ..........................................................................................................................................12
Using the AF Assist Light ............................................................................................................................12
Using the Digital Zoom................................................................................................................................. 13
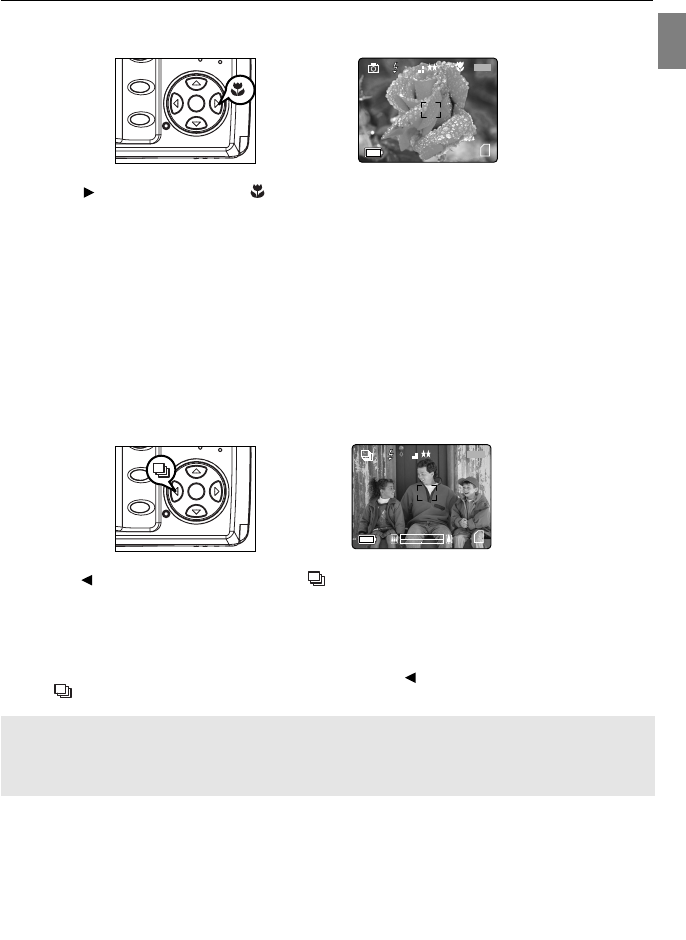
Taking Pictures in Macro Mode.................................................................................................................... 14
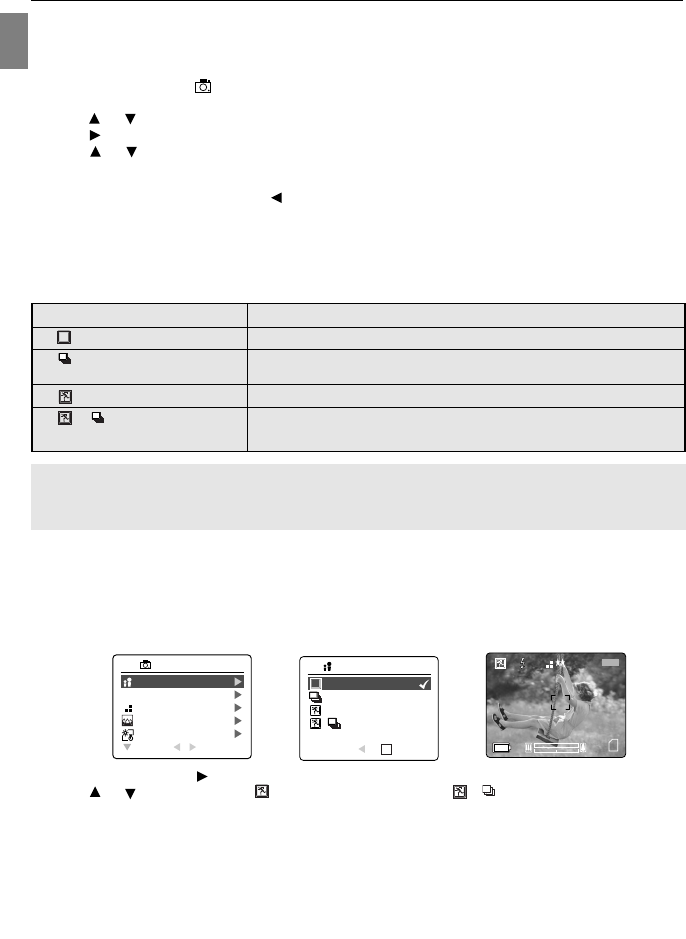
Taking Pictures in Continuous Mode ........................................................................................................... 14
Taking Pictures in Self-Timer Mode.............................................................................................................. 15
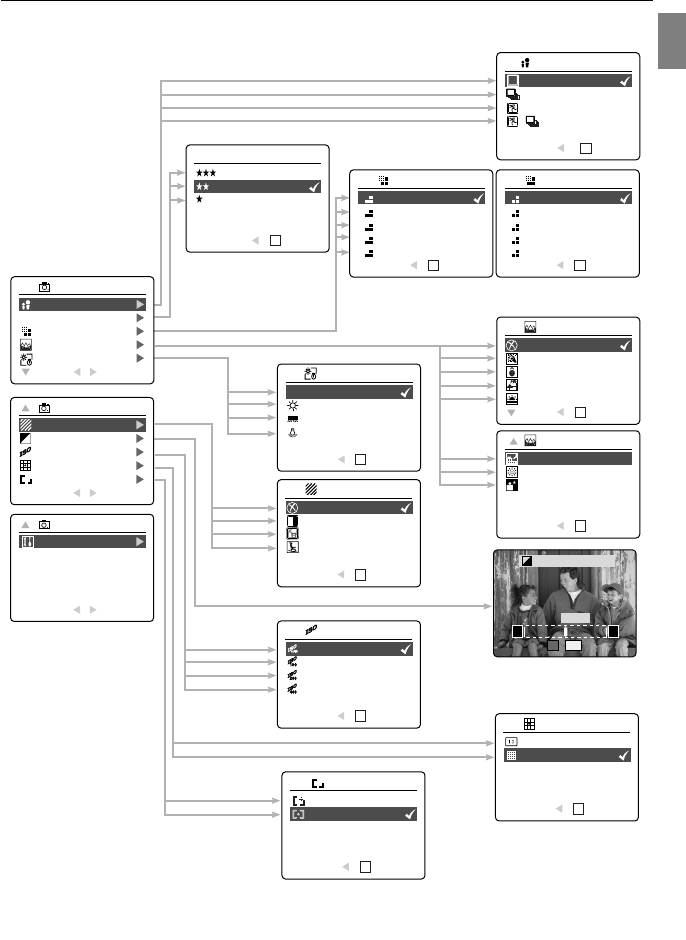
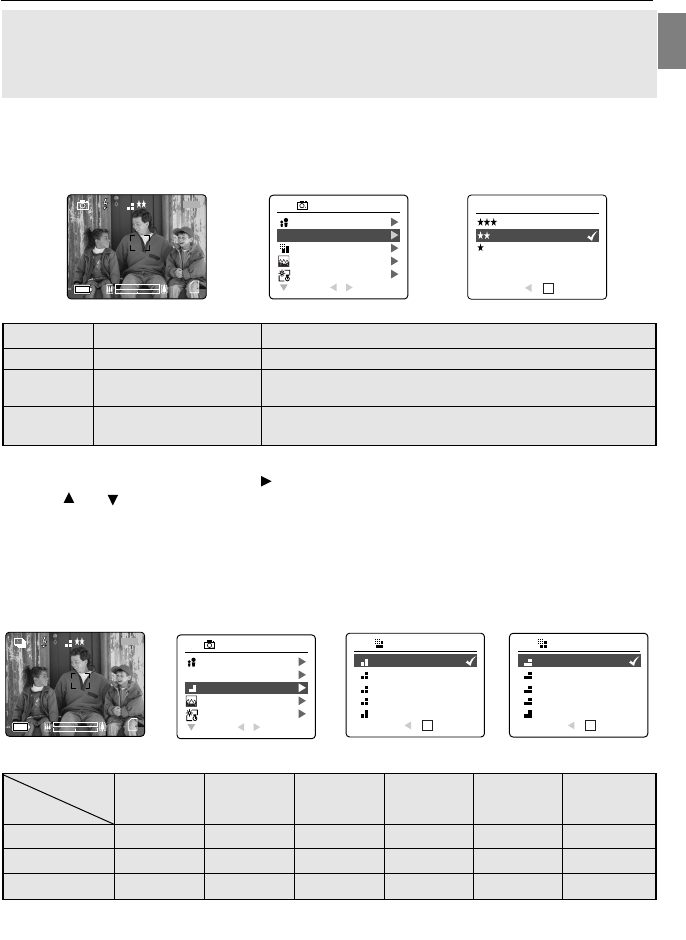
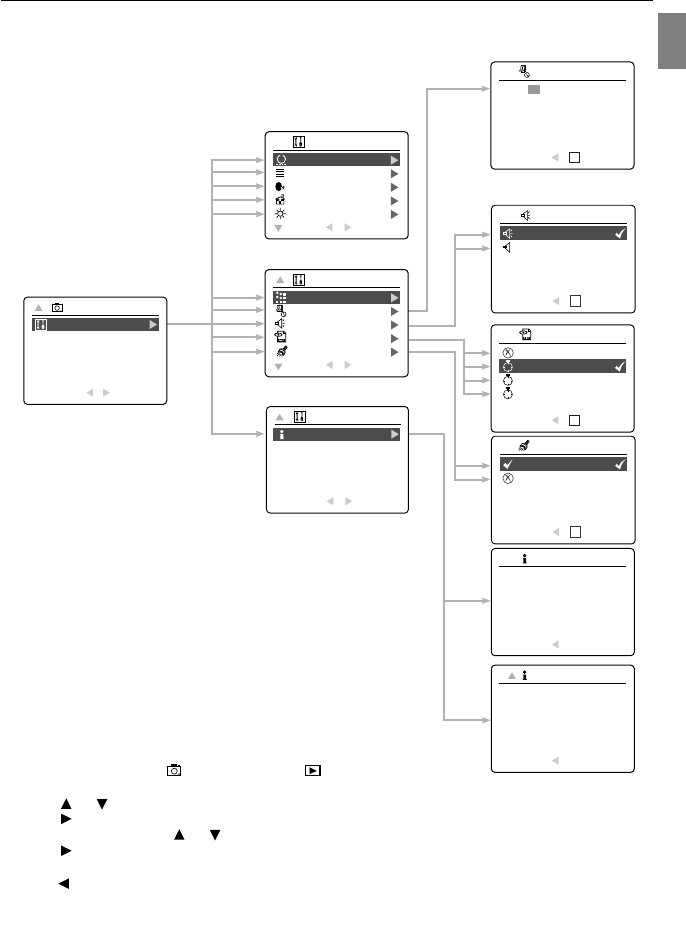
Using the Main Menu in Camera Mode .......................................................................................................16
• Selecting Scene ................................................................................................................................... 20
• Setting White Balance .......................................................................................................................... 21
• Setting EV Compensation..................................................................................................................... 22
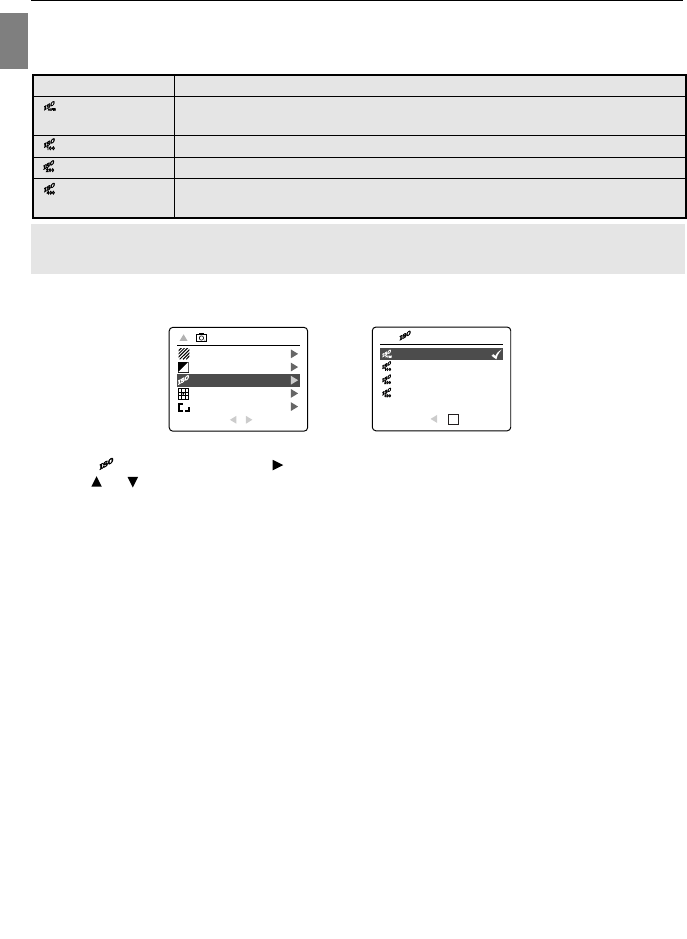
• Setting ISO Value.................................................................................................................................. 23
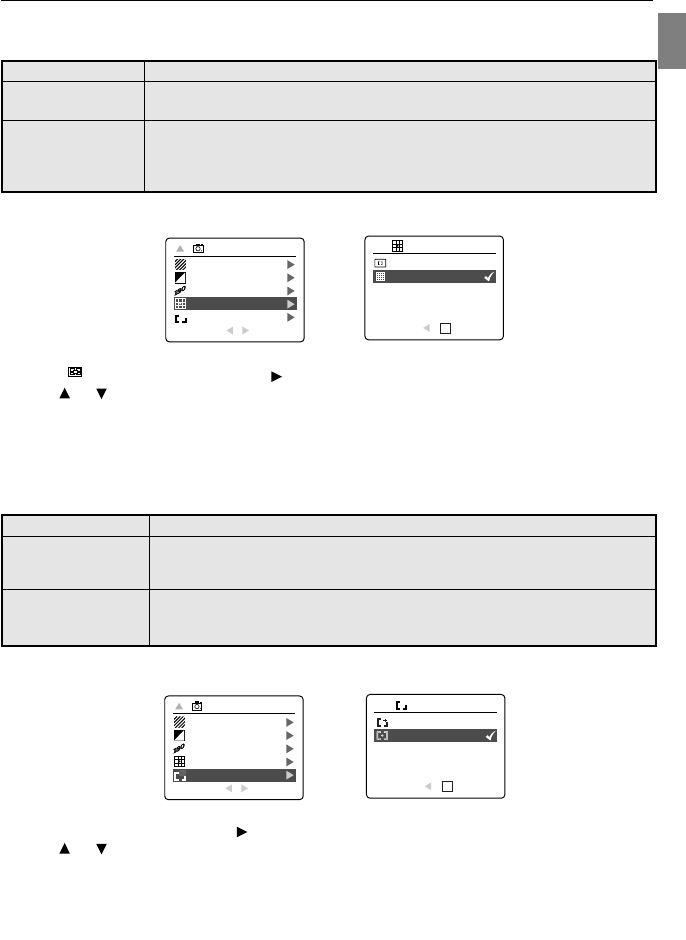
• Setting AF Mode .................................................................................................................................. 24
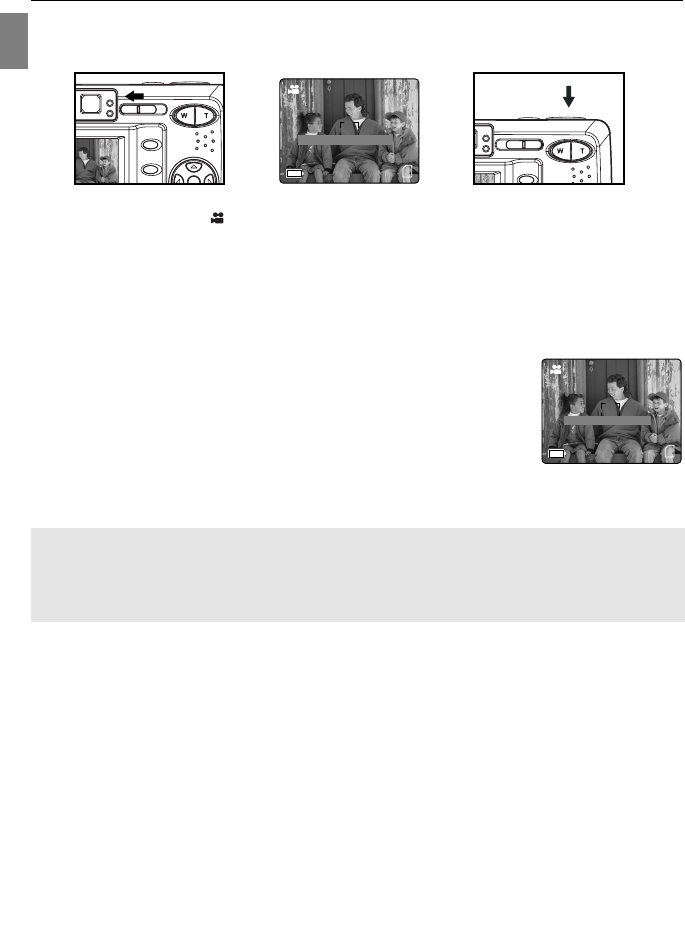
TAKING VIDEO CLIPS........................................................................................................................................25
Taking Video Clips ....................................................................................................................................... 25
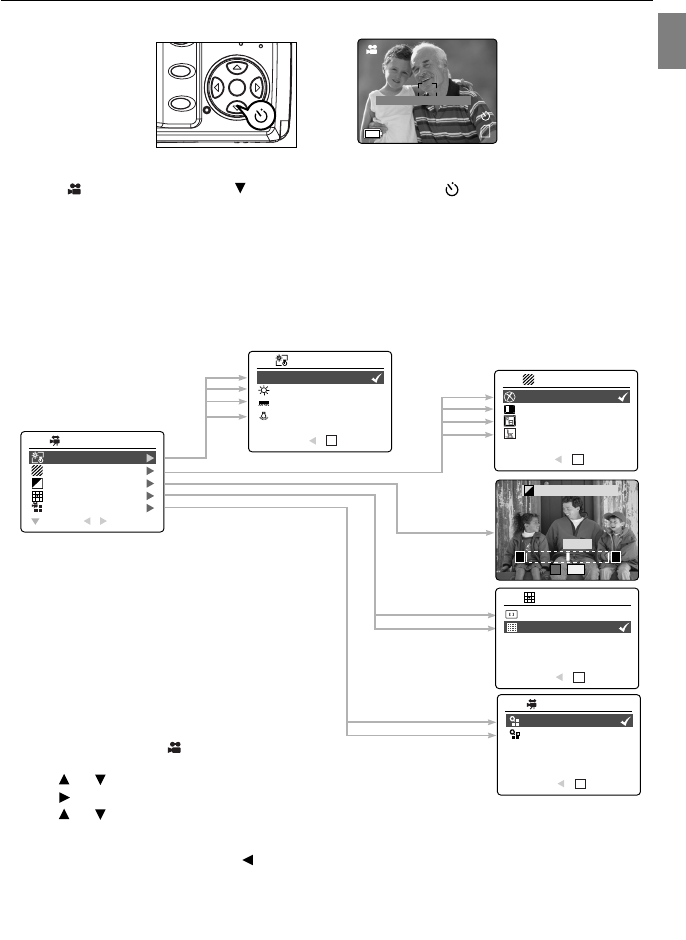
Taking Video Clips in Self-Timer Mode ........................................................................................................ 26
Using the Main Menu in Video Clip Mode.................................................................................................... 26
Setting Video Resolution.............................................................................................................................. 27
REVIEWING YOUR FILES.................................................................................................................................. 28
Using Review Mode ..................................................................................................................................... 28
Using Thumbnail View.................................................................................................................................. 30
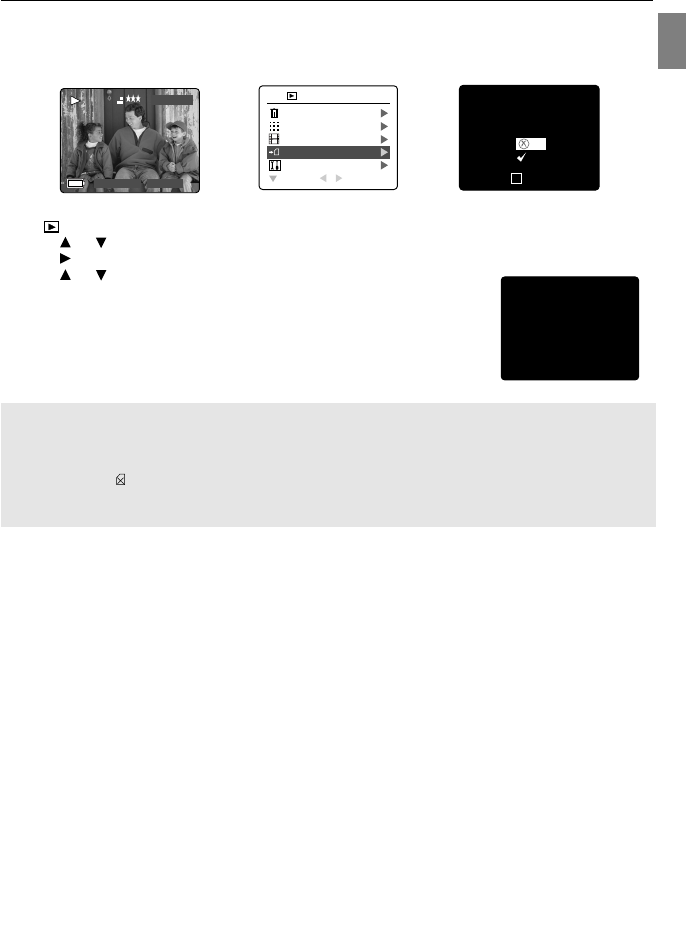
Using the Delete Button............................................................................................................................... 30
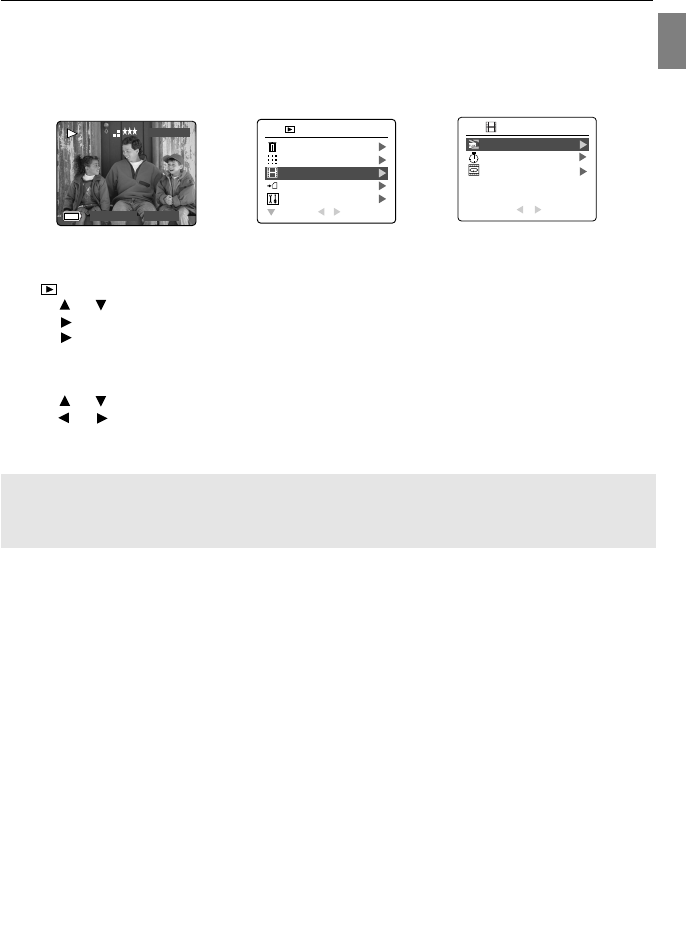
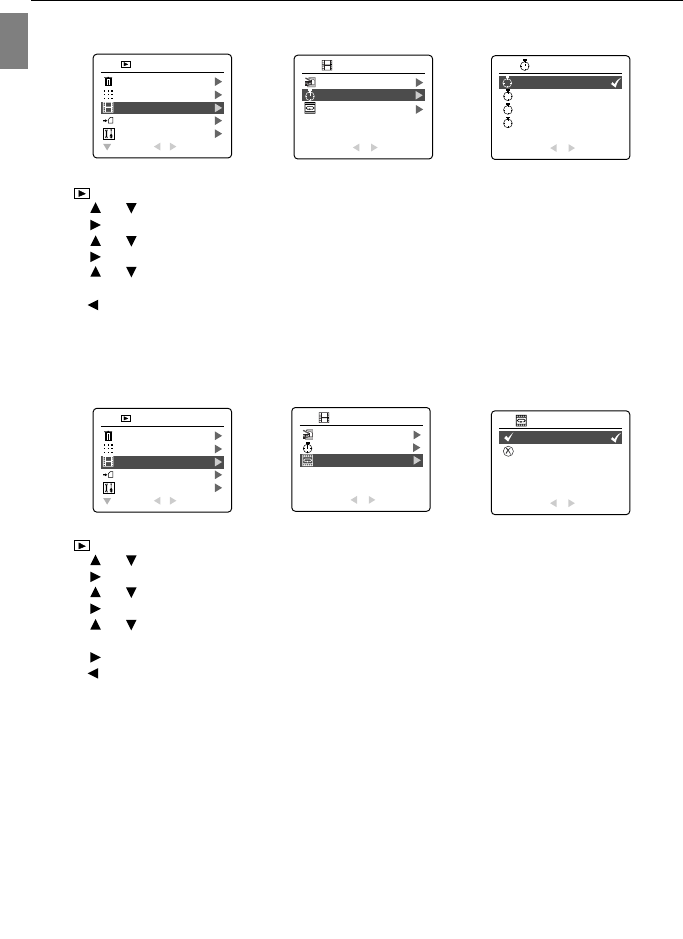
Using the Main Menu in Review Mode ........................................................................................................32
• Using Slide Show.................................................................................................................................. 34
• Transferring Files from Internal Memory to SD Card............................................................................ 36
CUSTOMIZING THE CAMERA SETTINGS.........................................................................................................37
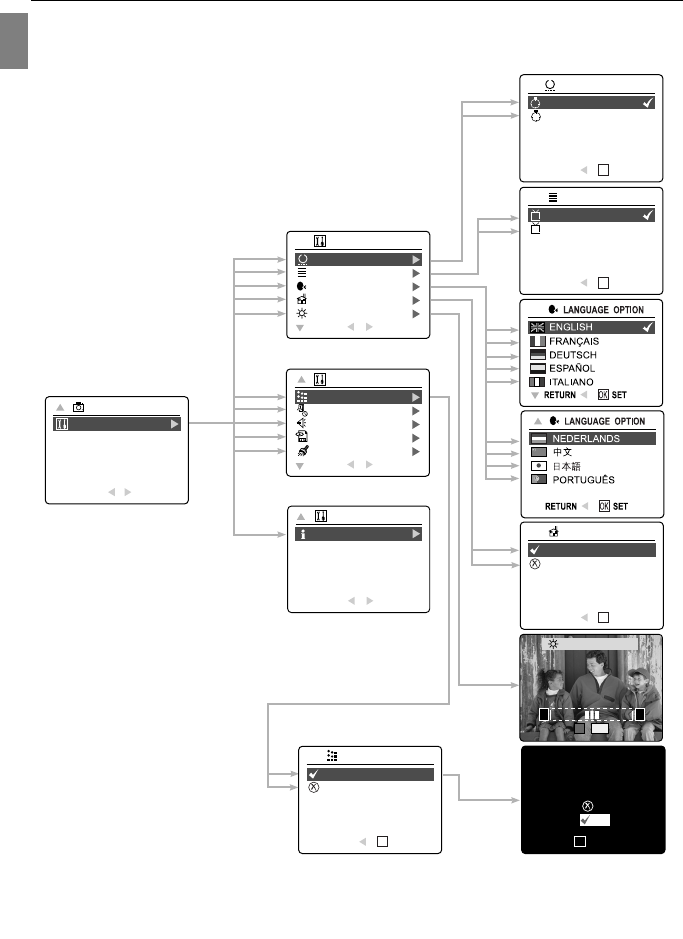
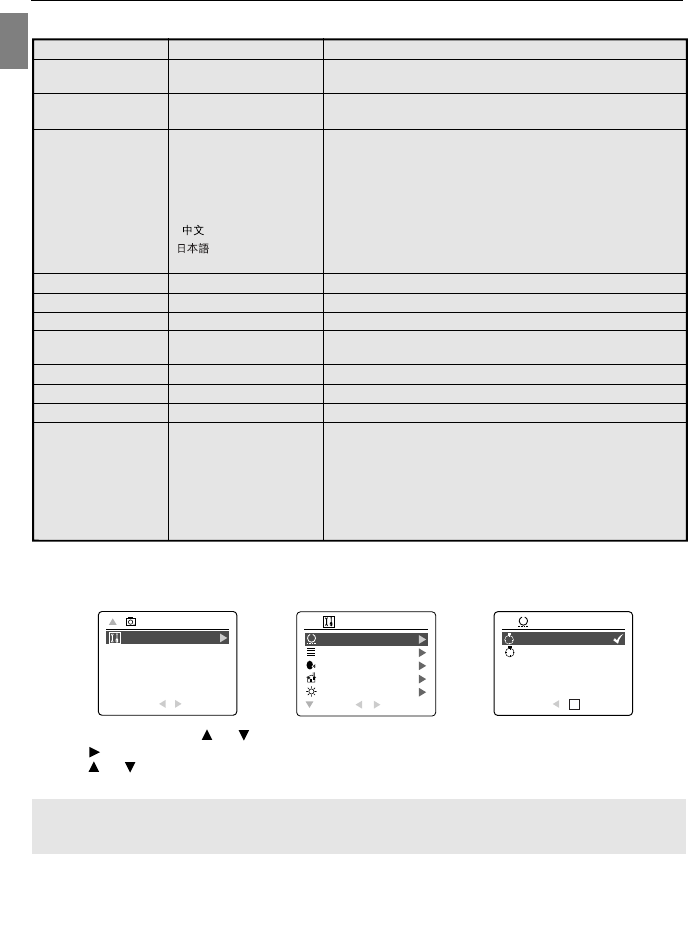
Setup Menu and Features............................................................................................................................ 39
Setting the Auto Off Time............................................................................................................................. 39
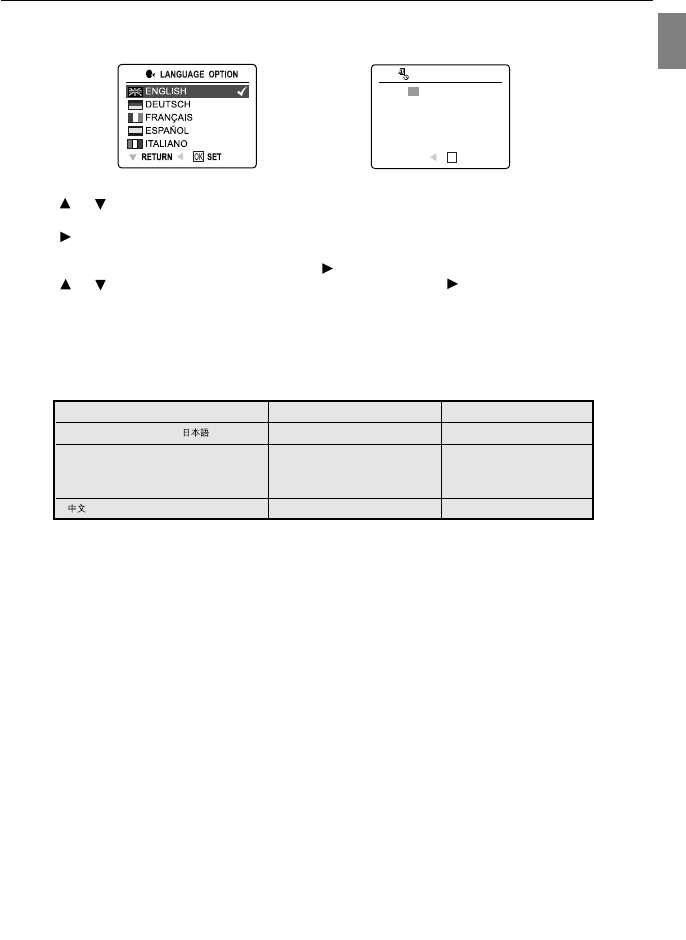
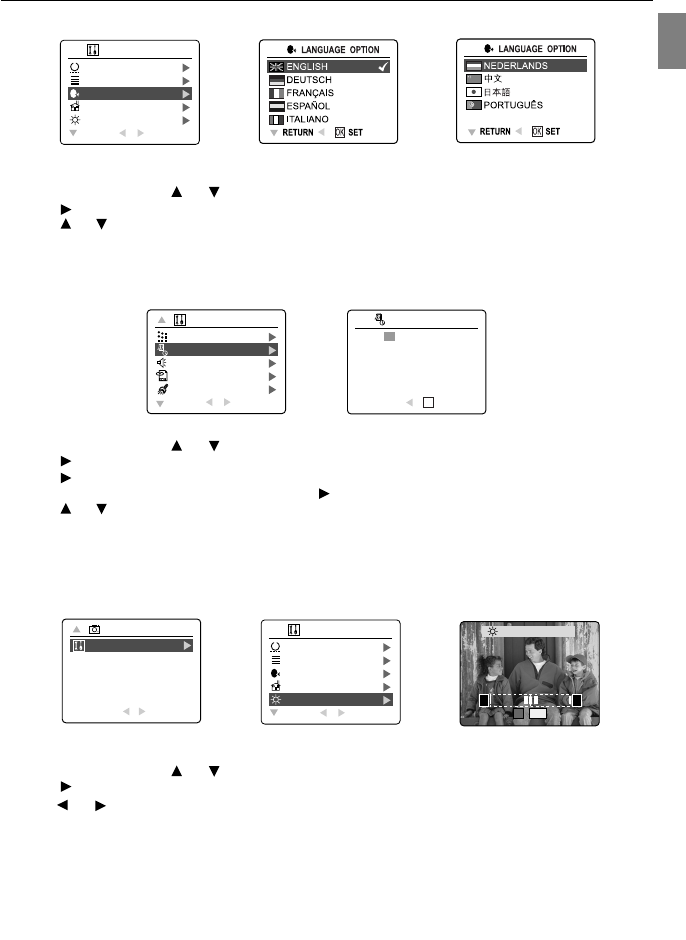
Setting the Language...................................................................................................................................40
Setting the Date and Time............................................................................................................................ 40
Setting the LCD Brightness.......................................................................................................................... 40
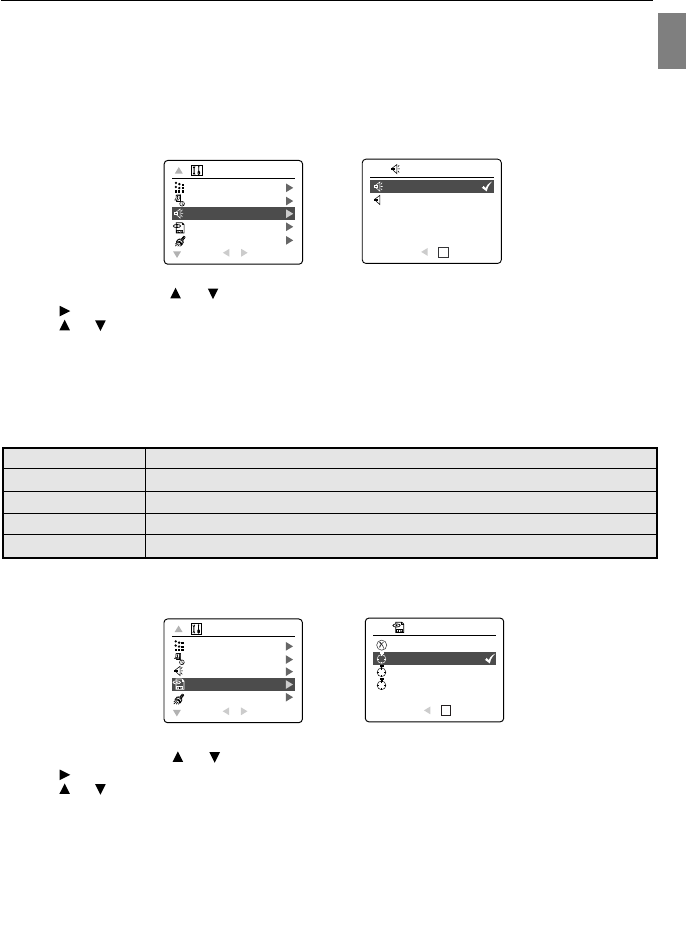
Turning Beep On or Off................................................................................................................................42
Setting AF Assist Light..................................................................................................................................43
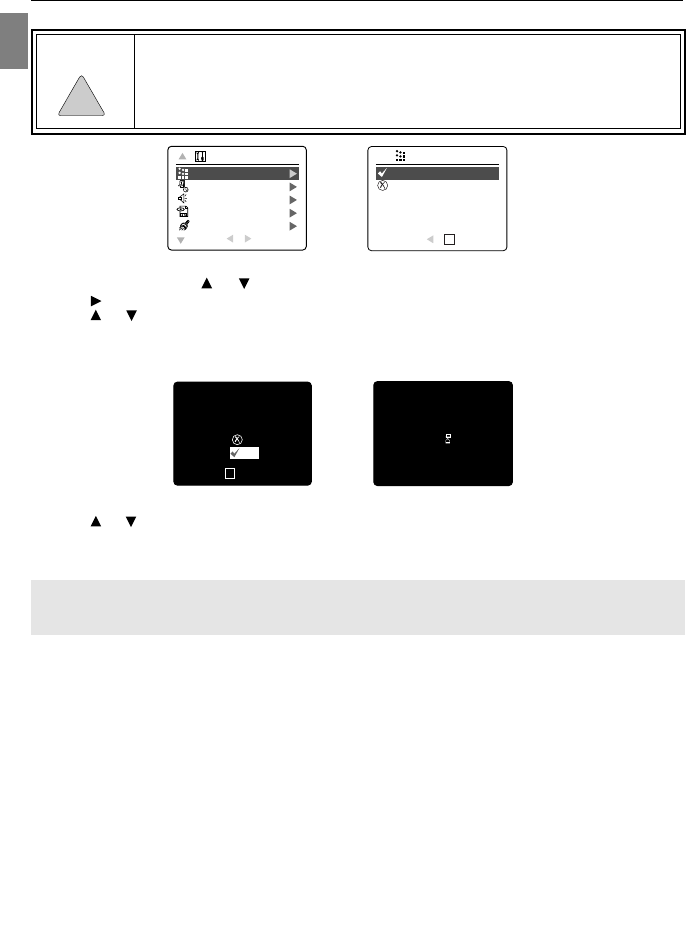
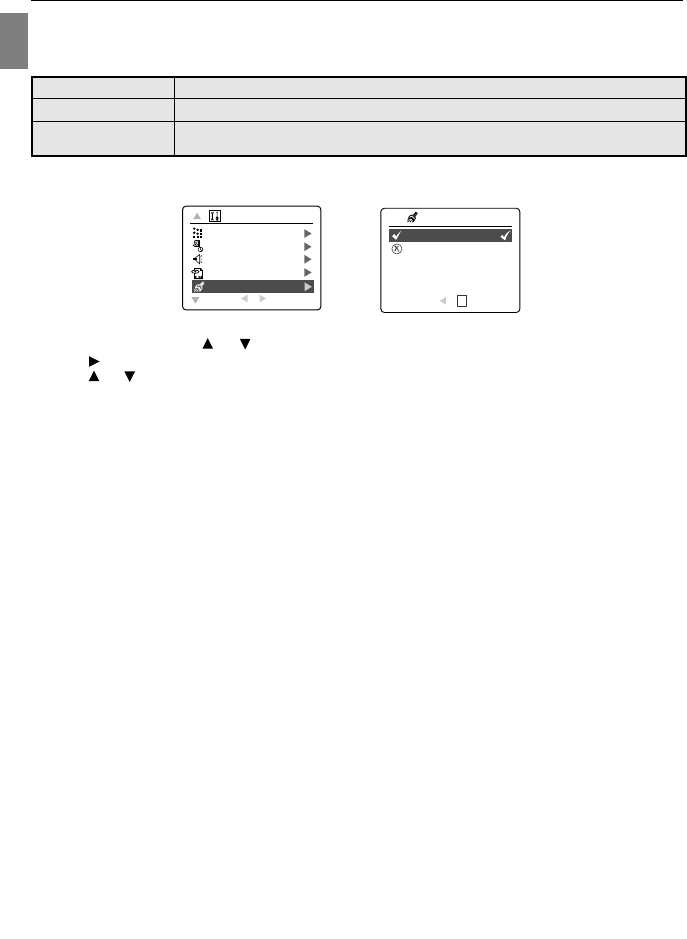
RESTORE THE CAMERA TO FACTORY DEFAULT SETTINGS....................................................................... 44
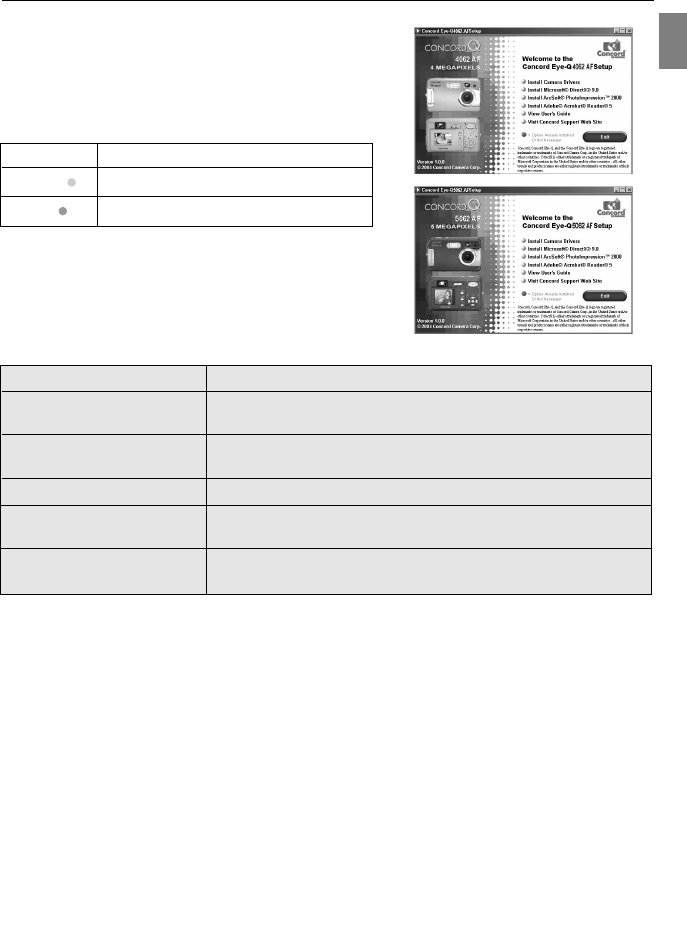
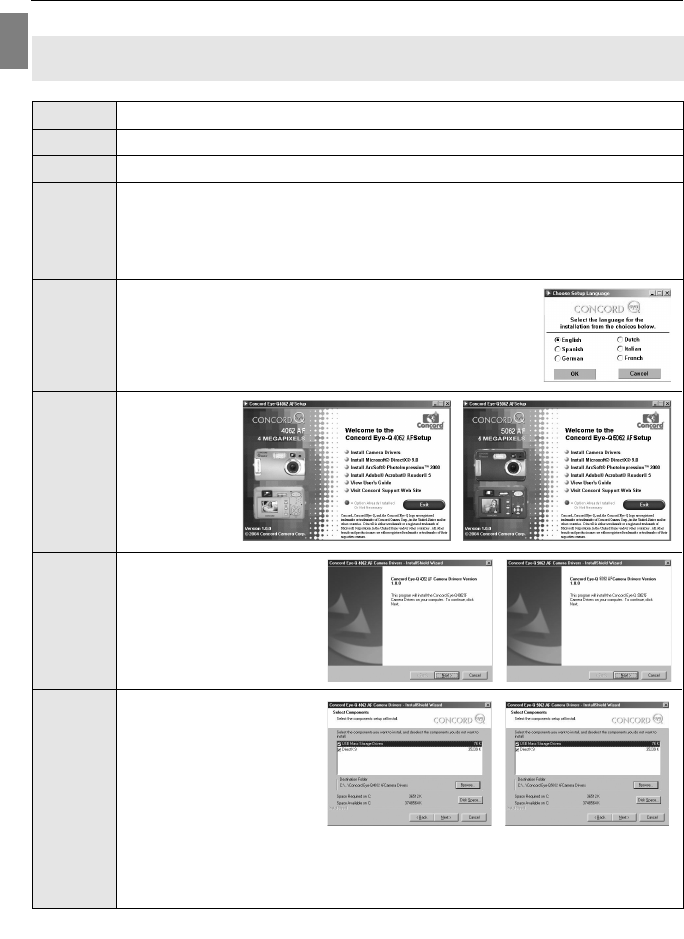
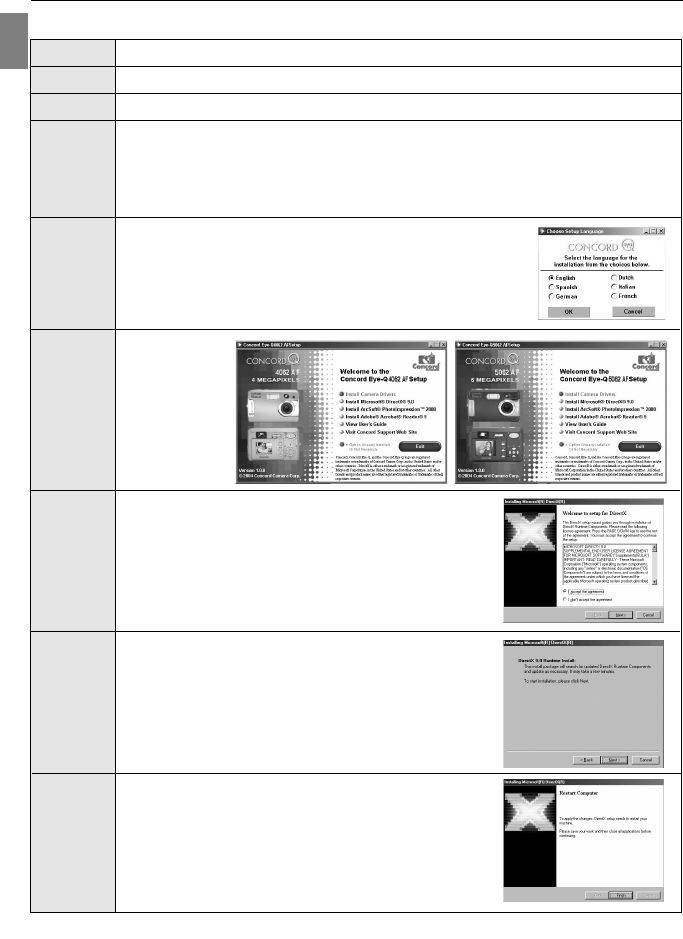
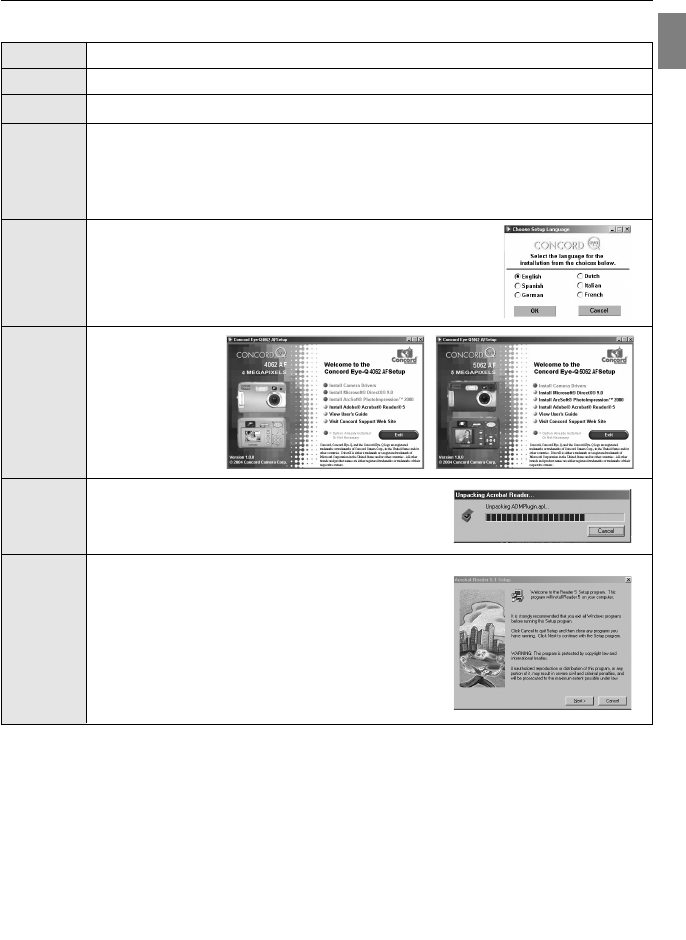
Using the Installer Splash Screen................................................................................................................ 46
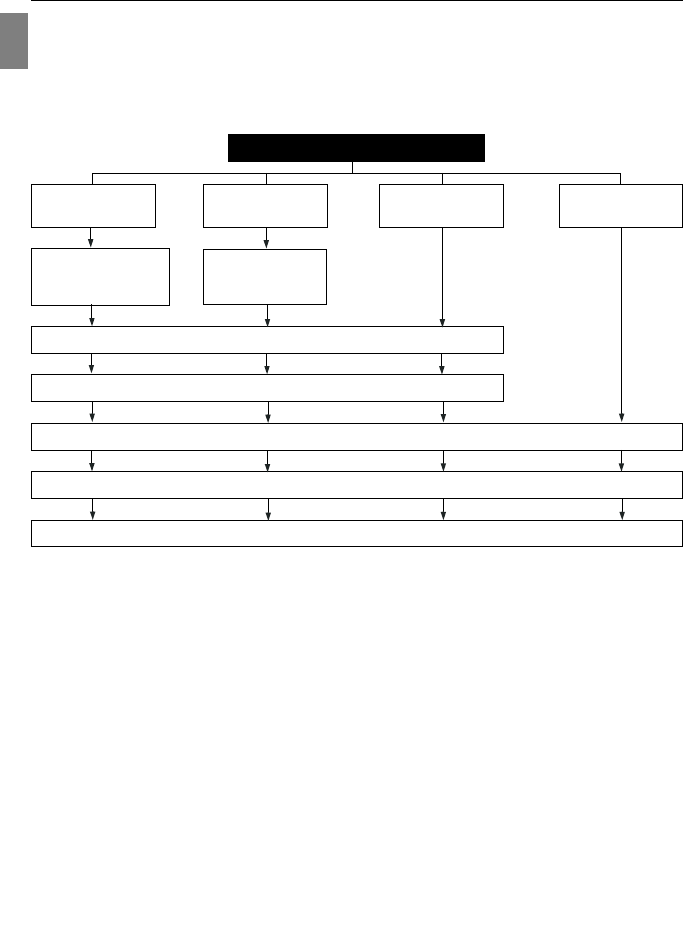
Flow Diagram for Software Installation ........................................................................................................ 47
Identifying your Operating System............................................................................................................... 48
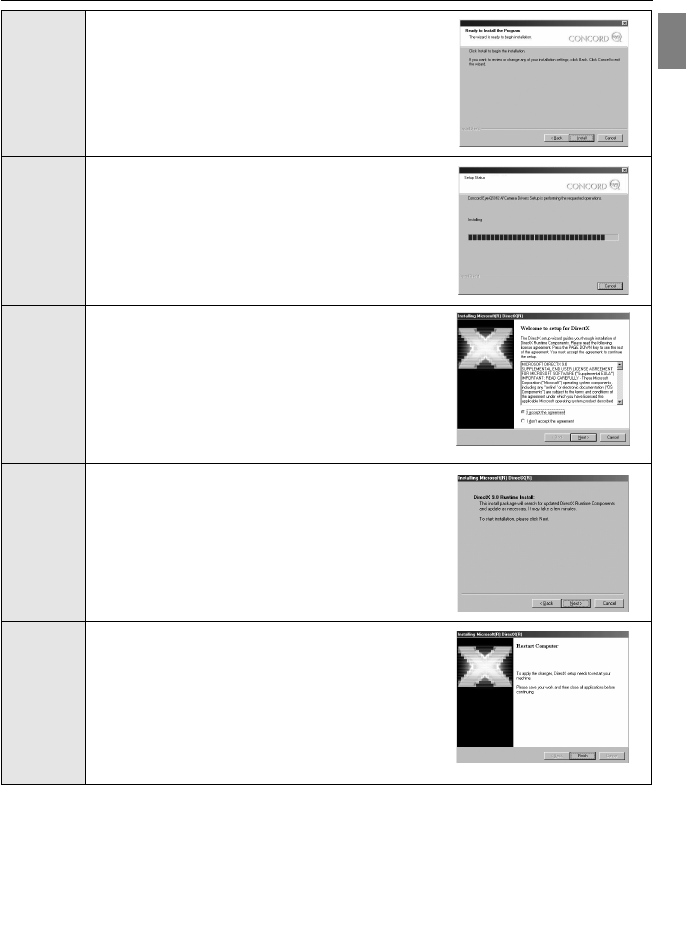
Installing the Driver and DirectX 9 - Windows 98/98SE............................................................................... 49
Installing DirectX 9 - Windows 2000 ............................................................................................................ 51
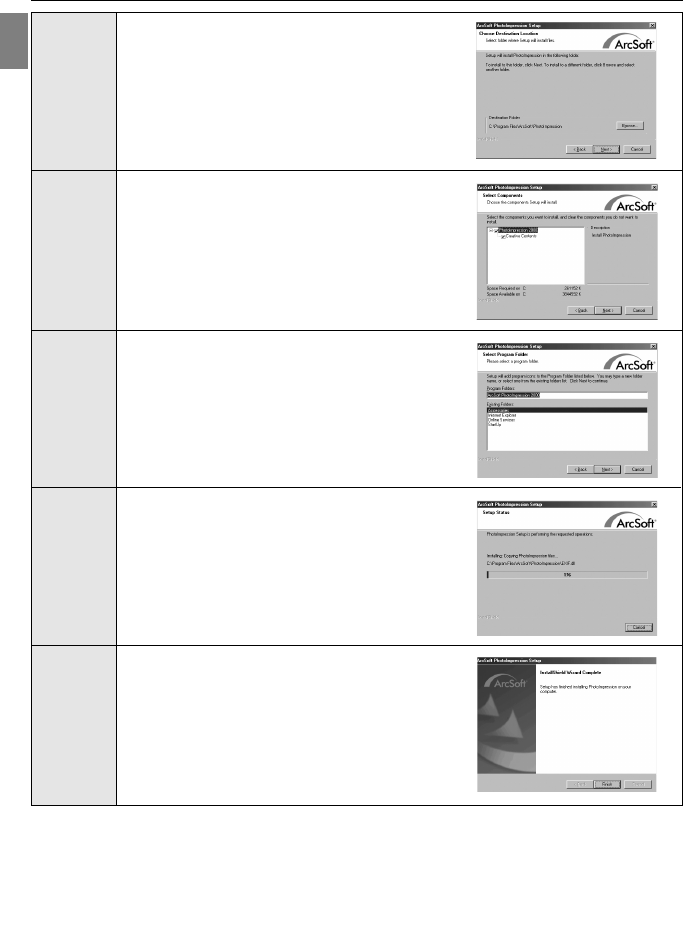
Installing ArcSoft PhotoImpression - all Windows Users ............................................................................. 52
Installing Adobe Acrobat Reader 5 - all Windows Users (optional).............................................................. 54
CONNECTING THE CAMERA TO THE COMPUTER........................................................................................ 56
Downloading Pictures and Video Clips onto your Computer....................................................................... 56
Using ArcSoft PhotoImpression.................................................................................................................... 57
Unplugging your Camera from the Computer.............................................................................................. 58
TV MODE............................................................................................................................................................. 59
Connecting the Camera to the Television ....................................................................................................59
Using the TV as a Live Viewfinder............................................................................................................... 59
Reviewing Pictures and Video Clips on your TV.......................................................................................... 59
CAMERA SPECIFICATIONS............................................................................................................................... 66
SAFETY TIPS AND MAINTENANCE..................................................................................................................69
Gebruikershandleiding.com neemt misbruik van zijn services uitermate serieus. U kunt hieronder aangeven waarom deze vraag ongepast is. Wij controleren de vraag en zonodig wordt deze verwijderd.
Product:
Spelregels forum
Om tot zinvolle vragen te komen hanteren wij de volgende spelregels:
lees eerst de handleiding door;
controleer of uw vraag al eerder door iemand anders is gesteld;
probeer uw vraag zo duidelijk mogelijk te stellen;
heeft u een probleem en al geprobeerd om dit op te lossen, vermeld dit erbij aub;
heeft u een oplossing gekregen van een bezoeker dan horen wij dat graag in dit forum;
wilt u een reactie geven op een vraag of antwoord, gebruik dan niet dit formulier maar klik op de knop 'reageer op deze vraag';
uw vraag wordt direct op de website gezet; vermijd daarom persoonlijke gegevens in te vullen;
Belangrijk! Als er een antwoord wordt gegeven op uw vraag, dan is het voor de gever van het antwoord nuttig om te weten als u er wel (of niet) mee geholpen bent! Wij vragen u dus ook te reageren op een antwoord.
Belangrijk! Antwoorden worden ook per e-mail naar abonnees gestuurd. Laat uw emailadres achter op deze site, zodat u op de hoogte blijft. U krijgt dan ook andere vragen en antwoorden te zien.
Abonneren
Abonneer u voor het ontvangen van emails voor uw Concord 4062 AF bij:
nieuwe vragen en antwoorden
nieuwe handleidingen
U ontvangt een email met instructies om u voor één of beide opties in te schrijven.
Ontvang uw handleiding per email
Vul uw emailadres in en ontvang de handleiding van Concord 4062 AF in de taal/talen: Duits, Engels, Frans, Spaans als bijlage per email.
De handleiding is 7,23 mb groot.
U ontvangt de handleiding per email binnen enkele minuten. Als u geen email heeft ontvangen, dan heeft u waarschijnlijk een verkeerd emailadres ingevuld of is uw mailbox te vol. Daarnaast kan het zijn dat uw internetprovider een maximum heeft aan de grootte per email. Omdat hier een handleiding wordt meegestuurd, kan het voorkomen dat de email groter is dan toegestaan bij uw provider.
Uw handleiding is per email verstuurd. Controleer uw email
Als u niet binnen een kwartier uw email met handleiding ontvangen heeft, kan het zijn dat u een verkeerd emailadres heeft ingevuld of dat uw emailprovider een maximum grootte per email heeft ingesteld die kleiner is dan de grootte van de handleiding.
Er is een email naar u verstuurd om uw inschrijving definitief te maken.
Controleer uw email en volg de aanwijzingen op om uw inschrijving definitief te maken
U heeft geen emailadres opgegeven
Als u de handleiding per email wilt ontvangen, vul dan een geldig emailadres in.
Uw vraag is op deze pagina toegevoegd
Wilt u een email ontvangen bij een antwoord en/of nieuwe vragen? Vul dan hier uw emailadres in.