Ill. 2
• Hold the dust bag over a rub-
bish bin. Empty the contents
of the dust bag. In order to do
this, press the button (PUSH)
on the dust bag (see Fig. 2).
• Close the base plate again
so that it is heard to lock into
place.
Ill. 3
Ill. 4
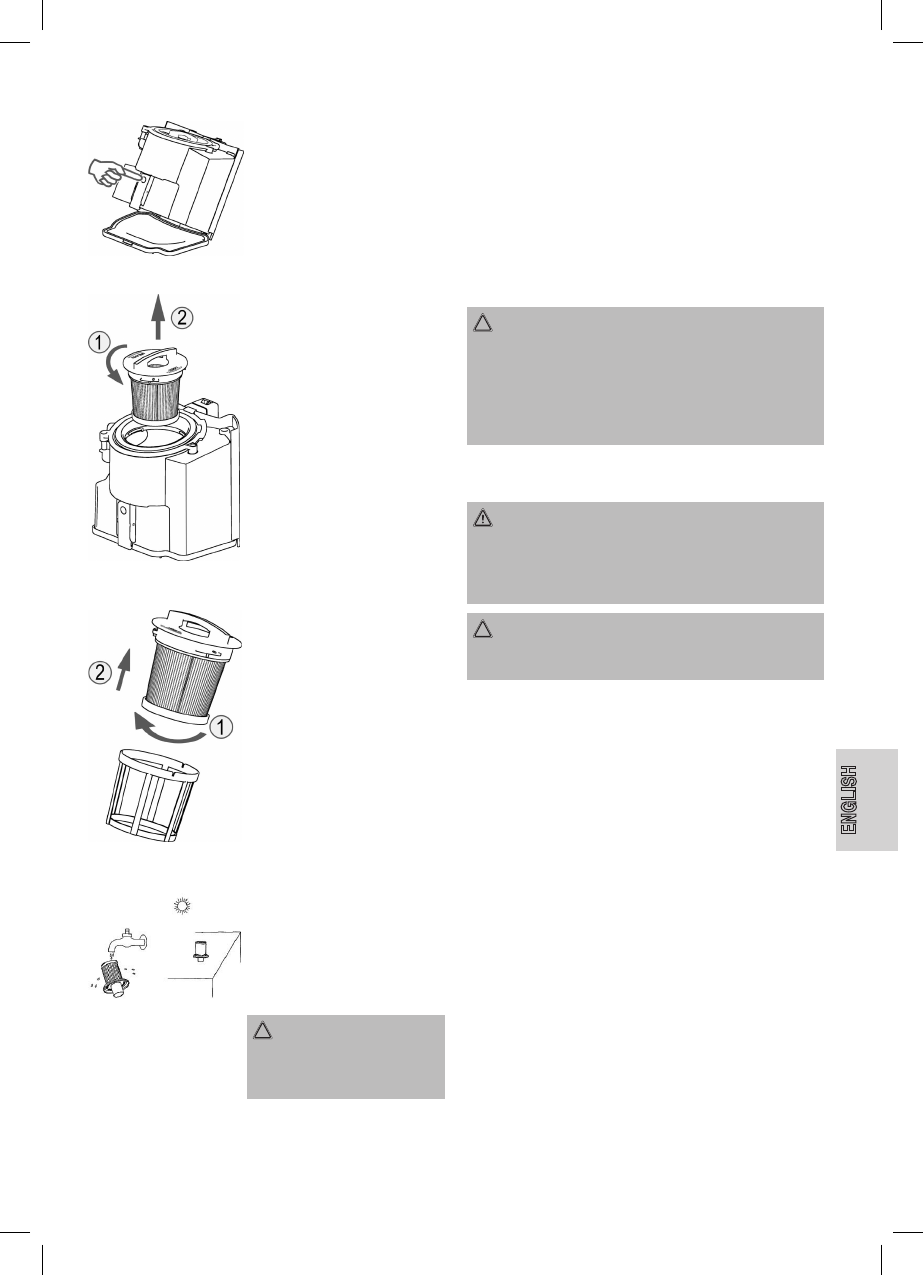
HEPA Motor Protective Filter
(in the Dust Container)
Cleaning the Filter Element
• Remove the mains plug from
the socket.
• Push the button for releasing
the dust bag downwards and
remove the dust bag (see
Fig. 1).
• Empty the contents of the dust
bag (see illustration 2).
• Unlock the lter element by
turning briey in the direction of
UNLOCK. Then take it out (see
Figure 3). In the second step
separate the nylon pre-lter (4)
from the HEPA lter (3) by
turning against the lock .
(see Fig. 4). Clean the nylon
pre-lter by tapping out the
contents and the HEPA lter
by gently brushing out.
• Now replace the components.
• Lock the lter element in the
dust bag by turning it as far as
will go in the direction of LOCK.
• Attach the dust container again
by locking it in position
Ill. 5
Every third time the dust container
is emptied, or in the case of severe
soiling, clean the lter by allowing
water to ow through the lter fabric
against the direction in which the
vacuum cleaner blows. The dust
container should only be reinserted
when it is completely dry!
CAUTION:
Never wash the lter in the
washing machine, and please
do not use a hairdryer to dry it.
Outlet lter
The appliance is also equipped with an outlet lter. This lter can
be found under the lter cover (13). In order to ensure that the
lter works correctly, we recommend that you replace it every
six months.
• Remove the mains plug from the socket.
• Open the ventilation grille by pressing the lever on its side.
• Then pull the grille out towards the front. Remove the lter
and clean as described above.
• Please reinsert the lter correctly and close the air outlet
grille (until it locks into place)
CAUTION: Important note!
Cleaning may become necessary after a shorter time, depen-
ding on the conditions of use, e.g. when vacuuming ne dust.
If the suction power of your vacuum cleaner diminishes please
clean the lters as described.
If the suction power suddenly diminishes during operation this
may be due to the lters being locked.
Cleaning & maintenance
AVVISO:
• Always remove the mains lead before cleaning!
• Under no circumstances should you immerse the device
in water for cleaning purposes. Otherwise this might result
in an electric shock or re.
CAUTION:
• Do not use a wire brush or any abrasive items.
• Do not use any acidic or abrasive detergents.
Clean the casing with a dry cloth.
Storage
• Let the iron cool down completely.
• Wind the cable completely.
• Please insert the hook of the oor nozzle into the parking
assistant on the rear of the device.
Troubleshooting
• The Device Does Not Work.
Remedy:
Check the connection to the mains.
Check the position of the switch.
• The device does not suck up anything.
Possible Cause:
The suction power is set too low.
Remedy:
Check the position of the control switch.
or