553680
58
Verklein
Vergroot
Pagina terug
1/63
Pagina verder
1
To determine the movement number
Your watch features a case number engraved on the
case back (refer to figure to the right).
The first four characters of the case number
represent the movement caliber number of the
watch.
In the example on the right, “1234” is the movement
number.
Thank you for your purchase of this Citizen watch.
Before using the watch, read this instruction manual carefully to ensure
correct use.
After reading, be sure to store this manual in a safe place should it be
needed for future reference.
The case has different features depending on the model.
Details of the case features are not contained in this manual, see
“ http://www.citizenwatch.jp/support/default.htm ”.
Engraving position example
The engraving position may differ
depending on watch model.
2
This manual may contain certain safety advisories. Your watch should be used in
accordance with these advisories at all times to ensure optimal enjoyment of your
watch and to prevent injury to yourself, other persons and/or damage to property.
Safety advisories are categorized and depicted in this manual as follows:
Highly likely to cause death or serious injury
May cause serious injury or death
May or will cause minor or moderate injury or damage
Important instructions are categorized and depicted in this manual as follows:
Warning (caution) symbol followed by instructions that should
be followed and/or precautions that should be observed.
Warning (caution) symbol followed by prohibited use and/or
operation advisory.
Safety precautions
3
Before using the watch
The followings must be done before using the watch:
Checking the power reserve Page
8
Check the charge level of the watch.
Checking the time signal reception Page
9
Check the result of the time signal reception.
Setting the city Page
10
Select the city for which you want to indicate the time and date.
4
Before using the watch ...............
3
Component identification...........
6
Checking the power reserve ........
8
Checking the time signal
reception ................................
9
Setting the city ........................
10
Notes on the time signal
reception ..............................
14
On-demand reception—manual
signal reception activation .....
22
During the Daylight Saving Time
season...................................
24
Recharging your watch .............
30
Adjusting the time/calender
manually ...............................
34
Table of contents
5
Checking and correcting the current
reference (0) position .............
38
Troubleshooting .......................
42
Solar-powered watch handling
precautions ...........................
48
Water resistance ......................
52
Precautions and
usage limitations...................
55
Maintenance ............................
60
Information .............................
61
Specifications...........................
62
6
Hour hand
Daylight saving time
indication (ON/OFF)
Second hand
Signal reception
indication (OK/RX/NO)
Upper right
button (
B
)
Crown
Minute hand
Lower right
button (
A
)
Date indicator
City indication
Component identification
The illustrations in this instruction manual may differ from the actual
appearance of your watch.
7
How to use the screw down crown and screw down push button
Some models feature a screw down crown and/or screw down push button.
Locking the crown and/or button prevents accidental operation. These must be
unlocked prior to using certain features of your watch such as setting the time or date.
Unlock Lock
Screw down
crown
Rotate the crown
counterclockwise until
it releases from the case.
Push the crown in to
the case. With gentle
pressure towards the
case, rotate the crown
clockwise to secure it
to the case. Be sure to
tighten firmly.
Screw down
push button
Rotate the locking screw
counterclockwise, and
loosen until it stops.
Rotate the locking screw
clockwise, and tighten
firmly.
Some models feature a recessed button.
Press the button with a narrow-tipped object such as a wooden toothpick.
8
Checking the power reserve
1. Ensure that the crown is in position .
2. Press and release the lower right button
A
.
• When the charge of the
watch is low, the second
hand rotates a quarter
counterclockwise.
You need to charge the
watch. See page
30
.
3. Press and release the lower
right button
A
.
The watch will resume normal
operation.
• The watch will resume normal operation
automatically after 10 seconds even without pressing
the button.
Crown position
The second hand indicates “OK” or “NO” at the end of this procedure to show the
reception result of the time signal.
9
Checking the time signal reception
1. Ensure that the crown is in position .
2. Press and release the lower
right button
A
.
The second hand moves and
indicates the reception result.
OK
Reception has succeeded.
NO
Reception has failed.
When reception has failed, see
page
22
.
3. Press and release the lower right button
A
.
The watch will resume normal operation.
• The watch will resume normal operation
automatically after 10 seconds even without pressing
the button.
Crown position
When reception has
been successful
10
Select the city for which you want to indicate the time and
date.
1. Pull the crown out to position .
The second hand moves to indicate the currently
selected city.
2. Rotate the crown to select the city for which you
want to indicate the time and date.
For details of the selection of cities, see pages
11
to
13
.
• Each time you select a city, the time and date of the
city you have selected will be indicated.
3. Pull the crown out to position .
The second hand rotates to indicate the current
Daylight Saving Time (SMT) setting.
• You can change the setting by rotating the crown. For
details, see pages
24
to
29
.
4. Push the crown in to position .
The watch resumes normal operation. (The current
time is indicated.)
Setting the city
When “New York” (49
seconds position) is
selected
Crown position
11
Table of selectable cities
• The cities listed in the table below may be abbreviated or spelled out, depending on
the model.
• The signal station is changed depending on the selected city. Some cities cannot
receive the signal though the signal station is assigned in the list.
• When you use the watch in a place which is not shown in the table below, select the
city in the same time zone one as the city you want to indicate.
• The time difference in the table below is based on UTC.
• For cities indicated by
/ , the result of the Daylight Saving Time check
signal reception is memorized in common.
Indication
Second hand
position
City name
Time
difference
Signal from...
London LON 0 London 0
Germany
Paris PAR 2 Paris +1
Athens ATH 4 Athens +2
Moscow MOW 7 Moscow +3
Dubai DXB 9 Dubai +4
Continued on the next page
12
Indication
Second hand
position
City name
Time
difference
Signal from...
Karachi KHI 11 Karachi +5
China
Delhi DEL 14 Delhi +5.5
Dhaka DAC 16 Dhaka +6
Bangkok BKK 18 Bangkok +7
Hong Kong
or Beijing
HKG
or
BJS
21
Hong Kong or
Beijing
+8
Tokyo TYO 23 Toky o + 9
Japan
Adelaide ADL 25 Adelaide +9.5
Sydney SYD 28 Sydney +10
Noumea NOU 30 Noumea +11
Auckland AKL 32 Auckland +12
13
Indication
Second hand
position
City name
Time
difference
Signal from...
Midway MDY 35 Midway Island -11
USA
Honolulu HNL 37 Honolulu -10
Anchorage ANC 39 Anchorage -9
L.Angeles LAX 42 Los Angeles -8
Denver DEN 44 Denver -7
Chicago CHI 46 Chicago -6
New York NYC 49 New York -5
Santiago SCL 51 Santiago -4
R.Janeiro RIO 53 Rio de Janeiro -3
F.Noronha FEN 56 Fernando de Noronha -2
Germany
Azores PDL 58 Azores -1
For details of each signal station, see pages
16
to
19
.
14
Notes on the time signal reception
Receiving the time signal
There are three ways to receive the time signal:
Methods Explanations
Automatic reception
Receives the signal at 2:00 a.m. every day. If reception is
unsuccessful, the watch tries to receive at 3:00 a.m. and 4:00
a.m.
On demand reception
Receive the signal manually when you want to adjust the
time and date. See page
22
.
Recovery automatic
reception
Receives the signal automatically after charging when the
watch stops due to insufficient charge.
The second hand indicates the reception result (OK/NO). (See page
9
.)
15
• The time signal reception function cannot be deactivated.
• Even when this watch receives a time signal successfully, the accuracy of the
displayed time will be dependent on the reception environment and internal
processing.
• If the watch is not able to receive the signal, it will operate normally within an
accuracy range of ±15 seconds per month.
When receiving the time signal
Remove the watch and place it on a stable surface
where it can receive the signal better, such as next
to a window.
• The reception antenna is located at the 9:00
position of the watch. Place the watch with the
9:00 position facing toward the station.
• Do not move the watch during time signal
reception.
• The watch will not receive a time signal when
in a low charge state as indicated by the second
hand moving in two second increments (the insufficient charge warning). Charge
the watch before reception.
16
Note on the time signal
This watch receives the time signal from the five signal stations located in four regions
and automatically adjusts the time and date. The receivable signal stations are listed as
follows:
Signal stations Kind of the time signal
Fukushima station, Japan
JJY
Kyushu station, Japan
Fort Collins station, Denver, Colorado, USA WWVB
Mainflingen station, Southeast Frankfurt, Germany DCF77
Shangqiu station, Henan, China BPC
Refer to the maps on pages
17
to
19
to see the locations of the signal stations and their
receivable area roughly.
17
Approximate receivable area
The distance of receivable range is only used as an approximate value. It is often
affected by the receiving environment and weather.
• The value of the distance is a radius of the value from the signal station.
JJY (Japan):
Approx. 2000 km
Kyushu station
JJY (Japan):
Approx. 1500 km
Fukushima station
Continued on the next page
18
WWVB (USA):
Approx. 3000 km
Fort Collins station
The distance of receivable range is only used as an approximate value. It is often
affected by the receiving environment and weather.
• The value of the distance is a radius of the value from the signal station.
19
DCF77 (Germany):
Approx. 1500 km
Mainflingen station
BPC (China):
Approx. 1500 km
Shangqiu station
The distance of receivable range is only used as an approximate value. It is often
affected by the receiving environment and weather.
• The value of the distance is a radius of the value from the signal station.
20
Poor reception areas
It may be difficult to receive the time signal properly under certain environmental
conditions or in areas susceptible to radio noise.
Extremely hot or cold locations
Inside vehicles
Near electrical equipment or office
appliances
Near high-tension electrical
lines, railway overhead wires or
communication facilities
Inside reinforced concrete
buildings, between tall buildings,
mountains, or underground
Near mobile phones that are in
use
21
When signal reception is poor
High-tension electrical lines or others structures near your house may block the path
to the signal location. This may cause a poor environment for receiving the time
signal.
With reference to pages
17
to
19
, search for a better place for reception.
Then, attempt to receive the time signal following the procedure on pages
22
and
23
.
22
On-demand reception—manual signal reception activation
You can adjust the watch by receiving the time signal any
time when the time and date are not correct or the reception
result is “NO.
• The watch will not start to receive if the second hand is
moving once every two seconds (this is the insufficient
charge warning). Fully charge the watch before
attempting on-demand reception.
• Not all areas can receive a signal. Be sure you are not in
such an area and confirm the city is selected for your
time zone. See pages
10
to
13
.
Crown position
23
1. Ensure that the crown is in position .
2. Press and hold the lower right button
A
for two or
more seconds.
The second hand moves to “RX” and the watch starts
receiving.
After receiving the time signal, the second hand will
move normally.
• Place your watch on a stable surface where it will not
be disturbed during the update process.
• It takes from two to fifteen minutes to complete the time signal reception.
Successful signal
reception
The time will be updated and the watch will resume
normal operation.
Failed signal reception Normal operation resumes with previously set time.
To cancel the reception
Press and hold the lower right button
A
for two or more seconds.
Cancel the reception and the current time will be indicated.
While receiving the
signal
24
During the Daylight Saving Time season
Before proceeding, please know the movement type in your watch. Please refer to
page
1
for this determination.
Some areas observe Daylight Saving Time.
• Daylight Saving Time rules will vary depending on the country or region within a
country.
Movement caliber H144
When the watch receives a time signal, the Daylight Saving Time setting is
automatically updated. The time signal update overrides any manual settings that
may have been made. If you live in an area that does not observe Daylight Saving
Time, you may need to use alternate city for correcting the time. See pages
10
to
13
.
Movement caliber H145
When the watch receives a time signal, the Daylight Saving Time setting is
automatically updated, provided the user has not manually turned OFF overridden
the Daylight Saving Time setting.
If you live in an area that does not receive a time signal, you will need to update the
Daylight Saving Time setting manually. See page
26
.
25
1. Pull the crown out to position .
The second hand will rotate to indicate the Daylight
Saving Time set in memory.
ON Daylight Saving Time
is on and time is
advanced.
OFF Daylight Saving Time
is off.
2. Push the crown in to
position .
Checking the Daylight Saving Time setting (both movement calibers H144 and
H145)
Crown position
When Daylight Saving
Time is on
26
1. Pull the crown out to position .
2. Rotate the crown to choose the city.
For details of the selection of cities, see pages
11
to
13
.
3. Pull the crown out to position .
• Rotate the crown clockwise to activate Daylight
Saving Time (turn on).
or
• Rotate the crown counterclockwise to deactivate
Daylight Saving Time (turn off).
4. Push the crown in to position .
To manually change the Daylight Saving Time setting
Crown position
Special note about movement caliber H145
When manually changing the Daylight Saving Time from OFF to ON to OFF,
this engages the manual override built into movement caliber H145. This manual
override precludes Daylight Saving Time from being automatically adjusted during
the time signal update. If this function is not desired, the only way to cancel the
manual override is to do the reset and 0-Positioning outlined on page
46
.
27
<Cities sharing the Daylight Saving Time setting>
The Daylight Saving Time / standard time is shared and automatically updated among
the cities within each table below.
Areas receiving the
signal from USA
Anchorage (Anchorage/ANC), Los Angeles (L. Angeles/
LAX), Denver (Denver/DEN), Chicago (Chicago/CHI),
New York (New York/NYC)
Areas receiving the
signal from Germany
London (London/LON), Paris (Paris/PAR),
Athens (Athens/ATH), Moscow (Moscow/MOW),
Azores (Azores/PDL)
When changing to a city other than outlined in the chart above:
Movement caliber
H144
Time signal overrides any manual setting of the Daylight
Saving Time.
Movement caliber
H145
Daylight Saving Time is set in accordance with the last-
received time signal. However, when manual override has
been activated, the time signal will not update the time zone
with the manual Daylight Saving Time override.
• For how to check the movement number, see page
1
.
28
If you live in an area that does not observe Daylight Saving Time
<Movement caliber H144>
Anytime a time signal is received, any manual Daylight Saving Time is overridden and
set in accordance with the time in the time signal. If you live in an area that does not
observe Daylight Saving Time, it will be necessary for you to utilize an alternate time
zone to have the correct time shown (see pages
10
to
13
).
e.g. The current city setting is +2 hour time difference.
Select the city with +1 hour time difference.
Caution
You must change the city setting to the correct time zone city after the Daylight
Saving Time season has finished.
29
If you live in an area that does not observe Daylight Saving Time (continued)
<Movement caliber H145>
Movement caliber H145 will “remember” a manual Daylight Saving Time setting. As
such, if you manually turn the Daylight Saving Time to “OFF” for a particular time
zone, it stay “off” and not be affected by any time signal update. It is important to note
however that with the change of each Daylight Saving Time, you will need to manually
turn the setting ON or OFF as outlined on page
26
.
The only way to cancel any manual override setting is to do the reset and 0-positioning
procedure as outlined on page
46
.
30
This watch has a rechargeable cell which is charged by exposing the dial to light such
as direct sunlight or fluorescent lamps.
For optimal performance:
• Expose the watch with the dial facing towards direct outdoors sunlight (not through
a window) for five to six hours at least once a month.
• After taking off the watch, put it in a position where the dial is exposed to bright
light, such as by a window.
• Before storing the watch in a dark place for an extended period of time, be sure to
charge it fully.
When the watch is regularly covered with long sleeves, it may not be charged
sufficiently. Try to keep the watch exposed to light sufficient for charging.
Do not charge the watch at a high temperature (about 60˚C/140˚F or higher).
Recharging your watch
31
When the watch reaches a low charge state—insufficient charge warning
function
When the power reserve becomes low, the second hand moves
once every two seconds—This is the insufficient charge
warning function. Charge the watch by exposing the dial to
light.
• After the watch is fully charged, the second hand will
resume normal operation.
• If you have not charged the watch for three days or more
since the insufficient charge warning movement began, the
watch will run out power and stop.
Caution
• Even when the second hand moves once every two seconds, the current time
and date are indicated. However, no other functions or time signal reception will
operate under a lower power state.
• When you check the power reserve (page
8
) or the time signal reception (page
9
) and the second hand rotates a quarter counterclockwise, you can operate the
watch as usual. However the watch needs to be charged.
32
Charging time by environment
Below are the approximate times needed for charging when exposing the watch dial to
light continuously. Please use this table as a reference only.
Environment
Illuminance
(Lx)
Charging time to
work for one day
Charging time to start
working normally when the
rechargeable cell is empty
Under direct
sunlight or cloudy
weather (not through
a window)
10000 to
100000
4 to 12 minutes 40 minutes to 1 hour
20 cm (7-7/8
inches) away from
a fluorescent lamp
(30 W)
3000 40 minutes 2.5 hours
Interior lighting 500 4 hours 14 hours
Your watch will run for approximately six months from a full charge or up to two years
with the power save feature engaged (based on a full charge).
After the second hand starts moving once every two seconds, it will last for
approximately three days.
33
Power save feature
When the watch is not exposed to light for more than seven days such as when you
store it in the dark, the minute hand and second hand automatically stop to save
power. (The time signal reception is not possible with the power save feature engaged.)
However the watch still keeps the time.
• When the crown position is
or , the power save feature will not activate.
• The power save feature can not be activated manually.
To cancel the power save feature
When the watch is exposed to light sufficient for charging, the power save feature is
automatically disengaged and normal time indication will resume.
After the power save feature is disengaged, you should receive the time signal
manually. See pages
22
and
23
.
34
Adjusting the time/calendar manually
1. Pull the crown out to position .
2. Press and release the lower right button
A
.
The second hand moves to the 0 second position.
3. Rotate the crown to adjust the minute.
• The second hand rotates around once and the minute
hand moves one minute.
• When it passed “0:00:00,” date advances once.
Be aware of the AM/PM status when you adjust the
time.
4. Press and release the lower right button
A
.
The hour hand moves slightly.
5. Rotate the crown to adjust the hour.
• When it passed “0:00:00,” date advances once.
Be aware of the AM/PM status when you adjust the
time.
Crown position
35
6. Press and release the lower right button
A
.
The date indicator moves slightly.
7. Rotate the crown to adjust the date.
8. Press and release the lower right button
A
.
The second hand indicates the current setting of the month and year.
9. Rotate the crown to set the current month and leap year.
• See pages
36
and
37
for how to read the year and month.
10. Push the crown in to position .
The current time is indicated.
When adjusting minute/hour/date, you can move hands or date indicator
continuously by spinning the crown quickly a few times. To stop them, rotate the
crown in either direction.
Continued on the next page
36
Month and year indications
The year and month are indicated by the second hand.
The position of the second hand shows the month.
The first three minute marks after the hour
mark denote the number of years since a leap
year.
Dec.
Jan.
Feb.
Mar.
Apr.
MayJun.
Jul.
Aug.
Sept.
Oct.
Nov.
Leap year
1st year since leap year
2nd year since leap year
3rd year since leap year
e.g.
When it is March in the second year since
the leap year.
37
The figure shows
August in the 2nd year
since the recent leap
year (e.g. 2010).
The figure shows
April in the 3rd year
since the recent leap
year (e.g. 2011).
Quick reference chart for number of years passed since leap year
Indication of the second hand Passed year Year
Hour marker Leap year 2012, 2016, 2020
1st min. marker 1st year 2013, 2017, 2021
2nd min. marker 2nd year 2010, 2014, 2018
3rd min. marker 3rd year 2011, 2015, 2019
38
Checking and correcting the current reference (0) position
If the time or date is not shown correctly even after proper reception of the time
signal, check whether the reference (0) position is correct or not.
What is the reference (0) position?
The base position for all the hands to indicate
the time and date.
• For the time indication: “0:00:00”
• For the date indication: “1”
If the time and date indications are off from
the correct reference (0) position, the watch
will not indicate the time and date correctly.
Correct reference (0) position
39
1. Pull the crown out to position .
2. Press the upper right button
B
for five or more
seconds, then release it.
All hands and the date indicator move to indicate the
current reference (0) position.
No operations are available while the hands and date
indicator are moving.
Reference (0) position Next operation
Correct Push the crown in to position
. (You do not need to correct
the reference position.)
Incorrect Correct the reference position.
(Proceed to step 3 on page
40
.)
Crown position
Continued on the next page
40
3. Pull the crown out to position .
4. Press and release the lower right button
A
.
The hour hand moves slightly.
5. Rotate the crown to adjust the hour hand to the
“0:00:00” position.
• If you spin the crown quickly a few times, the hand
will move continuously. To stop it, rotate the crown in
either direction.
6. Press and release the lower right button
A
.
The minute hand and second hand move slightly.
Crown position
41
7. Rotate the crown to adjust the minute hand and second hand to the
“0:00:00” position.
• If you spin the crown quickly a few times, the hands will move continuously. To
stop them, rotate the crown in either direction.
8. Press and release the lower right button
A
.
The date indicator moves slightly.
9. Rotate the crown to adjust the date to the “1” position.
• If you spin the crown quickly a few times, the date indicator will move
continuously. To stop it, rotate the crown in either direction.
10. Push the crown in to position .
Correction of the current reference (0) position is finished and the time is
indicated.
4242
If you have a problem with your watch, check the table below.
Symptoms Remedies Page
Problems with time signal reception.
Reception is
unsuccessful in a
receivable area.
Push the crown in to position
(closed position next
to the case).
Check the city setting.
10
to
13
Avoid things likely to interfere with the time signal and
place the watch with the 9:00 position facing toward the
station.
15
and
20
Do not move the watch until the reception is finished.
15
When the second hand moves once every two seconds
(low power state), the watch cannot receive the time
signal. Fully charge the watch.
32
Troubleshooting
4343
The correct time and date are
not indicated after successful
reception.
Check the city setting.
10
to
13
Check and correct the current reference (0)
position.
38
to
41
The hands do not work properly.
The second hand rotates a
quarter counterclockwise
when you check the reception
result.
This indicates a low charge state. Fully charge
your watch.
30
The second hand moves once
every two seconds.
This indicates a low charge state. Fully charge
your watch.
31
All hands stop moving.
Push the crown in to position
(closed position
next to the case).
Fully charge your watch by exposing it to direct
sunlight.
32
Symptoms Remedies Page
Continued on the next page
4444
Symptoms Remedies Page
The hands do not work properly.
The hands start turning
rapidly as you take the watch
out of the case.
The watch is canceling the power save feature.
Wait until the rapid movement stops.
33
The time and/or date is not correct.
The time and/or date is
wrong.
Check the city setting.
10
to
13
Check and correct the current reference (0)
position.
38
to
41
Receive the time signal manually to adjust the
time and date.
22
and
23
Set the time and date manually.
34
to
37
Daylight Saving Time is not
shown.
Select “ON” manually or receive the time
signal.
24
to
29
4545
The time is wrong even
though the city setting
is correct and the signal
reception was successful.
Check the indicated time (Daylight Saving
Time or standard time) and change it if
necessary.
24
to
29
Check and correct the current reference (0)
position.
38
to
41
The date changes at around
12:00 p.m.
Receive the time signal manually to adjust the
time and date.
22
and
23
Adjust the time by 12 hours manually.
34
to
37
Others
The watch does not function,
even after fully charging and
setting.
Charge the watch by exposing it to direct
sunlight for five to six hours.
If, after fully charging and setting your watch,
it continues to malfunction, contact your
nearest Authorized Citizen Service Center
listed in your warranty booklet.
32
Symptoms Remedies Page
4646
The watch may not work properly if it is affected by static
electricity or shock. In this case, you must reset the watch.
Caution
• Be sure to charge the watch fully before resetting it. (Page
32
)
• You must correct the current reference (0) position after
resetting the watch.
1. Pull the crown out to position .
2. Press the upper and lower right buttons
A
and
B
, then release them.
The second hand moves to the “0” second position, the
hour hand and date indicator move slightly, and the
watch is now reset.
3. Correct the current reference (0) position.
See from step 4 on page
40
.
Resetting the watch
Crown position
47
After resetting the watch
You must set the watch again following the procedure below.
1. Select a city.
See pages
10
to
13
.
• After resetting the watch, the standard time is shown for all cities (the watch
automatically switches between Daylight Saving Time and standard time in
accordance with the Daylight Saving Time check signal). For Daylight Saving
Time, see pages
24
to
29
.
2. Adjust the time/calendar.
• When adjusting by receiving the time signal manually:
See pages
22
and
23
.
• When adjusting manually:
See pages
34
to
37
.
48
Solar-powered watch handling precautions
<Always be Sure to Expose Your Watch to Light Regularly>
Your watch enjoys regular exposure to light. Wearing in situations that prevent light exposure such
as long shirt or coat sleeves will prevent your watch from receiving light sufficient for charging. In
these instances, supplemental charging may be needed.
When you take your watch off, try and place it in a bright location. This will ensure your watch
receives light for charging and will continue to operate properly. Storing your watch in dark places
for extended periods of time may cause the stored energy to become depleted and your watch to
stop.
49
CAUTION
Recharging Precautions
Do not charge your watch at high temperatures (60°C/140°F) as
this may cause damage to sensitive components and the watch to
malfunction.
Examples:
Charging the watch too close to a light source which generates
a large amount of heat such as an incandescent lamp or
halogen lamp.
* When charging your watch under an incandescent lamp,
be sure to leave 50 cm (19-11/16 inches) distance between
the lamp and the watch to avoid excessive heat. Never use a
halogen lamp for recharging as these generate excessive heat.
Charging the watch in a location where the temperature may become extremely high such as on
the dashboard of a vehicle.
50
<Replacement of Rechargeable Cell>
Your watch features a cell that does not need regular replacement.
However, after an extended period of time, power consumption may increase due to deterioration
of lubrication in the movement. This may result in shorter than expected run time. Be sure to have
your watch regularly inspected by an Authorized Service Center.
Note: Regular maintenance is not covered under the terms of the warranty.
WARNING
Handling of Rechargeable Cell
The rechargeable cell should never be removed from the watch.
If for any reason it becomes necessary to remove the rechargeable cell from the watch, keep out of
the reach of children to prevent accidental swallowing.
If the rechargeable cell is accidentally swallowed, consult a doctor immediately.
Do not dispose of the rechargeable cell with ordinary garbage. Please follow the instructions of
your municipality regarding collection of batteries to prevent the risk of fire or environmental
contamination.
51
WARNING
Use Only the Specified Rechargeable Cell
Never install a conventional battery in your watch. Only use the specified rechargeable cell.
Your watch is designed to operate only with the original type of rechargeable cell. It is not designed
to run or be used with a conventional type of battery. Installing such a battery may result in
overcharging which may cause the battery to burst. This can cause damage to the watch and injury
to the wearer.
If for any reason the rechargeable cell needs replacement, be sure to use only the original type
rechargeable cell. We recommend contacting your nearest Authorized Service Center for this
service.
52
Name
Indication
Specification
Dial or Case back
Non-water resistant Non-water resistant
Everyday-use water resistant
watch
WATER RESIST(ANT)
Water-resistant to 3
atmospheres
Upgraded everyday use water-
resistant watch
WATER RESIST(ANT)
5 bar
Water-resistant to 5
atmospheres
WATER RESIST(ANT)
10/20 bar
Water-resistant to 10 or 20
atmospheres
Water resistance
WARNING
Water Resistance
Refer to the watch dial and the case back for the indication of the water resistance of your watch.
The following chart provides examples of use for reference to ensure that your watch is used
properly.
(The unit “1bar” is roughly equal to 1 atmosphere.)
WATER RESIST(ANT) ××bar may also be indicated as W.R.××bar.
53
Water-related use
Minor exposure
to water (washing
face, rain, etc.)
Swimming and
general washing work
Skin diving,
marine sports
Scuba diving
using an air tank
Operate the crown
or button when the
watch is wet
NO NO NO NO NO
OK NO NO NO NO
OK OK NO NO NO
OK OK OK NO NO
54
Non-water resistant watches cannot be used underwater or in environments in contact with water.
Water-resistance for daily use (to 3 atmospheres) means that the watch may be worn while washing
your face or in the rain, but is not to be immersed in water.
Upgraded water-resistance for daily use (to 5 atmospheres) means that the watch may be worn
while swimming, but is not to worn while skin diving.
Upgraded water-resistance for daily use (to 10/20 atmospheres) means that the watch may be worn
while skin diving, but not while scuba or saturated diving using helium gas.
For a metallic, plastic or rubber watchband, wash any dirt off with water. Remove the small
amounts of dirt trapped between the crevices of the metallic band with a soft brush. If your watch
is not water resistant, be sure not to get the case of the watch wet.
55
Precautions and usage limitations
CAUTION
To Avoid Injury
Be particularly careful when wearing your watch while holding a small child, to avoid injury.
Be particularly careful when engaged in strenuous exercise or work, to avoid injury to yourself and
others.
DO NOT wear your watch while in a sauna, jacuzzi or other location where it may become
excessively hot. This may result in burns to the wearer and/or malfunction of your watch.
Be careful when putting on or taking off your watch since there is a risk of pinching your skin or
damaging your fingernails depending on the manner in which the band is fastened.
56
CAUTION
Precautions
Always wear your watch with the crown pushed in to the normal position. If your crown is a screw
down type, be sure it is properly screwed down (locked) to the case.
Do not operate the crown or any buttons when the watch is wet. This may allow the entrance of
moisture and cause damage to sensitive components.
If water enters the watch or the watch fogs up and does not clear up even after a long time, consult
Authorized Service Center for inspection and/or repair.
If a watch of upgraded water resistance for daily use is immersed in sea water or subjected to
excessive perspiration, thoroughly rinse with fresh water and wipe completely dry with a soft cloth.
If seawater enters the watch, place the watch in a box or plastic bag and immediately take it in for repair.
Otherwise, pressure inside the watch will increase, and parts (crystal, crown, buttons, etc.) may come off.
CAUTION
When Wearing Your Watch
<Band>
The durability of a leather, cloth, or natural skin strap may be affected by moisture and
perspiration. Moreover, wet leather may cause a rash. Be sure to keep your strap dry and clean.
It is recommended to take off the watch if it gets wet, even if the watch itself is water-resistant.
Do not wear your watch too tightly. Try to leave enough space between the watch and your skin to
allow adequate ventilation.
57
A rubber type strap may become stained by dyes or soils found in clothing and other accessories.
Since these stains may become permanent, take caution when wearing your watch with items that
may transfer color (articles of clothing, purses, dyed bracelets, etc.).
Solvents, moisture and perspiration may cause the strap to deteriorate. Be sure to replace a strap
that has become dried, brittle, or cracked to prevent loss due to strap failure.
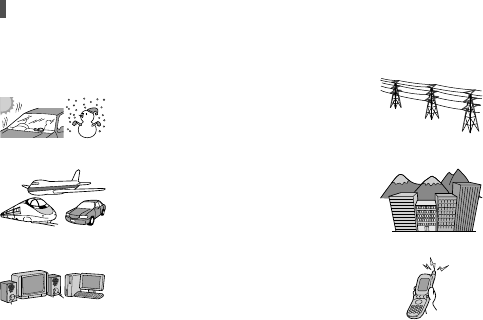
<Temperature>
The watch may stop or the function of the watch may be impaired in extremely high or low
temperature. Do not use the watch in places where the temperature is outside the operating
temperature range as stated in the specifications.
<Static Electricity>
The integrated circuits (IC) used in quartz watches are sensitive to static electricity. Please note that
the watch may malfunction if exposed to intense static electricity.
<Magnetism>
Analog type quartz watches are powered by a motor that utilizes a small magnet. The operation
of this motor can be disturbed if the watch is subjected to magnetic items resulting in the
malfunction of the watch. Do not allow the watch to come into close proximity to magnetic items
such as “health” bracelets or necklaces, coin trays, latches found in cabinets and refrigerators,
certain clasps of handbags and cell phone pouches, cell phone speakers, certain sporting
accessories, MRI equipment, etc.
58
<Strong Shock>
Avoid dropping the watch or subjecting it to other strong impact. It may cause malfunctions and/
or performance deterioration as well as damage to the case and bracelet.
<Chemicals, Corrosive Gasses and Mercury>
If paint thinner, benzene or other solvents or products containing these solvents (including
gasoline, nail-polish remover, cresol, bathroom cleaners and adhesives, water repellent, etc.)
are allowed to come in contact with the watch, they may cause discoloration, deterioration and
damage materials of the watch. Be careful when handling these chemicals. Contact with mercury
such as that used in thermometers may also cause discoloration of the band and case.
CAUTION
Always Keep Your Watch Clean
Rotate the crown while it is pressed in fully and press the buttons periodically so they do not
become stuck due to accumulations of foreign matter.
Note: Do not operate the crown or any buttons when the watch is wet.
The case and band of the watch come into direct contact with the skin in the same manner as
undergarments. Corrosion of the metal or unnoticed soiling such as that caused by perspiration
and dirt can soil sleeves and other portions of clothing. Keep your watch clean at all times.
58

Hulp nodig? Stel uw vraag in het forum

Spelregels
1

Forum

Citizen-Cal-H144

Misbruik melden

Gebruikershandleiding.com neemt misbruik van zijn services uitermate serieus. U kunt hieronder aangeven waarom deze vraag ongepast is. Wij controleren de vraag en zonodig wordt deze verwijderd.

Product:

Bijvoorbeeld antisemitische inhoud, racistische inhoud, of materiaal dat gewelddadige fysieke handelingen tot gevolg kan hebben.

Bijvoorbeeld een creditcardnummer, een persoonlijk identificatienummer, of een geheim adres. E-mailadressen en volledige namen worden niet als privégegevens beschouwd.

Spelregels forum

Om tot zinvolle vragen te komen hanteren wij de volgende spelregels:

Belangrijk! Als er een antwoord wordt gegeven op uw vraag, dan is het voor de gever van het antwoord nuttig om te weten als u er wel (of niet) mee geholpen bent! Wij vragen u dus ook te reageren op een antwoord.

Belangrijk! Antwoorden worden ook per e-mail naar abonnees gestuurd. Laat uw emailadres achter op deze site, zodat u op de hoogte blijft. U krijgt dan ook andere vragen en antwoorden te zien.

Abonneren

Abonneer u voor het ontvangen van emails voor uw Citizen Cal H144 bij:


U ontvangt een email met instructies om u voor één of beide opties in te schrijven.


Ontvang uw handleiding per email

Vul uw emailadres in en ontvang de handleiding van Citizen Cal H144 in de taal/talen: Engels als bijlage per email.

De handleiding is 2,09 mb groot.


U ontvangt de handleiding per email binnen enkele minuten. Als u geen email heeft ontvangen, dan heeft u waarschijnlijk een verkeerd emailadres ingevuld of is uw mailbox te vol. Daarnaast kan het zijn dat uw internetprovider een maximum heeft aan de grootte per email. Omdat hier een handleiding wordt meegestuurd, kan het voorkomen dat de email groter is dan toegestaan bij uw provider.

Stel vragen via chat aan uw handleiding

Stel uw vraag over deze PDF

Andere handleiding(en) van Citizen Cal H144

Citizen Cal H144 Snelstart handleiding - Nederlands - 3 pagina's

Citizen Cal H144 Snelstart handleiding - Deutsch - 2 pagina's


Uw handleiding is per email verstuurd. Controleer uw email

Als u niet binnen een kwartier uw email met handleiding ontvangen heeft, kan het zijn dat u een verkeerd emailadres heeft ingevuld of dat uw emailprovider een maximum grootte per email heeft ingesteld die kleiner is dan de grootte van de handleiding.

Er is een email naar u verstuurd om uw inschrijving definitief te maken.

Controleer uw email en volg de aanwijzingen op om uw inschrijving definitief te maken

U heeft geen emailadres opgegeven

Als u de handleiding per email wilt ontvangen, vul dan een geldig emailadres in.

Uw vraag is op deze pagina toegevoegd

Wilt u een email ontvangen bij een antwoord en/of nieuwe vragen? Vul dan hier uw emailadres in.


Info