607774
42
Verklein
Vergroot
Pagina terug
1/43
Pagina verder
FREISPRECHEINRICHTUNG / HANDS-FREE CAR KIT
CC 9050 / CC 9051
Bedienungsanleitung
Operating manual
Mode demploi
Gebruiksaanwijzing
D
GB
F
NL
FREISPRECHEINRICHTUNG / HANDS-FREE CAR KIT
Inhalt
Einleitendes 2
1. Allgemeine Hinweise 2
2. Sicherheitshinweise 2
Montage der Freisprecheinrichtung 4
3. Lieferumfang CC 9050 / 9051 4
4. Platzierung und Befestigung 5
5. Anschliessen der Elektronikbox 8
6. Installation der Umschaltbox AC 5120 9
Bedienungsanleitung 13
7. Einschalten 13
8. Herstellen einer Bluetooth-Verbindung 14
9. Trennung einer Bluetooth-Verbindung 15
10. Menüführung 15
Weitere Informationen 20
11. Serviceleistungen 20
CC 9050 / CC 9051
2
3
Einleitendes
1. Allgemeine Hinweise
Sehr geehrte Kundin, sehr geehrter Kunde,
Sie haben eine Freisprecheinrichtung der Marke BURY erworben und
sich so für ein Produkt mit hoher Qualität sowie höchstem Bedienungs-
komfort entschieden. Einkauf, Produktion sowie Service und Vertrieb
unterliegen bei Bury einem strengen Qualitätsmanagement nach DIN
EN ISO 9001. Alle Bury-Freisprechanlagen entsprechen den Sicher-
heitsnormen CE und e1. Außerdem geben wir auf alle Komponenten
zwei Jahre Gewährleistung.
Damit Sie den vollen Komfort Ihrer Bury-Freisprechanlage genießen
können, lesen Sie sich die Bedienungsanleitung bitte sorgfältig durch.
Falls Sie zusätzlich Fragen zum Einbau oder Betrieb haben, wenden Sie
sich bitte an Ihren Händler. Er berät Sie gerne und zuverlässig und leitet
Ihre Erfahrungen und Anregungen an den Hersteller weiter.
Oder wenden Sie sich an unsere Hotline. Die Telefon- und Faxnummern
finden Sie unter dem Stichwort Service.
Wir wünschen Ihnen eine gute Fahrt.
2. Sicherheitshinweise
Einbau – wer und wo
Der Einbau der Freisprecheinrichtung kann durch Sie vorgenommen
werden, beachten Sie aber bitte die Einbauvorgaben des Kfz-Herstel-
lers (VAS 1978) und stellen Sie dazu das Fahrzeug an einem Ort ab, an
dem es den Straßenverkehr nicht behindert. Wir empfehlen Ihnen, den
Einbau durch eine Fachwerkstatt durchführen zu lassen.
Stromversorgung
Diese Freisprecheinrichtung ist für den Einsatz in Kraftfahrzeugen mit
einem Bordnetz von 12 Volt (PKW) ausgelegt. Beabsichtigen Sie, das
Gerät in ein Kraftfahrzeug mit einem Bordnetz von 24 Volt (LKW) ein-
zubauen, benutzen Sie bitte einen Spannungswandler. Fragen zu die-
sem Thema beantwortet Ihnen gerne unsere Hotline.
Platzierung, Lautstärke
Installieren Sie die Komponenten des Gerätes so im Fahrzeug, dass
Ihre Sicht nicht beeinträchtigt wird und die Komponenten nicht in einer
Personenaufprallzone der Fahrgastzelle oder in Entfaltungsbereichen
von Airbags montiert sind. Zum Herauslösen von Verkleidungen (mit
und ohne Airbags) oder Komponenten des Armaturenbretts sind in ei-
nigen Fällen spezielles Werkzeug und spezielle Kenntnisse erforder-
lich.
Sachgemäße Handhabung
Für Beschädigungen und Störungen durch unsachgemäße Installation
und Handhabung des Systems übernehmen wir keine Haftung. Setzen
Sie deshalb das Gerät weder Nässe, extremen Temperaturen oder Er-
schütterungen aus und befolgen Sie genau die in der Einbau- und Be-
dienungsanleitung vorgegebenen Arbeitsschritte.
Bedienung im Straßenverkehr
Bedienen Sie das System nur in Situationen, in denen es Ihnen die
Verkehrslage erlaubt und Sie dabei andere Verkehrsteilnehmer nicht
gefährden, schädigen, behindern oder belästigen. Die Lautstärke des
Geräts ist so einzustellen, dass Außengeräusche weiterhin wahrgenom-
men werden können.
Im Störungsfall
Nehmen Sie das Gerät nicht in Betrieb, wenn Sie einen Defekt bemer-
ken bzw. vermuten. Suchen Sie einen Bury Fachhändler auf oder stellen
Sie Kontakt zur Bury Hotline her. Unsachgemäße Reparaturversuche
können für Sie gefährlich sein. Deshalb darf nur qualifiziertes Personal
Überprüfungen vornehmen.
Wichtig:
Der Fahrer ist jederzeit für die sichere Führung und Kon-
trolle seines Fahrzeugs verantwortlich. Sie sollten während
des Fahrens kein Mobiltelefon - und besonders nicht die
Funktionen SMS / MMS schreiben oder lesen - nutzen.
Untersuchungen ergaben, das es ein Risiko für Ihre Si-
cherheit darstellt, abgelenkt zu sein. Die Nutzung eines Mo-
biltelefons hrend der Fahrt kann die Ursache einer sol-
chen Ablenkung sein.
Der Hersteller weist hiermit ausdrücklich darauf hin, dass
Sie während der Fahrt eine Freisprecheinrichtung nutzen
sollten.
4
5
Montage der Freisprecheinrichtung
4. Platzierung und Befestigung
Schritt 1:
Wählen Sie bitte zuerst den für Sie in Ihrem Fahrzeug am besten geeig-
neten Standort für den Monitor samt Montagefuß aus, indem Sie den
Monitor an verschiedenen Positionen im Fahrzeug einmal anhalten,
bzw. positionieren.
Haben Sie eine geeignete Position für den Monitor im Fahrzeug gefun-
den, können Sie nun den Montagefuß / Klettverschluss entsprechend
anbringen / befestigen. Nutzen Sie bitte das beiliegende Säuberungs-
tuch zum Entfetten der Oberflächen, auf die Sie den Montagefuß an-
bringen möchten.
Wichtig:
Achten Sie bei der Platzierung darauf, dass der Monitor die
Sicht auf die Straße nicht behindert, nicht in Personenauf-
prallzonen (unter anderem Airbagbereiche) angebracht wird
und dass Kabel möglichst einfach verlegt werden können.
Der Montagefuß/Klettverschluss kann nur einmal aufge-
klebt werden, beim Entfernen kann es zur Bescdigung
der Klebefläche kommen. Außerdem ist es möglich, dass
sich die Oberfläche je nach Struktur und Beschaffenheit bei
starken Temperaturschwankungen während der späteren
Nutzung entfärbt.
Das Kabelende mit dem kleinen Molexstecker eignet sich gut zum Ver-
legen durch schmale Öffnungen im Armaturenbrettbereich. Dies er-
möglicht eine quasi unsichtbare Installation des Verbindungskabels.
Verlegen Sie das Kabel, ausgehend von der Position der Elektronikbox
(siehe Schritt 4 ) und verbinden Sie es anschließend mit dem Monitor:
3. Lieferumfang CC 9050 / 9051
Beschreibung der Komponenten:
1) Elektronikbox (CC 9051 mit integrierter Lautsprecher-Umschaltbox)
2) Monitor auf Montagefuß, Säuberungstuch
3) Verbindungskabel Monitor / Elektronikbox
4) Klettverschluss
5) Befestigungsschrauben für Elektronikbox, Reiter
6) AC 5120 Umschaltbox
7) Mikrofon
Hinweis:
Der hier beschriebene Lieferumfang bezieht sich auf die CC 9050. Sollten Komponenten
hinzukommen oder wegfallen, so erhalten Sie über ein separates Beiblatt eine entspre-
chende Information.
6
Montage der Freisprecheinrichtung
7
Installationsbeispiel 1:
Installationsbeispiel 2:
Schritt 2:
Je nach Fahrzeugtyp und dessen Ausstattung (z. B. Airbags) ist es sinn-
voll, das Mikrofon entweder an der A-Säule, an der Sonnenblende oder
am Dachhimmel zu installieren. Hinweise zu den Ausstattungsmerkma-
len entnehmen Sie bitte aus den Fahrzeugunterlagen.
Schritt 3:
Verlegen Sie bitte die Kabel möglichst so, dass sie nicht unbefestigt im
Fahrzeug liegen/hängen und keinen Einfluss auf das Führen des Fahr-
zeugs ausüben können. Achten Sie beim Verlegen eines Kabels darauf,
das es nicht auf Zug beansprucht wird sondern noch Spiel besitzt. Ver-
meiden Sie Kabelquetschungen, die zu Beschädigungen der Isolierun-
gen durch Reibung/Scheuern entstehen können.
Schritt 4:
Installieren Sie die Elektronikbox an geeigneter Stelle im Fahrzeug. Dies
kann z. B. hinter dem Radio, im Handschuhfach oder in der Mittelkon-
sole sein. Achten Sie darauf, dass Sie ohne Probleme an die Anschlüsse
der Box kommen. Bevor Sie Komponenten an der Elektronikbox an-
schließen, sollten Sie zur Sicherheit die Batterie abklemmen. Achten Sie
hierbei auf eine eventuelle Radiokodierung (siehe Radio-Handbuch).
Wichtig:
Installieren Sie die Elektronikbox hinter einer Verkleidung
bzw. an einer Stelle, an die Sie nur nach Öffnen / Lösen
eines Schutzes / einer Abdeckung herankommen. Die An-
schlussbox darf nicht offen im Fahrzeug herumhängen.
8
Montage der Freisprecheinrichtung
9
5. Anschliessen der Elektronikbox
An der Elektronikbox werden die anderen Komponenten der Freisprech-
einrichtung angeschlossen. Folgende Anschlüsse sind gegeben:
1 - Stromversorgung
(siehe Kapitel: Installation der Umschaltbox AC 5120)
2 - AUX-Out Ausgang
Musik in Stereoqualität wird am Anschluss 2 ausgegeben. Hier können
Sie den AUX-In Eingang Ihres Radios (falls vorhanden) über im Fach-
handel erhältliche Adapter anschliessen. Der Adapter muss für den An-
schluss an der Freisprecheinrichtung eine 3,5 mm Stereoklinkenbuchse
besitzen. Je nach Autoradio ist das andere Ende verschieden zu wählen.
Falls Ihr Radio nicht über einen Aux-In vergt, können Sie den Car
CD/MP3-Adapter aus dem BURY Zubehörprogramm nutzen, um die Mu-
sikwiedergabe über Ihr Radio zu ermöglichen.
3 - Sprachausgabe der FSE
(siehe Kapitel: Installation der Umschaltbox AC 5120)
4 - Mikrofoneingang
Hier schliessen die den Klinkenstecker des Mikrofons an. Setzen Sie,
nachdem auch der Anschluss 3 belegt worden ist, den Reiter ein, damit
sich die beiden Klinkenstecker nicht durch Vibrationen lösen können.
5 - Monitorbuchse
In diese Buchse stecken Sie bitte den 9poligen Stecker des Monitorver-
bindungskabels ein. Ziehen Sie mindestens eine der beiden Bestigungs-
schrauben handfest an, damit auch dieser Stecker nicht durch Vibratio-
nen herausrutschen kann.
6. Installation der Umschaltbox AC 5120
Mit der Lautsprecherumschaltbox AC 5120 erhalten Sie die Möglichkeit, die Ausgabe von Radiofunk /
CD-Player usw. zu unterdrücken und die Sprachausgabe Ihres Gesprächspartners während eines Tele-
fonats auf die Fahrzeuglautsprecher zu übertragen. Dadurch entfällt die Installation eines zusätzlichen
Lautsprechers. Sollte Ihr Radio eine Stummschaltungsfunktion besitzen, werden die Fahrzeuglautspre-
cher vom Radio her lautlos geschaltet (Mute Funktion). Besitzt Ihr Autoradio solch eine Funktion nicht,
werden die Signale von der Lautsprecherumschaltbox her unterdrückt. Die AC 5120 können Sie auf-
grund Ihrer Anschlüsse bei BURY Freisprecheinrichtungen einsetzen, die eine Spannungsversorgung
über Molexstecker gewährleisten und einen Lautsprecherausgang besitzen.
Wenn Sie ein Telefongespräch im Freisprechmodus führen, wird Ihr Autoradio automatisch stummge-
schaltet (die genaue Bedienung Ihrer Freisprecheinrichtung entnehmen Sie bitte der Anleitung der
Freisprecheinrichtung). Die Umschaltbox benutzt nun einen oder zwei Lautsprecher Ihres Autoradios
auch wenn das Radio nicht eingeschaltet ist. Diese Funktionen werden durch den Einbau automatisch
aktiv und müssen nicht extra bedient oder angewählt werden.
Einige Mobiltelefone unterstützen die Radiostummfunktion nicht. Lesen Sie dazu bitte auch die Bedie-
nungsanleitung Ihres Mobiltelefons durch. Genauere Informationen erhalten Sie bei Ihrem Fachhänd-
ler, im Internet unter www.bury.com oder telefonisch bei unserer Hotline.
Entscheiden Sie nach der Überprüfung aller Kabellängen, wo Sie die Umschaltbox anbringen können.
Sichern Sie anschließend die Umschaltbox so, dass diese nicht umherfliegt bzw. gegen andere Teile
klappern kann.
Stecken Sie den ausgehenden, weißen Spannungsversorgungsstecker der Umschaltbox (1) in die
Stromversorgungsbuchse der Elektronikbox ein. Schließen Sie jetzt den 3,5mm Klinkenstecker (3) an
der Elektronikbox an. (Die andere, kleinere Buchse wird durch den Klinkenstecker für das Mikrofon
belegt.)
10
Montage der Freisprecheinrichtung
11
Unterschiedliche Anschlüsse des ISO-Steckers am Radio
Ja nach Fahrzeugart variiert die Stift-Belegung der verwendeten ISO-Stecker. Stellen Sie vor
Gebrauch der Umschaltbox zur Vermeidung von Schäden sicher, dass die Belegung passend ist.
Konfiguration I
Wird die Belegung von Stift 7 des ISO-Steckers an die Gleichstrom-Versorgung und Stift 4 an die Zün-
dung angeschlossen, sollten Sie überprüfen, ob der Anschluss wie die unten dargestellte
Zeichnung aussieht.
Konfiguration II
Wird die Belegung von Stift 7 des ISO-Steckers an die Zündung und Stift 4 an die Wechselstromver-
sorgung angeschlossen, sollten Sie überprüfen, ob der Anschluss wie die unten dargestellte Zeichnung
aussieht.
Ziehen Sie nun den (a) bzw. die (b) Lautsprecherstecker von der Lautsprechereinfaßung hinten
am Radio ab. Verbinden Sie den bzw. diese Stecker mit der passenden Einfaßung (3) an der
AC 5120. Verbinden Sie nun den Stecker (4) mit dem Radio.
Abhängig von der Switcherposition (5) wird die Wiedergabe des Gesprächspartners auf den vorderen
rechten Lautsprecher, auf den vorderen linken Lautsprecher oder auf beide vorderen Lautsprecher
ausgegeben. Die Position „OFF“ ist zu wählen, falls Sie die Umschaltbox über die „Phone-IN“ Kabel (6)
an dem Radio anschließen.
Die zweiPhone-In“ Kabel sind entsprechend markiert und müssen passend zu den Anschlüssen
am Radio in die Stecker (blau, grün oder gelb) integriert werden. Beachten Sie bitte diesbezüglich
die Beschreibungen zu der Anschlussbelegung Ihres Autoradios in dessen Betriebsanleitung. Bei
vielen Autoradios läßt sich die Lautstärke (die Wiedergabe des Gespchspartners) über den
Phone-In Eingang und die Auswahl des Lautsprechers regeln.
Umschaltbox Fahrzeug
rot 7 (rot)
blau 4 (blau)
rot 7 (rot)
blau 4 (blau)
Umschaltbox
rot 7 (rot)
blau 4 (blau)
Umschaltbox
Fahrzeug
Fahrzeug
12
Montage der Freisprecheinrichtung
13
In der Betriebsanleitung des Radiogeräts finden Sie die Stiftbelegung für das „Stumm” Signal (mute).
Dieses Signal kann auf einem von drei Kabeln auftreten, die mit mute1, mute2”, „mute3” gekenn-
zeichnet werden.
Verbinden Sie das gelbe Mutekabel der Umschaltbox mit dem korrekten Kabel vom Autoradio:
“mute 1, “mute 2” oder “mute 3”.
ACHTUNG:
Die Plus- und Zündungsleitung werden in dem Gehäuse der Umschaltbox
mit 3A Sicherungen geschützt.
Bedienungsanleitung
7. Einschalten
Falls die Stromversorgung der Freisprecheinrichtung (FSE) ordnungs-
gemäß angeschlossen wurde, aktiviert sich die FSE, nachdem Sie die
Zündung eingeschaltet haben. Das Display schaltet sich ein und ein
kurzer hoher Ton erklingt.
Die FSE versucht sich nun automatisch mit einem Mobiltelefon zu ver-
binden. Im Auslieferungszustand ist noch keine Kennung eines Mobilte-
lefons gespeichert (siehe Kapitel: Herstellen einer Bluetooth-Verbin-
dung). Es erscheint kurz der Hinweis Leere Liste“ und anschließend
„Unterbrochen“ auf dem Display.
Falls schon einmal Mobiltelefone verbunden waren, erscheinen die Ken-
nungen / Namen der Mobitelefone im Display. Diese werden nacheinan-
der von der FSE abgefragt. Falls kein Mobiltelefon automatisch via Blue-
tooth mit der FSE verbunden wurde, ertönt hinweisend darauf in gleich-
mässigen Abständen ein tiefer Ton. Diese automatische Suche können
Sie durch Drücken auf die Taste 3 abbrechen.
Bei erfolgreich hergestellter Verbindung ertönt ein langer hoher Ton.
Der Name des gekoppelten Mobiltelefons wird angezeigt und Daten aus
dem Telefonbuch (SIM-Karte) und dem Adressbuch (Speicher des Tele-
fons) werden zur FSE übertragen. Dies kann, je nach Anzahl der gespei-
cherten Daten, einige Sekunden in Anspruch nehmen. Wird die Syn-
chronisation des Telefonbuchs durch z. B. Drücken der Taste 3 oder
eines eingehenden Anrufes unterbrochen, kann es vorkommen, dass
nicht alle Einträge übermittelt wurden. Hier sollte des Telefonbuch
nochmals manuell synchronisiert werden (siehe Kapitel: Menüfüh-
rung).
Beschreibung der Tasten:
1 = linke Funktionstaste
2 = Anrufannahmetaste
3 = rechte Funktionstaste
4 = Anrufbeendigungstaste
5 = Auswahltaste
6 = Scrolltaste (links/oben/rechts/unten)
mute 1
Autoradio Umschaltbox
mute 2
mute 3
mute (gelb)
Display mit englischer Menüführung
14
Bedienungsanleitung
15
8. Herstellen einer Bluetooth-Verbindung
Möchten Sie zum ersten Mal eine Bluetooth-Verbindung herstellen,
müssen Sie die Bluetooth-Funktion bei Ihrem Mobiltelefon aktivieren
und nach Bluetooth-Geräten suchen lassen. In diesem Fall nach einem
Gerät mit der Bezeichnung „CC 9050...“ oder „CC 9051.... Falls mehrere
Geräte entdeckt worden sind, wählen Sie bitte die FSE aus und geben
die PIN-Nummer 1234 ein. Die Bluetooth-Verbindung (Kopplung) wird
anschließend zwischen Ihrem Mobiltelefon und der FSE hergestellt. Die
FSE unterstützt die Profile „Freisprechen“ und „A2DP“. Bitte stellen Sie
Ihr Mobiltelefon entsprechend ein, bzw. prüfen Sie, ob diese Profile
unterstützt werden.
Läßt sich keine Verbindung aufbauen, überprüfen und aktualisieren Sie
bitte den Stand der Software (Firmware) auf Ihrem Mobiltelefon oder
bei der FSE. Eine Übersicht zu dieser Thematik finden Sie im Internet
unter www.bury.com.
Hinweis:
Im Internet finden Sie eine Übersicht mit einer Vielzahl
von Mobiltelefonen, welche mit dieser FSE getestet wurden.
Beachten Sie aber bitte, das eine von der Liste abweichen-
de Firmware des jeweilig aufgeführten Mobiltelefons dazu
führen kann, das bestimmte Anzeigen und Funktionen nicht
mehr oder nur eingeschnkt möglich sind.
Weiterhin ist es möglich, dass Sie erst die Liste der gekoppelten Geräte
in Ihrem Telefon schen müssen, damit die FSE richtig erkannt und
eine Verbindung aufgebaut werden kann. Lesen Sie sich die Bedie-
nungsanleitung Ihres Mobiltelefons durch, falls Sie Fragen zu dessen
Menüführung, Funktionen und Bedienung haben sollten. Diese weicht
je nach Hersteller und Typ stark voneinander ab.
Hinweis:
Ist der Akku Ihres Mobiltelefons fast leer, läßt sich in vie-
len Fällen ebenfalls keine Bluetooth-Verbindung aufbauen.
Die FSE besitzt einen Speicher, in dem die Kennungen von bis zu 10
Mobiltelefonen abgespeichert werden. Wird ein elfstes Mobiltelefon ge-
koppelt, wird der jeweils älteste Speichereintrag in der FSE gelöscht.
Nach Inbetriebnahme der FSE versucht diese automatisch, sich mit ei-
nem bereits gespeicherten Mobiltelefon im Profile Freisprechen“ zu
verbinden.
9. Trennung einer Bluetooth-Verbindung
Möchten Sie eine Bluetooth-Verbindung aufheben, besteht die glich-
keit, diese komfortabel an der FSE oder von Ihrem Mobiltelefon aus zu
unterbrechen. Des weiteren wird die Verbindung unterbrochen, wenn
Sie sich samt Mobiltelefon zu weit vom Fahrzeug und damit vom Emp-
fangsradius der FSE entfernen. Nach 15 Minuten ohne aktive Bluetooth-
Verbindung (Anzeige im Display: Unterbrochen) schaltet sich die FSE
automatisch aus, falls diese noch mit Spannung versorgt wird. Dies
dient der Schonung der Fahrzeugbatterie. Kommen Sie innerhalb die-
ses Zeitraumes zum Fahrzeug zurück, können Sie manuell eine Kopp-
lung initiieren, indem Sie die Taste 5 für drei Sekunden drücken.
Hinweis:
Beachten Sie bitte, dass die Kapazität des Akkus Ihres
Mobiltelefons bei aktivierter Bluetooth-Funktion schnell
abnehmen kann. chten Sie die Bluetooth-Funktion nicht
mehr nutzen, z. B. beim ngeren Verlassen des Fahrzeugs,
so sollten Sie diese deaktivieren.
10. Menüführung
Hinweis:
Beachten Sie bitte, das einige der nachfolgend beschrie-
benen Funktionen/Anzeigen nur möglich sind, falls diese
durch das Mobiltelefon unterstützt werden!
Nach dem Einschalten der FSE erscheint die Hauptmaske. Diese infor-
miert Sie, ob ein Mobiltelefon per Bluetooth verbunden ist oder nicht.
Hier haben Sie unabhängig vom Verbindungsstatus, durch Drücken der
Taste 5, die Möglichkeit das Hauptmenü aufzurufen. Der jeweils um-
rahmte Eintrag kann durch erneutes Drücken der Taste 5 ausgewählt
werden. Mit den Scrolltasten gelangen Sie in die gewünschte Richtung.
Mit der Taste 3 kann die Menüführung abgebrochen werden, bzw. ein
Schritt zurückgegangen werden.
Display mit englischer Menüführung
16
Bedienungsanleitung
17
Menüstruktur:
-> Anrufliste
-> Verpasste
-> Angerufene
-> Telefonbuch
-> Info
-> Software (Anzeige der Softwarestände der FSE)
-> Hardware (Anzeige der Hardwarestände der FSE)
-> DSP Info (Aktivierungsstatus der Sprachverbesserung
für Mobiltelefon und FSE)
-> Service
-> Farbe
-> Hintergrund
-> Text
-> DSP Setup
-> DSP im Handy (an / aus)
-> DSP im Gerät (an / aus)
-> Update (Durchführen von Firmwareupdates der FSE)
-> Telefonbuch synchronisieren
-> Bluetooth
->Kopplungsliste (Anzeige der schon einmal gekoppelten Geräte)
> Sprache
-> Englisch / Deutsch / Spanisch / Italienisch / Französisch /
Portugiesisch / US Englisch / Niederländisch / Slowakisch/
Polnisch
-> Tag / Nacht
-> Sleep Mode
-> Musik
Anruflisten
Das Menü Anrufliste ist ähnlich der Menüführung aufgebaut, wie Sie
es von Mobiltelefonen gewohnt sind. So lässt sich nachverfolgen wel-
che Nummern Sie gewählt und welche Anrufe Sie verpasst haben.
Telefonbuch
Im Menüpunkt Telefonbuch werden Ihnen die Speichereinträge des
Telefonbuches und des Adressbuches des Mobiltelefons angezeigt. Die
Einträge sind alphabetisch geordnet. Mit der oberen und unteren Scroll-
taste können Sie zu einem Eintrag scrollen. Sind sehr viele Kontakte
gespeichert, ist es sinnvoll, mit der linken oder rechten Scrolltaste die
Suchfunktion nach Buchstaben zu aktivieren.
Sie haben zwei Möglichkeiten um in das Alphabet zu gelangen:
Die weiter vorne liegenden Buchstaben erreichen Sie über die linke
Scrolltaste ausgehend vom Buchstaben „C“. Mit der rechten Scrolltaste
beginnen Sie Ihre Suche vom Buchstaben „Eaus. Wählen Sie einen
Buchstaben (links/rechts) aus und bestätigen Sie diesen mit der Aus-
wahltaste. Die Anzeige der Einträge beginnt dann mit diesem Buchsta-
ben.
Info
Im MeInfo erhalten Sie Informationen über die installierte Software
und Hardware Ihrer Freisprecheinrichtung. Diese Daten sollten Sie no-
tieren, falls Sie Probleme in der Nutzung der FSE mit Ihrem Mobiltelefon
haben und diesbezüglich mit der Bury Hotline Kontakt aufnehmen oder
Sie z. B. die Firmware (das Betriebssystem der FSE) aktualisieren möch-
ten.
Die Aufspielung einer aktuellen Firmware (Infos unter www.bury.com)
kann nützlich sein bei Handywechsel oder wenn neue Funktionen imp-
lementiert worden sind. Die Versionsnummer der Firmware finden Sie
hinter der Bezeichnung der FSE, z. B. „CC 9050 V05f“.
Im Unterpunkt <DSP Info> können Sie erkennen, ob der ‚Digitale Sig-
nalprozessor‘ (DSP) in der FSE und im Mobiltelefon (falls vorhanden)
aktiviert ist. Dies ermöglicht eine Verbesserung der Wiedergabe der
gesprochenen Sprache und unterstützt die Rauschunterdrückung.
Service
Im Menü Service können Sie die Farbeinstellungen für den Hinter-
grund und den Text einstellen. Weiterhin läßt sich im chsten Unter-
punkt die DSP-Funktion im Mobiltelefon und in der FSE an- und aus-
schalten. Über den Unterpunkt Update können Sie die Firmware der
FSE aktualisieren. Eine genaue Beschreibung hierzu und die entspre-
chende Firmware finden Sie im Internet unter www.bury.com. Der
nächste Unterpunkt ermöglicht Ihnen die erneute Synchronisation des
Telefonbuches mit Ihrem Mobiltelefon.
Bluetooth
Im Menüpunkt Bluetooth finden Sie eine Liste mit den Mobiltelefonen,
die schon einmal erfolgreich mit der FSE gekoppelt worden sind. Die
hier gespeicherten Einträge werden nach dem Einschalten der FSE ab-
gefragt, um eine Bluetooth-Verbindung aufzubauen. Aus der Liste kön-
nen Sie Mobiltelefone löschen, falls diese definitiv nicht mehr zum Ein-
satz kommen. Steuern Sie dazu mit den Scrolltasten auf den entspre-
chenden Eintrag und drücken Sie dann die Taste 5. Wählen Sie dann
bitte die Funktion „Löschen“ aus.
Display mit englischer Menüführung
18
Bedienungsanleitung
19
Aus diesem Menü heraus können Sie die Freisprecheinrichtung aber
auch mit Ihrem Mobiltelefon koppeln. Wählen Sie dazu bitte die Funkti-
on Verbinden“ aus. Ein kleines Icon zeigt Ihnen an, in welchen Profil
das Mobiltelefon zuletzt mit der FSE verbunden war. Ein Auto signali-
siert das Profil Freisprechen“ und ein Notenschlüssel das Profil A2DP“.
Sind beide Symbole abgebildet, werden Sie anschließend gefragt, in
welchem Profil Sie das Handy erneut verbinden möchten.
Sprache
Im Menüpunkt Sprache stellen Sie die Menüsprache um. Scrollen Sie
dazu auf die gewünschte Sprache und betätigen Sie dann die Auswahl-
taste. Nach wenigen Sekunden ist die neue Menüsprache geladen.
Tag/Nacht
Je nach aktuellen Lichtverhältnissen haben Sie im Menüpunkt Tag /
Nacht die Möglichkeit, die Helligkeit herab- bzw. heraufzusetzen. Das
ermöglicht eine bessere Ablesemöglichkeit der Daten auf dem Display.
Sleep Mode
Im Menüpunkt Sleep Mode können Sie einen Bildschirmschoner akti-
vieren. Dieser setzt ein, falls Sie 15 Sekunden keine Eingabe bzw. keine
Taste am Monitor betätigt haben. Das Display verdunkelt sich dabei
langsam bis keine Inhalte mehr zu sehen sind. Dies ist unabhängig da-
von, ob ein Mobiltelefon mit der FSE verbunden ist oder nicht. Bei ei-
nem aktiven Telefongespräch ist der Bildschirmschoner deaktiviert.
Musik
Viele Mobiltelefone übertragen den eigenen Klingelton bei einem einge-
henden Anruf auch auf die FSE. Aber es gibt Ausnahmen. Für diesen
Fall können Sie im Menüpunkt Musik einen Signalton festlegen, wel-
cher wiedergegeben werden soll.
Folgende Bedienung ist möglich:
Funktionen bei inaktiver Bluetooth-Verbindung:
Ist kein Mobiltelefon mit der FSE verbunden, erscheint die Meldung
„Unterbrochen“ im Display.
(4) = Herstellung einer Verbindung mit dem zuletzt gekoppelten
Mobiltelefon, Abbruch der Menüführung
(5) = Aktivierung des Menüs / Aufrufen eines Menüpunktes
(6) = Scrollen zwischen den Menüpunkten, Veränderung der Display-
helligkeit (links / rechts) wenn Menü inaktiv
Funktionen bei aktiver Bluetooth-Verbindung - Profil HF:
Ist ein Mobiltelefon mit der FSE verbunden, erscheint dessen BT-Iden-
tifikationsname, die Feldstärke (der Empfang) und die Akkukapazität
des Mobiltelefons sowie der Netzbetreibername und der Lautsrkepe-
gel der FSE auf dem Display (dies ist handyabhängig).
(1) = Aufrufen von Voice-Tags (Sprachwahlfunktion)
(2) = Anrufliste - gewählte Rufnummern
(3) = Bluetooth Verbindung unterbrechen
Um die Sprachwahlfunktionen Ihres Mobiltelefons mit der FSE nut-
zen zu können, ssen Sie vorab Rufnummern in Ihrem Mobiltelefon
entsprechend gekennzeichnet haben. Meistens können Sie Voice-Tags
nur für gespeicherte Rufnummern im Adressbuch Ihres Mobiltelefons
aufnehmen.
Funktionen bei aktiver Bluetooth-Verbindung - Profil A2DP,
MP3 Musikwiedergabe:
Verfügt Ihr Mobiltelefon über das Bluetooth Profil A2DP, dann lassen
sich Musiktitel (z. B. MP3 Dateien) über die FSE in Stereoqualität ab-
spielen. Wichtig ist, das Sie den jeweils angewählten Musiktitel über die
Funktion „Abspielen über...“ auf der FSE wiedergeben. Da die Menüfüh-
rung der Mobiltelefonhersteller sehr unterschiedlich ist, kann die Be-
zeichnung der Auswahl „...Bluetooth-Stereo-Headset“ voneinander ab-
weichen. Nehmen Sie diese Einstellung vor, so wird die Musikwiederga-
be über das an die FSE angeschlossene Soundsystem wiedergegeben.
(2) = Start / Stop der Wiedergabe
(6) = Wechseln der Titel (links = zurück, rechts = vor),
Lautstärkeeinstellung (lauter = oben, leiser = unten)
Anruf bei Musikwiedergabe
Sollte hrend der Wiedergabe eines Musiktitels ein Anruf eingehen, so
wird das Abspielen unterbrochen und graphisch wie akustisch auf den
Anruf hingewiesen. Mit der Taste 1 können Sie das Gespräch anneh-
men, mit der Taste 3 das Gespräch ablehnen. Nach Gesprächsende
wird die Wiedergabe des Musiktitels fortgesetzt. Sollte Ihr Mobiltelefon
diese Funktion nicht automatisch unterstützen, starten Sie bitte die
Wiedergabe des Titels erneut bei Ihrem Mobiltelefon.
Display mit englischer Menüführung
20
21
Index
Introductory information 22
1. General 22
2. Security guidelines 22
Installation of the hands-free car kit 24
3. Scope of supply CC 9050 / CC 9051 24
4. Positioning and mounting 25
5. Connecting the Electronic box 28
6. Installation of the audio switchbox AC 5120 29
Operating guidelines 33
7. Switch-on 33
8. Establishing a Bluetooth connection 34
9. Disconnect a Bluetooth connection 35
10. Menu navigation 35
Further Information 40
11. Service 40
CC 9050 / CC 9051
Stand 02/2008
25.0983.0-04-050208
Irrtum und Änderungen vorbehalten
Weitere Informationen
11. Serviceleistungen
Bei allgemeinen oder technischen Fragen, Anregungen und Kritiken steht Ihnen unser Team jeder Zeit
zur Verfügung:
BURY GmbH & Co. KG
Robert-Koch-Straße 1-7
32584 Löhne
Hotline: +49(0)180 5 - 842 468*
Faxline: +49(0)180 5 - 842 329*
* 0,14 €/Min. aus dem Festnetz der Deutschen Telekom AG
E-Mail: hotline@bury.com
Serviceannahme
Wenn Sie Ihr Gerät oder Zubehör aus Reklamationsgründen einschicken möchten, senden sie das
Produkt am besten direkt an unser Serviceteam:
BURY GmbH & Co. KG
Im Hause DPD Depot 103
Robinienweg
D-03222 Lübbenau
Wir sind für Ihre Vorschläge und Bemerkungen offen.
Hinweise zur Entsorgung von Elektrogeräten
Mit der Umsetzung des Elektro- und Elektronikgesetzes dürfen alte Elektrogeräte seit dem 24. März
2006 nicht mehr zusammen mit dem Hausmüll entsorgt werden. Als Besitzer eines Altgerätes sind Sie
verpflichtet, dieses zu den vorgesehenen Annahme- oder kommunalen Sammelstellen zu bringen.
Elektroaltgeräte werden dort kostenlos angenommen.
22
23
Introductory information
1. General
Dear customer,
Congratulation on purchasing a BURY hands-free car kit. You have cho-
sen a high quality product that is extremely easy to use. All aspects of
BURY production through to sales and service are subject to strict qua-
lity management according to DIN EN ISO 9001. All BURY hands-free
car kits meet CE and e1 security standards. Furthermore, we provide a
two-year warranty on all components.
Please read the operating manual carefully so that you can fully enjoy
your BURY hands-free car kit. If you have any further questions concer-
ning installation or operation of your car kit, please contact your dealer.
He will be happy to give you reliable advice. You can also contact our
hotline. Our phone and fax numbers are listed in the chapter Service at
the end of the operating instructions.
Have a good trip!
2. Security guidelines
Installation – who and where
The installation of this system can be carried out by yourself but please
observe the installation requirements of the automotive manufacturer
(VAS 1978). During the installation, park the car at a place where the
road traffic is not impaired. We recommend to let a specialised work-
shop perform the installation.
Power supply
This system has been designed for the use in vehicles with an on-board
supply system of 12 volts (passenger car). If you intend to install the
device in a vehicle with an on-board supply system of 24 volts (lorry),
please use a voltage converter. If you have queries regarding this sub-
ject, please contact our hotline.
Position, volume
Install the components of the device in the vehicle so that your field of
vision is not impaired and the components are not mounted in the im-
pact zone of the passenger compartment or in the airbag inflation zo-
nes. The removal of coverings (with and without airbags) or compon-
ents of the dashboard requires in some cases special tools and
special knowledge.
Intended use
We shall not be liable for damages or malfunctions due to improper use
of the navigation system. Therefore, do not expose the device to mois-
ture, extreme temperatures or shocks and carefully follow the procedu-
re described in the installation and operating guidelines.
Use while driving
Operate the system only when the situation allows it and when you do
not endanger, harm, constrain, or annoy other road users. The volume
of the device has to be set in a way that exterior noise is still audible.
Faults
Do not commission the device if you detect or assume a defect. In this
case, contact a Bury specialised dealer or our hotline. Improper repair
efforts can be dangerous for you. Therefore, only skilled personnel may
perform inspections.
Important:
The driver is ultimately responsible for the safe operation
and control of their vehicle at all times. You should never
use a hand held phone, including sending or reading text or
picture messages, while driving.
Research indicates that there is a risk to safety when the
driver of a motor vehicle is distracted and using a mobile
phone while driving can be a distriction.
The manufacturer strongly recommends that you use a
hands-free solution when driving.
24
25
3. Scope of supply CC 9050 / CC 9051
Description of the components:
1) Electronics box (CC 9051 with integrated loudspeaker switch-box)
2) Monitor on installation pad, cleaning cloth
3) Connection cable for monitor / electronics box
4) Hook-and-loop fastener
5) Fixing screws for electronics box and rider
6) AC 5120 Loudspeaker switch box
7) Microphone
Please note:
The scope of supply described here refers to the CC 9050. If certain components are ad-
ded or omitted you will receive the corresponding information on a separate enclosure.
Installation of the hands-free car kit
4. Positioning and mounting
Step 1:
First of all, please choose the most convenient position for the monitor
and the installation pad in your vehicle by attaching the monitor / hook-
and-loop fastener to the pad and checking different positions in the
vehicle. After having found a suitable position for the monitor in the
vehicle you can mount / attach the installation pad / hook-and-loop
fastener accordingly. Please use the enclosed cleaning cloth for degre-
asing the surfaces you want to attach the installation pad to.
Important:
When positioning the monitor please take care that the
monitor does not impair the view onto the road, that it will
not be installed in the impact zone of the passenger com-
partment (amongst others in the airbag inflation zones) and
that cables may be laid without any problems.
The installation pad / hook-and-loop fastener can be af-
fixed just once, removing could damage the adhesive area.
In case of high variations in temperatures - depending on
the structure and the features - decolourisations of the sur-
faces can occur during the subsequent utilization.
The cable end with the small molex plug is particularly suited to placing
through small openings in the dashboard section. This allows for the
almost invisible installation of the connection cable.
Lay the cable starting at the position of the electronics box (see step 4)
and then connect it with the monitor.
26
Installation of the hands-free car kit
27
Example of installation 1:
Example of installation 2:
Step 2:
Depending on the vehicle type and its equipment (e.g. airbags), it is
reasonable to install the microphone either at the A-pillar, at the sun
shield or at the roof interior. For details about the equipment features
please refer to the vehicle documents.
Step 3:
Please lay the cables in a way that they do not lie/hang unsecured in
the vehicle and that they may not influence the conducting of the ve-
hicle. When laying a cable, please take care that it is not under traction
stress but that it has some tolerance. Avoid crushing the cable as da-
mages of the insulation can be caused by friction/rubbing.
Step 4:
Install the electronics box at a convenient place in the vehicle. This can
e.g. be behind the radio, in the glove box, or in the centre console.
Please mind that you can access the connections of the box without
difficulty. Before connecting the components to the electronics box you
should branch off the battery for safety reasons. In doing so, take into
account that there might be a radio coding (confer radio manual).
Important:
Please install the electronics box behind a cover or so-
mewhere you can only reach by opening or unfastening a
protective cover / a cover. The terminal box must not hang
loosely in the vehicle.
28
Installation of the hands-free car kit
29
5. Connecting the Electronic box
The additional components of the hands-free car kit are connected to
the electronics box. The following connections are provided:
1 - Power supply
(Please refer to the section describing the connection of the AC 5120)
2 - AUX-Out connection
Stereo music is output at connection 2. Here you can connect the AUX-
In input of your radio (if existent) via adapters available at local retai-
lers. For the connection to the hands-free car kit, the adapter must
have a 3.5 mm stereo jack. Depending on the car radio, the other end
must be selected otherwise. If your radio does not have an AUX-In, you
can use the car CD/MP3 adapter from the Bury accessories programme
to enable the reproduction of music via your radio.
3 - Voice output of the hands-free car kit
(Please refer to the section describing the connection of the AC 5120)
4 - Microphone input
This is where you plug in the microphone jack. After connection 3 has
already been occupied use the rider. This ensures that neither of the
jacks is able to loosen as a result of vibrations.
5 - Monitor jack
Please plug the 9 pole plug of the monitor connection cable into this
jack. Tighten at least one of the two fixing screws hand-tight so that
this plug cannot become unplugged as a result of vibrations.
6. Installation of the audio switchbox AC 5120
With the AC 5120 speaker switchbox, you get the possibility of being able to mute the feedback of your
car radio / CD player etc. and to transfer the voice output of your conversation partner during a tele-
phone call to your vehicle’s speakers. This means that the installation of additional speakers isn‘t re-
quired. If your radio has a mute function, then the vehicle speakers are turned onto mute using the
radio. If your car radio doesn‘t have this function, then the signals will be suppressed by the speaker
switchbox. You can use the AC 5120 through the connections that your BURY hands free car kit offers,
which guarantee voltage supply via molex plugs and also have a speaker output.
If you want to make a telephone call in the hands-free mode, your car radio will be automatically swit-
ched on to mute (for the exact operation of your hands free car kit, please read your HFCK user ma-
nual). The Audio switchbox now uses one or two loudspeakers in your car for the telephone conversa-
tion, even if your radio is switched off. This function will be automatically activated after the installati-
on of the unit, there are no subsequent manual settings required.
Some mobile phones do not support a radio mute function. Please read your telephone user manual
for more details. You can find out more detailed information at your specialist retailer, in the internet
under www.bury.com, or over our telephone hotline.
After checking that all the cable lengths are sufficient, decide where you are able to attach the Audio
switchbox. Now secure the Audio switchbox so that it isn’t able to flap about and/or rattle against other
parts of your vehicle.
Connect the white power out cable connector (1) of your Audio switchbox to the power supply socket
of your hands-free kit. Now connect the audio switchbox plug (3) to the hands-free car kit. (The other,
smaller box is used by the audio switchbox plug for the microphone.)
30
Installation of the hands-free car kit
31
Now disconnect the (a) and/or the (b) loudspeaker connector from the speaker socket on the radio at
the back. Connect this connector with the suitable socket (3) on the AC 5120. Now connect the plug
(4) with the radio.
Depending on the switcher position (5), the voice of your conversation partner will be fed back through
either the front right speaker, the front left speaker, or through both of the front loudspeakers. The
‘OFF’ position is to be selected if you connect the switchbox to the radio using the ‘Phone-IN’ cable
(6).
The two ‘Phone-Incables are marked accordingly and must be plugged into the appropriate connec-
tions on the radio (blue, green or yellow). In this regard, please refer to the instructions concerning the
connection configuration of your car radio in your car radio handbook. In lots of radios, the volume
level (feedback of your conversation partner) can be controlled via the phone input and the selection
of the loudspeaker.
Different connections of the ISO plug on the radio
The layout of the pins on the ISO plug used in a car depends on the type of car. Before using the
switchbox, you should make sure that the connections are correct in order to prevent possible damage
to the device.
Configuration I
If the assignment of pin 7 of the ISO plug is connected to the DC Power Supply, and pin 4 is connected
to the ignition, you should check if the connection looks like the connection presented on the drawing
below.
Configuration II
If the assignment of pin 7 of the ISO plug is connected to the ignition, and pin 4 is connected to the
DC power supply, the connection of the cables should look like the connection presented on the dra-
wing below.
Switchbox Vehicle
red 7 (red)
blue 4 (blue)
red 7 (red)
blue 4 (blue)
Switchbox
red 7 (red)
blue 4 (blue)
Switchbox
Vehicle
Vehicle
32
Installation of the hands-free car kit
33
In the operating manual of the radio device, you can find the pin assignment for the mute” signal. This
signal can occur on one of three cables marked with “mute1, “mute2”, or “mute3”.
Connect the yellow “mute” cable to the switchbox using the correct cable from the car radio: “mute 1,
“mute 2” or “mute3”.
ATTENTION:
The positive wires and ignition wires are protected in the casing of the switchbox with
3A fuses.
Operating guidelines
7. Switch-on
If the power supply of the hands-free car kit (HFCK) is connected pro-
perly, the HFCK is activated after having started the ignition. The dis-
play is switched on and a short high sound is audible.
The HFCK now tries to connect automatically to a mobile phone. In the
delivery status an identification of a mobile phone has not been saved.
(cf. chapter: Establishing a Bluetooth connection). The note empty
list“ and then „disconnected“ are displayed shortly.
If mobile phones were already connected, the identifications / names of
the mobile phones will appear on the display. These are queried by the
HFCK successively. If no mobile phone was connected to the HFCK
automatically via Bluetooth, a deep sound is audible in regular intervals
indicating this. You can stop this automatic search by pressing key 3.
In case of a successfully established connection, a long high sound is
audible. The name of the connected mobile phone is displayed and data
from the phone book (SIM-card) and from the address book (telephone
directory) are then transmitted to the HFCK. Depending on the number
of data stored, this could take some seconds. If the synchronisation of
the phone book is interrupted, e.g. by pressing key 3 or by an incoming
call, it may occur that not all entries have been transmitted. In this
case, the phone book should be synchronised manually (cf. chapter:
menu navigation).
Key specifications:
1 = left function key
2 = call answering key
3 = right function key
4 = call termination key
5 = selection key
6 = scroll key (left/top/right/bottom)
Display with English menu navigation
mute 1
radio device Switchbox
mute 2
mute 3
mute (yellow)
34
Operating guidelines
35
8. Establishing a Bluetooth connection
If you wish to establish a Bluetooth connection for the first time, you
have to activate the Bluetooth function of your mobile phone and
search for Bluetooth devices. In this case, search for a device labelled
„CC 9050...or „CC 9051...“. If several devices were identified, please
select the HFCK and enter the PIN number 1234. The Bluetooth con-
nection (pairing) will then be established between your mobile phone
and the HFCK. The HFCK supports the profiles hands-free operation“
and A2DP. Please set your mobile phone accordingly or check whe-
ther these profiles are supported.
If it is not possible to establish a connection, please check and update
the software release (firmware) of your mobile phone or of the HFCK.
You will find an overview dealing with this subject on the Internet at
www.bury.com.
Please note:
In the internet you can find an overview with a large num-
ber of mobile telephones which have been tested with this
hands-free car kit. Please note, however, the use of firm-
ware which deviates from the list and is installed on a listed
mobile telephone can lead to the fact that certain displays
and functions are no longer possible or only possible to a
limited extent.
In addition it is possible that you must delete all devices connected to
your mobile phone first in order to enable a correct identification of the
HFCK and the establishment of a connection. If you have queries regar-
ding the menu navigation, functions and operation of your mobile pho-
ne, please refer to the operating guidelines of your mobile phone. De-
pending on the manufacturer and type, this can differ considerably
between phones.
Note:
If the rechargeable battery of the mobile phone is low,
it is sometimes not possible to establish a Bluetooth con-
nection.
The HFCK has a memory for the storage of the identification of up to 10
mobile phones. In case an eleventh mobile phone is connected, the
oldest entry in the HFCK memory will be cancelled. After the commis-
sioning of the HFCK it automatically tries - „hands-free operation“ pro-
file - to connect with a mobile telephone already saved.
9. Disconnect a Bluetooth connection
If you wish to cancel a Bluetooth connection, you can either disconnect
it conveniently at the HFCK or at your mobile phone. In addition, the
connection is disconnected, if you move too far away from the vehicle
while taking your mobile phone with you and thus leave the reception
radius of the HFCK. After 15 minutes without active Bluetooth connec-
tion (information on the display: interrupted), the HFCK automatically
disconnects if it is still supplied with power. This is to save the vehicle
battery. If you return to the vehicle within this time, you can manually
initialise a pairing by pressing key 5 for 3 seconds.
Please note that the capacity of your mobile phone‘s storage battery
can quickly decrease when the Bluetooth function is active. If you do
not want to use the Bluetooth function anymore, e.g. if you leave the
vehicle for a longer period, it is recommended to deactivate this func-
tion.
10. Menu navigation
Note:
Please note that some of the functions/displays specified
subsequently are only possible if they are supported by the
mobile phone!
After switching on the HFCK the main menu is displayed. It informs you
whether a mobile telephone is connected via Bluetooth or not. Regard-
less of the connection state, you can call the main menu here by pres-
sing key 5. The entry, marked with a bar, can be selected by pressing
key 5 once more. The scroll keys enable you to select the desired direc-
tion. With key 3 you can interrupt the menu navigation or return to the
previous step.
Display with English menu navigation
36
Operating guidelines
37
Display with English menu navigation
Menu structure:
-> Call list
-> missed
-> dialled
-> Phone book
-> Info
-> software (display of the HFCKs software status)
-> hardware (display of the HFCK‘s hardware status)
-> DSP info (activation status of the voice improvement
for mobile telephone and HFCK)
-> Service
-> colour
-> background
-> text
-> DSP setup
-> DSP in the mobile telephone (on / off)
-> DSP in the device (on / off)
-> update (performance of firmware updates of the HFCK)
-> synchronise telephone book
-> Bluetooth
-> pairing list (display of the devices already connected before)
-> Language
-> English / German / Spanish / Italian / French /
Portuguese / US English / Dutch / Slovak /
Polish
-> Day / Night
-> Sleep Mode
-> Music
Call Lists
The structure of the menu Call List is similar to the structure of the
menu navigation, as you are used to from mobile telephones. It is thus
possible to trace the numbers dialled and the calls missed.
Phone book
In the menu item Phone book the memory entries of the mobile
telephone‘s phone book and address book are displayed. The entries
are in alphabetical order. With the upper and lower scroll keys you can
scroll to an entry. If many contacts are stored, it makes sense to acti-
vate the search function with the left or right scroll key according to
characters. Select a character (left/right) and confirm it with the selec-
tion key. The entries are displayed starting with this character.
You have two possibilities to access the alphabet:
The characters at the beginning can be accessed via the left scroll key
starting from character „C“. With the right scroll key you start searching
at character E. Select a character (left/right) and confirm this with the
selection key. Entries are then displayed starting from this character.
Info
In the menu Info you receive information on the installed software and
hardware of your hands-free car kit. You should write down these data
if you have problems in using the HFCK with your mobile telephone and
contact the Bury hotline or if you e.g. wish to update the firmware (the
operating system of the HFCK).
It can be useful to update the firmware (information at www.bury.com)
in case of a mobile phone change or when new functions have been
implemented. You can find the version number of the firmware after
the name of the HFCK, e.g. „CC 9050 V05f“. In the sub-menu <DSP
Info> you can see whether the digital signal processor(DSP) in the
HFCK and in the mobile telephone (if available) is activated. This enab-
les an improvement of the reproduction of the spoken language and
supports the noise suppression.
Service
In the menu Service you can set the colours for the background and
the text. Furthermore, the next sub-item enables you to switch on and
off the DSP-function in the mobile telephone as well as in the HFCK.
You can update the firmware of the HFCK via the sub-item update. A
detailed description and the corresponding firmware can be had on the
Internet at www.bury.com. The next sub-item enables you to again
synchronise the phone book with your mobile phone.
Bluetooth
Under the menu item Bluetooth you will find a list of the mobile tele-
phones which have already been successfully paired with the HFCK.
After switching on the HFCK, the entries saved here are scanned for
establishing a Bluetooth connection. You can delete mobile telephones
from the list if they are definitively no longer used. Select the respecti-
ve entry with the scroll keys and then press key 5. Please select the
function ‚delete‘.
Display with English menu navigation
38
Operating guidelines
39
Further Information
This menu enables you to connect the hands-free car kit to your mobi-
le telephone. Please select the function ‚connect‘. A small icon indicates
the profile the mobile telephone was connected to the HFCK last. A car
signalises the profile „hands-free“ and a grading key the profile A2DP.
If both symbols are displayed, you will be subsequently asked to select
the profile you want to connect the mobile telephone again.
Language
In the menu item Language you can change the menu language.
Therefore scroll to the required language and then press the selection
key. After a few seconds the new menu language is loaded.
Day/Night
As the lighting conditions vary according to the time of the day, you
have the possibility to reduce or increase the brightness under the
menu item Day / Night. This enables a better legibility of data on the
display.
Sleep Mode
In the menu item Sleep Mode you can activate a screen saver. It ap-
pears if you have not made any entry or pressed any key at the monitor
for 15 seconds. The display thereby darkens slowly until no contents
are visible, regardless if a mobile telephone is connected to the HFCK
or not. During an active phone call, the screen saver is deactivated.
Music
In case of an incoming call many mobile telephones transmit the proper
ring tone to the HFCK, but there are also exceptions. In this case, you
can configure a signal tone to be reproduced under the menu item
Music.
The following operation is possible:
Functions while Bluetooth connection is inactive:
If no mobile telephone is connected to the HFCK, the notice ‚disconnec-
ted‘ appears on the display.
(4) = Establishment of a connection with the mobile telephone connec
ted last, interrupt the menu navigation
(5) = Activation of the menu / calling up a menu item
(6) = Scrolling between the menu items, modification of the display
brightness (left / right) when menu inactive
Other keys = no function
Functions while Bluetooth connection is active – profile HF:
If a mobile telephone is connected to the HFCK, its BT identification
name is displayed. The field strength equally appears (the reception) as
well as the capacity of the storage battery, the name of the network
provider and the volume level of the HFCK.
(1) = calling of voice tags (voice tag function)
(2) = call list - previously dialled telephone numbers
(3) = interrupt Bluetooth connection
In order to be able to use the voice tag functions of your mobile te-
lephone with the HFCK, you must have marked the telephone numbers
in your mobile telephone accordingly beforehand. In most cases you
can only adopt voice tags for numbers memorised in the address book
of your mobile telephone.
Functions while Bluetooth connection is active - profile A2DP,
Play MP3:
If your mobile telephone possesses the Bluetooth profile A2DP, you can
play music (e.g. MP3 files) in stereo quality via the HFCK. It is important
to play the music title selected respectively on the HFCK via the func-
tion ‚play via...‘. As the menu navigation of the manufacturers of mobile
telephones differs considerably, the designation of the selection ‚...
Bluetooth-stereo-headsetmay vary. If you establish this setting, the
music is played via the sound system connected to the HFCK.
(2) = start / stop the reproduction
(6) = change the title (left = back, right = forward),
volume adjustment (louder = top, lower = bottom)
ncoming call while playing MP3
If a call is received while music is played, the reproduction is interrup-
ted and the call is indicated graphically and acoustically. With key 1 you
can accept the call, with key 3 you can reject the call. After termination
of the call, the reproduction of music is continued. If your mobile tele-
phone does not automatically support this function, please restart the
reproduction of the music title at your mobile phone.
Display with English menu navigation
40
41
Version 02/2008
25.0983.0-04-050208
Subject to change. Errors and ommissions excepted
CC 9050 / CC 9051
Table de matières
Introduction 42
1. Géralités 42
2. Consignes de sécuri 42
Montage du kit mains-libres 44
3. Étendue de la livraison CC 9050 / CC 9051 44
4. Implantation et fixation 45
5. Branchement du btier électronique 48
6. Installation de la bte de commutation AC 5120 49
Mode d‘emploi 53
7. Mise en service 53
8. Etablir une connexion Bluetooth 54
9. Interrompre une connexion Bluetooth 55
10. Menus 55
Informations suppmentaires 60
11. Service après-vente 60
11. Service
In case of general or technical queries, suggestions and comments, please do not hesitate to contact
our team at any time:
BURY GmbH & Co. KG
Robert-Koch-Straße 1-7
32584 Löhne
Hotline: +49(0)180 5 - 842 468*
Faxline: +49(0)180 5 - 842 329*
* 0.14 €/min. Deutsche Telekom AG landline
E-Mail: hotline@bury.com
Service desk:
In case of complaints, please return the product directly to our service desk:
BURY GmbH & Co. KG
Im Hause DPD Depot 103
Robinienweg
D-03222 Lübbenau
Suggestions and feedback are always welcomed.
Notes on the disposal of electronic devices
In compliance with the German law on electric and electronic devices, old electric and electronic de-
vices must not be disposed of together with domestic garbage in Germany, beginning March 24, 2006.
If you want to dispose of an old electric or electronic device you are required to take it to a designated
collection point (“point of acceptance” or “communal collection point). There old electric and electro-
nic devices are taken back free of charge.
Further Information
42
43
Introduction
1. Généralités
Chère cliente, cher client,
Vous venez d‘acheter un kit mains-libres de la marque BURY et avez
ainsi choisi un produit de haute qualité ainsi que de confort d‘utilisation
le plus élevé. BURY applique un système de gestion de la qualité rigou-
reux selon la norme DIN EN ISO 9001 pour les achats, la production, la
distribution et le service après-vente. Tous les kits mains-libres BURY
sont conformes aux normes de curiCE et e1. Nous vous assurons
en plus une garantie de deux ans sur toutes les pièces.
Pour profiter pleinement du confort de votre appareil BURY, veuillez lire
attentivement ce mode d‘emploi. Pour tout renseignement complémen-
taire sur le montage ou l‘utilisation de votre appareil, consultez votre
revendeur. Celui-ci saura vous conseiller de manière fiable et trans-
mettre vos remarques et vos propositions au fabricant. Ou contactez
directement notre hotline. Les numéros de léphone et de lécopie de
ce service se trouvent sur la page sous l’entrée «Service».
Nous vous souhaitons un bon voyage !
2. Consignes de sécurité
Installation – où et par qui
Vous pouvez installer vous-même le système de kit-main libres. Re-
spectez toutefois les consignes de montage du fabricant du véhicule
(VAS 1978). Pour l’installation, garez votre véhicule de manière à ce
qu’il ne gêne pas la circulation. Nous vous recommandons de vous
adresser à un garage professionnel pour l’installation du système.
Alimentation électrique
Ce système est prévu pour des véhicules alimentés en 12 volts (voitu-
res). Si vous envisagez d’installer l’appareil dans un véhicule alimenté
en 24 volts (camion), veuillez utiliser un convertisseur de tension. Notre
Hotline se tient à votre disposition pour toute question à ce sujet.
Implantation, volume sonore
Les composants du système ne doivent pas vous gêner la vue, ni se
trouver dans une zone de l’habitacle à risques d’impact pour les passa-
gers ou dans la zone de déploiement des airbags. Pour retirer certains
revêtements (avec ou sans airbags) ou des composants du tableau de
bord, des outils ou des connaissances spécifiques sont nécessaires
dans certains cas.
Utilisation appropriée
Nous ne sommes pas responsables des dommages ni anomalies causés
par une installation ou utilisation inappropriée du système. Conservez
donc votre appareil à l’abri de l’humidité, des températures extrêmes et
des chocs, et suivez scrupuleusement les étapes définies dans la notice
de montage et d‘utilisation.
Prudence sur la route
Utilisez le système uniquement si létat de la circulation le permet. Ne
mettez pas en danger, ne portez pas tort, ne nez pas, et n’incommodez
pas les autres usagers. Le volume sonore de l’appareil doit être glé de
sorte à ce que les bruits extérieurs puissent encore être perçus.
En cas d‘anomalie
N’allumez pas l’appareil si vous constatez ou supposez un défaut. Dans
ce cas, rendez-vous chez un revendeur Bury ou appelez notre Hotline.
Toute réparation effectuée par une personne non qualifiée peut être
source de danger pour vous. C’est pourquoi les parations doivent être
effectuées uniquement par du personnel qualifié.
Important :
Le conducteur est responsable à tout moment de con-
duire et maîtriser son hicule dans le respect des règles
de sécurité. Au volant, il est interdit dutiliser un téléphone
mobileet en particulier les fonctions Ecrire ou lire un SMS
/ MMS.
Des études ont montré que toute inattention constitue
un risque pour votre curité. Lutilisation d‘un téléphone
mobile au volant peut être à lorigine dune inattention de
ce type.
Le fabricant vous informe formellement quil est préfé-
rable de ne pas utiliser un kit mains-libres pendant vos dé-
placements.
44
45
Montage du kit mains-libres
4. Implantation et fixation
1ère étape :
Choisissez d‘abord l‘emplacement le plus adapté de votre véhicule pour
installer le moniteur sur son pied et le fixer dans différentes positions à
l‘intérieur du véhicule.
Une fois que vous avez trouvé un emplacement approprié pour le mo-
niteur, vous pouvez y installer ou fixer le pied / fermeture velcro. Utili-
sez le chiffon nettoyant inclus pour dégraisser la surface où vous fixe-
rez le pied.
Important :
Lors du positionnement, veillez à ce que le moniteur ne
gêne pas la visibilité en direction de la route, à éviter ab-
solument les zones de lhabitacle présentant des risques
dimpact pour les passagers (notamment les zones de
déploiement des airbags) et à une pose simple des câbles.
L‘adhésif du pied / fermeture velcro est à usage unique.
En lecollant ulrieurement, vous risquez dabîmer la
surface adhésive. Par ailleurs, dimportantes différences de
température au cours de l’utilisation peuvent entraîner une
décoloration de la surface selon le matériel et la structure.
La petite prise Molex à l‘extrémité du câble permet de le poser sans
difficultés à travers de minces ouvertures dans le tableau de bord. Ain-
si, le câble de raccordement peut être installé de manière quasi invisib-
le.
Posez le câble en partant de la position du boîtier électronique (4ème
étape), puis reliez le avec l‘écran:
3. Étendue de la livraison CC 9050 / CC 9051
Description des composants :
1) Boîtier électronique (CC 9051 avec un boîtier de commutation intégré pour le haut-parleur)
2) Moniteur sur pied de montage, chiffon nettoyant
3) Câble de raccordement moniteur / boîtier électronique
4) Fermeture velcro
5) Vis de fixation pour boîtier électronique
6) AC 5120 Boîte de commutation
7) Microphone
Note:
Le volume de livraison indiqué ici concerne le CC 9050. En cas d‘ajout ou de suppression
de composants, nous vous en informons via une fiche annexe séparée.
46
Montage du kit mains-libres
47
Scma d‘installation 1:
Scma d‘installation 2:
2ème étape :
En fonction du type de véhicule et de l‘équipement (par ex. airbags), il
est préférable d‘installer le microphone soit dans le montant latéral,
dans la visière pare-soleil ou au toit. Pour plus de détails sur les carac-
téristiques d‘équipement, veuillez consulter les documents du hicu-
le.
3ème étape :
Fixez les câbles de sorte à ce qu‘ils ne pendent pas /ne traînent pas
dans le véhicule et qu‘ils ne puissent pas perturber la conduite du véhi-
cule. Lors de la pose d’un câble, veillez à laisser suffisamment de jeu
afin que le câble ne soit pas trop tendu. Evitez d‘entortiller les câbles,
ce qui pourrait provoquer des dommages à l‘isolation suite à des frot-
tements /frictions.
me étape :
Installez le boîtier électronique à un endroit adéquat dans le hicule,
par exemple derrière la radio, dans la boîte à gants ou dans la console
centrale. Veillez à ce que les branchements du boîtier soient aisément
accessibles. Avant de brancher les composants au boîtier électronique,
veuillez débrancher la batterie pour des raisons de sécurité. Attention :
la radio posde éventuellement un code spécifique (cf. mode d’emploi
de la radio).
Important :
Installez le boîtier électronique derrre un retement ou
à un endroit auquel l‘accès n‘est possible qu‘après ouverture
/ blocage dune protection / dun cache. Le boîtier élec-
tronique ne doit pas traîner à découvert dans le véhicule.
48
Montage du kit mains-libres
49
5. Branchement du btier électronique
Les autres composants du kit mains-libres doivent être branchés au
boîtier électronique. Les connecteurs suivants sont disponibles:
1 - Alimentation
(voir chapitre: branchement de la AC 5120)
2 - Sortie AUX-Out
La musique en qualité stéréo est diffusée par le connecteur 2. Vous
pouvez y connecter l’entrée Aux-In de votre radio (si disponible) avec
un adaptateur disponible dans le commerce spécialisé. L’adaptateur
doit posséder une fiche stéréo 3,5 mm pour être raccordé au kit mains-
libres. En fonction des autoradios, il faudra peuttre choisir une autre
extrémité. Si votre radio ne dispose pas d’un Aux-In, vous pouvez utili-
ser l’adaptateur Car CD/MP3 du programme accessoires de Bury pour
permettre une diffusion de la musique par votre radio.
3 - Sortie vocale du kit mains-libres
(voir chapitre: branchement de la AC 5120)
4 - Entrée microphone
Connectez à cet emplacement le jack du microphone. Placez le taquet
même lorsque le connecteur 3 n‘est plus libre afin que les deux jacks ne
se détachent pas sous l‘effet des vibrations.
5 - Prise femelle du moniteur
Branchez dans cette prise femelle la fiche 9 pôles du câble de raccor-
dement du moniteur. Serrez au moins une des deux vis de fixation à la
main pour empêcher cette fiche de glisser sous l‘effet des vibrations.
6. Installation de la boîte de commutation AC 5120
La boîte de commutation AC 5120 pour haut-parleurs vous permet de baisser le volume de votre radio/
lecteur CD etc. pour diffuser la voix de votre correspondant téléphonique sur les haut-parleurs de
votre autoradio. Il n’est ainsi plus nécessaire d’installer un haut-parleur supplémentaire. Si votre radio
est équipée d’une fonction de sourdine, c’est la radio qui coupe le son des haut-parleurs du véhicule
(fonction Mute). Si votre autoradio ne dispose pas d’une telle fonction, c’est la boîte de commutation
pour haut-parleurs qui s‘en charge.
Les bornes de raccordement de lAC 5120 permettent de l‘utiliser sur les kits mains-libres BURY, qui
garantissent une tension d’alimentation par fiche Molex et possèdent une sortie de haut-parleurs. Lors
d’une conversation téléphonique en mode mains libres, votre autoradio est automatiquement mis en
sourdine (veuillez consulter le mode d’emploi du kit mains libres pour savoir comment l’utiliser). La
boîte de commutation utilise un ou deux haut-parleurs de l’autoradio, même lorsque la radio n’est pas
allumée. Ces fonctions sont automatiquement activées par l’installation de la boîte et ne doivent pas
faire l’objet d’une sélection ou d’un réglage supplémentaire.
Certains téléphones mobiles sont incompatibles avec la fonction de mise en sourdine de l’autoradio.
Pour en apprendre davantage, veuillez lire intégralement le mode d’emploi de votre téléphone mobile.
Pour de plus amples informations, adressez-vous à votre revendeur, consultez le site Internet
www.bury.com ou contactez notre hotline par téléphone.
Après avoir vérifque tous les câbles sont de bonne longueur, cidez de l‘endroit vous pourrez
placer la boîte de commutation. Fixez ensuite la boîte de commutation de manière à ce qu’elle ne
puisse pas tomber ou heurter d’autres objets.
Branchez maintenant le connecteur de sortie d’alimentation de sortie (blanc) de la boîte de commuta-
tion (1) dans la prise d’alimentation de la boîte électronique. Branchez à présent la fiche à jack de
3,5mm (3) à la boîte électronique (l’autre prise plus petite est destinée à la fiche à jack du micro).
50
Montage du kit mains-libres
51
Différents raccordement du connecteur ISO à la radio
L’attribution des broches du connecteur ISO utilisé varie en fonction du modèle de véhicule. Avant
d’utiliser la boîte de commutation, assurez-vous que l’attribution des broches est adaptée afin
d’éviter des dommages.
Configuration I
Si la broche 7 du connecteur ISO est raccordée à l‘alimentation en courant continu et la broche 4 à
l’allumage, veuillez vérifier que le raccordement est identique au schéma représenté ci-dessous.
Configuration II
Si la broche 7 du connecteur ISO est raccordée à l’allumage et la broche 4 à l’alimentation en courant
alternatif, veuillez vérifier que le raccordement est identique au schéma représenté ci-dessous.
Retirez la fiche de haut-parleurs (a) ou (b) de la prise correspondante à l‘arrière de la radio. Raccordez
cette ou ces fiches à la prise correspondante (3) sur l’AC 5120. Branchez à présent la fiche (4) à la
radio.
En fonction de la position du switcher (5), la voix de l’interlocuteur sera restituée par le haut-parleur
avant droit, le haut-parleur avant gauche ou les deux haut-parleurs avant. Optez pour la position « OFF
» si la boîte de commutation est branchée à la radio via le câble « Phone-IN » (6).
Les deux câbles « Phone-In » sont marqués en conséquence et doivent être insérés dans les
fiches (bleu, vert ou jaune) correspondant aux raccords sur la radio. A cet égard, nous vous pri-
ons de tenir compte des descriptions concernant l’attribution des raccords de votre autoradio
dans le mode d’emploi correspondant. Sur de nombreux autoradios, il est possible de gler le
volume (de la voix de linterlocuteur) via l’entrée Phone-In et la sélection du haut-parleur.
Boîte de commutation Véhicule
rouge 7 (rouge)
bleu 4 (bleu)
rouge 7 (rouge)
bleu 4 (bleu)
Boîte de
commutation
rouge 7 (rouge)
bleu 4 (bleu)
Boîte de
commutation
Véhicule
Véhicule
52
Montage du kit mains-libres
53
Consultez le mode d’emploi de l’autoradio pour connaître la broche attribuée au signal « sourdine »
(mute). Ce signal peut apparaître à l’un des trois câbles portant les identifications « mute1 »,
« mute2 », « mute3 ».
Raccordez le câble jaune de sourdine de la boîte de commutation au bon câble de l’autoradio :
« mute 1 », « mute 2 » ou « mute 3 ».
ATTENTION :
Les lignes plus et d’allumage sont protégées par des fusibles 3A dans le btier de la
boîte de commutation.
Menu en version anglaise
Mode d‘emploi
7. Mise en service
Si l’alimentation électrique du kit mains-libres a été reliée en bonne et
due forme, le kit mains-libres s’active après avoir mis le contact. L’écran
s’allume et un bref signal sonore aigu est émis.
Le kit mains-libres tente alors de se connecter automatiquement avec
un téléphone portable. A la livraison, aucun nom d‘identification de té-
léphone portable n‘est encore sauvegardé dans le kit mains-libres (voir
chapitre : Etablir une connexion Bluetooth). L‘écran affiche brièvement
le message „ Liste vide“ puis „Interrompu“.
Si le kit mains-libres a déjà é connec à des téléphones mobiles,
leurs identifications / noms s‘affichent à l‘écran. Le kit mains-libres in-
terroge l‘une après l‘autre ces identifications. Si aucun téléphone mobi-
le n‘a été connecautomatiquement par liaison Bluetooth, un signal
grave retentit à intervalles guliers en guise d‘avertissement. Vous
pouvez interrompre cette recherche automatique en appuyant sur la
touche 3.
Si le kit mains-libres réussit à établir la connexion, un long signal aigu
retentit. Le nom du téléphone mobile connecté s‘affiche et les données
du pertoire (carte SIM) et du carnet d‘adresses (mémoire du télépho-
ne) sont transmises au kit mains-libres. Selon le volume des données
sauvegardées, cette opération peut prendre quelques secondes. Si la
synchronisation du pertoire est interrompue, p. ex. en appuyant sur
la touche 3 ou parce qu‘un appel entrant est reçu, les enregistrements
risquent de ne pas être tous transférés. Dans ce cas, il faudra synchro-
niser une nouvelle fois le répertoire en mode manuel (voir chapitre :
Navigation dans le menu).
Description des touches :
1 = Touche de fonction gauche
2 = Touche de réception d‘appel
3 = Touche de fonction droite
4 = Touche de fin d‘appel
5 = Touche de sélection
6 = Touche de défilement (gauche / haut / droite / bas)
mute 1
l’autoradio Boîte de
commutation
mute 2
mute 3
mute (jaune)
54
Mode d‘emploi
55
Menu en version anglaise
8. Etablir une connexion Bluetooth
Pour établir une première connexion Bluetooth, vous devez activer la
fonction Bluetooth sur votre léphone portable et rechercher les ap-
pareils compatibles Bluetooth. Dans ce cas, vous devez effectuer la
recherche pour un appareil avec désignation „CC 9050…“ ou „CC
9051…“. Si plusieurs appareils ont été tecs, lectionnez le kit
mains-libres et indiquez le numéro PIN 1234. La connexion Bluetooth
(couplage) sera ensuite établie entre votre portable et le kit mains-lib-
res. Le kit mains-libres supporte les profils „mains-libres“ et A2DP.
Veuillez régler votre téléphone portable en conquence ou rifier si
votre téléphone portable supporte ces profils.
Si aucune connexion ne peut être établie, contrôlez et mettez à jour le
logiciel (microprogramme) de votre léphone portable ou de votre kit
mains-libres. Pour de plus amples informations sur ce thème, veuillez
consulter le site Internet www.bury.com.
Remarque :
Vous trouverez sur Internet un aperçu des divers lé-
phones mobiles ayant é testés avec ce kit mains-libres.
Veuillez cependant noter que lutilisation dun micrologiciel
dun téléphone mobile indiqué sur la liste ne figurant pas sur
celle-ci peut avoir pour conséquence que certains afficha-
ges et fonctions ne sont plus possibles ou le sont dans une
mesure limitée.
En outre, il est possible que vous deviez d‘abord effacer dans votre té-
léphone la liste des léphones reliés afin que le kit mains-libres soit
vraiment reconnu et qu‘une connexion puisse être établie. Pour toute
question sur les menus, fonctions et l‘utilisation de votre téléphone
portable, veuillez lire le mode d‘emploi. L‘utilisation diffère considérab-
lement selon les fabricants et les types de téléphone.
Remarque :
Si la batterie de portable est presque à plat, il es souvent
impossible d’établir une connexion Bluetooth.
Le kit mains-libres possède une mémoire qui peut contenir les caracté-
ristiques de jusqu‘à 10 téléphones portables. Si un onzième téléphone
portable est relié, les données les plus anciennes en mémoire dans le
kit mains-libres seront alors effacées. Après la mise en service du kit
mains-libres, ce dernier tente de se connecter avec un téléphone por-
table déjà sauvegardé dans le profil „Mains-libres“.
9. Interrompre une connexion Bluetooth
Si vous souhaitez interrompre une connexion Bluetooth, vous avez la
possibilité de le faire en tout confort à partir de votre kit mains-libres ou
à partir de votre téléphone portable. De plus, une connexion sera éga-
lement interrompue si vous vous trouvez avec votre léphone portable
trop loin du véhicule et que vous vous éloignez ainsi de la zone de -
ception du kit mains-libres. Lorsque la connexion Bluetooth reste inac-
tive plus de 15 minutes (Message à l‘écran : Interrompu), le kit mains-
libres s‘éteint automatiquement s‘il est encore alimenté en tension. Ce
mode d‘économie d‘énergie ménage la batterie du véhicule. Si vous
revenez à votre véhicule dans ce laps de temps, vous pouvez lancer une
connexion manuelle en appuyant pendant trois secondes sur
la touche 5.
Remarque :
La capacité des batteries de votreléphone portable
peut diminuer rapidement si la fonction Bluetooth est acti-
e. Si vous n‘utilisez pas la fonction Bluetooth pendant une
longue période, par ex. lors dune absence prolongée hors
du hicule, vous devez désactiver cette fonction.
10. Menus
Remarque :
Certaines fonctions ou certains affichages décrits ci-des-
sous sont possibles uniquement s‘ils sont supportés par le
téphone portable !
Après la mise en service du kit mains-libres, le masque principal appa-
raît. Ce dernier vous informe si un téléphone portable est relié par
Bluetooth ou non. Vous avez la possibilité ici, indépendamment de vot-
re statut de connexion, de consulter le menu principal en appuyant sur
la touche 5. L’option respectivement encadrée peut être sélectionnée
en appuyant une nouvelle fois sur la touche 5. Les touches de file-
ment servent à se déplacer dans la direction voulue. La touche 3 per-
met d‘interrompre la lection des menus ou de revenir en arrière à
l‘écran précédent.
56
Mode d‘emploi
57
Menu en version anglaise
Structure des menus :
-> Liste d‘appels
-> Appels perdus
-> Correspondants appelés
-> Répertoire
-> Info
-> Logiciel (Affichage des versions logicielles du kit mains-libres)
-> Matériel (Affichage des versions matérielles du kit mains-libres)
-> Info DSP (Etat d‘activation de la correction vocale
pour téléphone mobile et kit mains-libres)
-> Service
-> Couleur
-> Arrière plan
-> Texte
-> Installation DSP
-> DSP du portable (marche / arrêt)
-> DSP du kit (marche / arrêt)
-> Mise à jour (Lancer une mise à jour du microprogramme du kit
mains-libres)
-> Synchronisation du répertoire
-> Bluetooth
-> Liste de couplage (Affichage des appareils déjà couplés)
-> Langue
-> anglais / allemand / espagnol / italien / français /
portugais / américain / néerlandais / slovaque /
polonais
-> Jour / Nuit
-> Mode veille
-> Musique
Liste d‘appels
Le menu Liste d‘appels est structuré de façon similaire aux menus de
navigation courants des téléphones portables. Cette structure vous
permet de suivre quels numéros vous avez composés et quels appels
vous avez ratés.
Répertoire
Dans l‘option du menu pertoire sont affichés les correspondants
sauvegardés dans le répertoire et le carnet d‘adresse du téléphone
mobile. Les correspondants sont class par ordre alphabétique. La
touche de défilement vers le haut ou vers le bas vous permet de sélec-
tionner un correspondant précis. Si la liste contient beaucoup de corre-
spondants, il est recommandé d‘activer la fonction de recherche par
caractères en actionnant la touche de défilement gauche ou droite.
Sélectionnez un caracre (droite /gauche) et confirmez en appuyant
sur la touche de sélection. La liste des correspondants est alors affi-
chée à partir du caracre sélectionné.
Vous avez deux possibilités d’accès à l’alphabet :
Aux lettres se trouvant au début vous parvenez par la touche de file-
ment gauche. La lettre « C » s’affiche. En appuyant sur la touche de
défilement droite la lettre « E » apparaît. Puis il faut choisir la lettre
souhaitée par la touche gauche ou droite et la valider par la touche de
sélection. Les entrées du répertoire s’affichent en commençant par cet-
te lettre.
Info
Le menu Info vous fournit des informations sur le logiciel installé et le
matériel de votre kit mains-libres. Il est conseillé de noter ces données
si vous rencontrez des problèmes dans l‘utilisation du kit mains-libres
avec votre téléphone mobile et souhaitez contacter à ce sujet la Hotline
Bury ou p. ex. actualiser le microprogramme (le système d‘exploitation
du kit mains-libres).
La mise à jour d‘une version actuelle du microprogramme (infos à www.
bury.com) peut s‘avérer utile en cas de changement de portable ou
d‘implémentation de nouvelles fonctions. Le numéro de version du mi-
croprogramme figure derrière la désignation du kit mains-libres, p. ex.
„CC 9050 V3.0a“. Dans le sous-menu <DSP Info> vous avez la possibi-
lité de terminer si le ‚processeur de signal numérique‘ (DSP) du kit
mains-libres et du téléphone mobile (si celui-ci en est équipé) est acti-
vé. L‘activation du processeur permet d‘améliorer la qualité de la trans-
mission vocale tout en favorisant la réduction des bruits parasites.
Service
Dans le menu Service, vous pouvez gler la couleur d‘arrière-plan et
du texte de l‘écran. Dans le sous-menu suivant, il est également pos-
sible d‘activer et de désactiver la fonction DSP du téléphone mobile et
du kit mains-libres. Dans le sous-menu Update, vous pouvez actualiser
le microprogramme du kit mains-libres. Une description précise de cet-
te opération ainsi que le microprogramme nécessaire sont télécharge-
ables sur Internet à l‘adresse www.bury.com. Le sous-menu suivant
vous permet de procéder à une nouvelle synchronisation du répertoire
avec votre téléphone mobile.
Bluetooth
Dans l‘option de menu Bluetooth, vous trouvez une liste des télépho-
nes mobiles qui se sont déjà connecs avec succès au kit mains-libres.
Les léphones sauvegardés dans cette liste sont interrogés après la
mise en marche du kit mains-libres afin d‘établir une connexion Blue-
Menu en version anglaise
58
Mode d‘emploi
59
tooth. Vous pouvez supprimer des téléphones mobiles de la liste à con-
dition que ceux-ci ne soient finitivement plus utilisés. Pour ce faire,
sélectionnez le téléphone à supprimer à l‘aide des touches de défile-
ment puis appuyez sur la touche 5. Sélectionnez ensuite la fonction
„Effacer“.
Depuis ce menu, vous pouvez également réaliser la connexion du kit
mains-libres avec votre téléphone mobile. Pour ce faire, sélectionnez la
fonction „Connecter“. Un petit icone vous indique via quel profil le télé-
phone mobile était relié pour la dernière fois avec le kit mains-libres.
L‘icone „voiture“ correspond au profil Mains-libres“ et l‘icone „clé de
note“ au profil A2DP. Si les deux symboles apparaissent simultané-
ment, un message vous demande ensuite de choisir avec quel profil
vous souhaitez connecter à nouveau le portable.
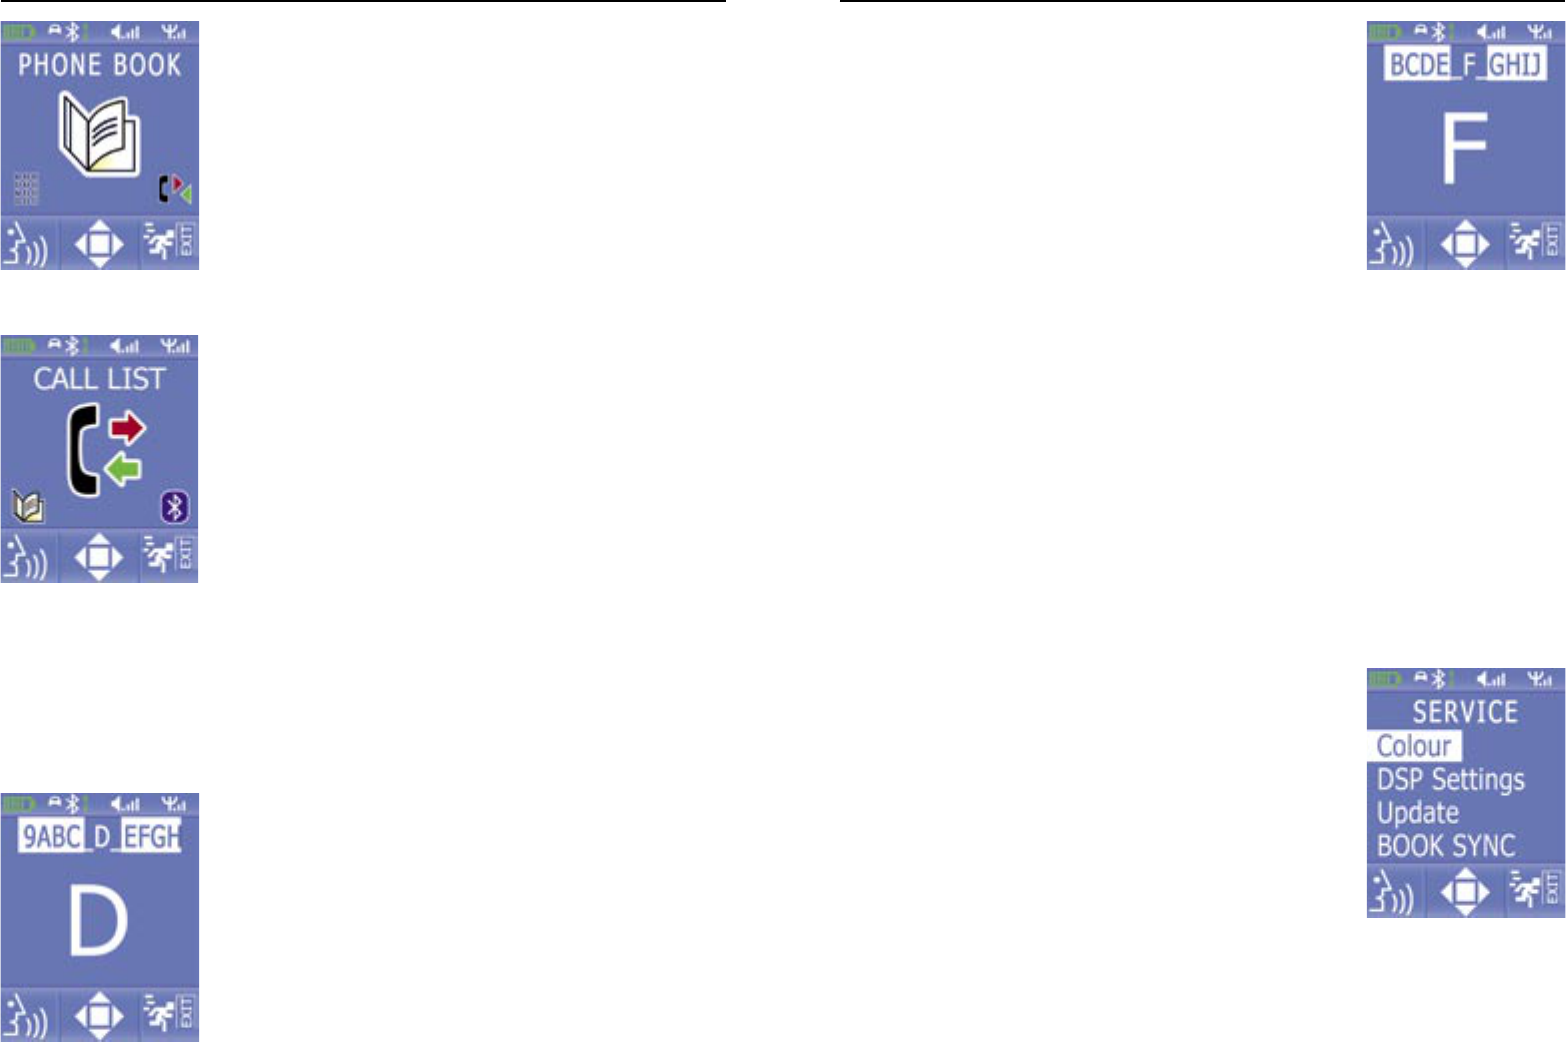
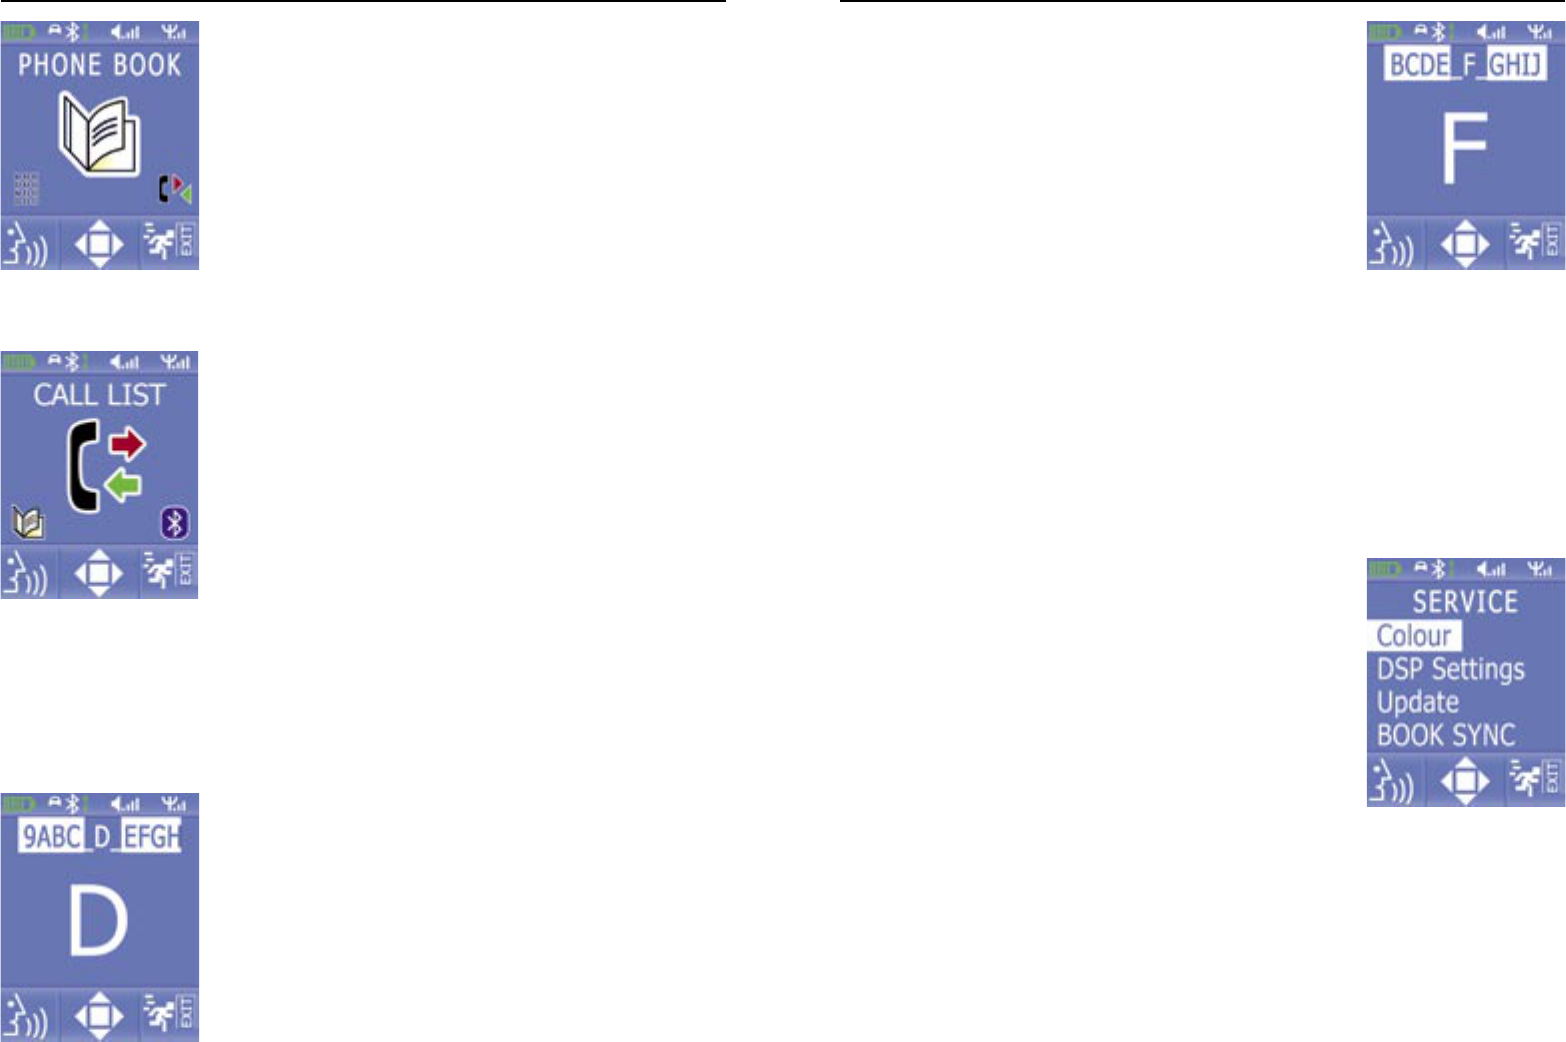
Langue
Dans l‘option de menu Langue, vous pouvez modifier la langue
d‘affichage des menus. Pour ce faire, sélectionnez la langue souhaitée
à l‘aide des touches de défilement et appuyez ensuite sur la touche de
sélection. Le chargement de la nouvelle langue de menu est effectif
après quelques secondes.
Jour / Nuit
Pour une meilleure adaptation aux variations de lumière tout au long de
la journée, l‘option de menu Jour / Nuit vous offre la possibilité
d‘abaisser ou d‘augmenter la luminosité. Cette option de réglage amé-
liore la lisibilité des données à l‘écran.
Mode veille
L‘option de menu Mode veille vous permet d‘activer un économiseur
d‘écran qui s‘active au bout de 15 secondes lorsqu‘il n‘enregistre aucu-
ne entrée ni commande sur le moniteur. L‘écran s‘assombrit progressi-
vement jusqu‘à disparition complète des contenus. Qu‘un léphone
mobile soit relié ou non avec le kit mains-libres n‘affecte pas
l‘économiseur. Lorsqu‘une conversation téléphonique est en cours,
l‘économiseur d‘écran est désactivé.
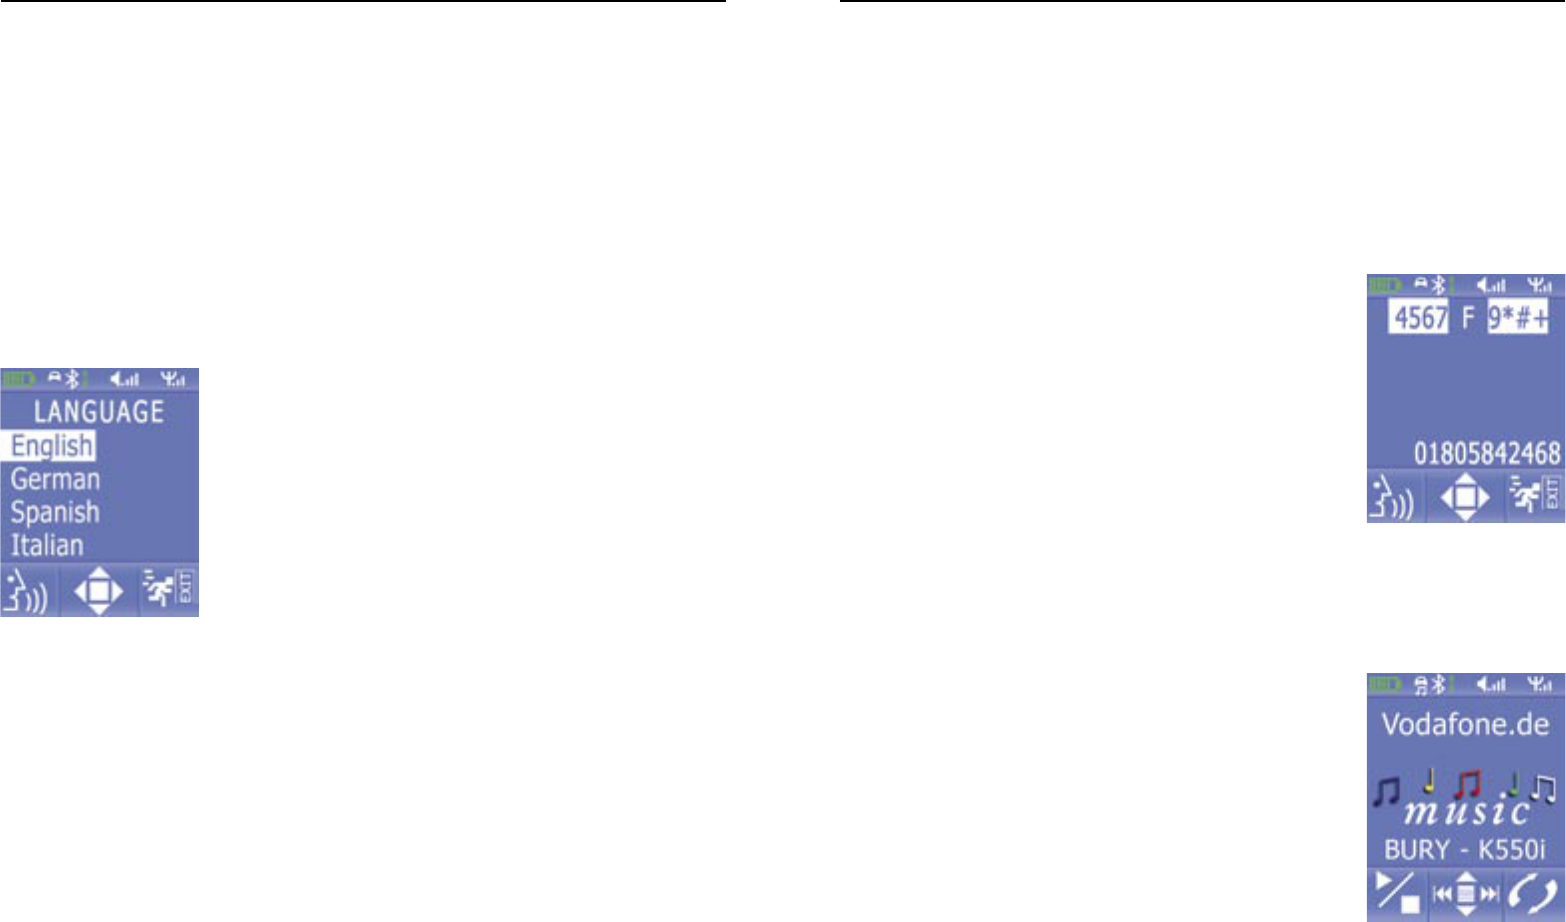
De nombreux léphones mobiles transmettent leur propre sonnerie au
kit mains-libres lorsqu‘ils enregistrent un appel entrant. Mais il y a des
exceptions. Dans ce cas, vous pouvez choisir une sonnerie dans l‘option
de menu Musique laquelle retentira en cas d‘appel entrant.
Les configurations suivantes sont possibles :
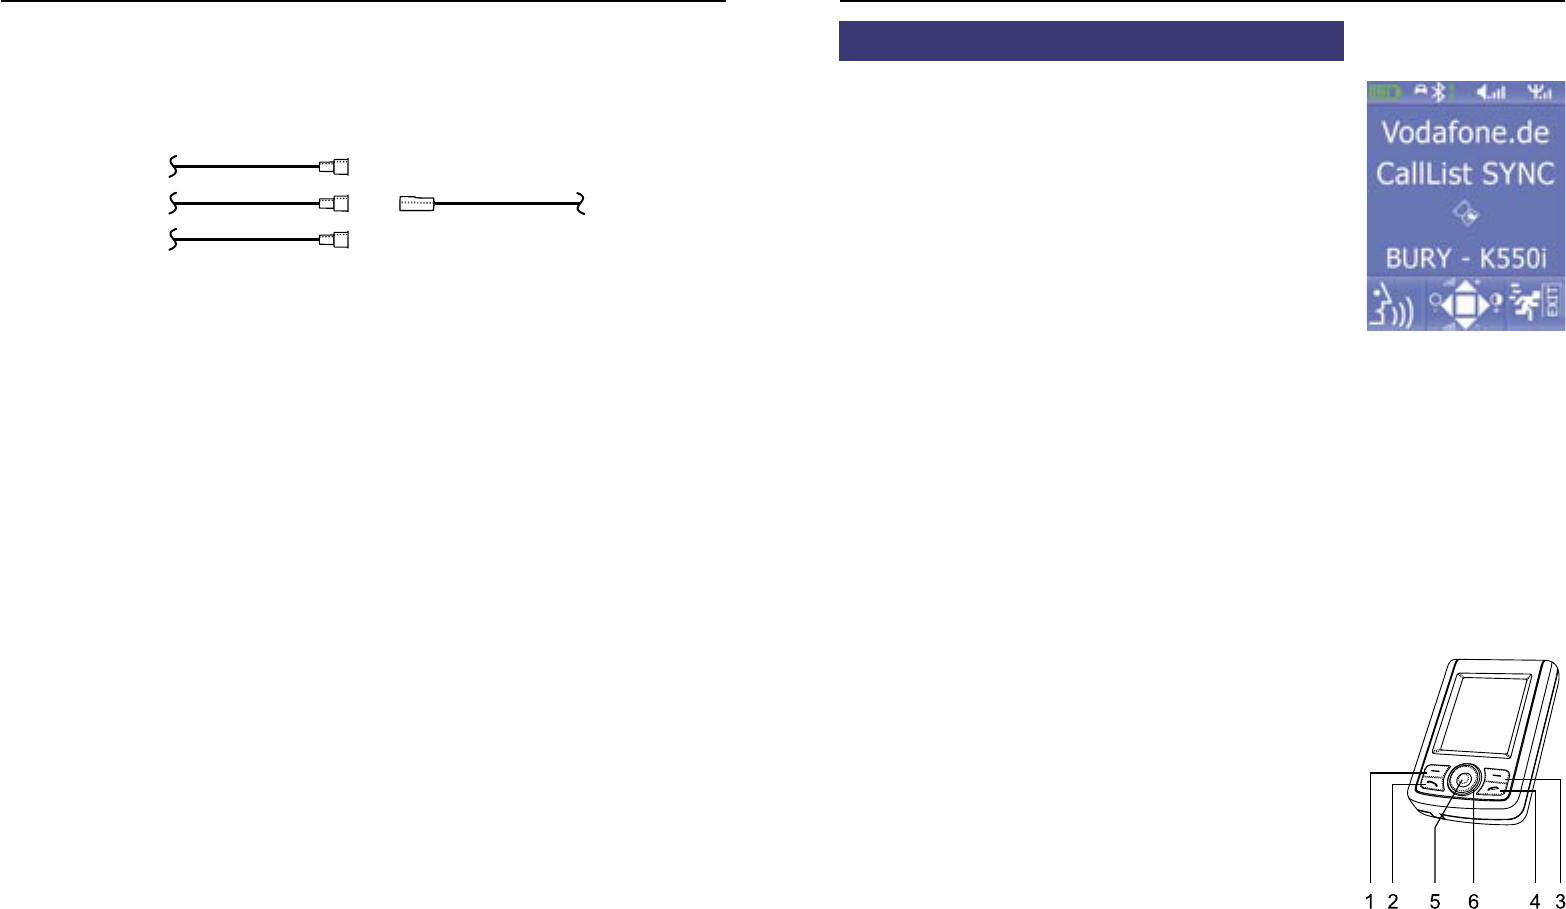
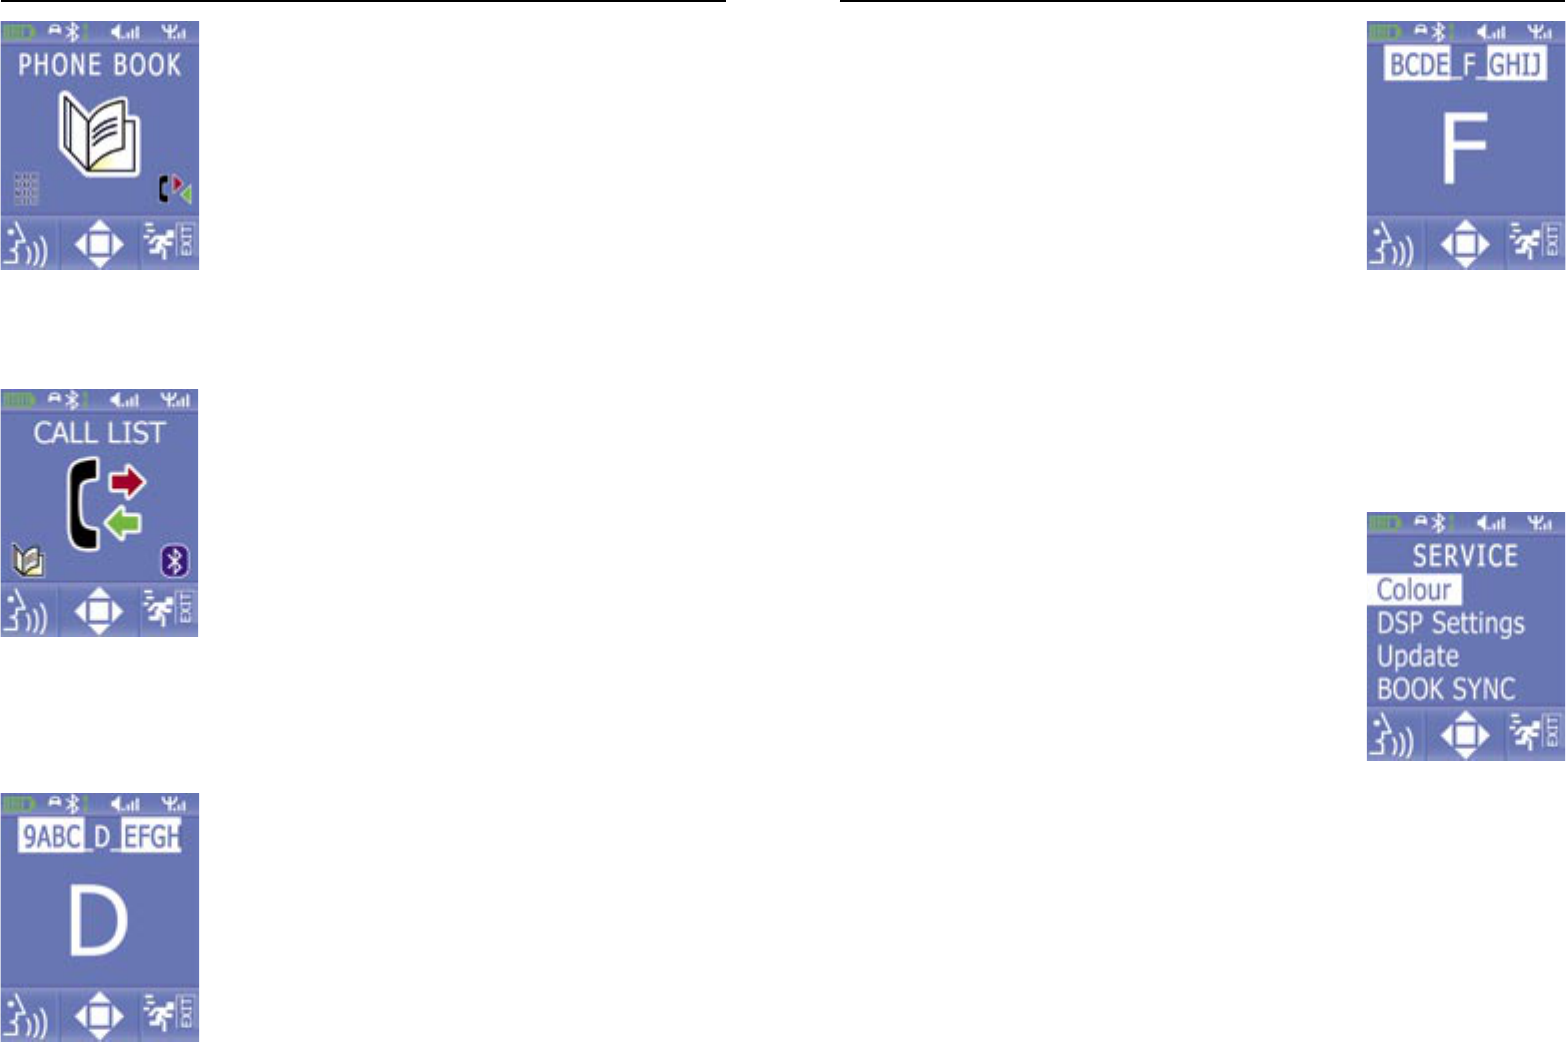
Fonctions en cas de connexion Bluetooth inactive :
Si aucun léphone portable n’est relié, le message „Interrompu“ appa-
raît sur le display.
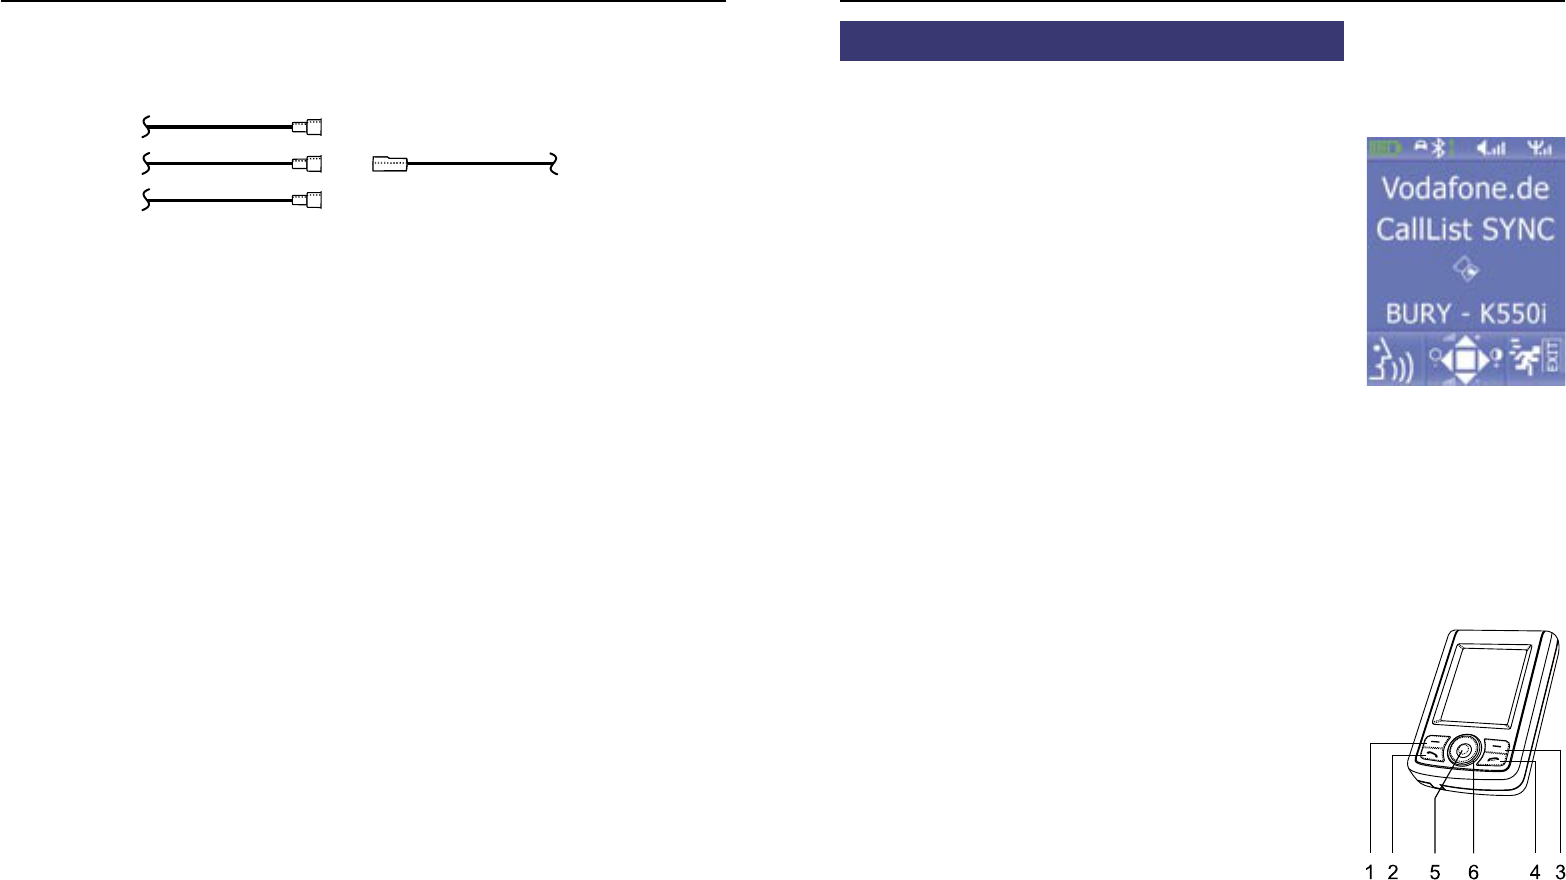
(4) = établir une connexion avec le dernier téléphone portable relié,
interrompre la navigation menu
(5) = activer le menu / consulter une option du menu
(6) = faire défiler les options du menu,
modifier la luminosité de l‘écran (gauche / droite) lorsque le
menu est inactif
Fonctions en cas de liaison Bluetooth active – profil HF :
Si un téléphone portable est relié avec le kit mains-libres, son nom
d’identification BT apparaît à l’écran. En outre, la puissance de champ
(de la ception), l’état de charge des batteries du téléphone portable
ainsi que le niveau de volume du kit mains-libres sont indiqués.
(1) = Activation de fiches de reconnaissance vocale
(fonction commande vocale)
(2) = Liste des appels - numéros d‘appels composés
(4) = Interrompre la connexion Bluetooth
Pour pouvoir utiliser les fonctions de commande vocale de votre télé-
phone mobile, il faut au préalable enregistrer des numéros de télépho-
ne sur fiches de reconnaissance vocale sur votre téléphone portable. La
plupart du temps, votre téléphone mobile offre uniquement la possibi-
lité d‘enregistrer des fiches de reconnaissance vocale pour les numéros
de téléphone sauvegardés dans le répertoire.
Fonctions en cas de liaison Bluetooth active – profil A2DP,
Lecture MP3
Si votre téléphone mobile possède le profil Bluetooth Profil A2DP, il est
en mesure de diffuser des morceaux de musique (p. ex. fichiers MP3)
en qualité stéo via le kit mains-libres. L‘important est que vous utili-
siez la fonction „Diffusion par...du kit mains-libres pour entendre le
titre de votre choix. Comme la navigation des menus varie beaucoup
d‘un fabricant de téléphone mobile à l‘autre, la sélection „...Bluetooth-
Stereo-Headset“ peut s‘appeler autrement selon le modèle que vous
posdez. Une fois que vous aurez procéà ce réglage, la musique
sera diffue via le système de sonorisation connecté au kit mains-lib-
res.
(2) = Marche / Arrêt de la diffusion
(6) = Changement de titre (gauche = arrière, droite = avant),
Réglage du volume (plus fort = vers le haut, plus bas = vers le bas)
Menu en version anglaise
60
61
Dernière mise à jour 02/2008
25.0983.0-04-050208
Sous réserve de fautes et de modifications
Si un appel entrant est détecté pendant la diffusion d‘un morceau de musique, la lecture est interrom-
pue et un message graphique et acoustique signale l‘appel entrant. Pour prendre l‘appel appuyez sur
la touche 1, pour le rejeter appuyez sur la touche 3. Une fois la conversation téléphonique terminée, la
diffusion du morceau de musique reprend. Si votre téléphone mobile ne supporte pas cette fonction
automatiquement, relancez la diffusion du titre depuis votre téléphone mobile.
11. Service après-vente
Pour toute question d‘ordre général ou technique, toute suggestion et critique, notre équipe se tient à
tout moment à votre disposition :
BURY GmbH & Co. KG
Robert-Koch-Straße 1-7
32584 Löhne
Hotline : +49(0)180 5 - 842 468*
Télécopie : +49(0)180 5 - 842 329*
* 0,14 €/min. depuis un poste fixe de Deutsche Telekom AG
E-mail : hotline@bury.com
Plateforme Service
Si vous souhaitez retourner votre appareil ou accessoires pour réclamation, il est préférable d‘envoyer
directement le produit à notre équipe SAV :
BURY GmbH & Co. KG
Im Hause DPD Depot 103
Robinienweg
D-03222 Lübbenau
Nous sommes ouverts à toutes vos propositions et remarques.
Informations sur l‘élimination des appareils électriques
La mise en application de la Loi sur les appareils électriques et électroniques interdit depuis le 24 mars
2006 l‘élimination des appareils électriques avec les déchets ménagers. En tant que tenteur d‘un
appareil usagé, vous êtes dans l‘obligation de ramener celui-ci aux points de collecte communaux ou
aux déchetteries officielles. Les appareils électriques usagés y sont repris gratuitement.
CC 9050 / CC 9051
Inhoudsopgave
Inleiding 62
1. Algemene aanwijzingen 62
2. Veiligheidsaanwijzingen 62
Montage van de handsfreeset 64
3. Leveringsomvang CC 9050 / CC 9051 64
4. Plaatsing en bevestiging 65
5. Aansluiting van elektronicabox 68
6. Installatie van de schakelbox AC 5120 69
Handleiding 73
7. Inschakelen 73
8. Tot stand brengen van een Bluetooth-verbinding 74
9. Verbreken van een Bluetooth-verbinding 75
10. Menubesturing 75
Verdere mededelingen 80
11. Servicediensten 80
Informations supplémentaires
62
63
Inleiding
1. Algemene aanwijzingen
Geachte klant,
U heeft een handsfreeset van het merk Bury gekocht en dus gekozen
voor een product met hoge kwaliteit alsmede maximaal bedieningsge-
mak. Inkoop, productie alsmede service en verkoop worden bij Bury
onderworpen aan een streng kwaliteitsmanagement conform DIN EN
ISO 9001. Alle Bury handsfreesets voldoen aan de veiligheidsnormen
CE en e1. Bovendien geven wij op alle onderdelen twee jaar garantie.
Om ten volle te kunnen genieten van het comfort van uw Bury hands-
freeset, leest u de bedieningshandleiding a.u.b. zorgvuldig door.
Als u nog vragen heeft over inbouw of bediening, neem dan a.u.b.
contact op met uw dealer. Hij geeft u graag betrouwbaar advies en
geeft uw ervaringen en suggesties door aan de fabrikant. Of neem
contact op met onze hotline. De telefoon- en faxnummers vindt u onder
het hoofdstuk Service.
Wij wensen u een goede reis.
2. Veiligheidsaanwijzingen
Inbouw – wie en waar
Het inbouwen van het systeem kan door u worden uitgevoerd. Neem
dan echter goed nota van de inbouwinstructies van de autofabrikant
(VAS 1978). Parkeer het voertuig tijdens de installatie op een plaats
waar het verkeer niet wordt gehinderd. Wij adviseren u het inbouwen
te laten uitvoeren door een erkende garage.
Stroomvoorziening
Deze handsfreeset is ontworpen voor gebruik in motorvoertuigen met
een boordnet van 12 Volt (personenauto‘s). Wanneer u van plan bent
het apparaat in te bouwen in een motorvoertuig met een boordnet van
24 Volt (vrachtwagens), gebruik dan a.u.b. een spanningsomvormer.
Heeft u vragen over dit onderwerp, dan kunt u altijd bij onze hotline
terecht.
Plaatsing, volume
Installeer de onderdelen van het apparaat zo in het voertuig, dat uw
uitzicht niet wordt belemmerd en de onderdelen niet zijn gemonteerd
in een kreukelzone van het passagierscompartiment of binnen het ont-
vouwgebied van airbags. Voor het losmaken van bekledingen (met en
zonder airbags) of onderdelen van het dashboard zijn in enkele geval-
len speciaal gereedschap en speciale kennis nodig.
Vakkundige bediening
Wij zijn niet aansprakelijk voor beschadigingen en storingen door een
ondeskundige installatie van en omgang met het systeem. Stel het ap-
paraat daarom niet bloot aan natheid, extreme temperaturen of trillin-
gen en volg de in de inbouw- en bedieningshandleiding aangegeven
stappen nauwkeurig op.
Bediening in het verkeer
Bedien het systeem alleen in situaties waarin de verkeersomstandighe-
den het toelaten en waarbij andere verkeersdeelnemers niet in gevaar
gebracht, gehinderd of lastig gevallen worden. Het volume van het ap-
paraat dient zo te worden ingesteld, dat geluiden van buitenaf ook nog
kunnen worden waargenomen.
Bij storing
Neem het apparaat niet in gebruik, wanneer u een defect opmerkt
resp. vermoedt. Neem in dat geval contact op met een Bury dealer of
met onze Bury hotline. Ondeskundige reparatiepogingen kunnen ge-
vaarlijk voor u zijn. Daarom mag alleen gekwalificeerd personeel cont-
roles uitvoeren.
Belangrijk:
De bestuurder is te allen tijde verantwoordelijk voor de
veilige besturing van en controle over zijn voertuig. U dient
tijdens het rijden geen mobiele telefoon - en vooral niet de
functies SMS / MMS schrijven of lezen - te gebruiken.
Onderzoeken hebben aangetoond dat het een veiligheids-
risico is om afgeleid te zijn. Het gebruik van een mobiele
telefoon tijdens het rijden kan de oorzaak van een dergeli-
jke afleiding zijn.
De fabrikant wijst er hierbij uitdrukkelijk op dat u tijdens
het rijden een handsfreeset moet gebruiken.
64
65
Montage van de handsfreeset
3. Leveringsomvang CC 9050 / CC 9051
Beschrijving van de onderdelen:
1) Elektronicabox (CC 9051 met geïntegreerde luidspreker-omschakelbox)
2) Monitor op montagevoet, schoonmaakdoekje
3) Verbindingssnoer monitor / elektronicabox
4) Klitteband
5) Bevestigingsschroeven voor elektronicabox, kabelklem
6) AC 5120 schakelbox
7) Microfoon
Opmerking:
De hier omschreven levering heeft betrekking op de CC 9050. Mochten er componen-
ten wegvallen of toegevoegd worden, dan ontvangt u via een apart bijgevoegd blad de
benodigde informatie.
4. Plaatsing en bevestiging
Stap 1:
Kies a.u.b. eerst de voor u in uw voertuig geschiktste plaats voor de
monitor plus montagevoet, door de monitor op de voet te steken en
deze op verschillende plaatsen in het voertuig te houden of te plaat-
sen.
Heeft u een geschikte positie voor de monitor in het voertuig gevon-
den, dan kunt u nu de montagevoet / klitteband dienovereenkomstig
aanbrengen / bevestigen. Gebruik a.u.b. het meegeleverde schoon-
maakdoekje om de oppervlakken te ontvetten waarop u de montage-
voet wilt aanbrengen.
Belangrijk:
Let er bij de plaatsing op dat de monitor het uitzicht op de
weg niet belemmert, niet in zones voor inzittendenbescher-
ming (onder andere airbagbereiken) wordt aangebracht en
dat kabels zo eenvoudig mogelijk kunnen worden gelegd.
De montagevoet / klitteband kan slechts één keer wor-
den vastgeplakt, bij verwijderen kan het kleefvlak worden
beschadigd. Bovendien is het mogelijk, dat het oppervlak
naargelang structuur en kwaliteit bij sterke temperatuur-
schommelingen tijdens het latere gebruik verkleurt.
Het snoeruiteinde met de kleine molexstecker is uitstekend geschikt
voor het aanbrengen door smalle openingen op het dashboard. Hier-
door wordt een vrijwel onzichtbare installatie van het verbindingssnoer
mogelijk.
Breng het snoer aan, uitgaand van de positie van de elektronicabox (zie
stap 4 ) en verbind het snoer aansluitend met de monitor:
66
Montage van de handsfreeset
67
Installatievoorbeeld 1:
Installatievoorbeeld 2:
Stap 2:
Naargelang voertuigtype en uitrusting ervan (b.v. airbags) is het prak-
tisch om de microfoon aan de A-zuil, aan de zonneklep of aan de dak-
hemel te installeren. Aanwijzingen m.b.t. de uitrustingskenmerken kunt
u vinden in de documenten van uw auto.
Stap 3:
Leg de kabels a.u.b. zodanig dat deze niet onbevestigd in het voertuig
liggen/hangen en geen invloed kunnen uitoefenen op het besturen van
het voertuig. Let er bij het leggen van een kabel op dat deze niet op
trek wordt belast, maar nog speling heeft. Voorkom dat de kabel klem
komt te zitten, wat tot beschadigingen van de isolatie door wrijving/
schuren kan leiden.
Stap 4:
Installeer de elektronicabox op een geschikte plek in het voertuig. Dit
kan b.v. achter de radio, in het handschoenenvak of in de middencon-
sole zijn. Let erop, dat u zonder problemen bij de aansluitingen van de
box komt. Voordat u componenten aansluit op de elektronicabox, moet
u voor de zekerheid de accu loskoppelen. Let hierbij op een eventuele
radiocodering (zie handleiding van de radio).
Belangrijk:
Installeer de elektronicabox achter een bekleding of op
een plek die u bereikt na openen / losmaken van een be-
scherming / afdekking. De aansluitbox mag niet open in het
voertuig rondhangen.
68
Montage van de handsfreeset
69
5. Aansluiting van elektronicabox
Aan de elektronicabox worden de andere componenten van de hands-
freeset aangesloten. Volgende aansluitingen zijn voorhanden:
1 - Stroomvoorziening
(zie hoofdstuk: AC 5120 aansluiten)
2 - AUX-Out uitggang
Aansluiting 2 is de uitgang voor muziek in stereokwaliteit. Hier kunt u
de Aux-In ingang van uw radio (indien aanwezig) via in de speciaalzaak
verkrijgbare adapters aansluiten. De adapter moet voor de aansluiting
op de handsfreeset een 3,5 mm stereostekkerbus hebben. Afhankelijk
van autoradio moet het andere uiteinde verschillend worden gekozen.
Als uw radio niet over een Aux-In beschikt, kunt u de Car CD/MP3-ad-
apter uit het Bury toebehorenprogramma gebruiken om de muziek-
weergave via uw radio mogelijk te maken.
3 - Spraakweergave van de handsfreeset
(zie hoofdstuk: AC 5120 aansluiten)
4 - Microfooningang
Hier sluit u de klinkstekker van de microfoon aan. Maak gebruik van de
kabelklem als ook aansluiting 3 in gebruik is, zodat beide klinkstekkers
niet door trillingen los kunnen schieten.
5 - Contact voor de monitor
Steek in dit contact de 9-polige stekker van het verbindingssnoer van
de monitor. Minstens één van de beide bevestigingsschroeven stevig
aandraaien, zodat ook deze stekker niet door trillingen los kan schie-
ten.
6. Installatie van de schakelbox AC 5120
Met de schakelbox AC 5120 voor uw luidsprekers krijgt u de mogelijkheid om de toon van uw radio/cd-
speler enz. uit te schakelen en het gesprek met uw gesprekspartner tijdens het bellen over de luidspre-
kers van uw auto uit te zenden. Daardoor hoeft u geen extra luidsprekers te installeren. Mocht uw
autoradio reeds over een mute-modus beschikken worden de luisprekers van uw auto door de radio
uitgeschakeld. Beschikt uw auto niet over een dergelijke functie, worden de signalen door de schakel-
box voor de luidsprekers onderdrukt. Op grond van de aansluitingen kan de AC 5120 op de handsfree
sets van BURY worden aangesloten, die de spanningsvoorziening d.m.v. van molexstekkers waarbor-
gen en over een uitgang voor de luidsprekers beschikken.
Als u handsfree met uw telefoon belt, wordt het geluid van uw autoradio automatisch uitgeschakeld
(de juiste bediening van uw handsfree set ontleent u a.u.b. aan de gebruiksaanwijzing van de hands-
free set). De schakelbox maakt nu gebruik van een of twee luidsprekers van uw autoradio, ook als de
radio niet ingeschakeld is. Deze functies worden door de installatie automatisch geactiveerd en hoeven
niet speciaal bediend of geselecteerd te worden.
Sommige mobiele telefoons ondersteunden de mute-functie van de radio niet. Lees daarom ook de
gebruiksaanwijzing van uw mobiele telefoon door. Meer gedetailleerde informatie krijgt u bij uw vaka-
nelaar, op het internet op www.bury.com of per telefoon bij onze hotline.
Besluit na het controleren van alle kabellengtes, waar u de schakelbox kunt plaatsen. Zeker daarna de
schakelbox, zodat hij niet kan loskomen of tegen andere onderdelen kan slaan.
Verbindt nu de uitgaande, witte stekker voor de spanningsvoorziening van de schakelbox (1) met het
contact voor de stroomvoorziening van de elektronicabox. Sluit vervolgens de 3,5 mm klinkstekker (3)
aan op de elektronicabox. (Het andere, kleinere contact wordt door de klinkstekker voor de microfoon
bezet.)
70
Montage van de handsfreeset
71
Verwijder vervolgens de (a) of (b) stekker(s) van de luidsprekers van de omlijsting van de luidsprekers
aan de achterkant van uw autoradio. Verbind de stekker(s) met de passende omlijsting (3) van de AC
5120. Verbind nu de stekker (4) met uw autoradio.
Afhankelijk van de positie van de schakelaar (5) hoort u het gesprek met uw gesprekspartner door de
voorste rechterluidspreker, door de voorste linkerluidspreker of door allebei de voorste luidsprekers. U
moet de positie “OFF” kiezen, indien u de schakelbox over de “PHONE-IN” kabels (6) op de autoradio
wilt aansluiten.
De twee “PHONE-IN” kabels beschikken over markeringen en dienen passend bij de aansluitingen van
de autoradio in de stekkers (blauw, groen of geel) geïntegreerd te worden. Let derhalve ook op de
toewijzingen van de aansluitingen van uw autoradio overeenkomstig de gebruiksaanwijzing van de
autoradio. Bij veel autoradio‘s kan het geluidsvolume (het volume van de gesprekspartner) over de
„PHONE-IN“ ingang en de selectie van de luidspreker geregeld worden.
Verschillende aansluitingen van de ISO-stekkers op de radio
Afhankelijk van het type voertuig verschilt de toewijzing van de pinnen van de gebruikte ISO-stekkers.
Om schade te voorkomen moet u voor het gebruik van de schakelbox controleren of de toewijzingen
passend zijn.
Configuratie I
Wordt de uitgang van pin 7 van de ISO-stekker aangesloten op de gelijkstroomaansluiting en wordt pin
4 aangesloten op de ontsteking, moet u controleren of de aansluiting eruitziet als beneden in de afbe-
elding getoond.
Configuratie II
Wordt de uitgang van pin 7 van de ISO-stekker aangesloten op de ontsteking en wordt pin 4 aanges-
loten op de wisselstroomaansluiting, moet u controleren of de aansluiting eruitziet als beneden in de
afbeelding getoond.
Schakelbox Voertuig
rood 7 (rood)
blauw 4 (blauw)
rood 7 (rood)
blauw 4 (blauw)
Schakelbox
rood 7 (rood)
blauw 4 (blauw)
Schakelbox
Voertuig
Voertuig
72
Montage van de handsfreeset
73
Display met Engelse menubesturing
In de gebruiksaanwijzing van het radioapparaat vindt u de toewijzingen van de pinnen voor het “stil
signaal (mute). Dit signaal kan op een van drie kabels optreden die met “mute1, “mute2” en “mute3”
gekenmerkt zijn.
Verbind de gele mute-kabel van de schakelbox met de correcte kabel van de autoradio: “mute1,
“mute2” of “mute3”.
LET OP:
De plus- en ontstekingsleidingen worden in de kast van de schakelbox met 3A zekerin-
gen geborgd.
Handleiding
7. Inschakelen
Als de stroomvoorziening van de handsfreeset correct werd aangeslo-
ten, wordt de handsfreeset geactiveerd nadat u de ontsteking heeft
ingeschakeld. Het display wordt ingeschakeld en een kort aanhoudend
hoog geluid is te horen.
De handsfreeset probeert nu automatisch verbinding te maken met een
mobiele telefoon. Bij levering is nog geen ID van een mobiele telefoon
opgeslagen (zie hoofdstuk: Tot stand brengen van een Bluetooth-ver-
binding). Er verschijnt kort de melding „Lege lijsten vervolgens „Ver-
broken“ op het display.
Als de handsfreeset al eens met mobiele telefoons was verbonden,
verschijnen de ID‘s / namen van de mobiele telefoons in het display.
Deze worden achtereenvolgens door de handsfreeset afgevraagd. Als
geen mobiele telefoon automatisch via Bluetooth met de handsfreeset
werd verbonden, is als aanwijzing hiervoor met gelijkmatige tussenpo-
zen een laag geluid te horen. Dit automatisch zoeken kunt u afbreken
door op toets 3 te drukken.
Bij een met succes tot stand gebrachte verbinding is een lang aanhou-
dend hoog geluid te horen. De naam van de gekoppelde mobiele tele-
foon verschijnt en gegevens uit het telefoonboek (SIM-kaart) en het
adresboek (geheugen van de telefoon) worden naar de handsfreeset
overgebracht. Dit kan, afhankelijk van hoeveelheid van opgeslagen ge-
gevens, enkele seconden in beslag nemen. Als de synchronisatie van
het telefoonboek door b.v. drukken op toets 3 of een binnenkomend
gesprek wordt onderbroken, kan het gebeuren dat niet alle invoeren
werden overgebracht. Hier dient het telefoonboek dan nogmaals hand-
matig te worden gesynchroniseerd (zie hoofdstuk: Menubesturing).
Beschrijving van de toetsen:
1 = linker functietoets
2 = toets voor gesprek aannemen
3 = rechter functietoets
4 = toets voor gesprek beëindigen
5 = keuzetoets
6 = scrolltoets (links/boven/rechts/onder)
mute 1
autoradio Schakelbox
mute 2
mute 3
mute (geel)
74
Handleiding
75
8. Tot stand brengen van een Bluetooth-verbinding
Wanneer u voor de eerste keer een Bluetooth-verbinding tot stand wilt
brengen, moet u de Bluetooth-functie bij uw mobiele telefoon activeren
en naar Bluetooth-apparaten laten zoeken. In dit geval naar een ap-
paraat met de aanduiding „CC 9050...“ of „CC 9051...“. Indien er meer-
dere apparaten zijn ontdekt, selecteer dan a.u.b. de handsfreeset en
voer het PIN-nummer 1234 in. Vervolgens wordt de Bluetooth-verbin-
ding (koppeling) tussen uw mobiele telefoon en de handsfreeset tot
stand gebracht. De handsfreeset ondersteunt de profielen „Handsfree“
en A2DP“. Stel a.u.b. uw mobiele telefoon dienovereenkomstig in of
controleer of deze profielen worden ondersteund.
Kan er geen verbinding tot stand worden gebracht, controleer dan
a.u.b. de stand van de software (firmware) op uw mobiele telefoon of
bij de handsfreeset en actualiseer deze. Een overzicht over dit onder-
werp vindt u op Internet op www.bury.com.
Opmerking:
Op internet vindt u een overzicht van meerdere mobiele
telefoons die met deze handsfreeset getest werden. Indien
firmware van de desbetreffende mobiele telefoon echter van
de lijst afwijkt, kan dit er toe leiden dat bepaalde weergaves
en functies niet meer of slechts beperkt mogelijk zijn.
Verder is het mogelijk dat u eerst de lijst van de gekoppelde apparaten
in uw telefoon moet wissen, zodat de handsfreeset juist kan worden
herkend en een verbinding kan worden opgebouwd. Lees de bedie-
ningshandleiding van uw mobiele telefoon door, wanneer u vragen
heeft over de menubesturing, functies en bediening ervan. Deze wijken
naargelang fabrikant en type sterk van elkaar af.
Anmerking:
Is de accu van uw mobiele telefoon bijna leeg, dan kan in
veel gevallen eveneens geen Bluetooth-verbinding tot stand
worden gebracht.
De handsfreeset heeft een geheugen waarin de ID‘s van maximaal 10
mobiele telefoons worden opgeslagen. Wordt een elfde mobiele tele-
foon gekoppeld, dan wordt telkens de oudste invoer in het geheugen
van de handsfreeset gewist. Na inbedrijfstelling van de handsfreeset
probeert deze automatisch een verbinding te maken met een reeds
opgeslagen mobiele telefoon in het profiel „Handsfree“.
9. Verbreken van een Bluetooth-verbinding
Wanneer u een Bluetooth-verbinding wilt verbreken, bestaat de moge-
lijkheid deze comfortabel op de handsfreeset of vanaf uw mobiele tele-
foon te onderbreken. Verder wordt de verbinding onderbroken, wan-
neer u zich met uw mobiele telefoon te ver van het voertuig en daar-
mee van de ontvangstradius van de handsfreeset verwijdert. Na 15
minuten zonder actieve Bluetooth-verbinding (aanduiding in display:
Verbroken) wordt de handsfreeset automatisch uitgeschakeld, als deze
nog van spanning wordt voorzien. Dit dient om de voertuigaccu te spa-
ren. Komt u binnen deze periode terug bij het voertuig, dan kunt u
handmatig een koppeling tot stand brengen door toets 5 gedurende
drie seconden in te drukken.
Aanmerking:
Let er a.u.b. op, dat de capaciteit van de accu van uw
mobiele telefoon bij geactiveerde Bluetooth-functie snel
kan verminderen. Wilt u geen gebruik meer maken van de
Bluetooth-functie, b.v. als u het voertuig voor langere tijd
verlaat, dan moet u deze deactiveren.
10. Menubesturing
Aanmerking:
Denk er a.u.b. aan dat enkele van de hierna beschreven
functies/aanduidingen alleen mogelijk zijn, wanneer deze
door de mobiele telefoon worden ondersteund!
Na inschakelen van de handsfreeset verschijnt het hoofdscherm. Dit
informeert u of een mobiele telefoon per Bluetooth is verbonden of
niet. Hier heeft u, onafhankelijk van de verbindingsstatus, door drukken
op toets 5 de mogelijkheid het hoofdmenu op te vragen. De telkens
omkaderde invoer kan door opnieuw indrukken van toets 5 worden
geselecteerd. Met de scrolltoetsen komt u in de gewenste richting. Met
toets 3 kan de menubesturing worden afgebroken, of een stap worden
teruggegaan.
Display met Engelse menubesturing
76
Handleiding
77
Display met Engelse menubesturing
Menustructuur:
-> Gesprekkenlijst
-> Gemist
-> Gevoerd
-> Telefoonboek
-> Info
-> Software (aanduiding van softwarestand van handsfreeset)
-> Hardware (aanduiding van hardwarestand van handsfreeset)
-> DSP info (activeringsstatus van spraakverbetering
voor mobiele telefoon en handsfreeset)
-> Service
-> Kleur
-> Achtergrond
-> Tekst
-> DSP setup
-> DSP in mobiele telefoon (aan / uit)
-> DSP in apparaat (aan / uit)
-> Update (uitvoeren van firmware-updates van handsfreeset)
-> Telefoonboek synchroniseren
-> Bluetooth
->Koppelingslijst (aanduiding van reeds een keer gekoppelde appa-
raten)
-> Taal
-> Engels / Duits / Spaans / Italiaans / Frans /
Portugees / US Engels / Nederlands / Slowaaks/
Pools
-> Dag / nacht
-> Sleep mode
-> Muziek
Gesprekkenlijst
Het menu Gesprekkenlijst is hetzelfde opgebouwd als de menu-
besturing die u gewend bent van mobiele telefoons. Zo kan worden
nagegaan welke nummers u gekozen en welke gesprekken u gemist
heeft.
Telefoonboek
In het menupunt Telefoonboek krijgt u de geheugeninvoeren van het
telefoonboek en het adresboek van de mobiele telefoon te zien. De in-
voeren zijn alfabetisch gerangschikt. Met de bovenste en onderste
scrolltoets kunt u naar een invoer scrollen. Zijn zeer veel contacten
opgeslagen, dan is het praktisch om met de linker of rechter scrolltoets
de zoekfunctie naar letters te activeren. Selecteer een letter (links/
rechts) en bevestig deze met de keuzetoets. De aanduiding van de in-
voeren begint dan met deze letter.
U heeft twee mogelijkheden om in het alfabet te komen:
De verder naar voor liggende letters bereikt u via de linker scrolltoets
uitgaande van de letter C. Met de rechter scrolltoets begint u het
zoeken vanaf de letter „E. Selecteer een letter (links/rechts) en beves-
tig deze met de keuzetoets. De aanduiding van de invoeren begint dan
met deze letter.
Info
In het menu Info krijgt u informatie over de geïnstalleerde software en
hardware van uw handsfreeset. Deze gegevens moet u noteren, als u
problemen heeft met het gebruik van de handsfreeset met uw mobiele
telefoon en hierover contact wilt opnemen met de Bury hotline of u b.v.
de firmware (het besturingssysteem van de handsfreeset) wilt actuali-
seren.
Het installeren van een actuele firmware (info op www.bury.com) kan
handig zijn bij wissel van mobiele telefoon of wanneer nieuwe functies
zijn geïmplementeerd. Het versienummer van de firmware vindt u ach-
ter de benaming van de handsfreeset, b.v. „CC 9050 V05f. In het sub-
punt <DSP info> kunt u zien of de ‚Digitale Signaalprocessor‘ (DSP) in
de handsfreeset en in de mobiele telefoon (indien aanwezig) is geacti-
veerd. Dit maakt het mogelijk de weergave van de gesproken taal te
verbeteren en de ruisonderdrukking te ondersteunen.
Service
In het menu Service kunt u de kleurinstellingen voor de achtergrond
en de tekst instellen. Verder kan in het volgende subpunt de DSP-func-
tie in de mobiele telefoon en in de handsfreeset worden in- en uitge-
schakeld. Via het subpunt Update kunt u de firmware van de handsfree-
set actualiseren. Een nauwkeurige beschrijving hiervan en de betref-
fende firmware vindt u op Internet op www.bury.com. Het volgende
subpunt stelt u in staat het telefoonboek opnieuw te synchroniseren
met uw mobiele telefoon.
Bluetooth
In het menupunt Bluetooth vindt u een lijst met mobiele telefoons die
al een keer met succes zijn gekoppeld met de handsfreeset. De hier
opgeslagen invoeren worden na het inschakelen van de handsfreeset
afgevraagd, om een Bluetooth-verbinding tot stand te brengen. Uit de
lijst kunt u mobiele telefoons wissen, als deze beslist niet meer worden
gebruikt. Ga hiervoor met de scrolltoetsen naar de betreffende invoer
en druk daarna op toets 5. Selecteer dan a.u.b. de functie „Wissen“.
Display met Engelse menubesturing
78
Handleiding
79
Vanuit dit menu kunt u de handsfreeset echter ook met uw mobiele
telefoon koppelen. Selecteer hiervoor a.u.b. de functie „Verbinden“.
Een klein pictograam laat u zien in welk profiel de mobiele telefoon de
laatste keer met de handsfreeset was verbonden. Een auto signaleert
het profiel „Handsfree“ en een muzieksleutel het profiel A2DP“. Zijn
beide symbolen afgebeeld, dan wordt u vervolgens gevraagd in welk
profiel u de mobiele telefoon opnieuw wilt verbinden.
Taal
In het menupunt Taal schakelt u de menutaal om. Scroll hiervoor naar
de gewenste taal en bedien daarna de keuzetoets. Na enkele seconden
is de nieuwe menutaal geladen.
Dag / nacht
Aangezien de lichtomstandigheden naargelang tijdstip wisselen, heeft
u in het menupunt Dag / nacht de mogelijkheid de helderheid te ver-
hogen of te verlagen. Dat maakt het mogelijk om de gegevens op het
display beter af te lezen.
Sleep mode
In het menupunt Sleep mode kunt u een screensaver activeren. Deze
begint als u 15 seconden geen invoer of geen toets op de monitor be-
diend heeft. Het display wordt daarbij langzaam donker tot geen inhoud
meer te zien is. Het maakt daarbij niet uit of een mobiele telefoon met
de handsfreeset is verbonden of niet. Bij een actief telefoongesprek is
de screensaver gedeactiveerd.
Muziek
Vele mobiele telefoons brengen het eigen belsignaal bij een binnenko-
mend gesprek over naar de handsfreeset. Er zijn echter uitzonderin-
gen. Voor dit geval kunt u in het menupunt Muziek een belsignaal
vastleggen dat moet worden weergegeven.
De volgende bediening is mogelijk:
Functies bij niet actieve Bluetooth-verbinding:
Is er geen mobiele telefoon met de handsfreeset verbonden, dan ver-
schijnt de melding „Verbroken“ in het display.
(4) = tot stand brengen van een verbinding met de laatst gekoppelde
mobiele telefoon, afbreken van de menubesturing
(5) = activering van het menu / opvragen van een menupunt
(6) = scrollen tussen de menupunten,
verandering van de displayhelderheid (links / rechts) als menu
niet actief is
Functies bij actieve Bluetooth-verbinding - profiel HF:
Is een mobiele telefoon met de handsfreeset verbonden, dan verschijnt
de BT-identificatienaam ervan op het display. Ook de veldsterkte (de
ontvangst) en de accucapaciteit van de mobiele telefoon alsmede het
volumeniveau van de handsfreeset verschijnen op het display.
(1) = oproepen van voice-tags (spraakkiezen)
(2) = lijst van gekozen nummers
(4) = Bluetooth-verbinding verbreken
Om de functies voor spraakkiezen bij uw mobiele telefoon met de
handsfreeset te kunnen gebruiken, moet u tevoren telefoonnummers in
uw mobiele telefoon dienovereenkomstig hebben gemarkeerd. Meestal
kunt u voice-tags alleen voor opgeslagen telefoonnummers in het
adresboek van uw mobiele telefoon opnemen.
Functies bij actieve Bluetooth-verbinding - profiel A2DP,
MP3 muziek afspelen:
Beschikt uw mobiele telefoon over het Bluetooth profiel A2DP, dan kun-
nen muzieknummers (b.v. MP3 bestanden) via de handsfreeset in ste-
reokwaliteit worden beluisterd. Het is belangrijk dat u het telkens geko-
zen muzieknummer via de functie Afspelen via...op de handsfreeset
weergeeft. Aangezien de menubesturing van de fabrikanten van mo-
biele telefoons zeer verschillend is, kan de benaming van de selectie „...
Bluetooth-Stereo-Headset“ van elkaar afwijken. Voert u deze instelling
uit, dan wordt de muziekweergave via het op de handsfreeset aanges-
loten geluidssysteem weergegeven.
(2) = start / stop van weergave
(6) = nummers wisselen (links = achteruit, rechts = vooruit),
volume-instelling (harder = boven, zachter = onder)
Display met Engelse menubesturing
80
Stand 02/2008
25.0983.0-04-050208
Vergissingen en wijzigingen voorbehouden
Verdere mededelingen
Binnenkomend gesprek tijdens muziek afspelen
Mocht tijdens het weergeven van een muzieknummer een gesprek binnenkomen, dan wordt het afs-
pelen onderbroken en wordt er zowel grafisch als akoestisch gewezen op het gesprek. Met toets 1 kunt
u het gesprek aannemen, met toets 3 het gesprek weigeren (wegdrukken). Na einde van het gesprek
wordt de weergave van het muzieknummer hervat. Mocht uw mobiele telefoon deze functie niet auto-
matisch ondersteunen, start dan a.u.b. de weergave van het nummer opnieuw bij uw mobiele tele-
foon.
11. Servicediensten
Bij algemene of technische vragen, suggesties en opmerkingen is ons team u te allen tijde van
dienst:
BURY GmbH & Co. KG
Robert-Koch-Straße 1-7
32584 Löhne
Hotline: +49(0)180 5 - 842 468*
Faxline: +49(0)180 5 - 842 329*
* 0,14 €/min. uit het vaste net van de Deutsche Telekom AG
E-Mail: hotline@bury.com
Service-acceptatie
Als u uw apparaat of toebehoren wegens reclamaties wilt opsturen, stuur het product dan het beste
direct naar ons serviceteam:
BURY GmbH & Co. KG
Im Hause DPD Depot 103
Robinienweg
D-03222 Lübbenau
Wij staan open voor uw suggesties en opmerkingen.
Aanwijzingen m.b.t. afvoer van elektrische apparatuur
Met de inwerkingtreding van de wet inzake elektrische en elektronische apparatuur mogen oude elek-
trische en elektronische apparatuur sinds 24 maart 2006 niet meer samen met het huisvuil worden
afgevoerd. Als eigenaar van een oud apparaat bent u verplicht dit naar de hiervoor bestemde ont-
vangst- of gemeentelijke verzamelpunten te brengen. Oude elektrische en elektronische apparatuur
wordt daar gratis in ontvangst genomen.
www.bury.com
Bury GmbH & Co. KG
Robert-Koch-Str. 1-7
D-32584 hne
Hotline Tel: +49 (0)180 - 584 24 68*
Hotline Fax: +49 (0)180 - 584 23 29*
E-Mail: infoline@bury.com
* 0,14 €/Min. aus dem Festnetz der Deutschen Telekom AG / from Deutsche Telekom AG landlines
59-0710-0-01-280507
www.bury.com
42

Hulp nodig? Stel uw vraag in het forum

Spelregels

Misbruik melden

Gebruikershandleiding.com neemt misbruik van zijn services uitermate serieus. U kunt hieronder aangeven waarom deze vraag ongepast is. Wij controleren de vraag en zonodig wordt deze verwijderd.

Product:

Bijvoorbeeld antisemitische inhoud, racistische inhoud, of materiaal dat gewelddadige fysieke handelingen tot gevolg kan hebben.

Bijvoorbeeld een creditcardnummer, een persoonlijk identificatienummer, of een geheim adres. E-mailadressen en volledige namen worden niet als privégegevens beschouwd.

Spelregels forum

Om tot zinvolle vragen te komen hanteren wij de volgende spelregels:

Belangrijk! Als er een antwoord wordt gegeven op uw vraag, dan is het voor de gever van het antwoord nuttig om te weten als u er wel (of niet) mee geholpen bent! Wij vragen u dus ook te reageren op een antwoord.

Belangrijk! Antwoorden worden ook per e-mail naar abonnees gestuurd. Laat uw emailadres achter op deze site, zodat u op de hoogte blijft. U krijgt dan ook andere vragen en antwoorden te zien.

Abonneren

Abonneer u voor het ontvangen van emails voor uw Bury CC 9051 bij:


U ontvangt een email met instructies om u voor één of beide opties in te schrijven.


Ontvang uw handleiding per email

Vul uw emailadres in en ontvang de handleiding van Bury CC 9051 in de taal/talen: Nederlands, Duits, Engels, Frans als bijlage per email.

De handleiding is 7,25 mb groot.


U ontvangt de handleiding per email binnen enkele minuten. Als u geen email heeft ontvangen, dan heeft u waarschijnlijk een verkeerd emailadres ingevuld of is uw mailbox te vol. Daarnaast kan het zijn dat uw internetprovider een maximum heeft aan de grootte per email. Omdat hier een handleiding wordt meegestuurd, kan het voorkomen dat de email groter is dan toegestaan bij uw provider.

Stel vragen via chat aan uw handleiding

Stel uw vraag over deze PDF

Andere handleiding(en) van Bury CC 9051

Bury CC 9051 Gebruiksaanwijzing en installatiehandleiding - Nederlands, Deutsch - 34 pagina's

Bury CC 9051 Aanvulling / aanpassing - Deutsch - 1 pagina's

Bury CC 9051 Gebruiksaanwijzing en installatiehandleiding - English, Français, Italiano, Português, Espanõl, Polski - 34 pagina's


Uw handleiding is per email verstuurd. Controleer uw email

Als u niet binnen een kwartier uw email met handleiding ontvangen heeft, kan het zijn dat u een verkeerd emailadres heeft ingevuld of dat uw emailprovider een maximum grootte per email heeft ingesteld die kleiner is dan de grootte van de handleiding.

Er is een email naar u verstuurd om uw inschrijving definitief te maken.

Controleer uw email en volg de aanwijzingen op om uw inschrijving definitief te maken

U heeft geen emailadres opgegeven

Als u de handleiding per email wilt ontvangen, vul dan een geldig emailadres in.

Uw vraag is op deze pagina toegevoegd

Wilt u een email ontvangen bij een antwoord en/of nieuwe vragen? Vul dan hier uw emailadres in.


Info