You can read this manual with Screen Reader ‘text-to-speech’ software.
You must set up the hardware and install the driver before you can use the machine.
Please use the Quick Setup Guide to set up the machine. You can find a printed copy in the box.
Please read this User’s Guide thoroughly before you use the machine.
Please visit us at http://solutions.brother.com/
where you can get product support, the latest driver updates and utilities,
and answers to frequently asked questions (FAQs) and technical questions.
Note: Not all models are available in all countries.
Version 0
UK/IRE
i
User's Guides and where do I find them?
Which Guide?What's in it?Where is it?
Product Safety GuideRead this Guide first. Read the Safety Instructions
before you set up your machine. See this Guide for
trademarks and legal limitations.
Printed / In the box
Quick Setup GuideFollow the instructions for setting up your machine
and installing the drivers and software for the
operating system and connection type you are using.
Printed / In the box
User’s GuideLearn the print operations, how to replace
consumables, and performing routine maintenance.
See troubleshooting tips.
PDF file / CD-ROM / In the box
Network User's GuideThis Guide provides useful information about wired
and wireless network settings and security settings
using the Brother machine. You can also find
supported protocol information for your machine and
detailed troubleshooting tips.
PDF file / CD-ROM / In the box
Wi-Fi Direct™ GuideThis Guide provides information about how to
configure and use your Brother machine for wireless
printing directly from a mobile device supporting the
Wi-Fi Direct™ standard.
PDF file / Brother Solutions Center
at http://solutions.brother.com/
Google Cloud Print
Guide
This Guide provides information about how to
configure your Brother machine to a Google account
and use Google Cloud Print services for printing over
the Internet.
PDF file / Brother Solutions Center
at http://solutions.brother.com/
Mobile Print/Scan
Guide for Brother
iPrint&Scan
This Guide provides useful information about printing
from your mobile device and scanning from your
Brother machine to your mobile device when
connected on a Wi-Fi network.
PDF file / Brother Solutions Center
at http://solutions.brother.com/
AirPrint GuideThis Guide provides information for using AirPrint to
print from OS X v10.7.x, 10.8.x, your iPhone, iPod
touch, iPad, or other iOS device to your Brother
machine without installing a printer driver.
PDF file / Brother Solutions Center
at http://solutions.brother.com/
ii
Using the documentation
Thank you for buying a Brother machine! Reading the documentation will help you make the most of your
machine.
Symbols and conventions used in the documentation
The following symbols and conventions are used throughout the documentation.
NOTE
If you are using a tablet running Windows
®
8, you can make your selections either by tapping the screen
or by clicking with your mouse.
WARNING
WARNING indicates a potentially hazardous situation which, if not avoided,
could result in death or serious injuries.
IMPORTANT
IMPORTANT indicates a potentially hazardous situation which, if not avoided,
may result in damage to property or loss of product functionality.
NOTE
Notes tell you how you should respond to a situation that may arise or give tips
about how the operation works with other features.
Electrical Hazard icons alert you to possible electrical shocks.
Fire Hazard icons alert you to the possibility of a fire.
Hot Surface icons warn you not to touch machine parts that are hot.
Prohibition icons indicate actions that must not be performed.
BoldBold style identifies keys on the machine control panel or computer screen.
ItalicsItalicized style emphasizes an important point or refers you to a related topic.
Courier NewCourier New font identifies the messages shown on the LCD of the machine.
iii
1Printing Methods1
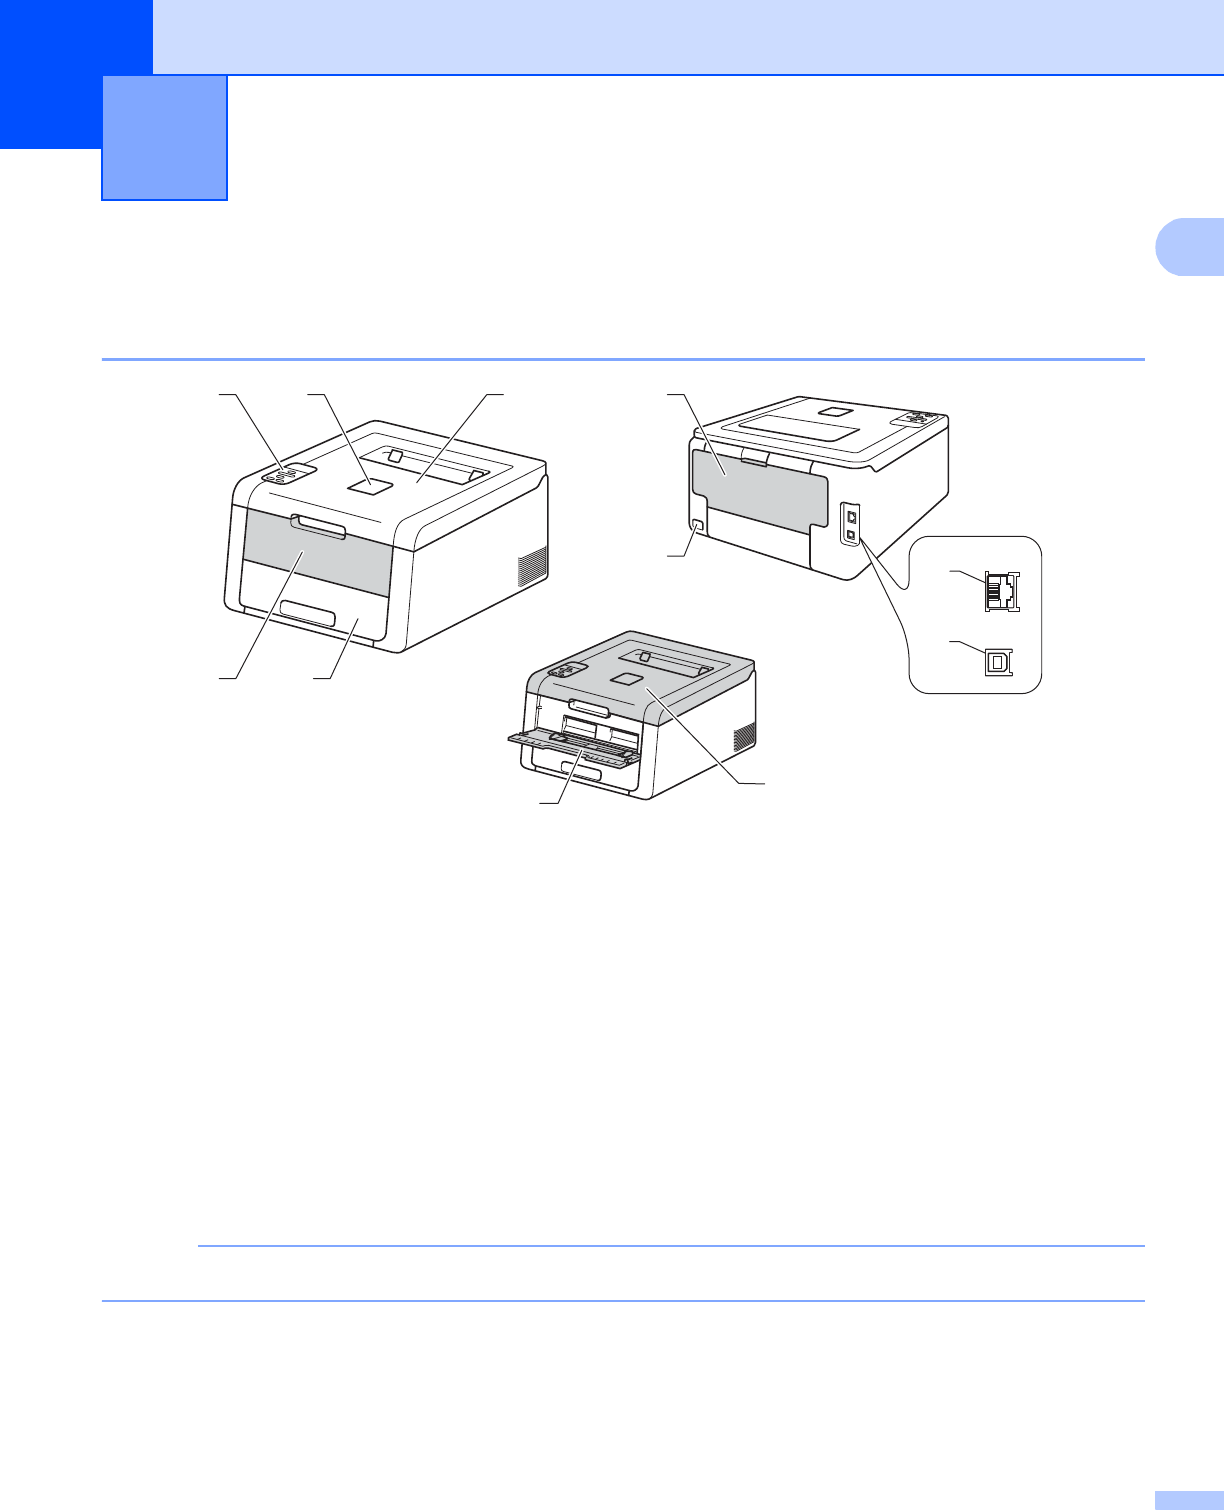
About this Machine....................................................................................................................................1
Front view and Back view....................................................................................................................1
Acceptable paper and other print media....................................................................................................2
Recommended paper and print media................................................................................................2
Type and size of paper........................................................................................................................2
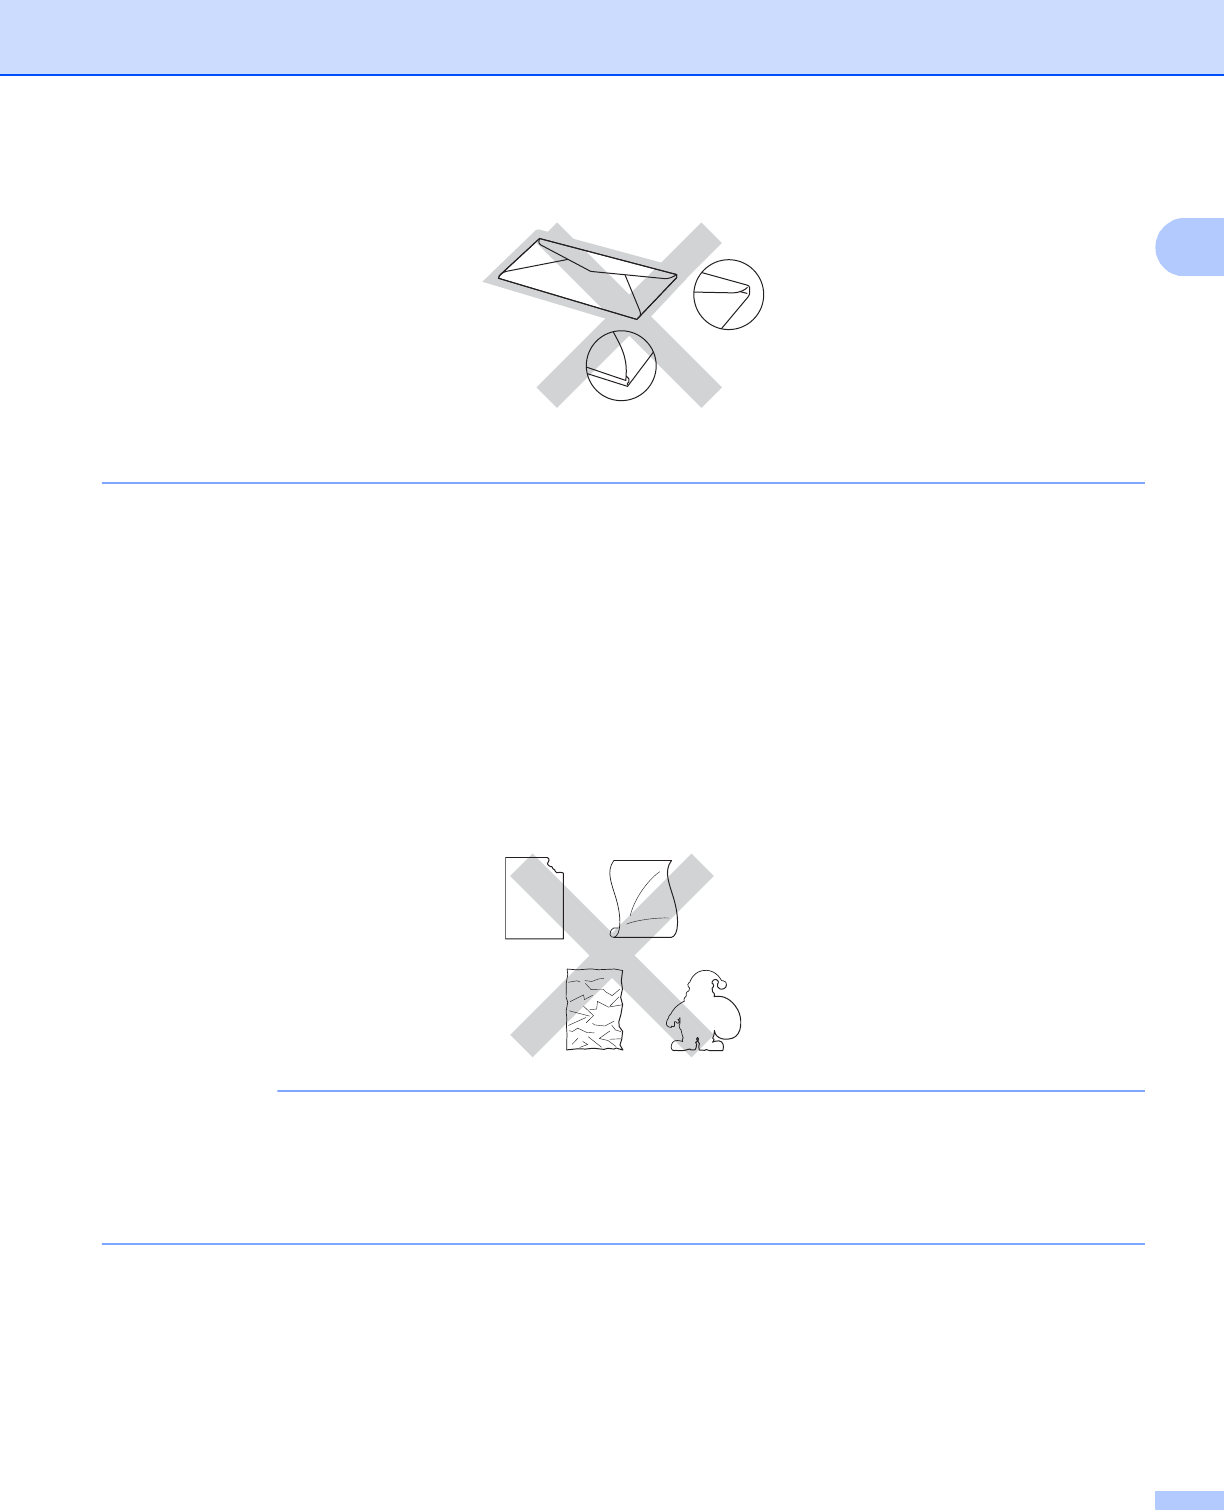
Handling and using special paper .......................................................................................................4
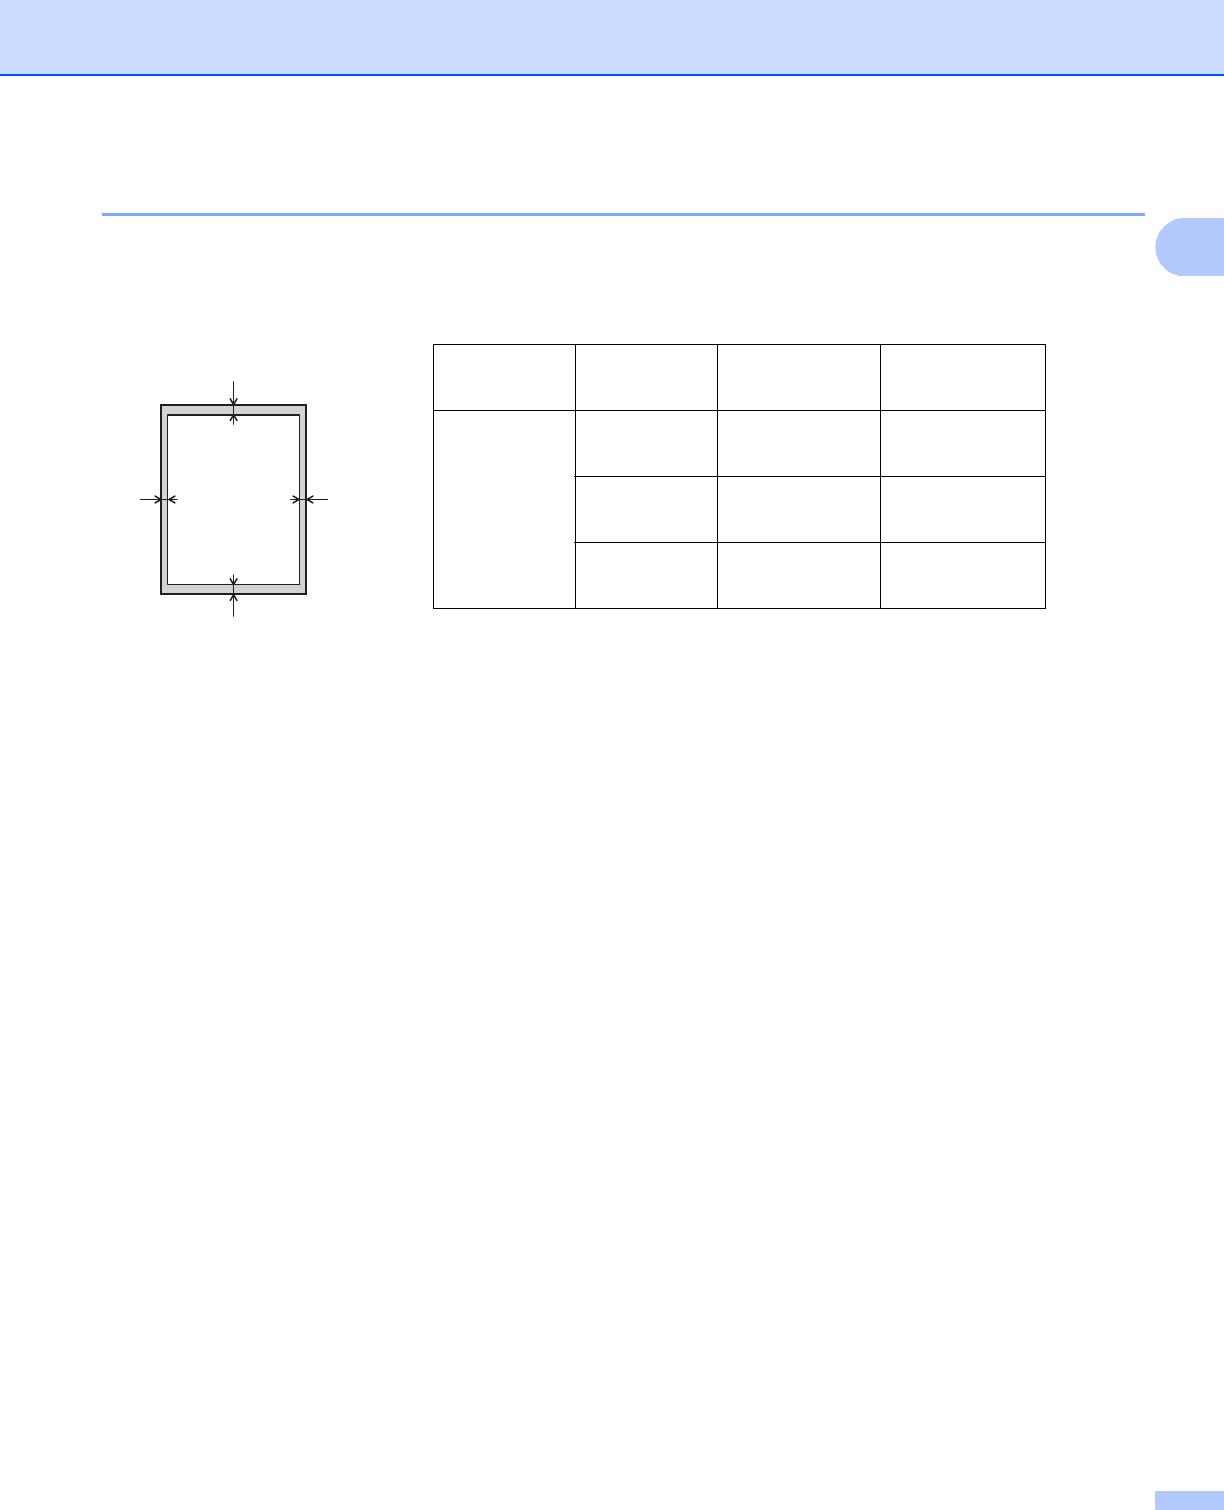
Unprintable area when printing from a computer ................................................................................7
Software for networks .......................................................................................................................80
Table of Contents
iv
3General Information81
Control panel...........................................................................................................................................81
Control panel overview......................................................................................................................81
LED indications..................................................................................................................................83
Machine status messages.................................................................................................................83
Menu table.........................................................................................................................................84
Gebruikershandleiding.com neemt misbruik van zijn services uitermate serieus. U kunt hieronder aangeven waarom deze vraag ongepast is. Wij controleren de vraag en zonodig wordt deze verwijderd.
Product:
Spelregels forum
Om tot zinvolle vragen te komen hanteren wij de volgende spelregels:
lees eerst de handleiding door;
controleer of uw vraag al eerder door iemand anders is gesteld;
probeer uw vraag zo duidelijk mogelijk te stellen;
heeft u een probleem en al geprobeerd om dit op te lossen, vermeld dit erbij aub;
heeft u een oplossing gekregen van een bezoeker dan horen wij dat graag in dit forum;
wilt u een reactie geven op een vraag of antwoord, gebruik dan niet dit formulier maar klik op de knop 'reageer op deze vraag';
uw vraag wordt direct op de website gezet; vermijd daarom persoonlijke gegevens in te vullen;
Belangrijk! Als er een antwoord wordt gegeven op uw vraag, dan is het voor de gever van het antwoord nuttig om te weten als u er wel (of niet) mee geholpen bent! Wij vragen u dus ook te reageren op een antwoord.
Belangrijk! Antwoorden worden ook per e-mail naar abonnees gestuurd. Laat uw emailadres achter op deze site, zodat u op de hoogte blijft. U krijgt dan ook andere vragen en antwoorden te zien.
Abonneren
Abonneer u voor het ontvangen van emails voor uw Brother HL-3170CDW bij:
nieuwe vragen en antwoorden
nieuwe handleidingen
U ontvangt een email met instructies om u voor één of beide opties in te schrijven.
Ontvang uw handleiding per email
Vul uw emailadres in en ontvang de handleiding van Brother HL-3170CDW in de taal/talen: Engels als bijlage per email.
De handleiding is 4,49 mb groot.
U ontvangt de handleiding per email binnen enkele minuten. Als u geen email heeft ontvangen, dan heeft u waarschijnlijk een verkeerd emailadres ingevuld of is uw mailbox te vol. Daarnaast kan het zijn dat uw internetprovider een maximum heeft aan de grootte per email. Omdat hier een handleiding wordt meegestuurd, kan het voorkomen dat de email groter is dan toegestaan bij uw provider.
Uw handleiding is per email verstuurd. Controleer uw email
Als u niet binnen een kwartier uw email met handleiding ontvangen heeft, kan het zijn dat u een verkeerd emailadres heeft ingevuld of dat uw emailprovider een maximum grootte per email heeft ingesteld die kleiner is dan de grootte van de handleiding.
Er is een email naar u verstuurd om uw inschrijving definitief te maken.
Controleer uw email en volg de aanwijzingen op om uw inschrijving definitief te maken
U heeft geen emailadres opgegeven
Als u de handleiding per email wilt ontvangen, vul dan een geldig emailadres in.
Uw vraag is op deze pagina toegevoegd
Wilt u een email ontvangen bij een antwoord en/of nieuwe vragen? Vul dan hier uw emailadres in.