For technical help, you must call the country where you bought the machine. Calls must be made from
within that country.
Register your product online at
www.brother.com/registration
By registering your product with Brother, you will be recorded as the original owner of the product. Your
registration with Brother:
•may serve as confirmation of the purchase date of your product should you lose your receipt;
•may support an insurance claim by you in the event of product loss covered by insurance; and,
•will help us notify you of enhancements to your product and special offers.
Register your new product online at www.brother.com/html/registration
FAQs (Frequently Asked Questions)
The Brother Solutions Center is our one-stop resource for all your Brother machine needs. You can download
the latest software and user documentation, read FAQs and troubleshooting tips, and learn how to get the
most from your Brother product.
support.brother.com
NOTE
•You can check here for Brother driver updates.
•To keep your machine performance up to date, check here for the latest firmware upgrade. Otherwise,
some of your machine’s functions may not be available.
ii
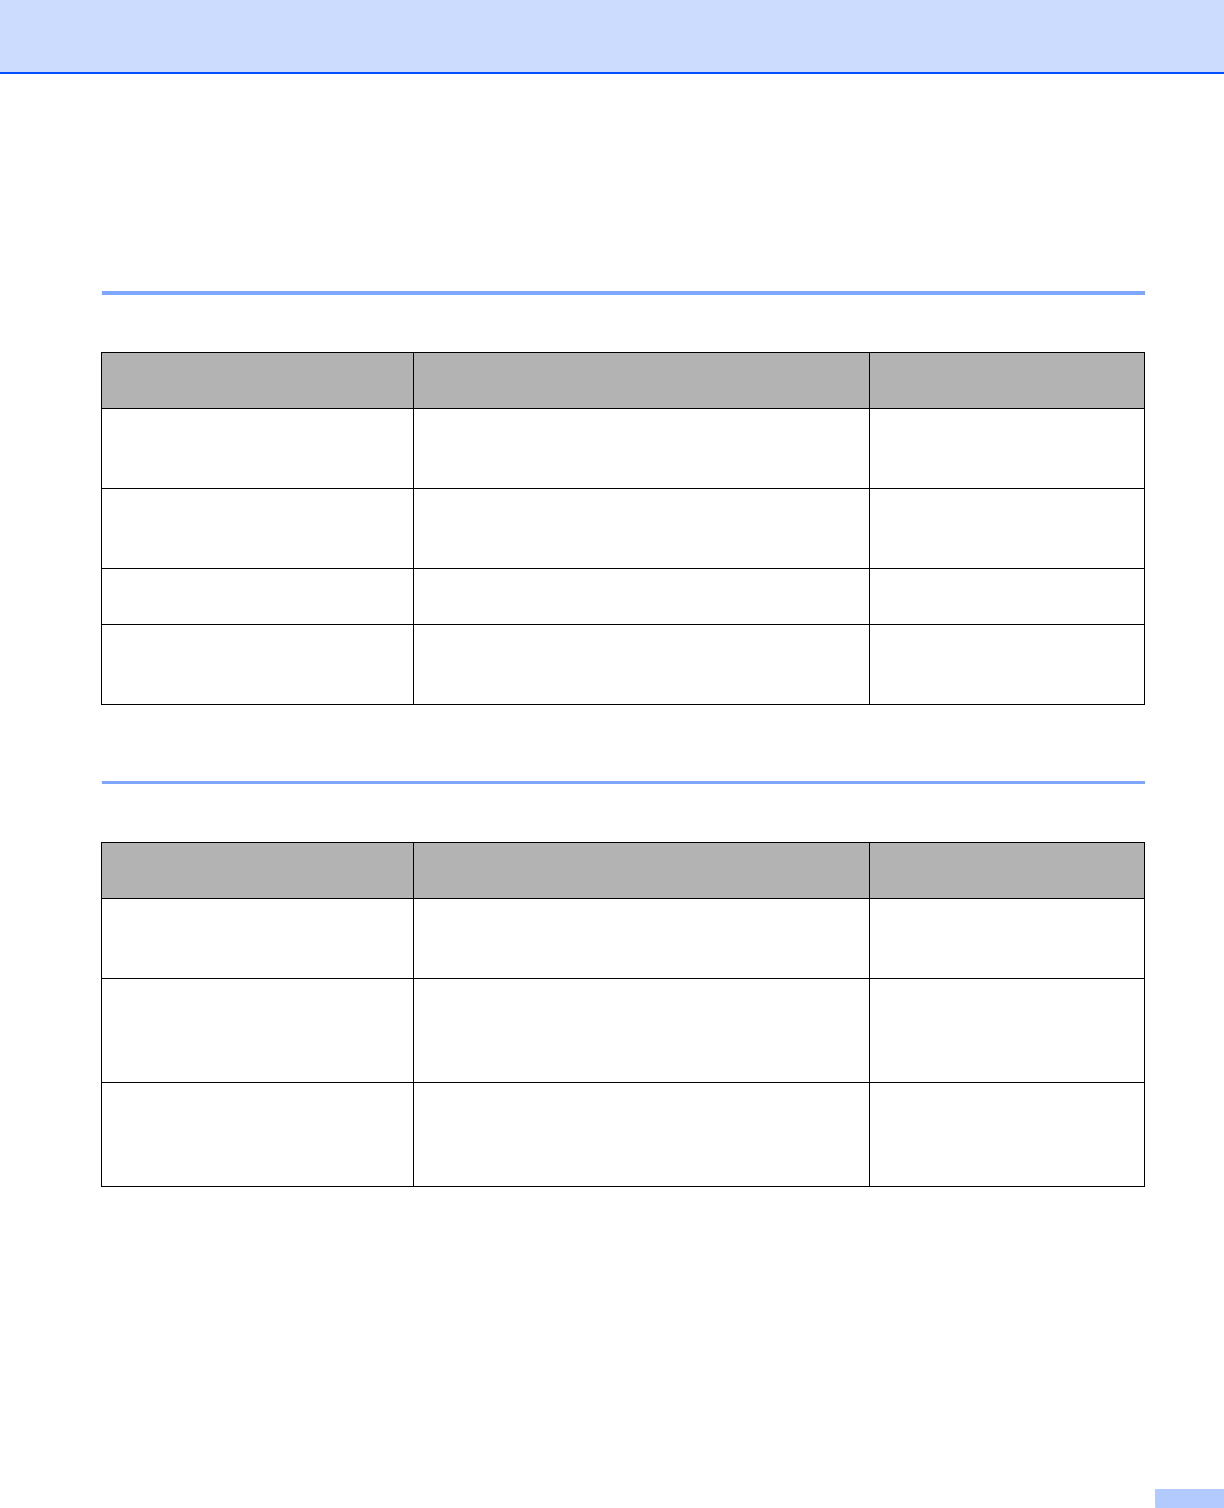
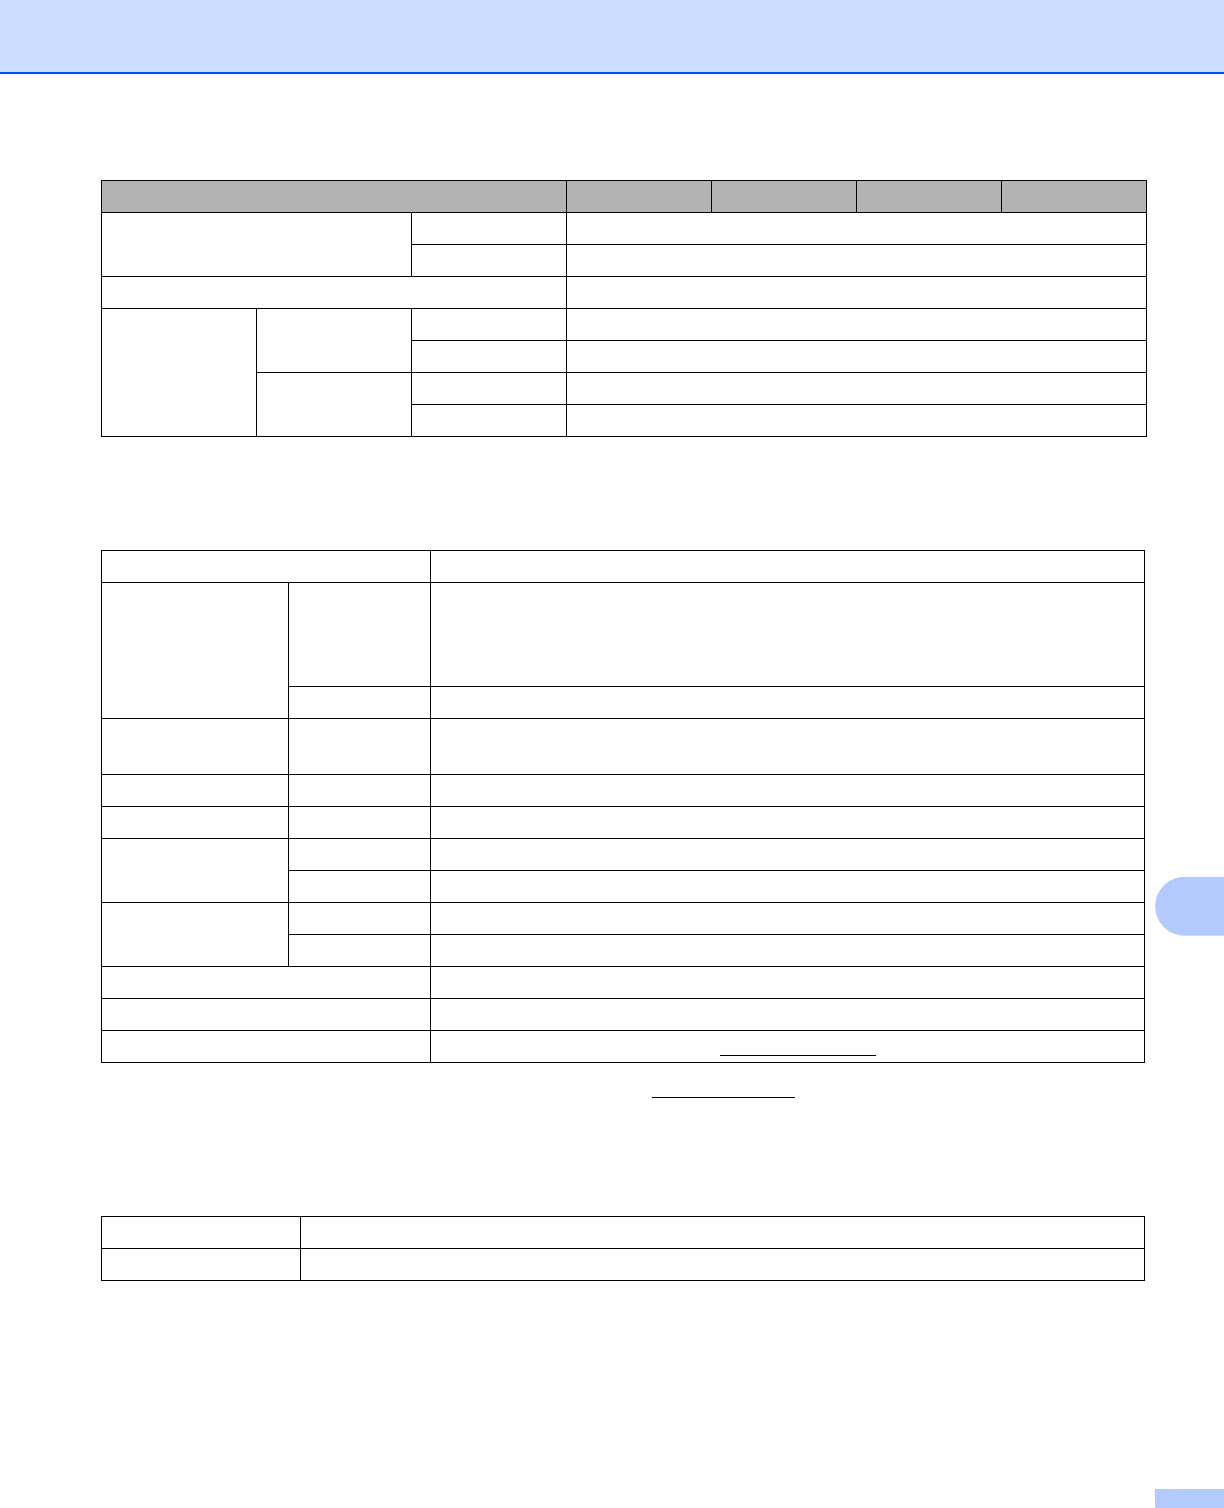
User’s Guides and Where Do I Find Them?
1
Visit Brother Solutions Center at support.brother.com
Which manual?What’s in it?Where is it?
Quick Setup GuideFollow the instructions for setting up your machine
and installing the drivers and software for the
operating system and connection type you are using.
Printed / In the box
Product Safety GuideRead this Guide first before you set up your machine.
See this Guide for the operating system and
connection type you are using.
Printed / In the box
User’s GuideLearn the Scan operations and security features,
learn how to perform routine maintenance, and see
troubleshooting tips.
PDF file / Brother
Solutions Center
1
Network User’s Guide This Guide provides useful information about Ethernet
network settings and security settings using the
Brother machine. You can also find supported
protocol information for your machine and detailed
troubleshooting tips.
PDF file / Brother
Solutions Center
1
Web Connect Guide
(ADS-2800W / ADS-3600W)
This Guide provides useful information about
accessing Internet services from the Brother
machine, as well as downloading images and
uploading files directly from Internet services.
PDF file / Brother
Solutions Center
1
Mobile Print/Scan Guide for
Brother iPrint&Scan
(ADS-2800W / ADS-3600W)
This Guide shows how to use your Brother machine to
scan to, and print from, your mobile device connected
to a Wi-Fi network.
PDF file / Brother
Solutions Center
1
Brother Image Viewer Guide
for Android™
This Guide provides useful information about using
your Android™ mobile device to view and edit
documents that were scanned by a Brother machine.
PDF file / Brother
Solutions Center
1
iii
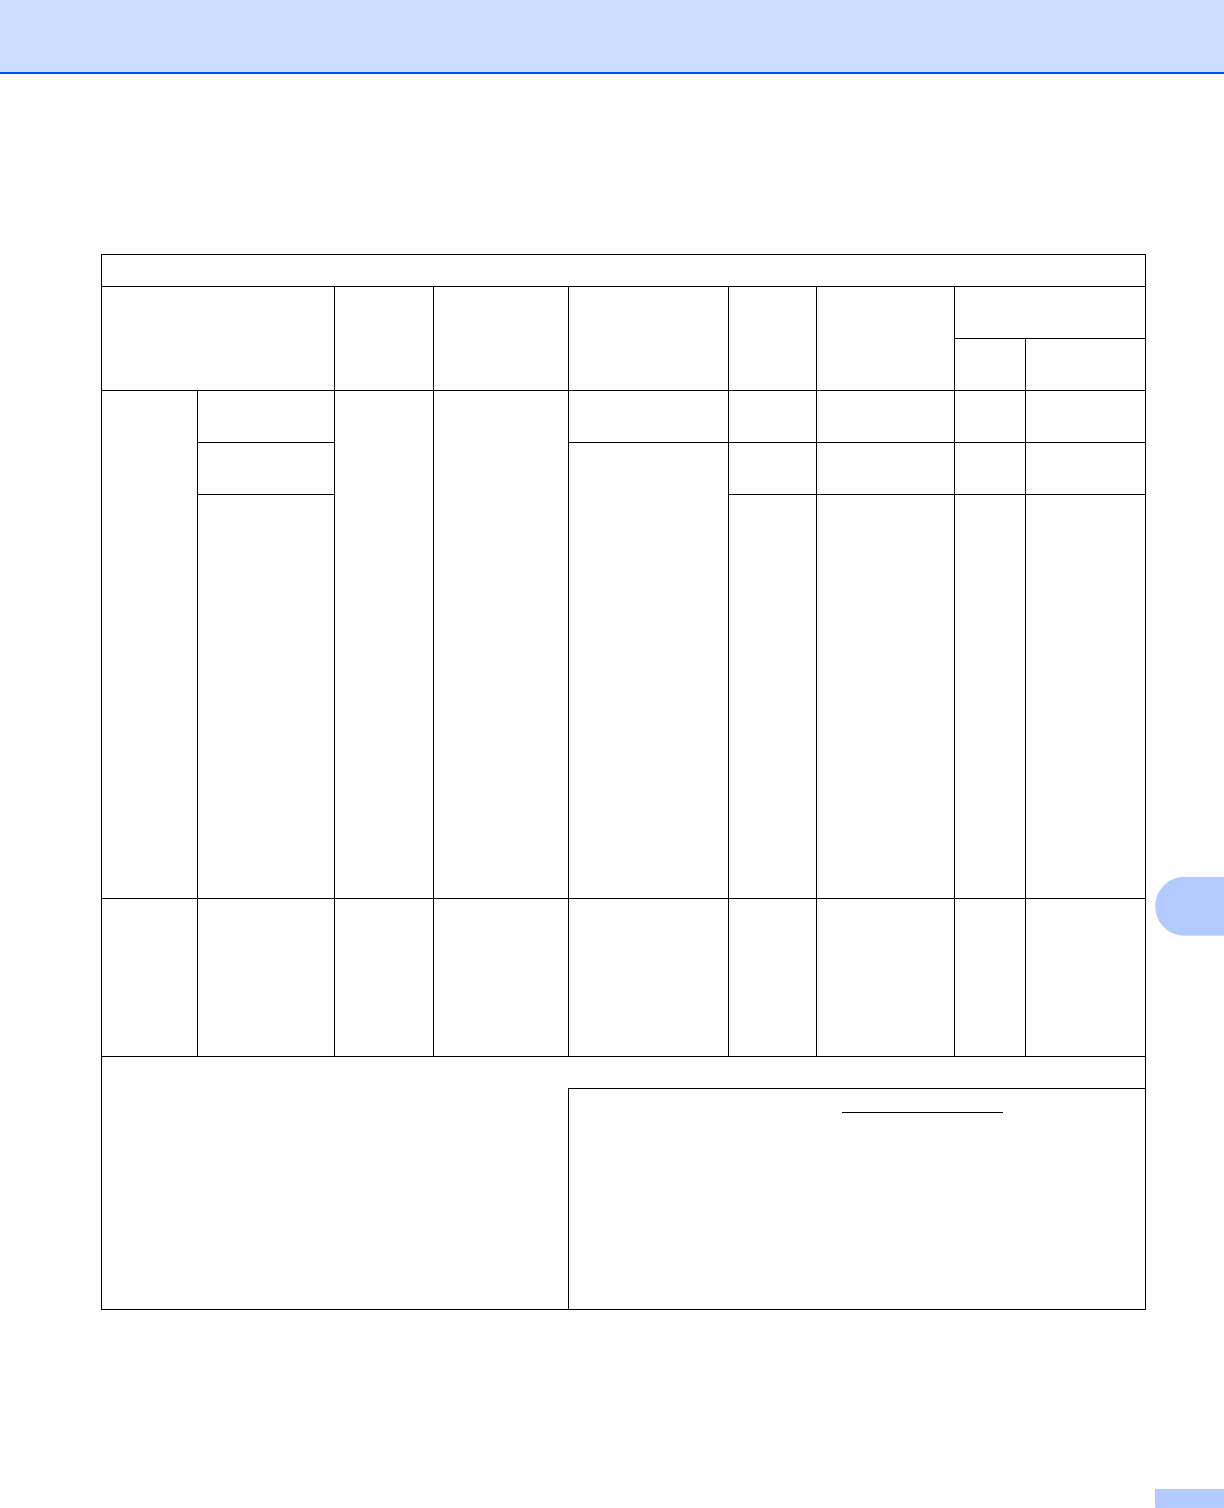
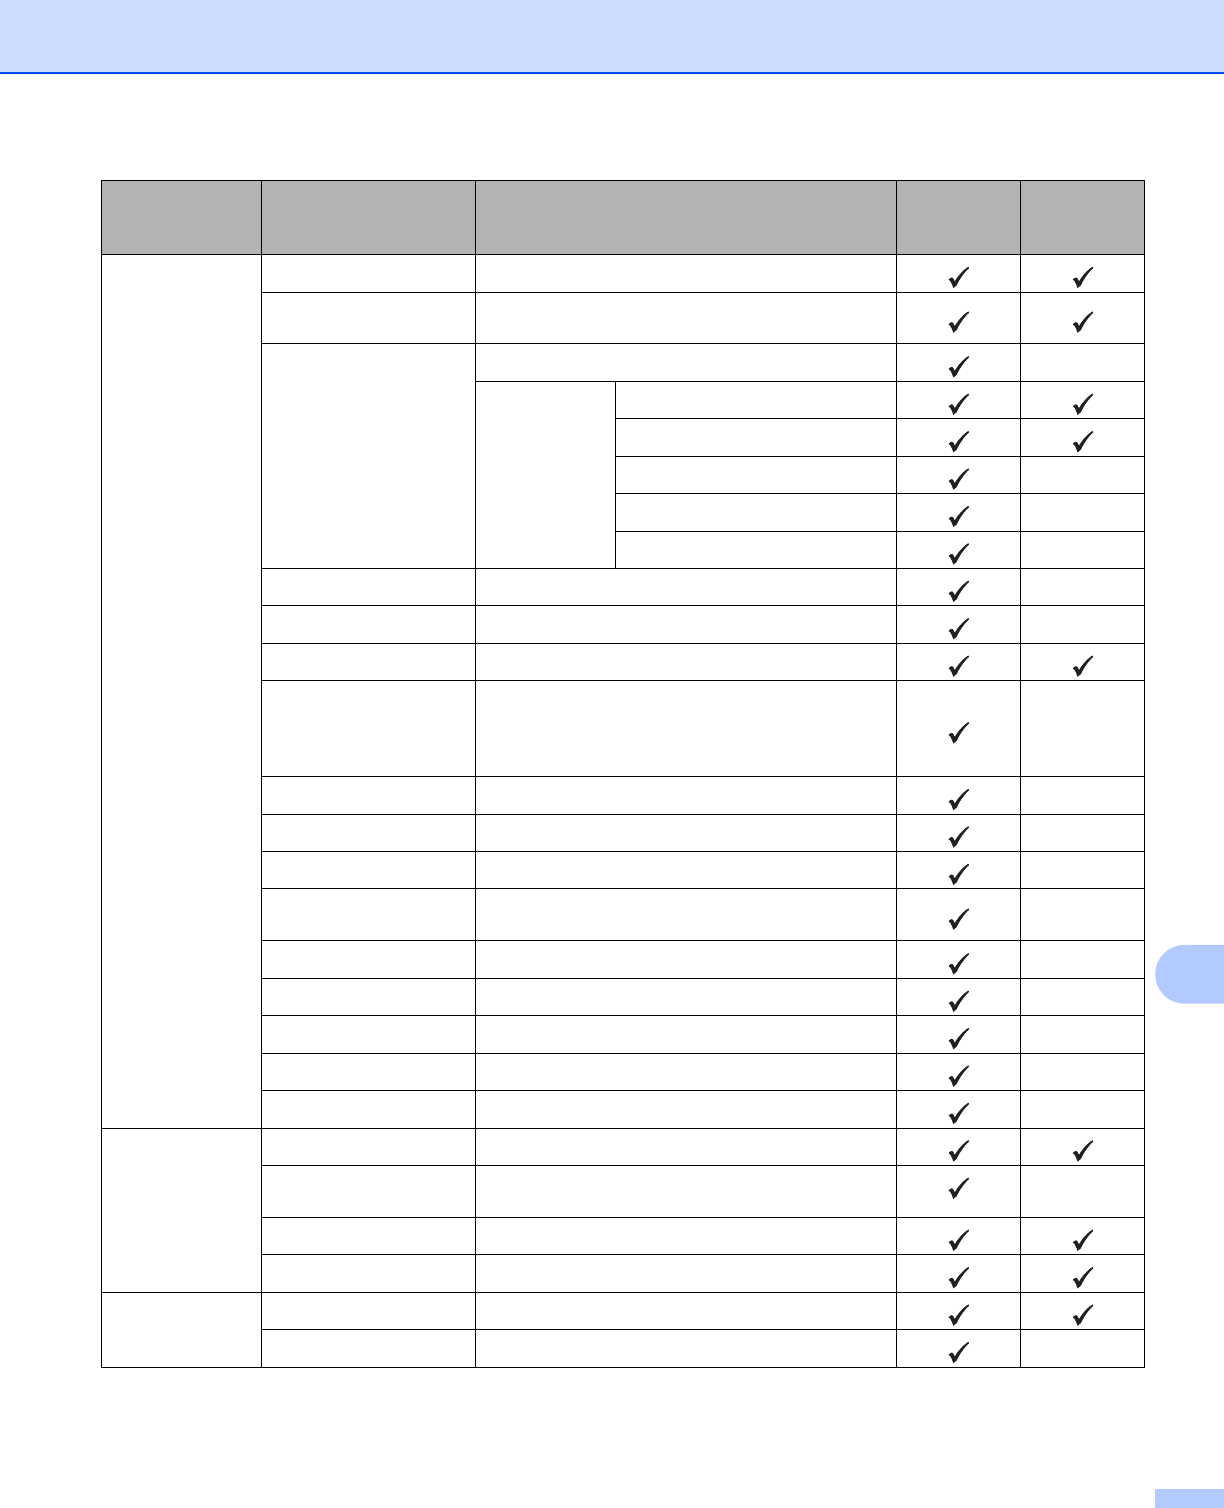
Getting Started
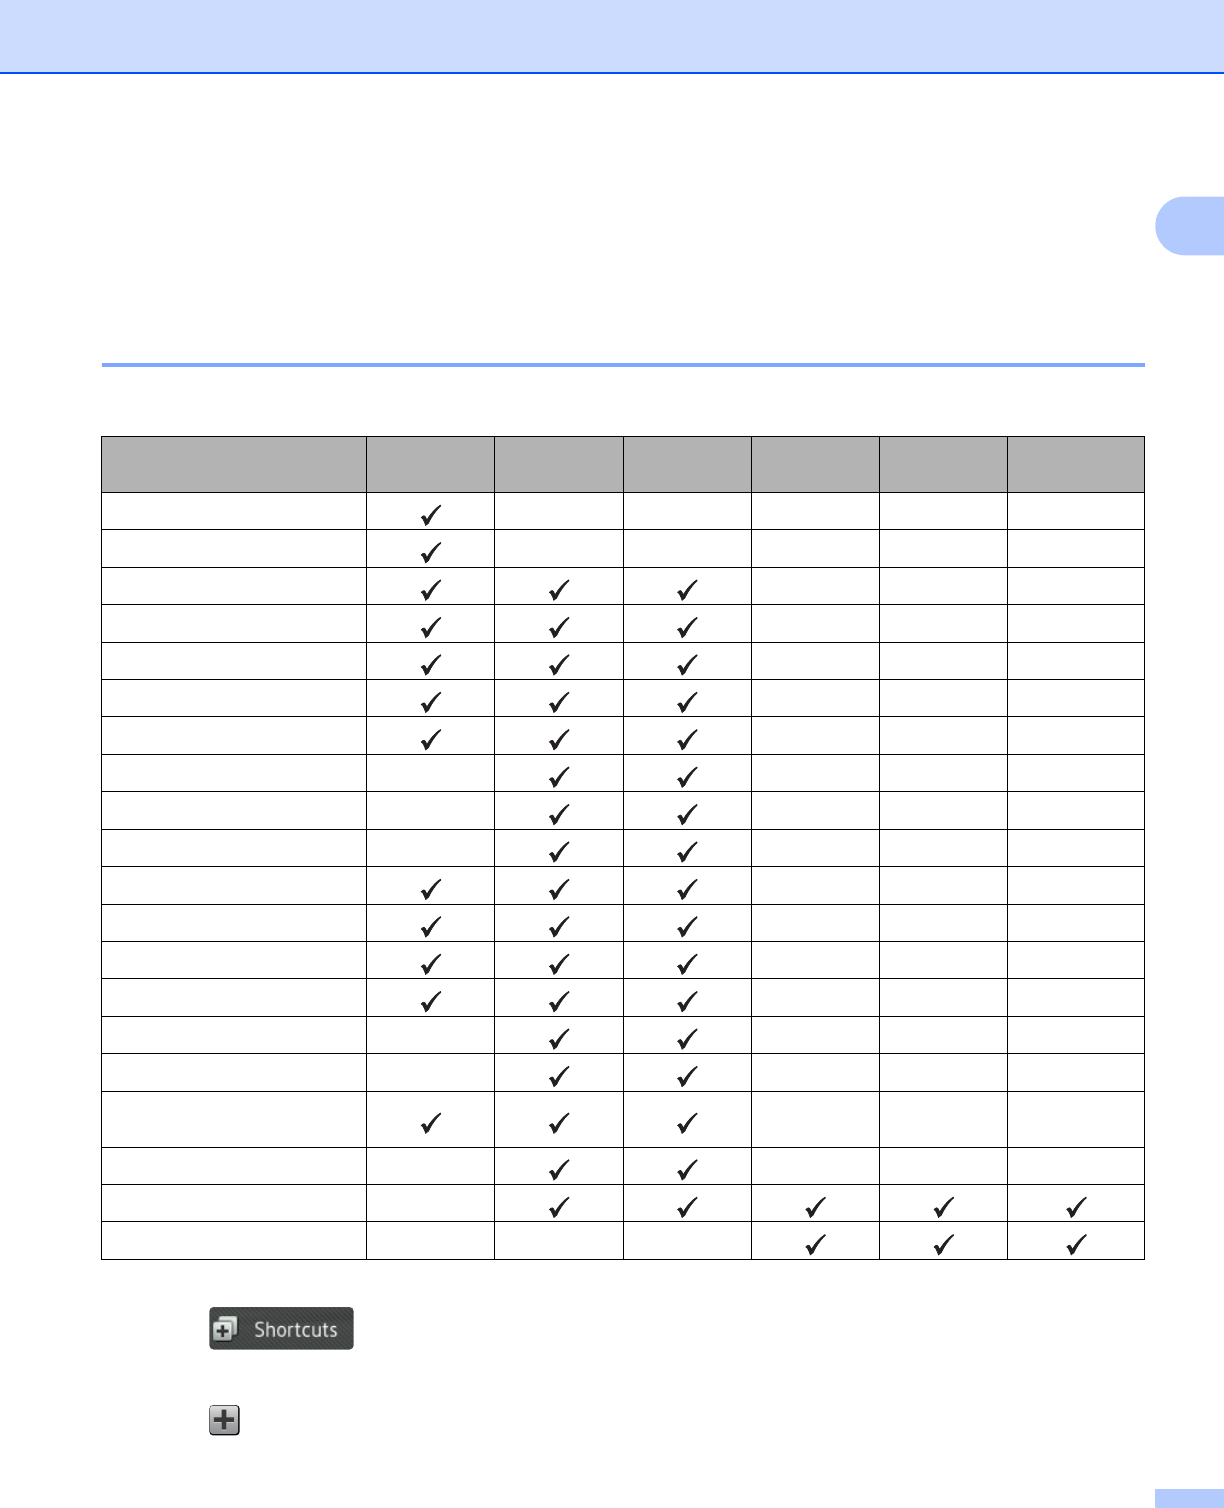
FeaturesApplicationsWhat Can I Do?
Where Should I Go for
More Information?
Scan to PCScan to ImageControlCenter4
(Windows
®
)
Brother iPrint &
Scan (Mac)
Scan your document directly
into a graphics application for
image editing.
For scanning from the Control
Panel of the machine:
Home Mode: Save Scanned
Documents on Your Computer
in Home Mode on page 130
Advanced Mode: Save
Scanned Documents on Your
Computer in Advanced Mode
on page 133
For scanning from ControlCenter4
(Windows
®
):
Home Mode: Basic Scan
on page 78
Advanced Mode: Basic Scan
on page 85
Scan to OCRScan your document and
convert it to text. This text can
be edited using your favourite
word processing software.
For scanning from the Control
Panel of the machine:
Home Mode: Save Scanned
Documents on Your Computer
in Home Mode on page 130
Advanced Mode: Save
Scanned Documents on Your
Computer in Advanced Mode
on page 133
For scanning from ControlCenter4
(Windows
®
):
Home Mode: Basic Scan
on page 78
Advanced Mode: Basic Scan
on page 85
iv
Scan to PC
(continued)
Scan to EmailControlCenter4
(Windows
®
)
Brother iPrint &
Scan (Mac)
(continued)
Scan your document to your
default email application so
you can send the scanned job
as an attachment.
For scanning from the Control
Panel of the machine:
Home Mode: Save Scanned
Documents on Your Computer
in Home Mode on page 130
Advanced Mode: Save
Scanned Documents on Your
Computer in Advanced Mode
on page 133
For scanning from ControlCenter4
(Windows
®
):
Home Mode: Basic Scan
on page 78
Advanced Mode: Basic Scan
on page 85
Scan to FileScan your document and save
it to a folder on your hard disk
in one of the file types shown in
the file type list (for example:
as a PDF file).
For scanning from the Control
Panel of the machine:
Home Mode: Save Scanned
Documents on Your Computer
in Home Mode on page 130
Advanced Mode: Save
Scanned Documents on Your
Computer in Advanced Mode
on page 133
For scanning from ControlCenter4
(Windows
®
):
Home Mode: Basic Scan
on page 78
Advanced Mode: Basic Scan
on page 85
FeaturesApplicationsWhat Can I Do?
Where Should I Go for
More Information?
v
Scan to PC
(continued)
Scan Using the
TWAIN/WIA
Driver for
Windows
®
Users
Applications
supporting the
TWAIN/WIA
driver such as:
Nuance™
PaperPort™
14SE
Windows
®
Fax
and Scan
Windows
®
Photo Gallery
Use the Nuance
™
PaperPort
™
14SE application
included in the scanner driver,
or other applications
supporting TWAIN or WIA
specifications, for scanning.
For scanning using the
TWAIN/WIA driver:
Scan Using Nuance™
PaperPort™ 14SE or Other
Windows
®
Applications
on page 105
Scan Using the
TWAIN/ICA
Driver for
Macintosh Users
Applications
supporting the
ICA driver, such
as:
ABBYY
FineReader Pro
Applications
supporting the
TWAIN/ICA
driver, such as:
Apple Image
Capture
Use the applications
supporting TWAIN
specifications for scanning.
After installing the scanner
driver, you can also use the
Apple Image Capture
application for scanning.
For scanning using the TWAIN
driver:
Scan Using TWAIN Applications
(Macintosh) on page 122
For scanning using the ICA driver:
Scan Using Apple Image Capture
(ICA Driver) on page 126
WS Scan
(Windows
®
users only)
(ADS-2800W /
ADS-3600W)
Windows
®
Fax
and Scan
Windows
®
Photo Gallery
Scan your document using
the Web Services protocol.
The Web Services protocol
enables you to scan over a
network using your machine
and a computer running
Windows Vista
®
, Windows
®
7,
Windows
®
8, Windows
®
8.1 or
Windows
®
10.
For installing drivers:
Install Drivers Used for
Scanning via Web Services
(Windows Vista
®
, Windows
®
7,
Windows
®
8, Windows
®
8.1,
Windows
®
10) in the Network
User’s Guide
For scanning from the Control
Panel of the machine:
Scan Using Web Services
(Windows Vista
®
, Windows
®
7,
Windows
®
8, Windows
®
8.1 and
Windows
®
10) on page 177
FeaturesApplicationsWhat Can I Do?
Where Should I Go for
More Information?
vi
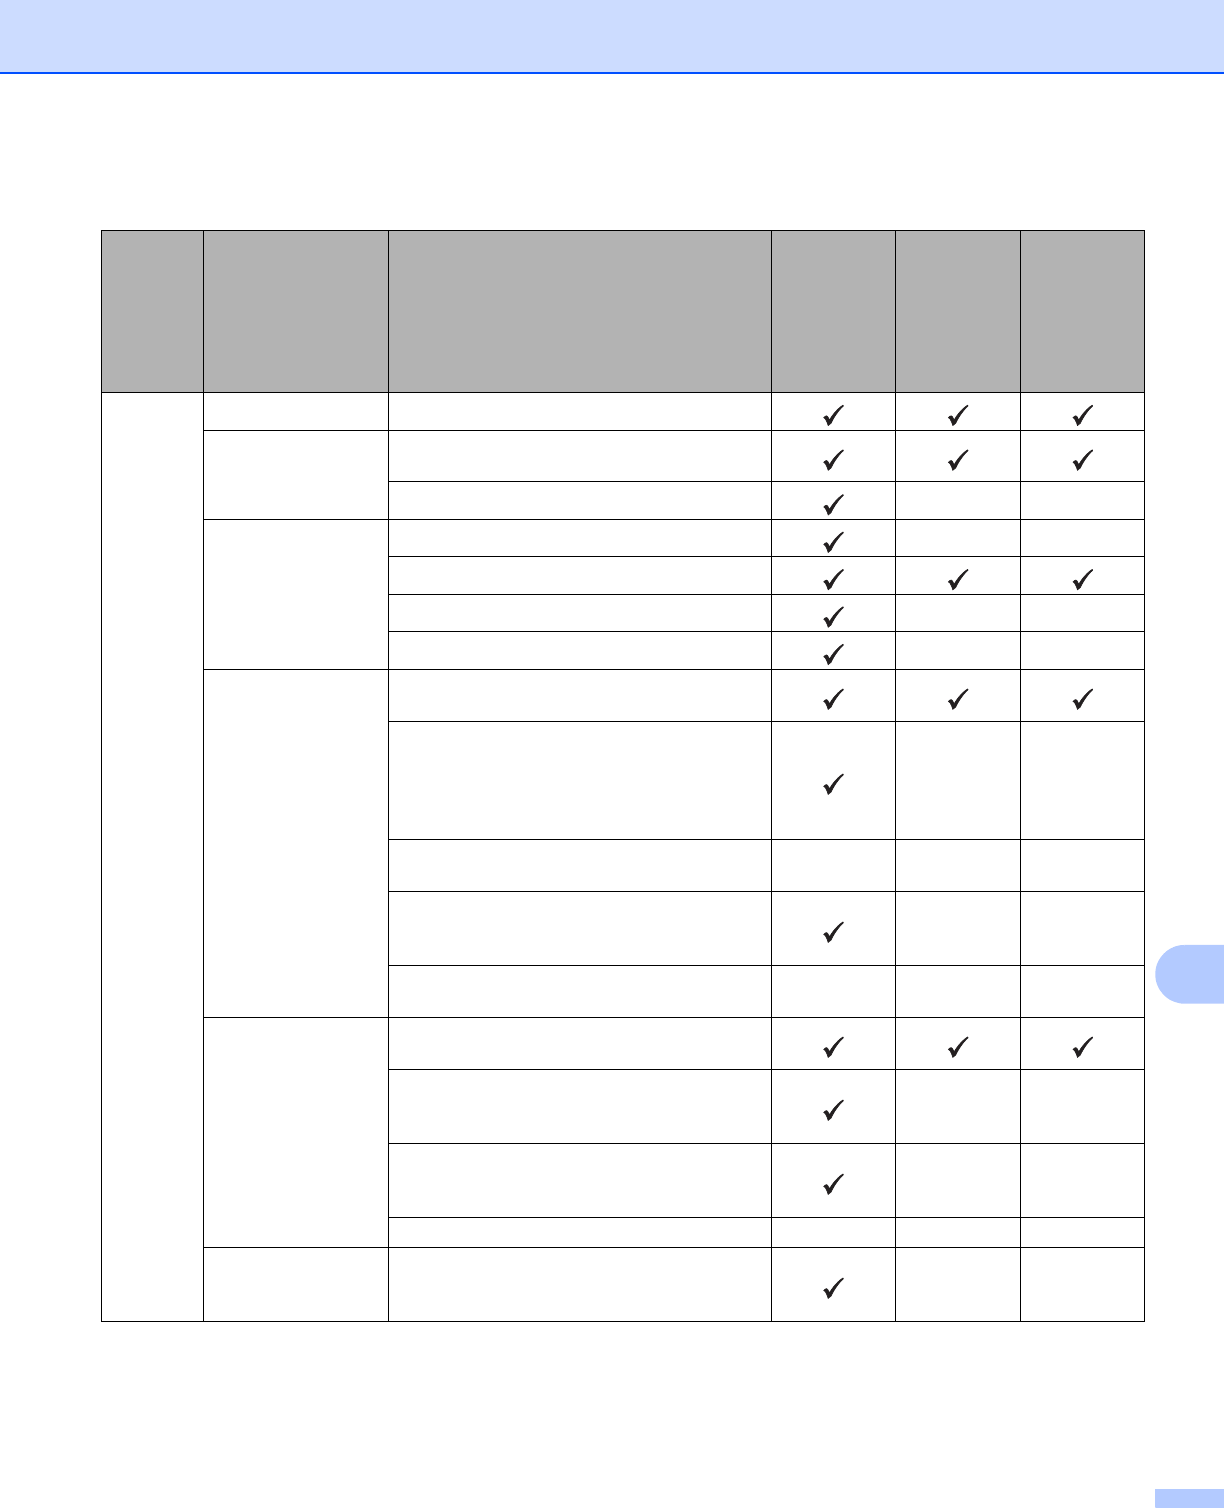
Scan from
the Control
Panel of the
Machine
Scan to USB—Scan your document and save
the scanned image on a USB
flash drive.
(ADS-2800W / ADS-3600W)
You can configure the settings
on the machine’s control panel.
Save Scanned Documents on a
USB Flash Drive on page 137
Scan to FTPScan your document directly
to an FTP server on your local
network, or on the Internet.
Scan Documents to an FTP
Server on page 142
Scan to SFTPScan your document directly to
an SFTP server on your local
network, or on the Internet.
Scan Documents to an SFTP
Server on page 151
Scan to
SharePoint
Scan your document directly
to a SharePoint server.
Scan Documents to SharePoint
on page 169
Scan to Apps
(ADS-2800W /
ADS-3600W)
Convert the scanned data to a
Microsoft Office compatible
document.
Network User’s Guide
Scan to Network
(Windows
®
users only)
Scan your document directly
to a shared folder on your local
network, or on the Internet.
Scan Documents to a Shared
Folder / Network Location
(Windows
®
) on page 160
Scan to Email
Server
(ADS-2800W /
ADS-3600W)
—Scan your document and send
it directly to an email address
from the machine. In addition,
because this feature can
assign an email address to
the machine, you can use the
machine to send documents
over your local network or
the Internet to computers.
Send Scanned Documents
Directly to an Email Address
(ADS-2800W / ADS-3600W)
on page 179
Scan to Web
(ADS-2800W /
ADS-3600W)
Scan your document and
upload it directly to Web
Services, such as Evernote,
Dropbox, Box and OneDrive,
without using a computer.
Web Connect Guide
FeaturesApplicationsWhat Can I Do?
Where Should I Go for
More Information?
vii
From
Mobile
Devices
Scan
Documents
(Brother
iPrint&Scan)
Brother
iPrint&Scan
Scan your document directly
from your Android™ devices,
iOS devices, and Windows
®
Phone without using a
computer.
You can download and install
Brother iPrint&Scan from
Google Play, the App Store, or
the Windows
®
Phone Store.
Mobile Print/Scan Guide
for Brother iPrint&Scan
View or Edit
Scanned Data
(Android™)
(ADS-2800W /
ADS-3600W)
Brother Image
Viewer
Use your Android™ mobile
device to view and edit
documents that were scanned
by a Brother machine.
You can download and install
Brother Image Viewer from
Google Play.
Brother Image Viewer Guide
for Android™
FeaturesApplicationsWhat Can I Do?
Where Should I Go for
More Information?
viii
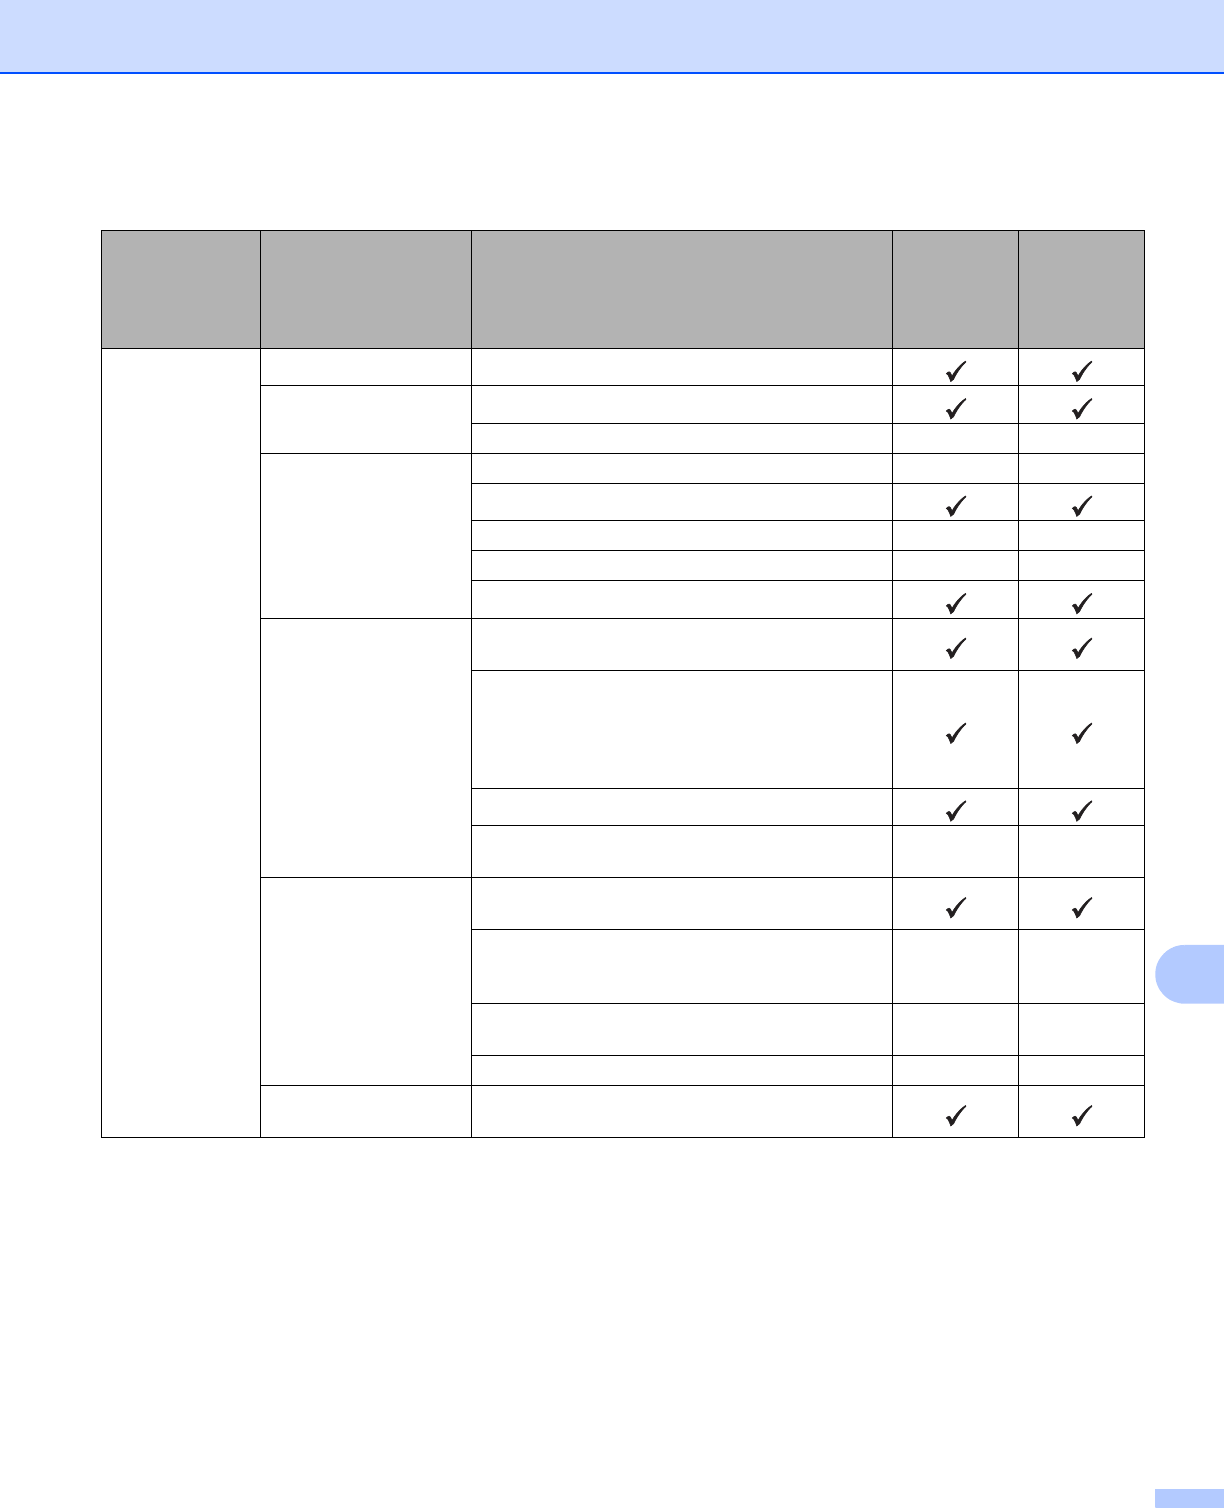
You Can Use the Following Features
Manage the machine securely
Streamlining Work
FeatureDescription
Where Should I Go for
More Information?
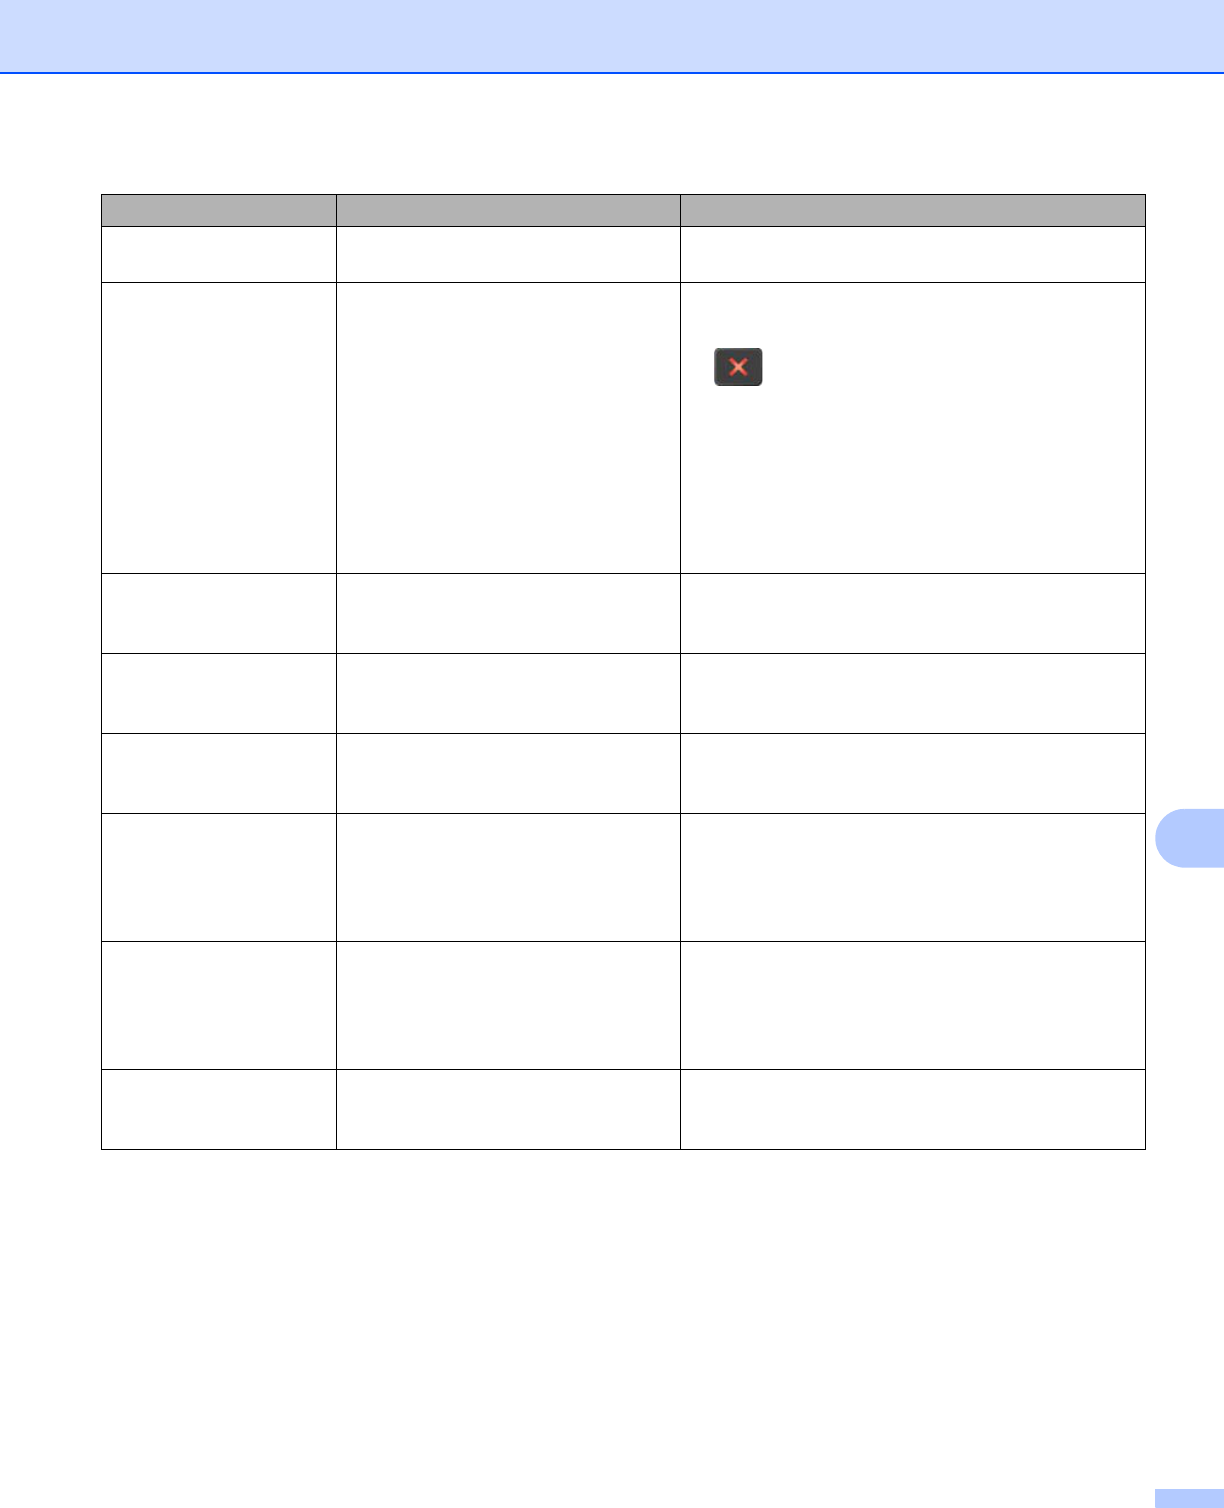
Secure Function Lock 3.0
(ADS-2800W / ADS-3600W)
Allows users to choose which functions each user
can use.
Secure Function Lock 3.0
(ADS-2800W / ADS-3600W)
on page 39
Active Directory Authentication
(ADS-2800W / ADS-3600W)
Restricts the use of the Brother machine unless
users provide the user ID and password.
Active Directory
Authentication (ADS-2800W /
ADS-3600W) on page 48
Setting Lock
(ADS-2800W / ADS-3600W)
Allows you to prevent users who do not know the
password from changing the machine’s settings.
Setting Lock (ADS-2800W /
ADS-3600W) on page 37
LDAP AuthenticationRestricts the use of the Brother machine unless
users enter the user name and password.
LDAP Authentication
(ADS-2800W / ADS-3600W)
on page 49
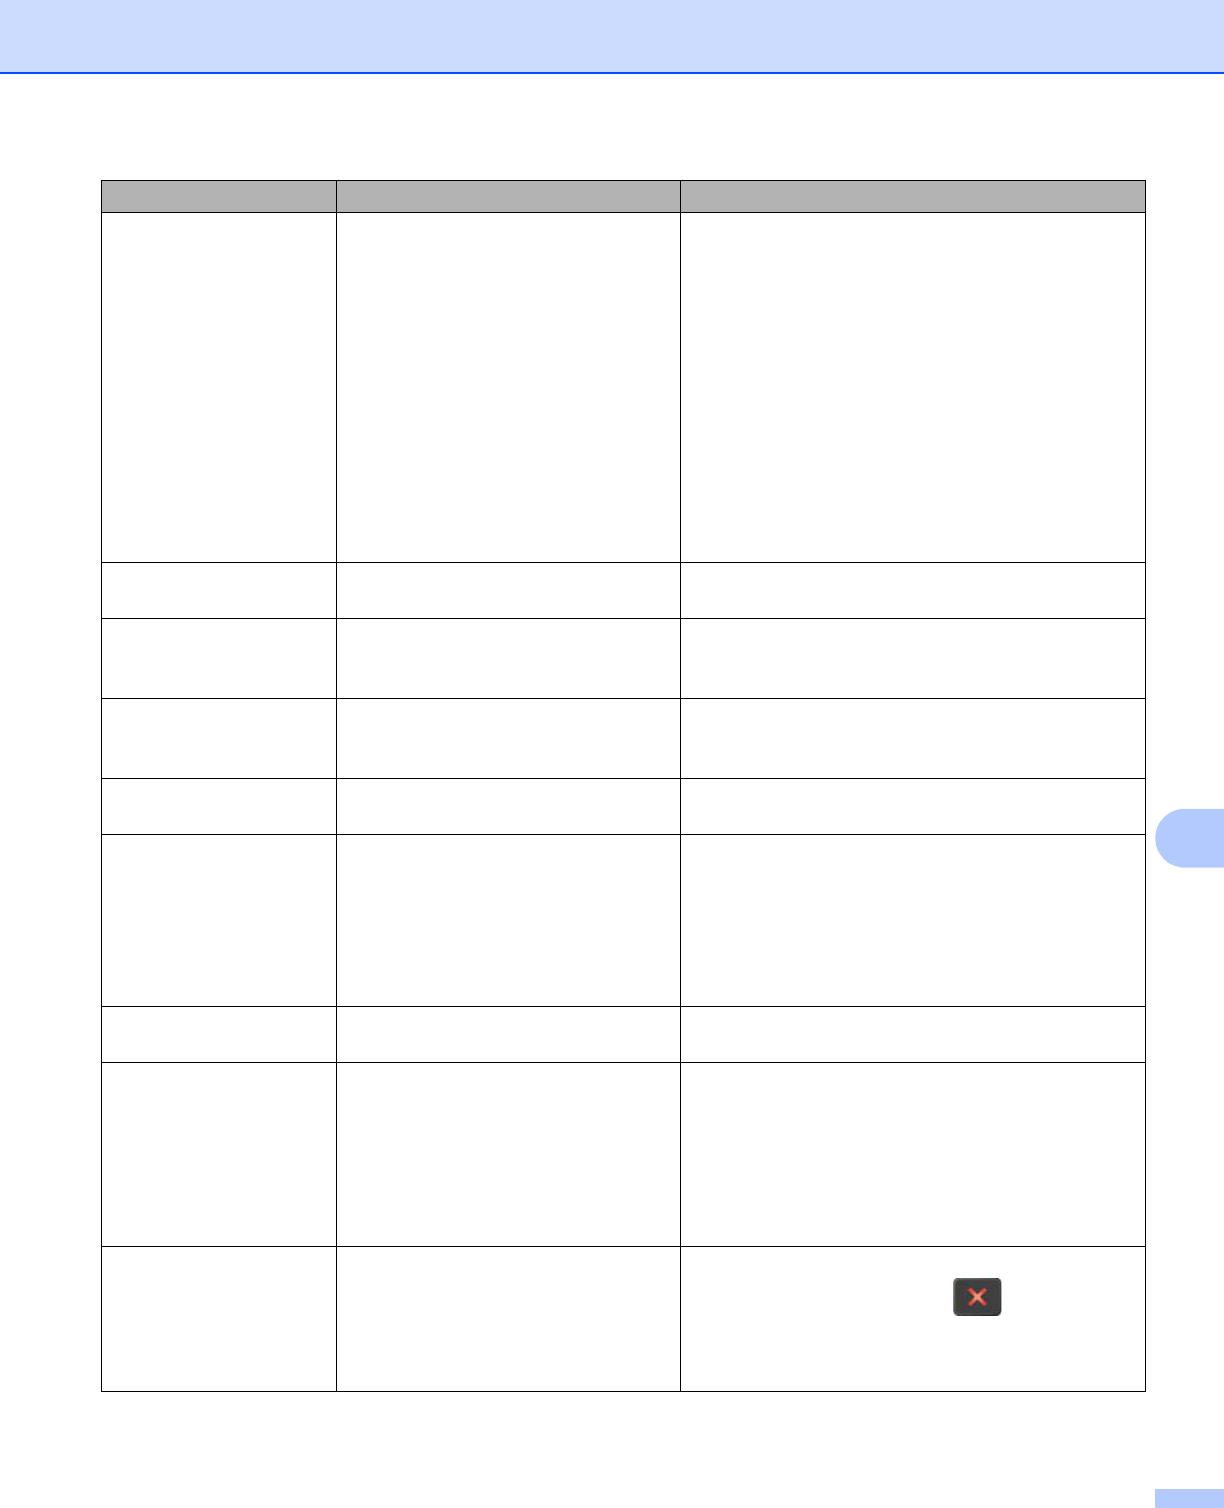
FeatureDescription
Where Should I Go for
More Information?
Scan Using Near Field
Communication (NFC)
(ADS-3600W)
Allows you to scan using the settings you saved
when you registered your NFC ID card to a
Shortcut.
Adding ID Card Shortcuts
(ADS-3600W only)
on page 14
BRAdmin Light (Windows
®
only)
BRAdmin Professional 3
(Windows
®
only)
Allows you to manage Brother machines connected
to a network. Using a computer, you can search for
Brother machines on the network, display device
status information, and change network settings.
Launch the BRAdmin Utility
on page 73
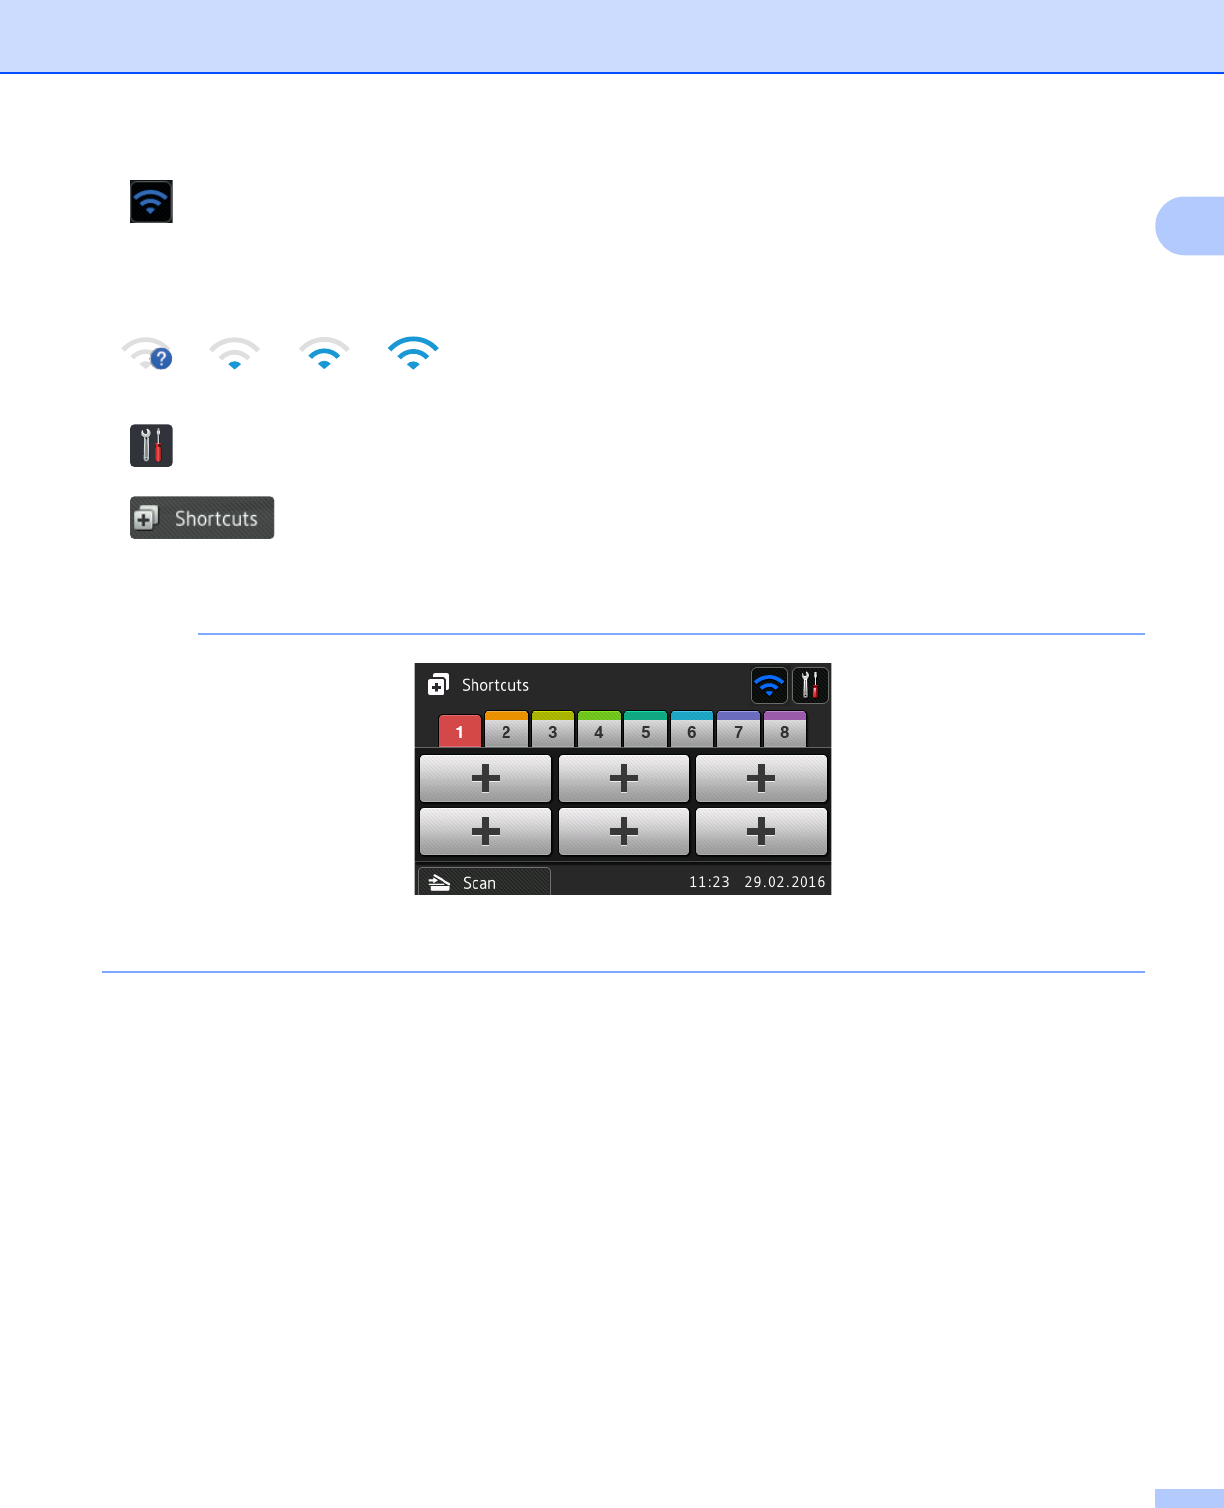
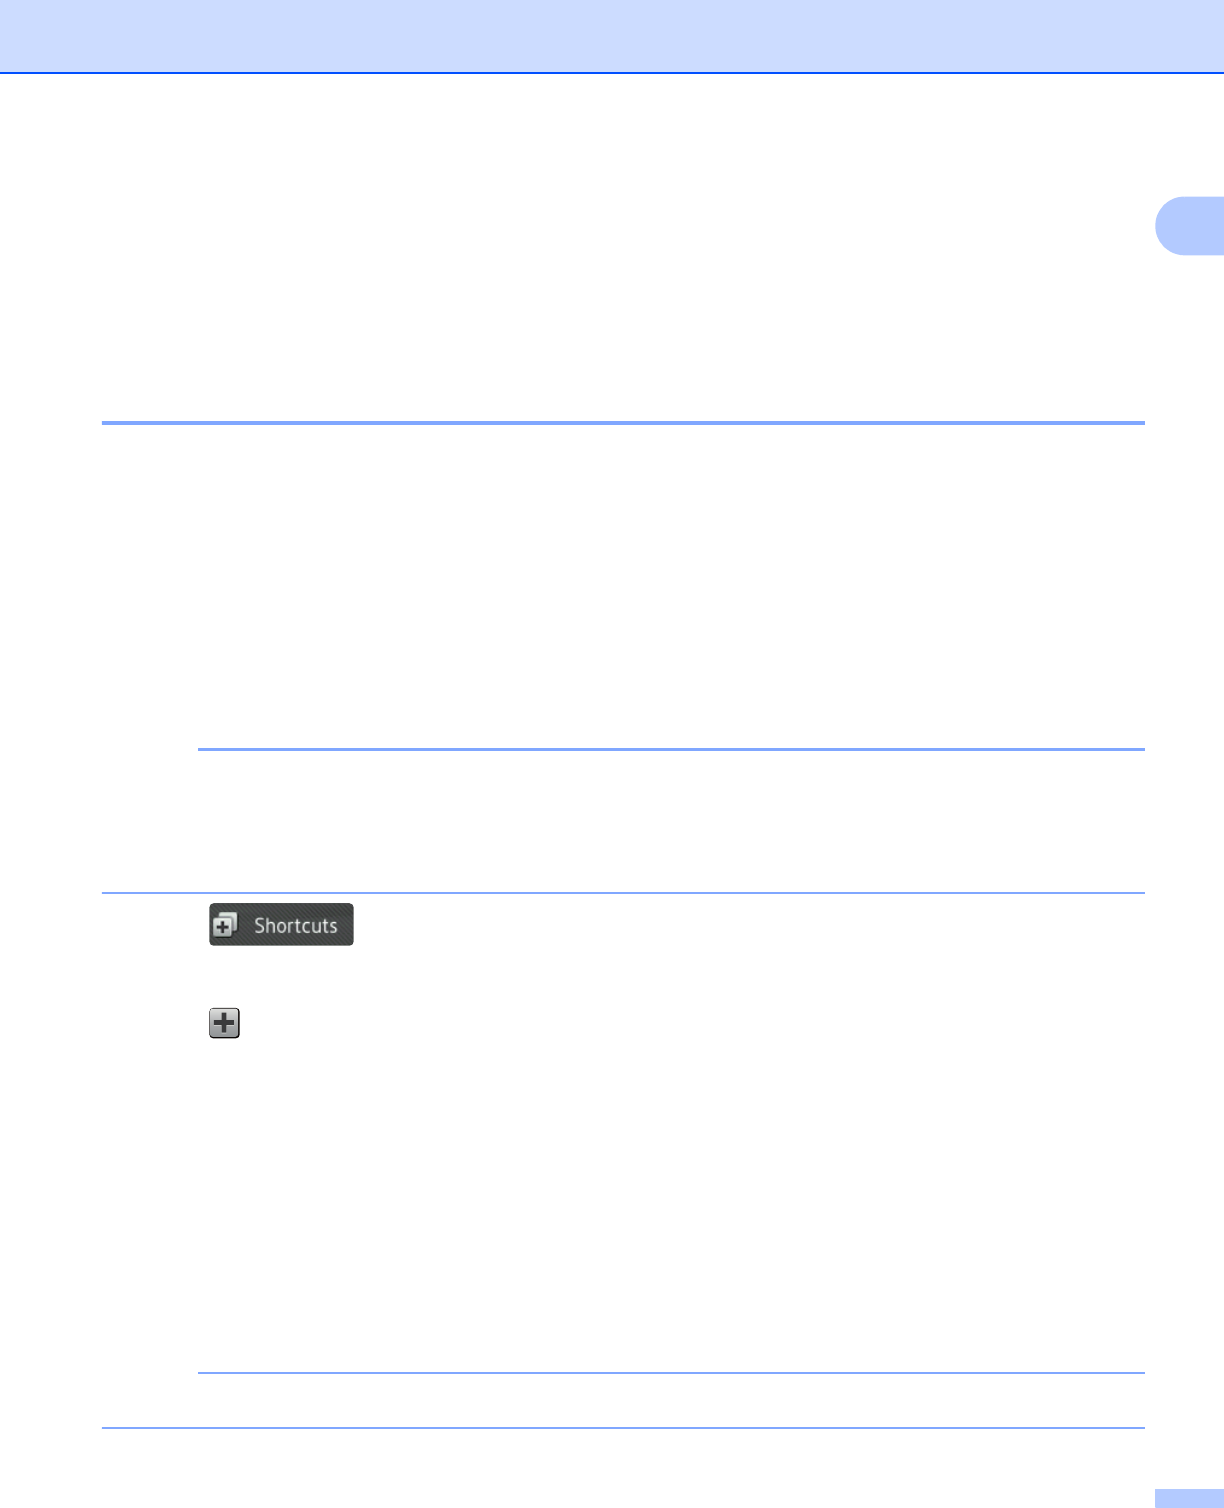
One touch scan
(ADS-2800W / ADS-3600W)
Allows you to scan documents in your favourite
settings with one button. To use this function, you
must create a one touch setting in your shortcut
and set the shortcut number on your Home screen.
Shortcut Settings
(ADS-2800W / ADS-3600W)
on page 10
ix
Saving Space and Managing Your Data
FeatureDescription See
Scan to FTP/SFTPAllows you to transmit scanned data directly to an
FTP/SFTP server without using a computer. This
feature makes it easy to share large data files that
cannot be sent by email.
Scan Documents to an
FTP Server on page 142
Scan Documents to an
SFTP Server on page 151
Scan to SharePointAllows you to transmit scanned data directly to
SharePoint without using a computer.
Scan Documents to
SharePoint on page 169
Scan to Email server
(ADS-2800W / ADS-3600W)
Allows you to scan documents and send them
directly to an email address from the machine.
Send Scanned Documents
Directly to an Email
Address (ADS-2800W /
ADS-3600W) on page179
Scan to Web
(ADS-2800W / ADS-3600W)
Allows you to scan your documents and upload them
directly to Web Services.
Upload Scanned
Documents to the Web
(ADS-2800W /
ADS-3600W) on page185
Scan to NetworkAllows you to scan your documents and upload them
directly to a Network.
Scan Using Scan to
Network Profiles
on page 167
x
Table of Contents
1General Information1
Using the Guide.........................................................................................................................................1
Symbols and Conventions Used in the Guide.....................................................................................1
About This Machine...................................................................................................................................2
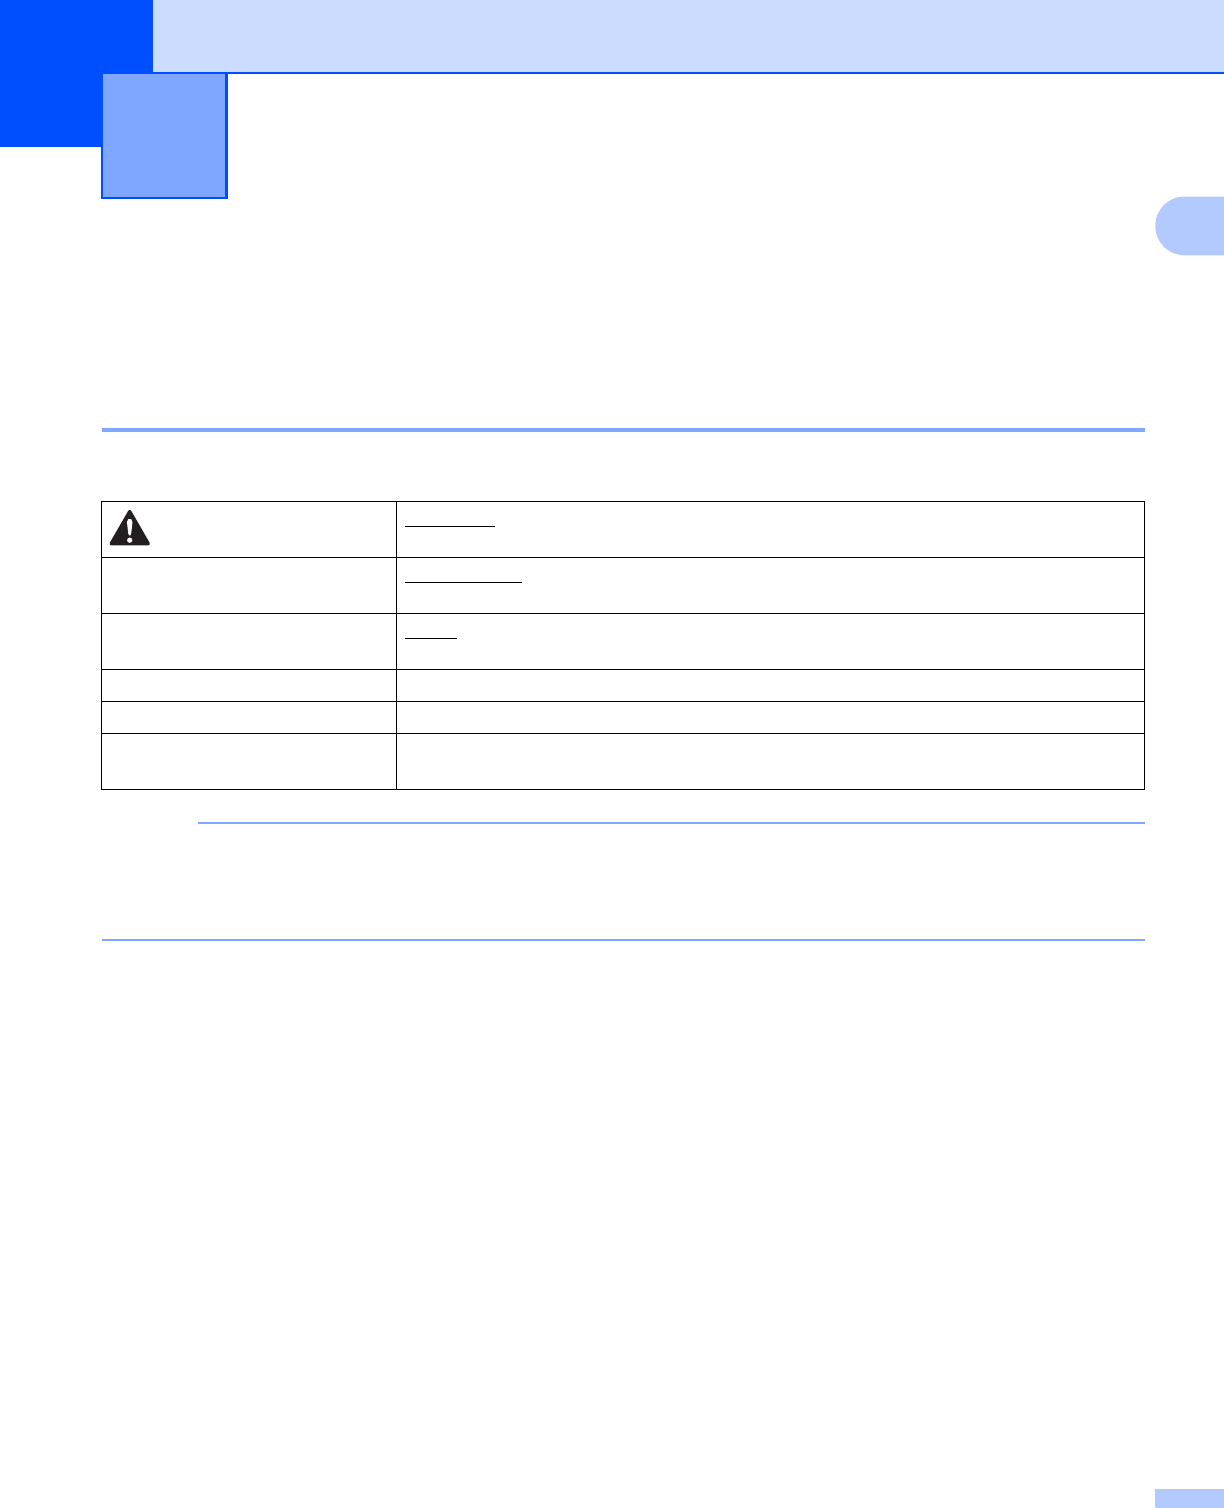
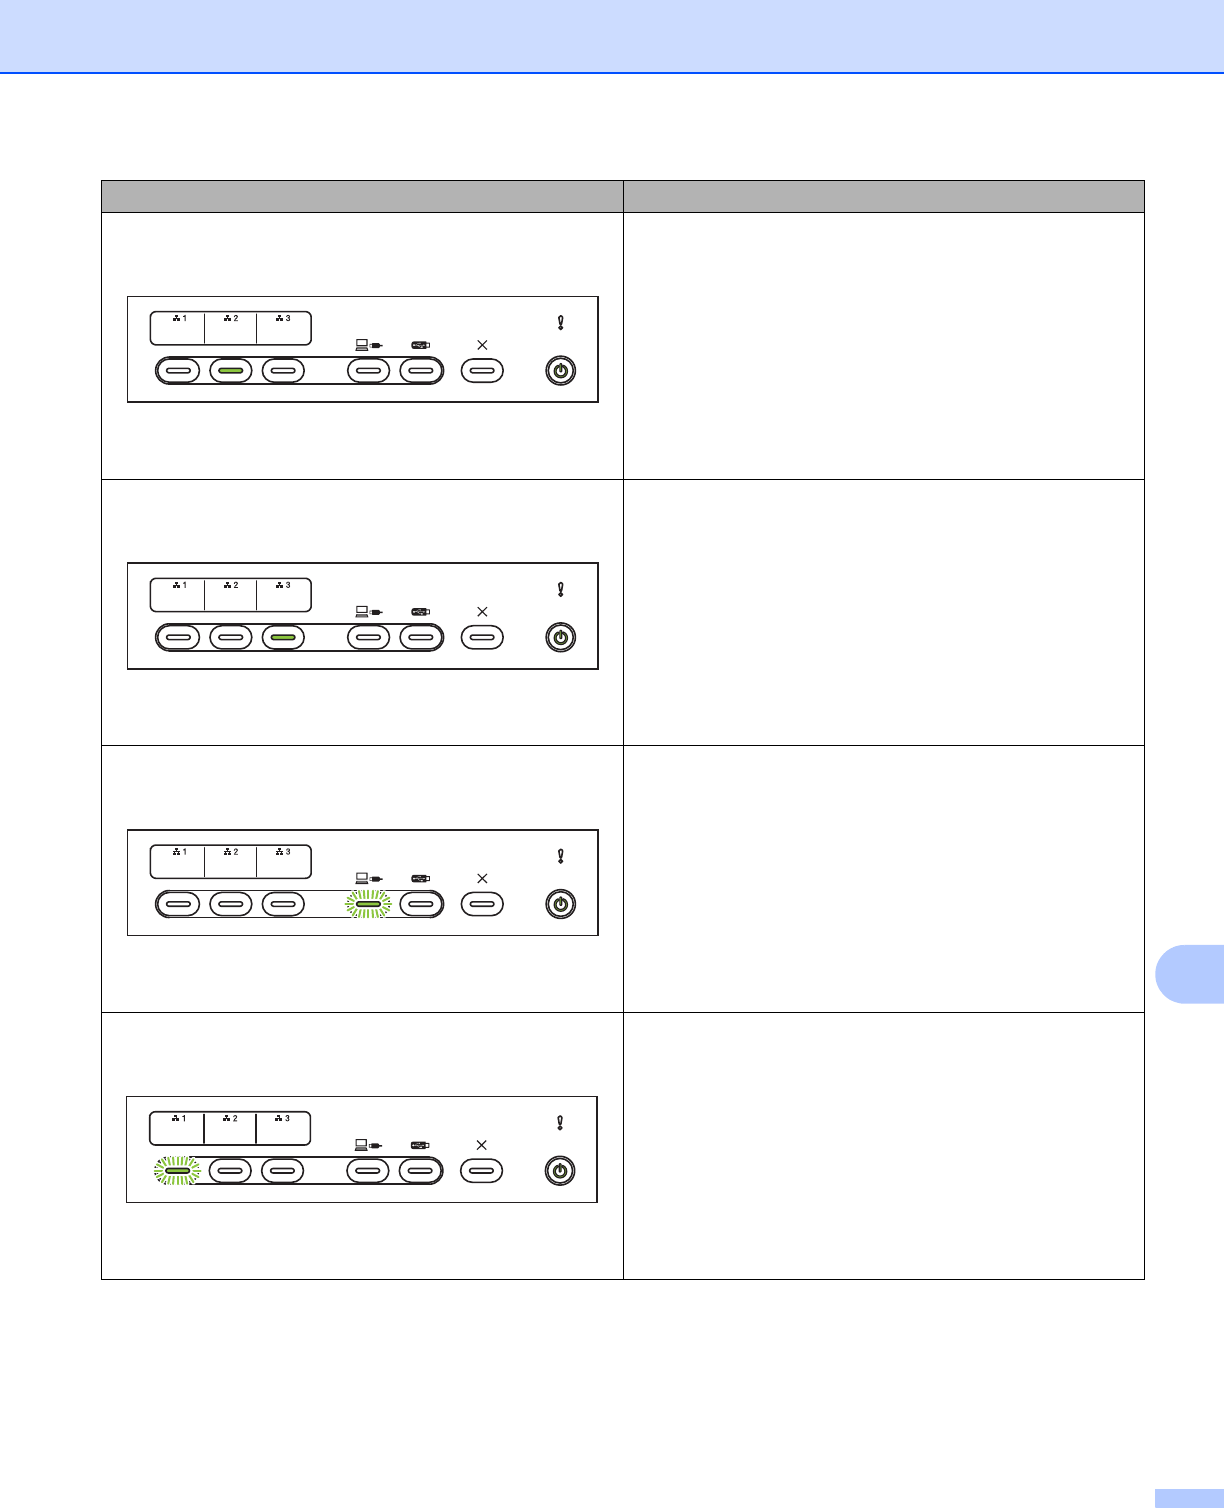
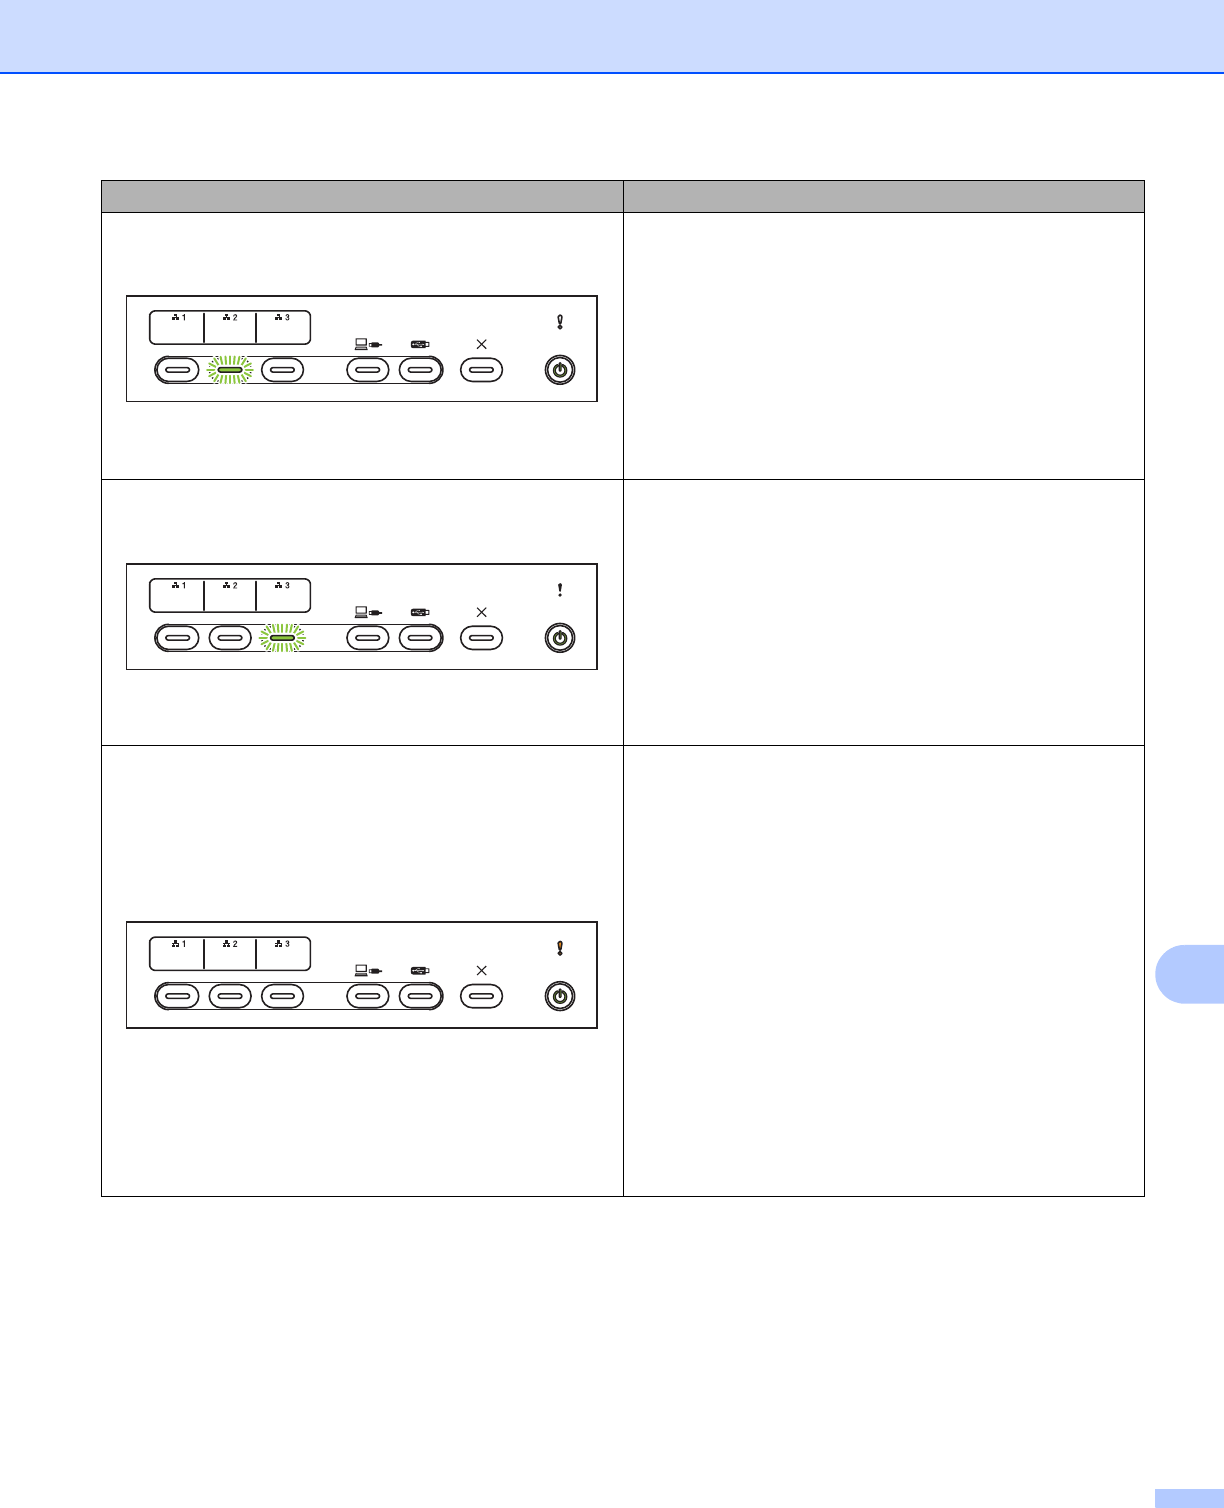
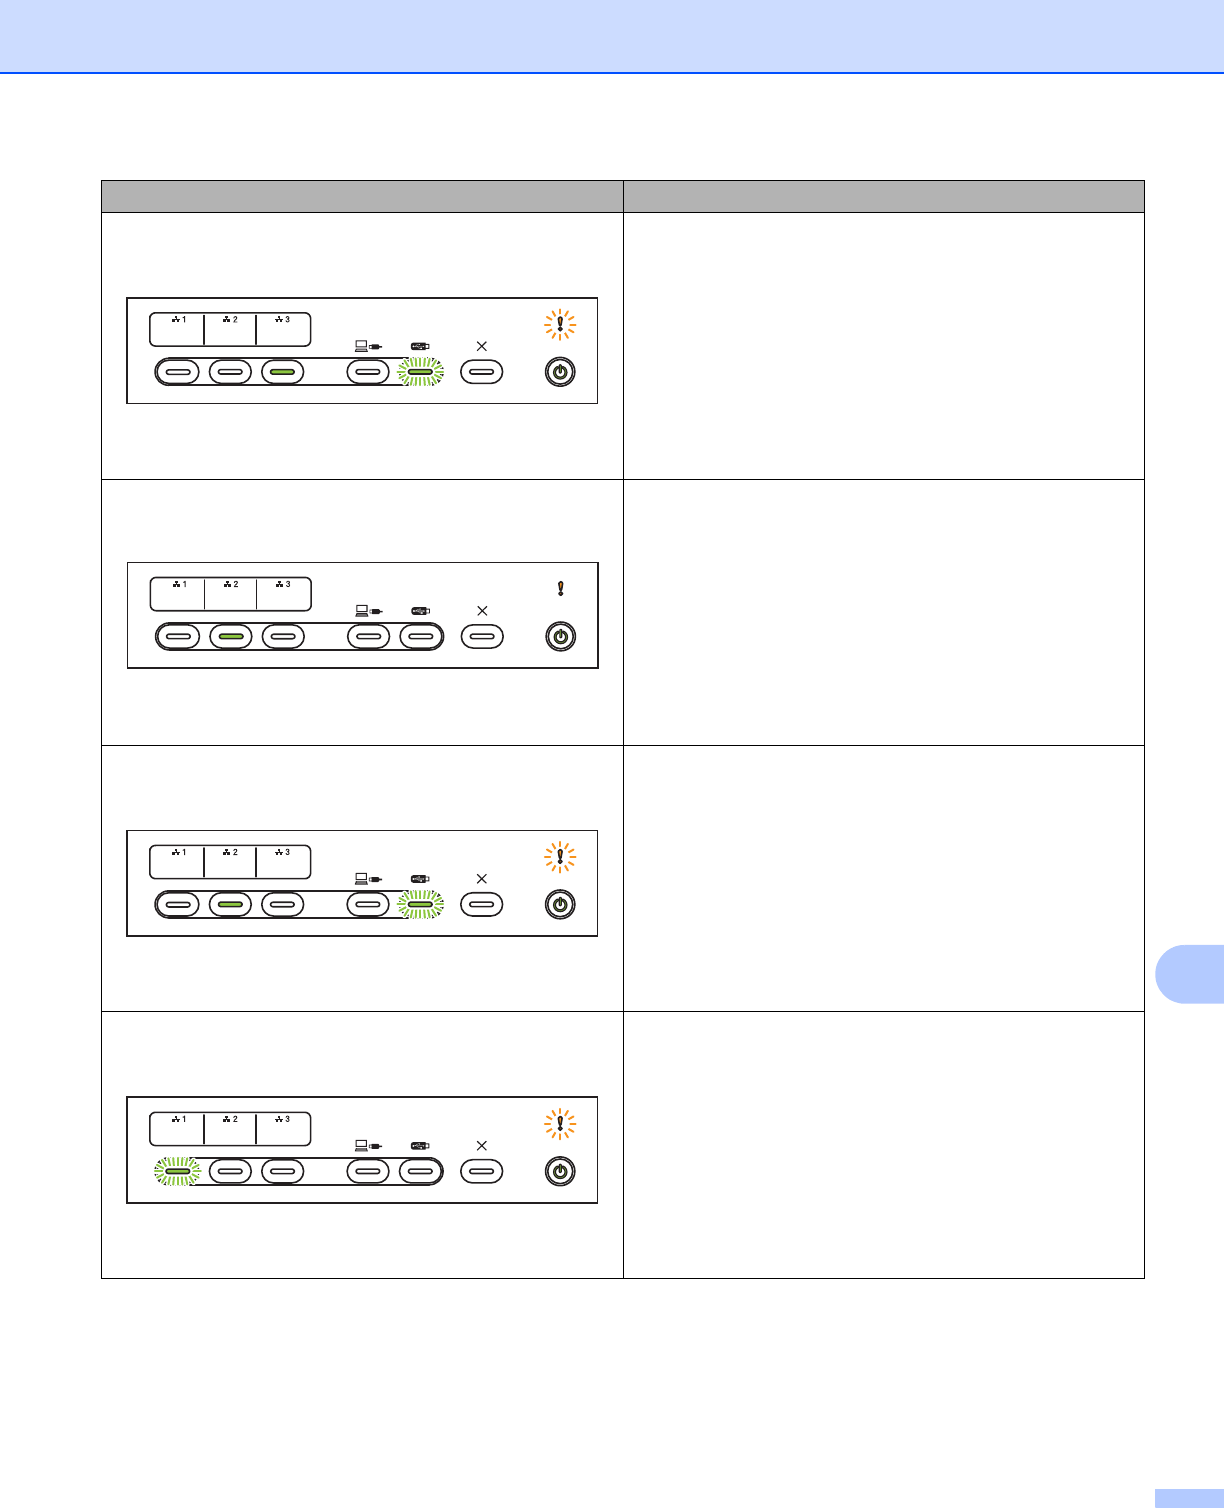
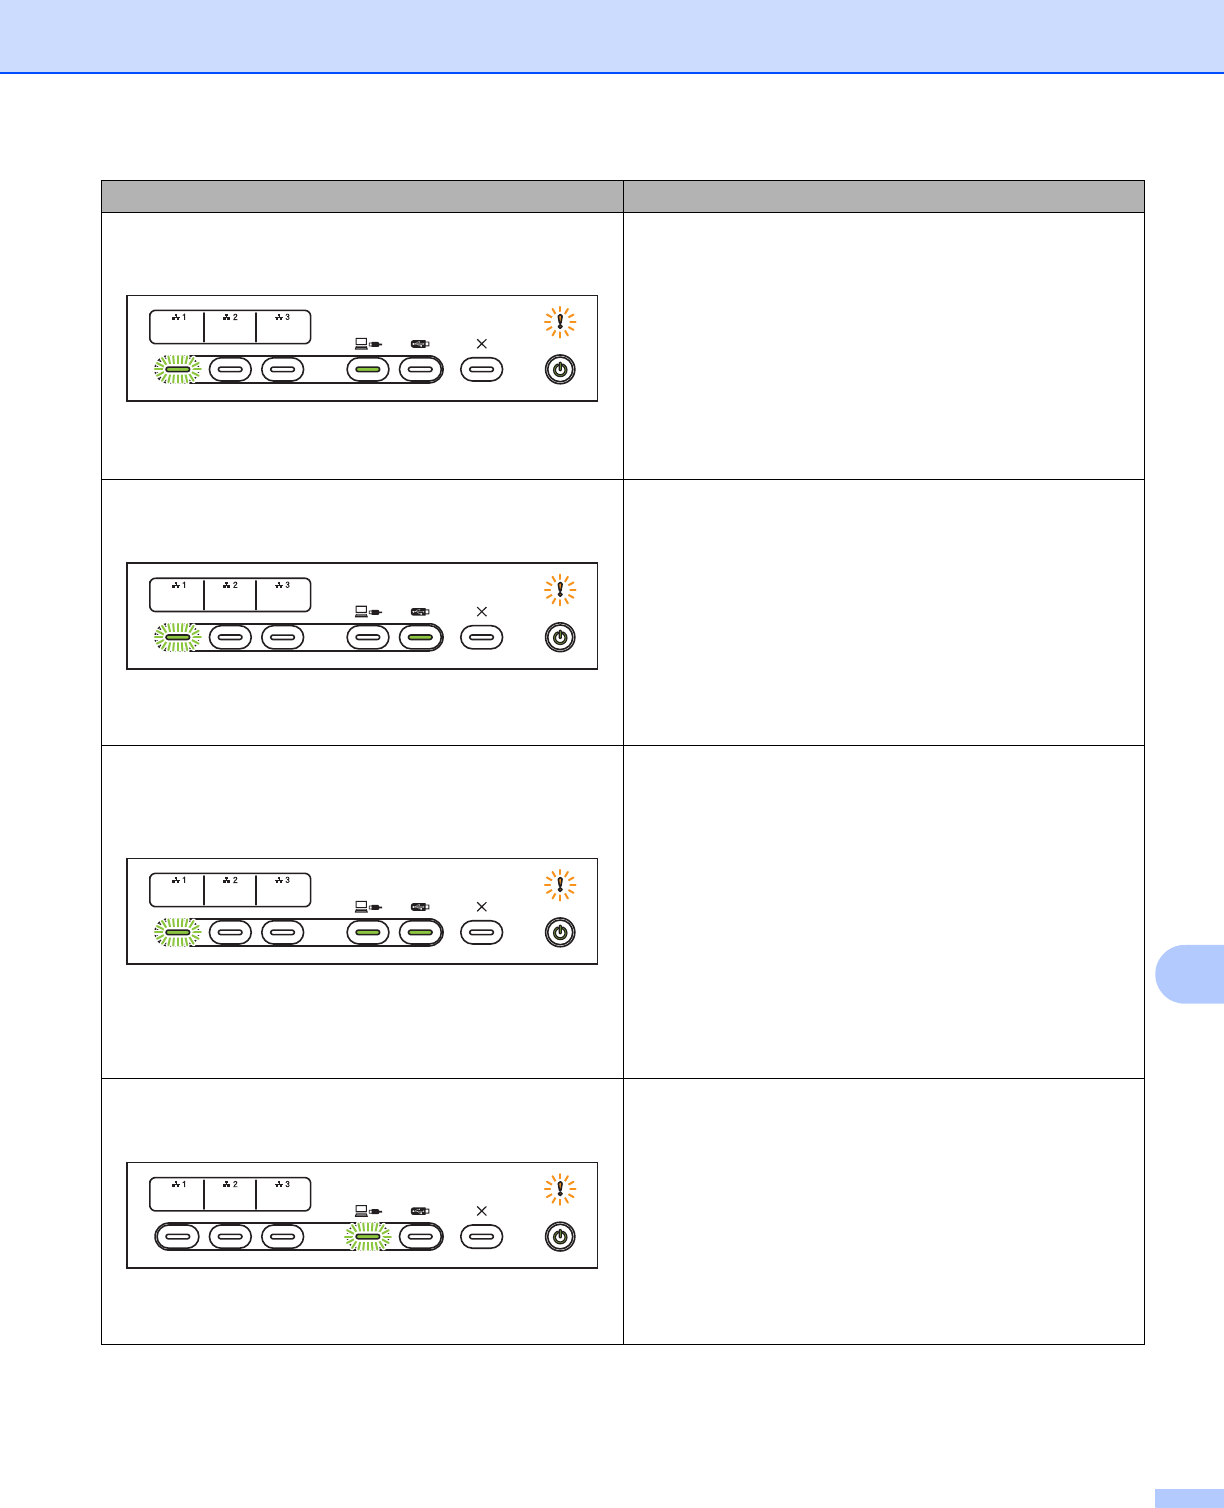
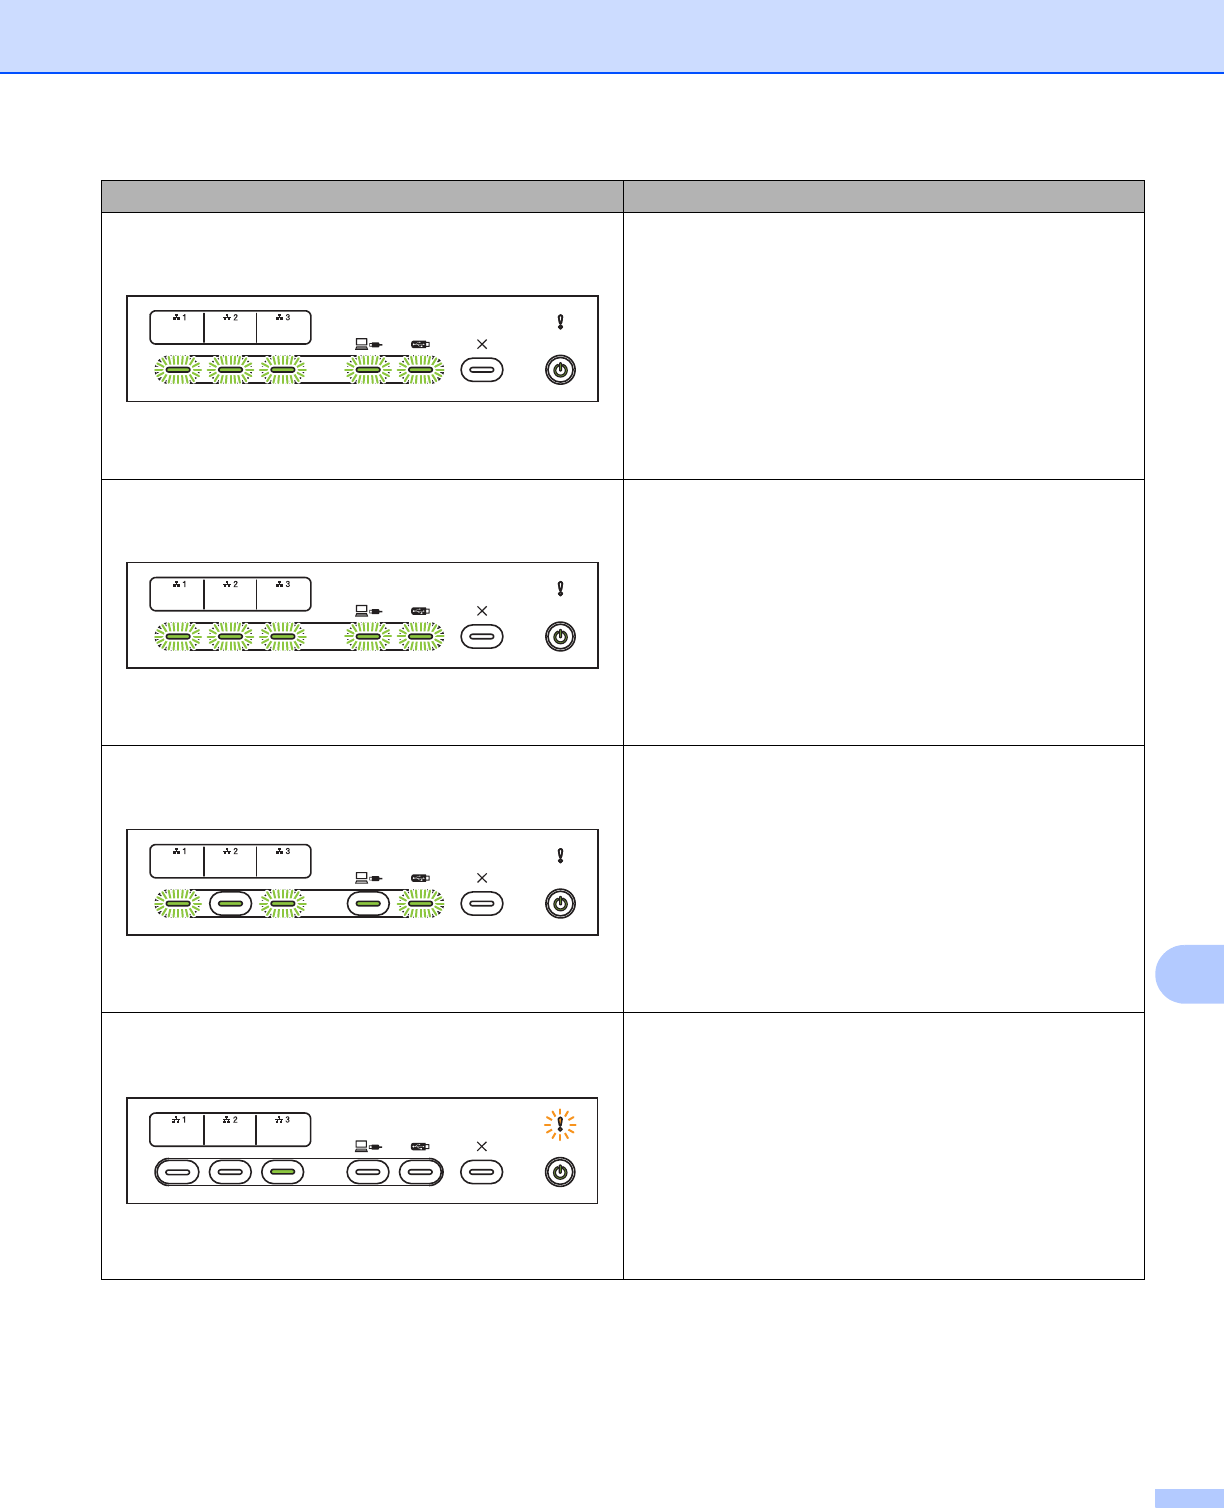
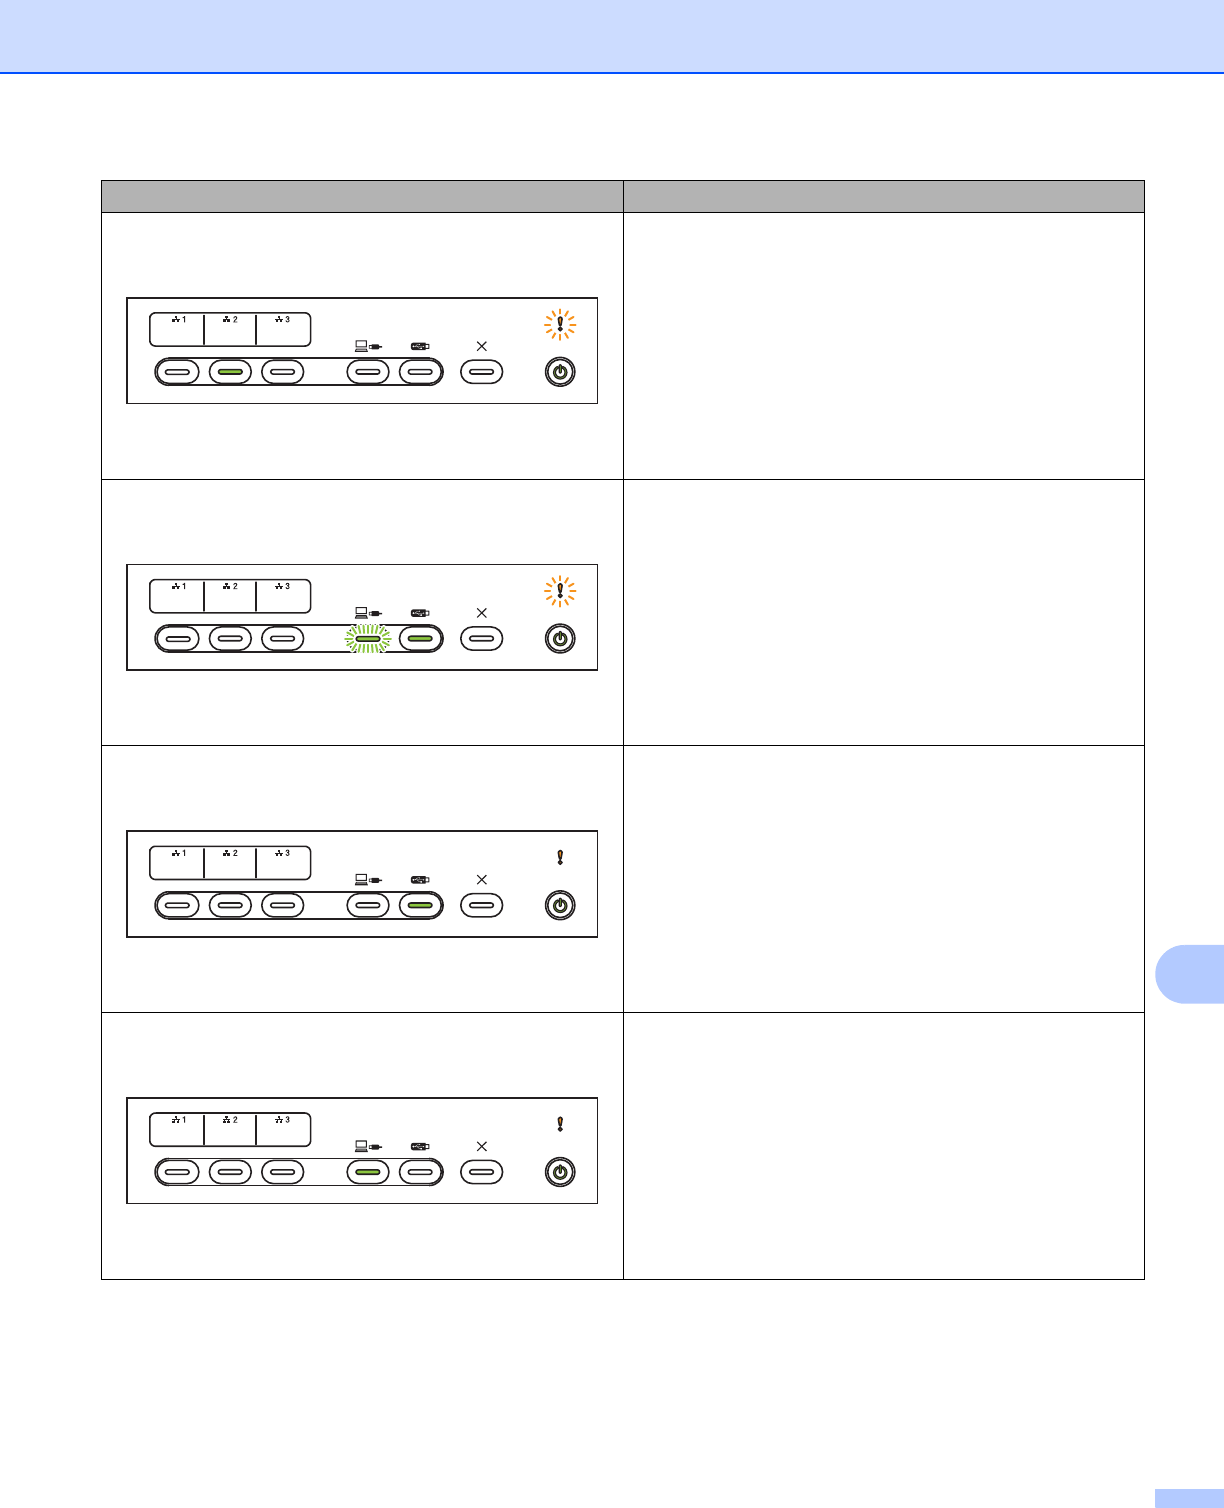
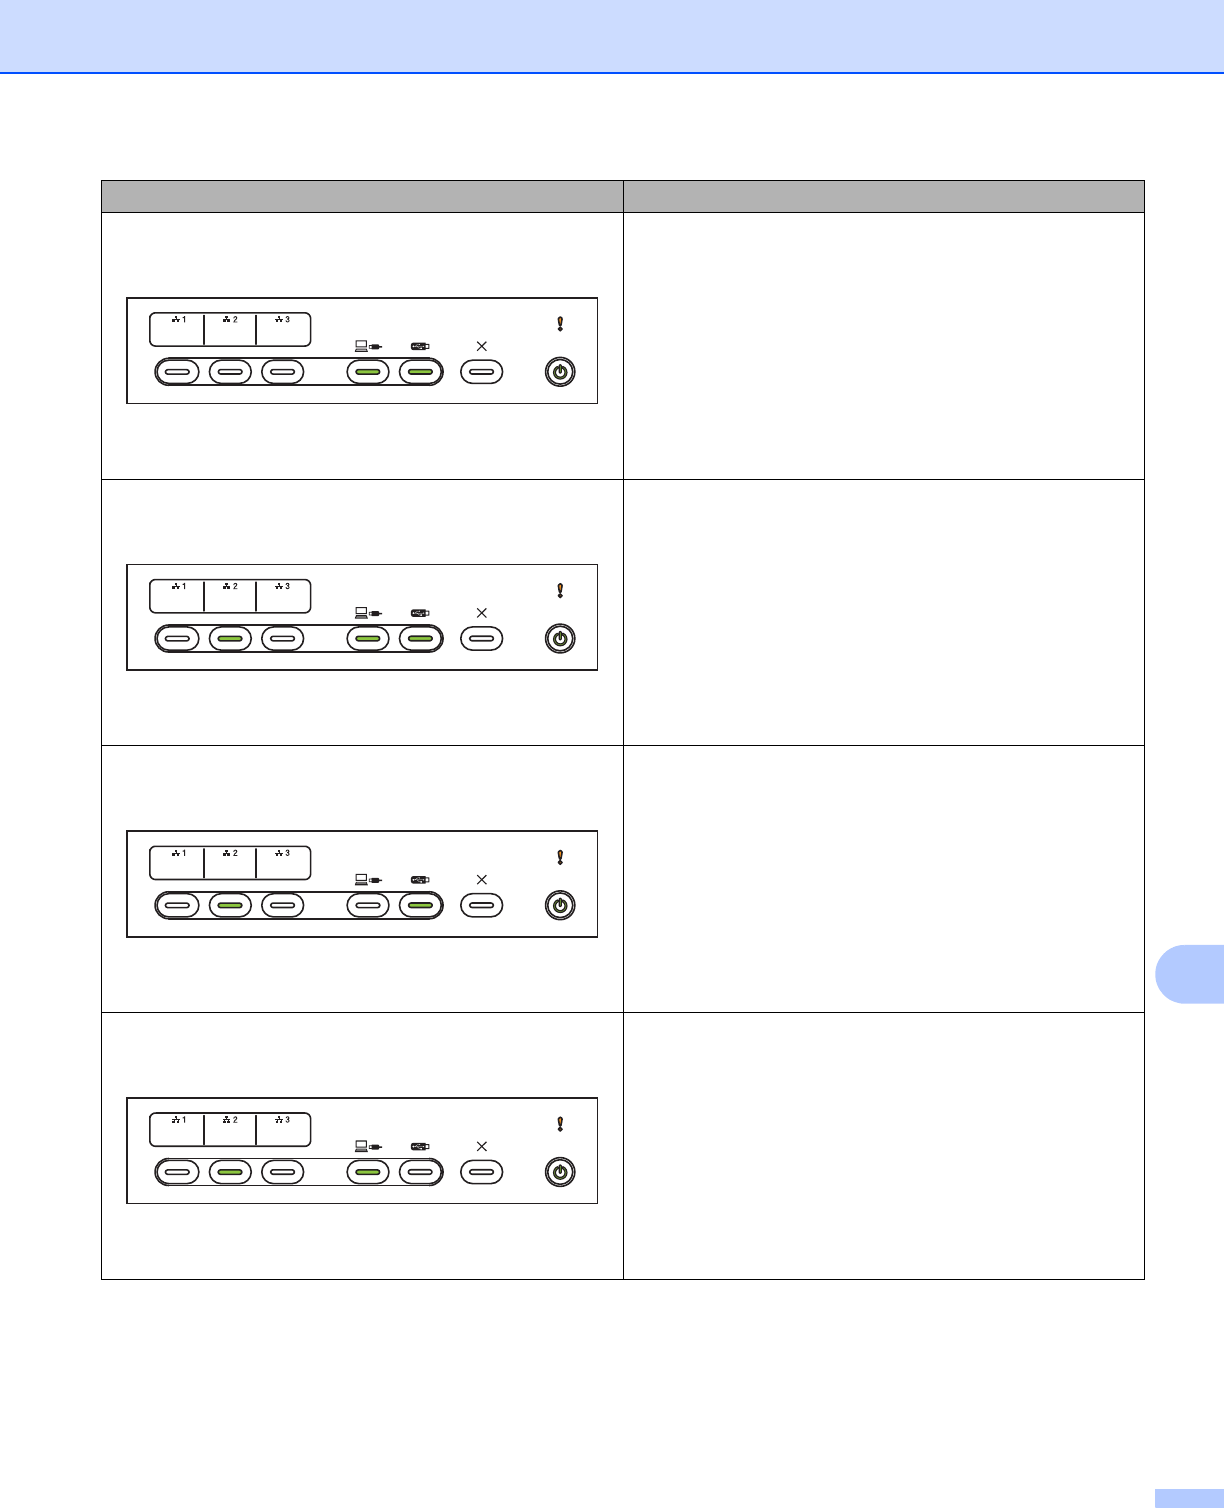
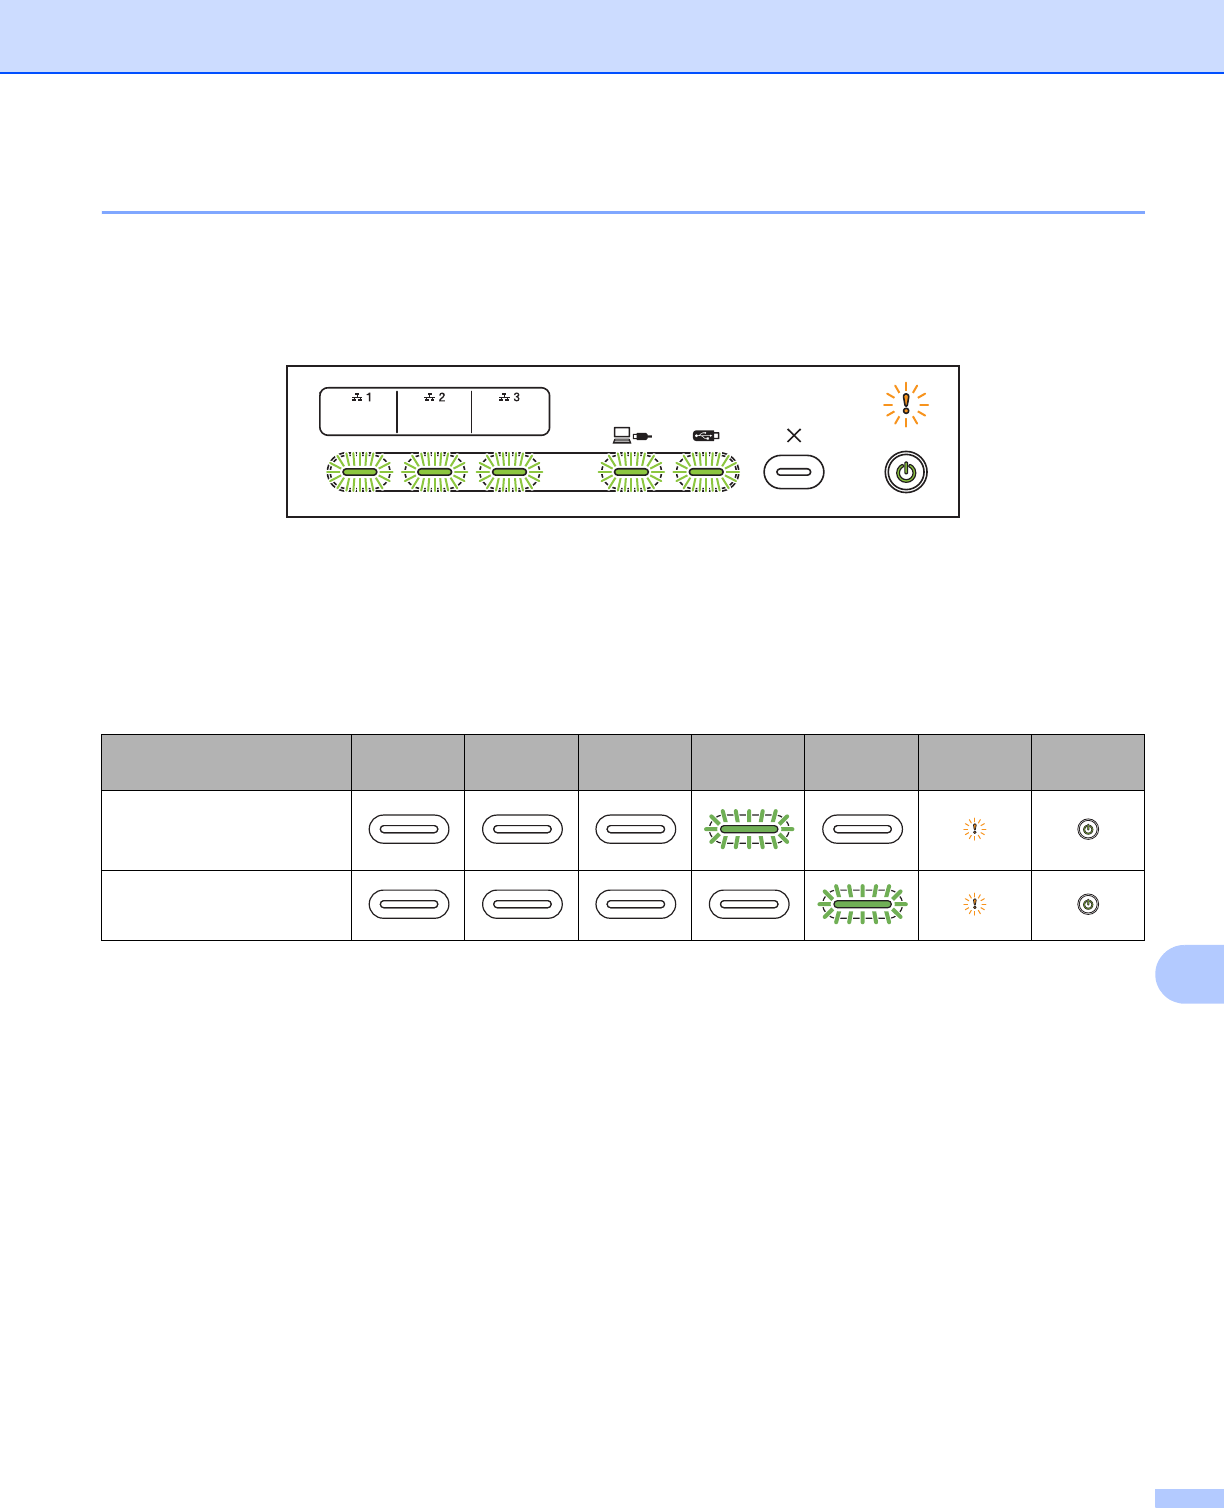
Control Panel Overview (ADS-2400N / ADS-3000N)................................................................................3
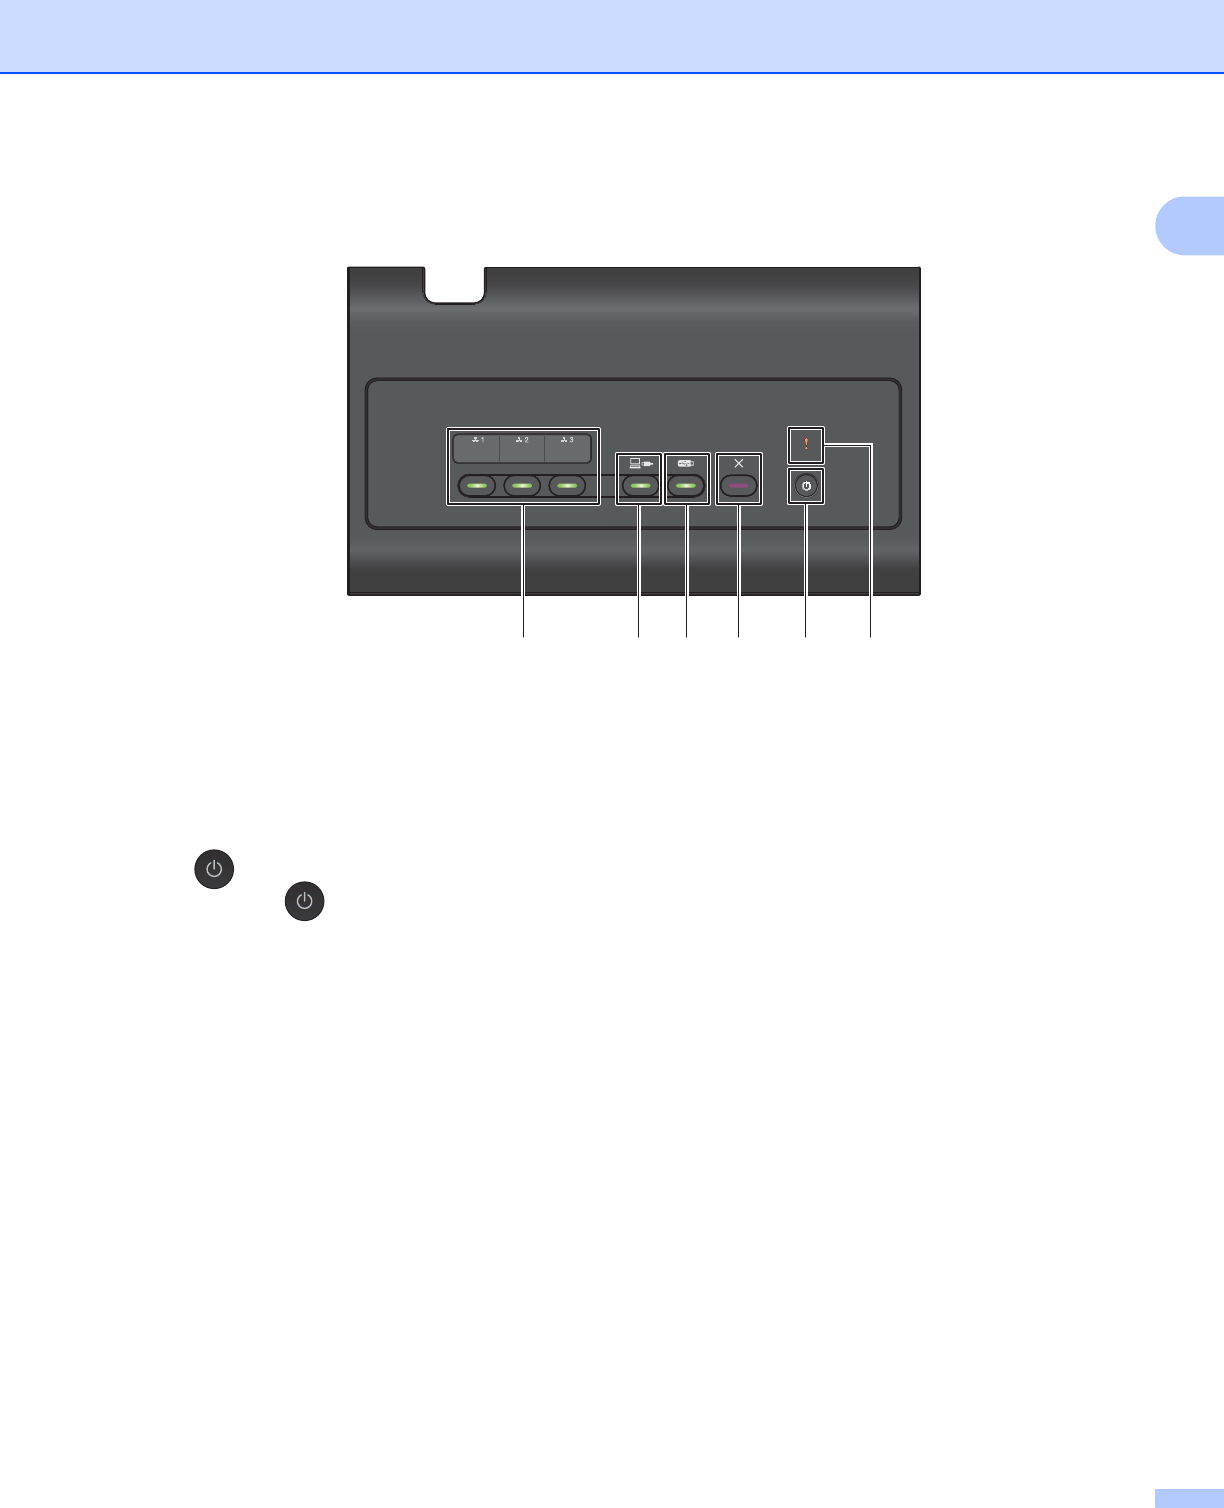
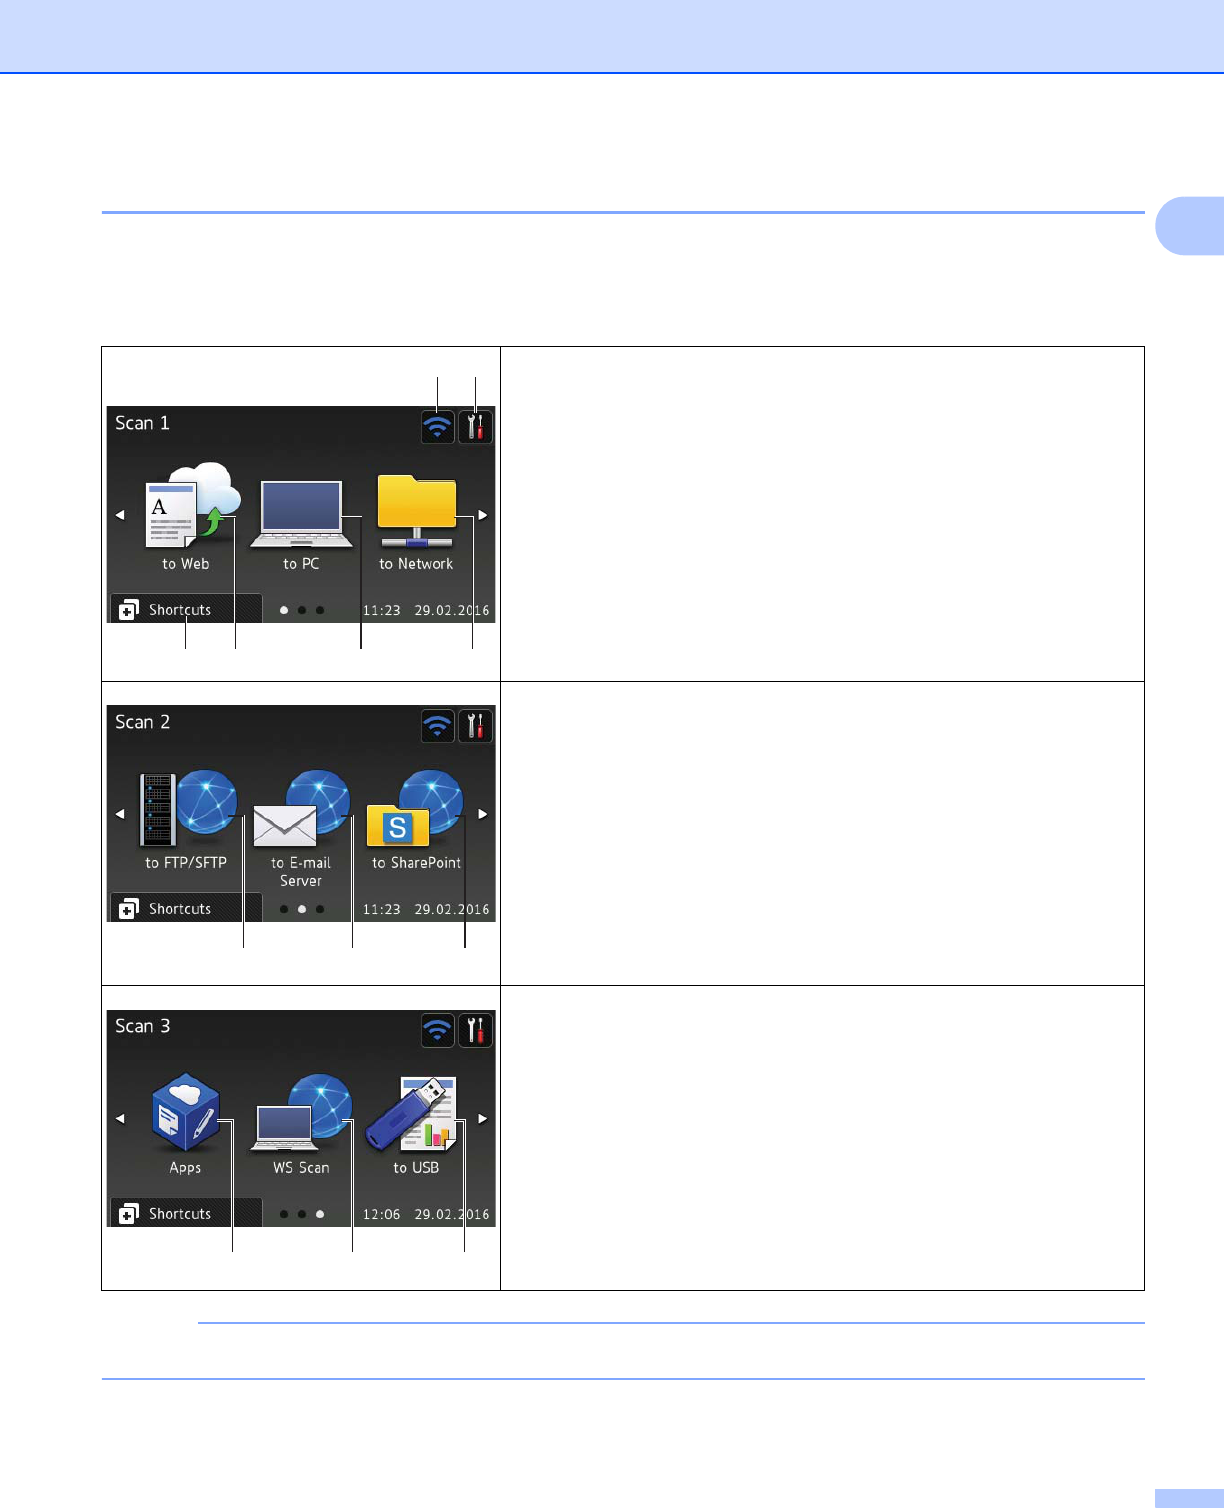
Control Panel Overview (ADS-2800W / ADS-3600W)...............................................................................5
Documents Longer than Standard-size.............................................................................................64
Documents Not Printed on Standard-size Paper...............................................................................65
Documents with Facing Pages..........................................................................................................66
Receipts, Clippings, Photos, and Other Documents .........................................................................66
4Prepare Your Network for Scanning with Your Computer68
Before Scanning......................................................................................................................................68
Before Network Scanning........................................................................................................................68
Gebruikershandleiding.com neemt misbruik van zijn services uitermate serieus. U kunt hieronder aangeven waarom deze vraag ongepast is. Wij controleren de vraag en zonodig wordt deze verwijderd.
Product:
Spelregels forum
Om tot zinvolle vragen te komen hanteren wij de volgende spelregels:
lees eerst de handleiding door;
controleer of uw vraag al eerder door iemand anders is gesteld;
probeer uw vraag zo duidelijk mogelijk te stellen;
heeft u een probleem en al geprobeerd om dit op te lossen, vermeld dit erbij aub;
heeft u een oplossing gekregen van een bezoeker dan horen wij dat graag in dit forum;
wilt u een reactie geven op een vraag of antwoord, gebruik dan niet dit formulier maar klik op de knop 'reageer op deze vraag';
uw vraag wordt direct op de website gezet; vermijd daarom persoonlijke gegevens in te vullen;
Belangrijk! Als er een antwoord wordt gegeven op uw vraag, dan is het voor de gever van het antwoord nuttig om te weten als u er wel (of niet) mee geholpen bent! Wij vragen u dus ook te reageren op een antwoord.
Belangrijk! Antwoorden worden ook per e-mail naar abonnees gestuurd. Laat uw emailadres achter op deze site, zodat u op de hoogte blijft. U krijgt dan ook andere vragen en antwoorden te zien.
Abonneren
Abonneer u voor het ontvangen van emails voor uw Brother ADS-3000N bij:
nieuwe vragen en antwoorden
nieuwe handleidingen
U ontvangt een email met instructies om u voor één of beide opties in te schrijven.
Ontvang uw handleiding per email
Vul uw emailadres in en ontvang de handleiding van Brother ADS-3000N in de taal/talen: Engels als bijlage per email.
De handleiding is 6,65 mb groot.
U ontvangt de handleiding per email binnen enkele minuten. Als u geen email heeft ontvangen, dan heeft u waarschijnlijk een verkeerd emailadres ingevuld of is uw mailbox te vol. Daarnaast kan het zijn dat uw internetprovider een maximum heeft aan de grootte per email. Omdat hier een handleiding wordt meegestuurd, kan het voorkomen dat de email groter is dan toegestaan bij uw provider.
Uw handleiding is per email verstuurd. Controleer uw email
Als u niet binnen een kwartier uw email met handleiding ontvangen heeft, kan het zijn dat u een verkeerd emailadres heeft ingevuld of dat uw emailprovider een maximum grootte per email heeft ingesteld die kleiner is dan de grootte van de handleiding.
Er is een email naar u verstuurd om uw inschrijving definitief te maken.
Controleer uw email en volg de aanwijzingen op om uw inschrijving definitief te maken
U heeft geen emailadres opgegeven
Als u de handleiding per email wilt ontvangen, vul dan een geldig emailadres in.
Uw vraag is op deze pagina toegevoegd
Wilt u een email ontvangen bij een antwoord en/of nieuwe vragen? Vul dan hier uw emailadres in.