IMPORTANT NOTE:
Do not force the 4 screws past their normal travel, and do not rotate any
screw or screws more than 2 full turns in a counterclockwise direction (i.e.,
not more than 2 full turns in their "loosening" direction), or else the
diagonal mirror may become loosened from its support. Note that the
diagonal mirror collimation adjustments are very sensitive: generally turning
a collimation screw 1/2-turn will have a dramatic effect on collimation.
3. If the reflection of the diagonal mirror is not centered within the reflection
of the primary mirror, adjust the 3 collimation screws located on the rear
of the primary mirror cell.
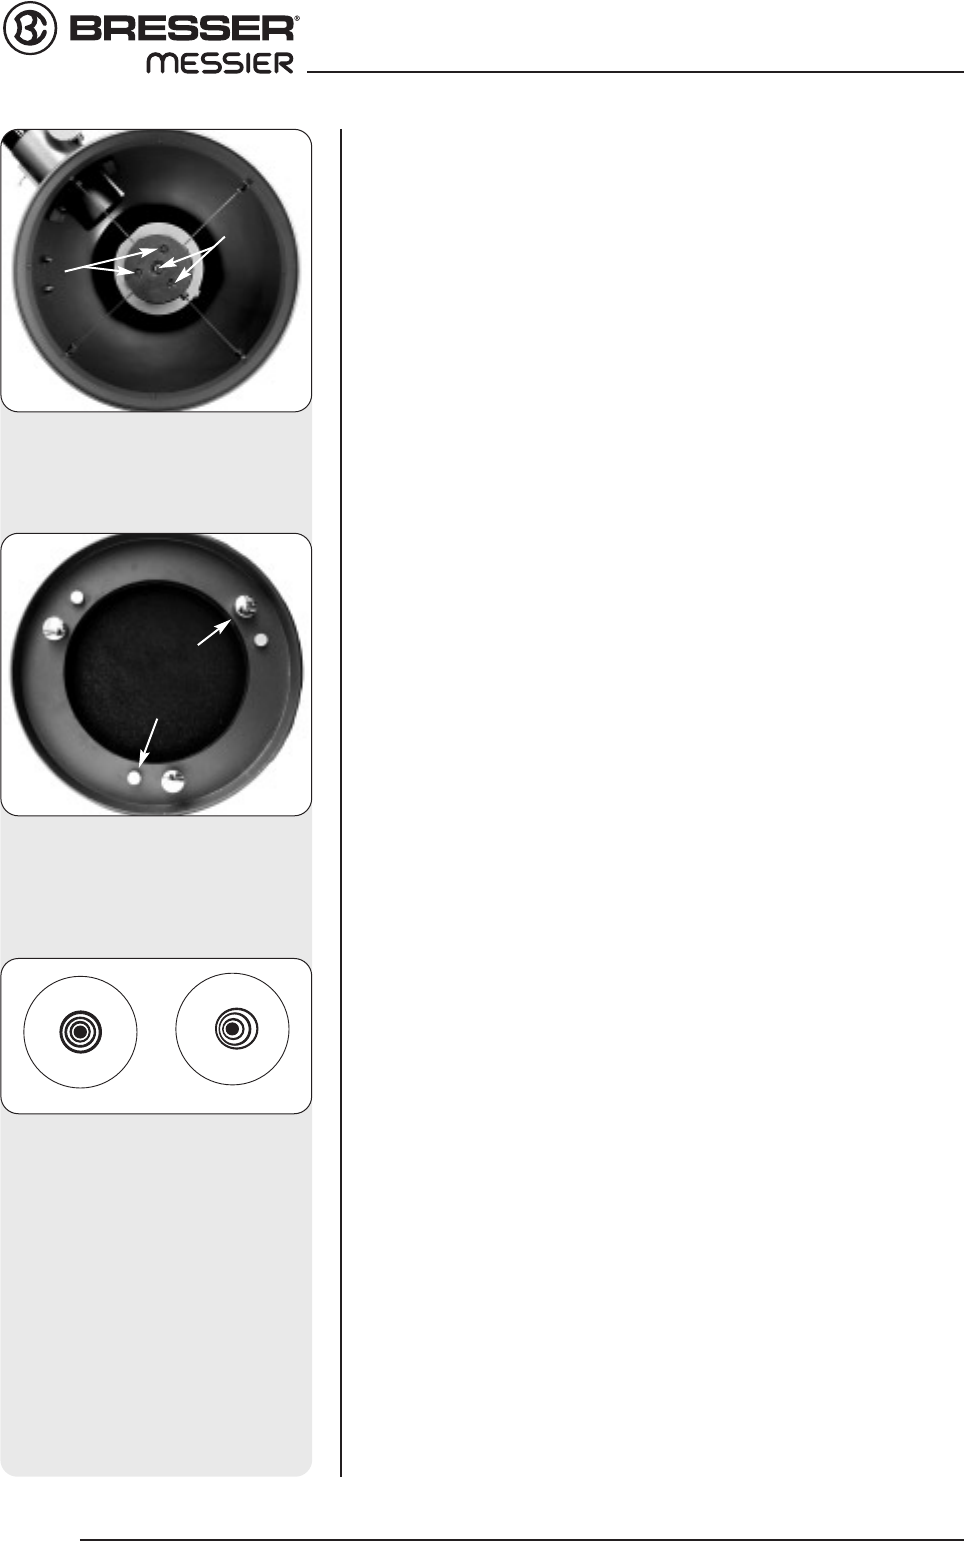
NOTE:
There are 6 screws (Fig. 31c) on the primary mirror cell. The 3 knurled
knobs are the collimation screws, and the 3 smaller thumb screws are
locking screws. The locking screws must be loosened slightly in order to
adjust the collimation screws.
Proceed by "trial and error" until you develop a feel for which collimation
screw to turn in order to change the image in any given way.
4. Perform an actual star test to confirm the accuracy of steps 1 through 3.
Using the 25mm eyepiece, point the telescope at a moderately bright
(second or third magnitude) star, and center the image in the main
telescope's field of view.
5. Bring the star's image slowly in and out of focus until you see several
disks surrounding the star's center. If steps 1 through 3 were done
correctly, you will see concentric (centered with respect to each other)
circles (1, Fig. 32).
An improperly collimated instrument will reveal oblong or elongated circles
(2, Fig. 32). Adjust the 3 collimating screws on the primary mirror housing
until the circles are concentric on either side of the focus.
In summary, the 4 adjustment screws on the plastic diagonal mirror
housing change the tilt of the secondary mirror so that it is correctly
centered in the focuser drawtube, and so that the primary mirror appears
centered when looking into the focuser. The 3 collimating knobs on the
primary mirror change the tilt of the primary mirror so that it reflects the
light directly up the center of the drawtube.
Inspecting the Optics
A Note About the “Flashlight Test: If a flashlight or other high-intensity light
source is pointed down the main telescope tube, the view (depending
upon the observer’s line of sight and the angle of the light) may reveal what
appears to be scratches, dark or bright spots, or just generally uneven
coatings, giving the appearance of poor quality optics. These items are
only seen when a high intensity light is transmitted through lenses or
reflected off the mirrors, and can be seen on any high quality optical
system, including giant research telescopes.
The optical quality of a telescope cannot be judged by the “flashlight test;"
the true test of optical quality can only be conducted through careful star
testing.
Looking at or near the Sun will cause instant and irreversible damage to your eye!
18
MAINTENANCE AND SERVICE
Fig 31b: The four collimation
screws on the secondary mirror
housing
Fig. 31c: The six collimation
screws on the rear of the primary
mirror cell.
knurled knob
thumbscrew
Fig. 32: Correct (1) and incorrect
(2) collimation viewed during a star
test.
1 2