medicus_smart_1609sd.qxd 03.11.2016 7:40 Uhr Seite 33
Measuring your blood pressure.......................................................................................................................................................................47
requirements for electro-mechanical blood pressure
measuring systems”.
Technical data
61
GB
medicus_smart_1609sd.qxd 03.11.2016 7:40 Uhr Seite 61
62
Calibration checks – every 2 years at the
latest – must be performed by the follo-
wing institutions or persons:
–Manufacturer
– Trade measurements authorities
– Persons who fulfil the requirements of
the legislation governing the operation
of medical devices.
A) Function testing
Function testing of the monitor can
only be carried out on a person or with
a suitable simulator.
B)Testing of Density of Pressure
Circuit and Divergence from
Pressure Indication
Calibration checks - Testing instructions
(for trained specialist staff only)
1.Remove battery.
2.Hold Start button pressed and at
the same time insert battery.
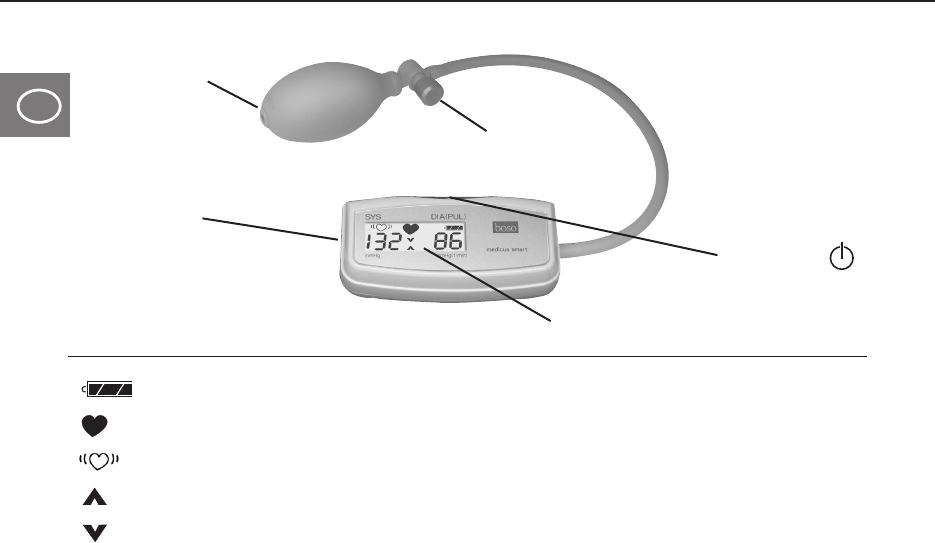
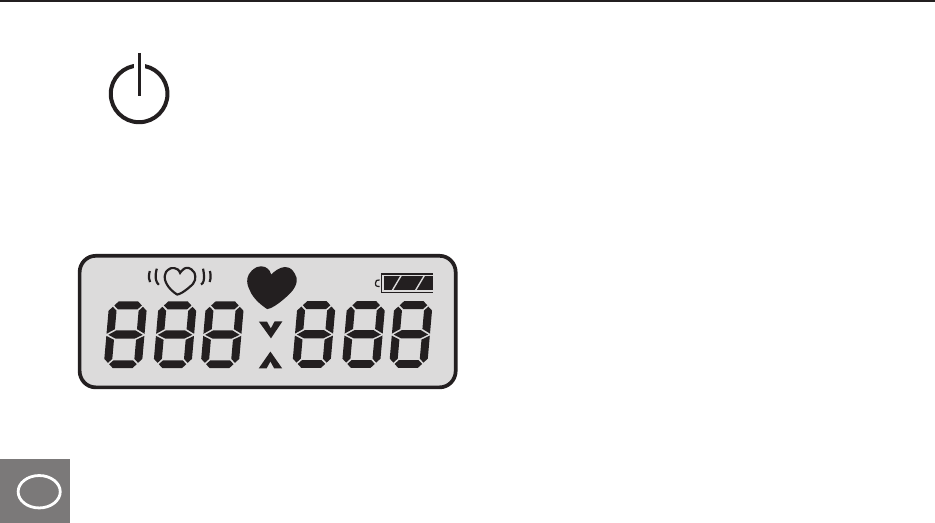
3.Release Start button .The unit now
is ready for testing.The displays of SYS
and DIA now show the actual pressu-
re.
4.Prior to testing the density, open the
battery compartment and take the T-
connector off the unit.Wrap the cuff
around a fixed cylinder and connect it
with the T-connector (without deflati-
on valve) to the pump ball and the
unit.
GB
medicus_smart_1609sd.qxd 03.11.2016 7:40 Uhr Seite 62
63
Calibration checks - Testing instructions
(for trained specialist staff only)
Mind the setting time for cuff:at least
30 seconds.
Accomplish testing in the usual man-
ner.
5.Prior to testing the divergence of the
pressure indication,open the battery
compartment and take the T-connec-
tor off the unit.Connect the unit with
the normal unit and a pump ball.
Accomplish testing in the usal man-
ner.
6.Switch off unit.
7.Re-connect the cuff and the pumpball
with the T-connector.
C)Placing of Safety Stamps
For complete safety cover up the drill
hole for the base screw.Alternatively,
connect upper housing and lower
housing with a safety stamp placed
directly on one of the housing edges.
GB
medicus_smart_1609sd.qxd 03.11.2016 7:40 Uhr Seite 63
Table des matières
Présentation de l’appareil........................................................................................................................................................................................66
medicus_smart_1609sd.qxd 03.11.2016 7:40 Uhr Seite 64
Mesure de la tension artérielle........................................................................................................................................................................78
medicus_smart_1609sd.qxd 03.11.2016 7:41 Uhr Seite 95
Misurazione della pressione arteriosa...............................................................................................................................................109
Condizioni di temperatura ambientale:-10°C - +60°C
immagazzinamento:umidità relativa:15 - 85%
Alimentazione:DC 1,5 V (1 batteria mignon 1,5 V,tipo IEC LR 6,alcaline,
al manganese)
Durata tipica delle batteria:6.000 cicli di misurazione
(a seconda della frequenza d'uso)
Controllo carica batteria:simbolo sullo schermo
Specifiche tecniche
IT
medicus_smart_1609sd.qxd 03.11.2016 7:41 Uhr Seite 121
Peso:100 g senza batteria
Dimensioni (largh.x alt.x prof.):105 mm x 35 mm x 50 mm
Classificazione:classe II ( )
Protezione contro oggettiIP21
solidi e acqua:
Test clinico la precisione di misurazione è conforme
(DIN 58130):ai requisiti della norma EN 1060 Parte 3
Deviazione massima della ± 3 mmHg
misurazione della pressione
del bracciale:
Deviazione massima della ±5%
misurazione delle pulsazioni:
Specifiche tecniche
122
IT
medicus_smart_1609sd.qxd 03.11.2016 7:41 Uhr Seite 122
Norme di riferimento:EN 1060,Parte 1:“Sfigmomanometri non invasivi –
Requisiti generali”e Parte 3:“Requisiti
supplementari per sfigmomanometri elettro-
meccanici”.
Specifiche tecniche
123
IT
medicus_smart_1609sd.qxd 03.11.2016 7:41 Uhr Seite 123
124
Il controllo metrologico deve essere
effettuato almeno ogni 2 anni da parte
delle seguenti istituzioni o persone:
–produttore
– competente autorità di metrologia
– persone che soddisfano i requisiti delle
norme di utilizzo dei prodotti medicali.
A) Prova di funzionalità
La prova di funzionalità dell’appa-
recchio può essere effettuata unica-
mente su persone o con un simulatore
idoneo.
B)Test della Densità del Circuito di
Pressione e di Divergenza dalla
Pressione Indicata
Istruzioni per il controllo metrologico
(solo per il personale specializzato addestrato)
1.Togliere la batteria dallo strumento.
2.Premere il pulsante Starte allo stes-
so tempo reinserire le batterie.
3.Rilasciare il pulsante Start .Lo stru-
mento è pronto per la fase di test.Il
display SYS, DIA mostrano la pressione
attuale.
4. Prima di testare la densità,aprire il
vano batterie e togliere il connettore a
T dallo strumento.Avvolgere il braccia-
le intorno ad un cilindro rigido e inser-
irlo nel connettore a T (senza la valvo-
la di deflazione) nella monopalla e
nello strumento.Il tempo di test del
IT
medicus_smart_1609sd.qxd 03.11.2016 7:41 Uhr Seite 124
125
Istruzioni per il controllo metrologico
(solo per il personale specializzato addestrato)
bracciale deve essere almeno di 30
secondi.Continuare il test nel modo
tradizionale.
5.Prima di testare le divergenze delle
indicazioni di pressione,aprire il vano
batterie e togliere il connettore a T
dallo strumento.
Collegare lo strumento con l’unità nor-
male e la monopalla.Continuare il test
nel modo tradizionale.
6.Spegnere lo strumento.
7.Ricollegare il bracciale e la monopalla
con il connettore a T.
C)Posizioni per apporre i sigilli di
garanzia
La posizione piu’importante per il sigil-
lo si trova sulla parte frontale dell’ap-
parecchio.Per garantire la custodia
della corretta taratura,le parti superio-
re ed inferiore dell’apparecchio devono
essere attaccate con un sigillo di
garanzia,preferibilmente su un lato
della parte superiore dell’apparecchio.
IT
medicus_smart_1609sd.qxd 03.11.2016 7:41 Uhr Seite 125
Índice de contenido
Visión global del aparato......................................................................................................................................................................................128
medicus_smart_1609sd.qxd 03.11.2016 7:41 Uhr Seite 126
Medición de la tensión arterial....................................................................................................................................................................140
Gebruikershandleiding.com neemt misbruik van zijn services uitermate serieus. U kunt hieronder aangeven waarom deze vraag ongepast is. Wij controleren de vraag en zonodig wordt deze verwijderd.
Product:
Spelregels forum
Om tot zinvolle vragen te komen hanteren wij de volgende spelregels:
lees eerst de handleiding door;
controleer of uw vraag al eerder door iemand anders is gesteld;
probeer uw vraag zo duidelijk mogelijk te stellen;
heeft u een probleem en al geprobeerd om dit op te lossen, vermeld dit erbij aub;
heeft u een oplossing gekregen van een bezoeker dan horen wij dat graag in dit forum;
wilt u een reactie geven op een vraag of antwoord, gebruik dan niet dit formulier maar klik op de knop 'reageer op deze vraag';
uw vraag wordt direct op de website gezet; vermijd daarom persoonlijke gegevens in te vullen;
Belangrijk! Als er een antwoord wordt gegeven op uw vraag, dan is het voor de gever van het antwoord nuttig om te weten als u er wel (of niet) mee geholpen bent! Wij vragen u dus ook te reageren op een antwoord.
Belangrijk! Antwoorden worden ook per e-mail naar abonnees gestuurd. Laat uw emailadres achter op deze site, zodat u op de hoogte blijft. U krijgt dan ook andere vragen en antwoorden te zien.
Abonneren
Abonneer u voor het ontvangen van emails voor uw Boso Medicus Smart bij:
nieuwe vragen en antwoorden
nieuwe handleidingen
U ontvangt een email met instructies om u voor één of beide opties in te schrijven.
Ontvang uw handleiding per email
Vul uw emailadres in en ontvang de handleiding van Boso Medicus Smart in de taal/talen: Duits, Engels, Frans, Italiaans, Spaans als bijlage per email.
De handleiding is 4,91 mb groot.
U ontvangt de handleiding per email binnen enkele minuten. Als u geen email heeft ontvangen, dan heeft u waarschijnlijk een verkeerd emailadres ingevuld of is uw mailbox te vol. Daarnaast kan het zijn dat uw internetprovider een maximum heeft aan de grootte per email. Omdat hier een handleiding wordt meegestuurd, kan het voorkomen dat de email groter is dan toegestaan bij uw provider.
Stel vragen via chat aan uw handleiding
Stel uw vraag over deze PDF
Uw handleiding is per email verstuurd. Controleer uw email
Als u niet binnen een kwartier uw email met handleiding ontvangen heeft, kan het zijn dat u een verkeerd emailadres heeft ingevuld of dat uw emailprovider een maximum grootte per email heeft ingesteld die kleiner is dan de grootte van de handleiding.
Er is een email naar u verstuurd om uw inschrijving definitief te maken.
Controleer uw email en volg de aanwijzingen op om uw inschrijving definitief te maken
U heeft geen emailadres opgegeven
Als u de handleiding per email wilt ontvangen, vul dan een geldig emailadres in.
Uw vraag is op deze pagina toegevoegd
Wilt u een email ontvangen bij een antwoord en/of nieuwe vragen? Vul dan hier uw emailadres in.