English - 5
Flap Disc
Depending on the application, remove the protec-
tion guard 7 and mount the hand guard 19. Place
the special mounting flange 10 (accessory, Order
No. 2 605 703 028) and the flap disc on the
grinder spindle 6. Screw on the clamping nut 12
and tighten with the two-pin spanner.
Rubber Sanding Plate 21
Depending on the application, remove the protec-
tion guard 7 and mount the hand guard 19.
Before mounting the rubber sanding pad 21,
place the 2 spacers 20 onto the grinding spindle.
For mounting, see the illustration page.
Screw on the round nut 23 and tighten with the
two-pin spanner.
Cup Brush 24/Disc Brush
Depending on the application, remove the protec-
tion guard 7 and mount the hand guard 19.
The grinding tool must be able to be screwed
onto the grinding spindle 6 until it rests firmly
against the grinder spindle flange at the end of
the grinder spindle threads. Tighten with an
open-end spanner.
Grinding Cup
When working with grinding cups, use
the special guard 16.
The grinding cup 17 should always protrude
from the guard 16 only as far as absolutely nec-
essary for the work to be performed in each case.
Adjust the guard 16 to this distance.
For mounting, see the illustration page.
Screw on the clamping nut 12 and tighten with
the fitting offset two-pin spanner 18.
Instead of the clamping nut 12, the quick-clamp-
ing nut 13 (accessory) can be used. Grinding
tools can then be mounted without using tools.
The quick-clamping nut 13 may be used only
for grinding and cutting discs.
Use only a flawless, undamaged quick-clamp-
ing nut 13.
When screwing on, take care that the side
with printing does not point to the grinding
disc. The arrow must point to the index
mark 30.
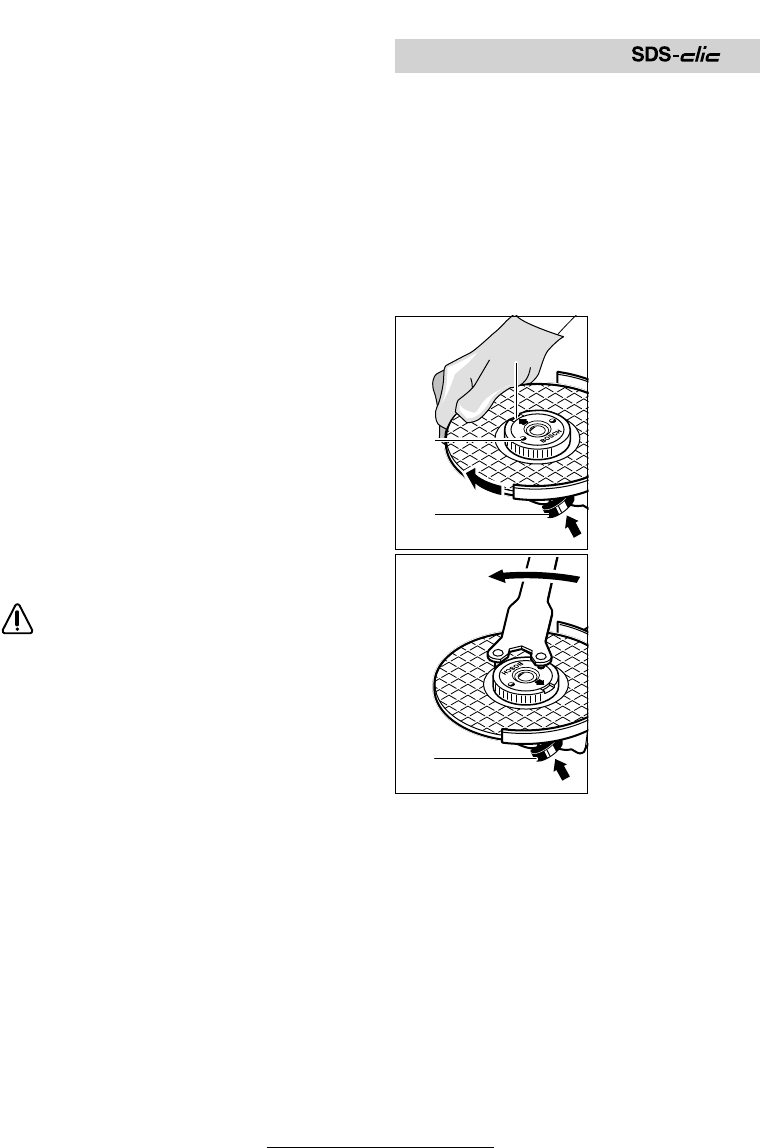
Lock the grinder
spindle with the spin-
dle lock button 2.
Tighten the quick-
clamping nut by
forcefully turning the
grinding disc in the
clockwise direction.
A properly tightened
undamaged, quick-
clamping nut can be
loosened by hand
turning the knurled
ring in anticlockwise
direction.
Never loosen a tight
quick-clamping nut
with pliers but use a
two-pin spanner. In-
sert the two-pin
spanner as shown in
the illustration.
Quick Clamping Nut
2
30
13
2
19 • 1 609 929 F55 • TMS • 18.12.03