en Tested for you in our cooking studio
48
Fish
Your appliance offers you a range of heating types for
preparing fish. You can find the ideal settings for many
dishes in the settings tables.
The whole fish does not have to be turned. Place the
whole fish into the cooking compartment in swimming
position with the dorsal fin facing upwards. Placing half
a potato or a small oven-proof container in the stomach
cavity of the fish will provide stability.
You can tell when the fish is cooked because the dorsal
fin can be removed easily.
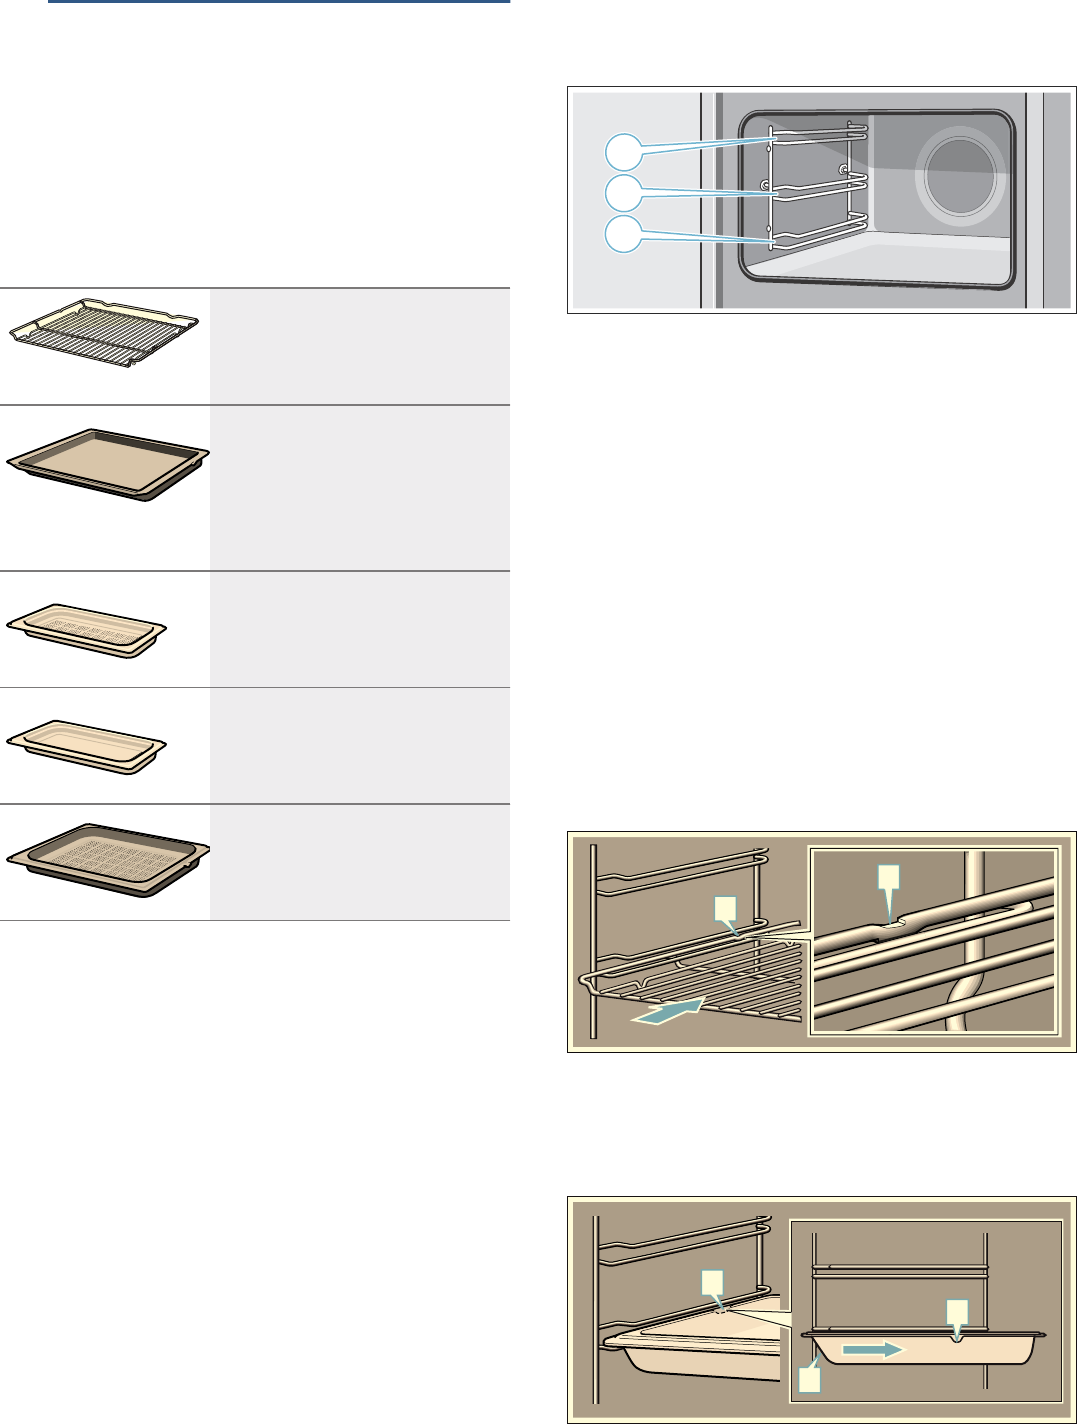
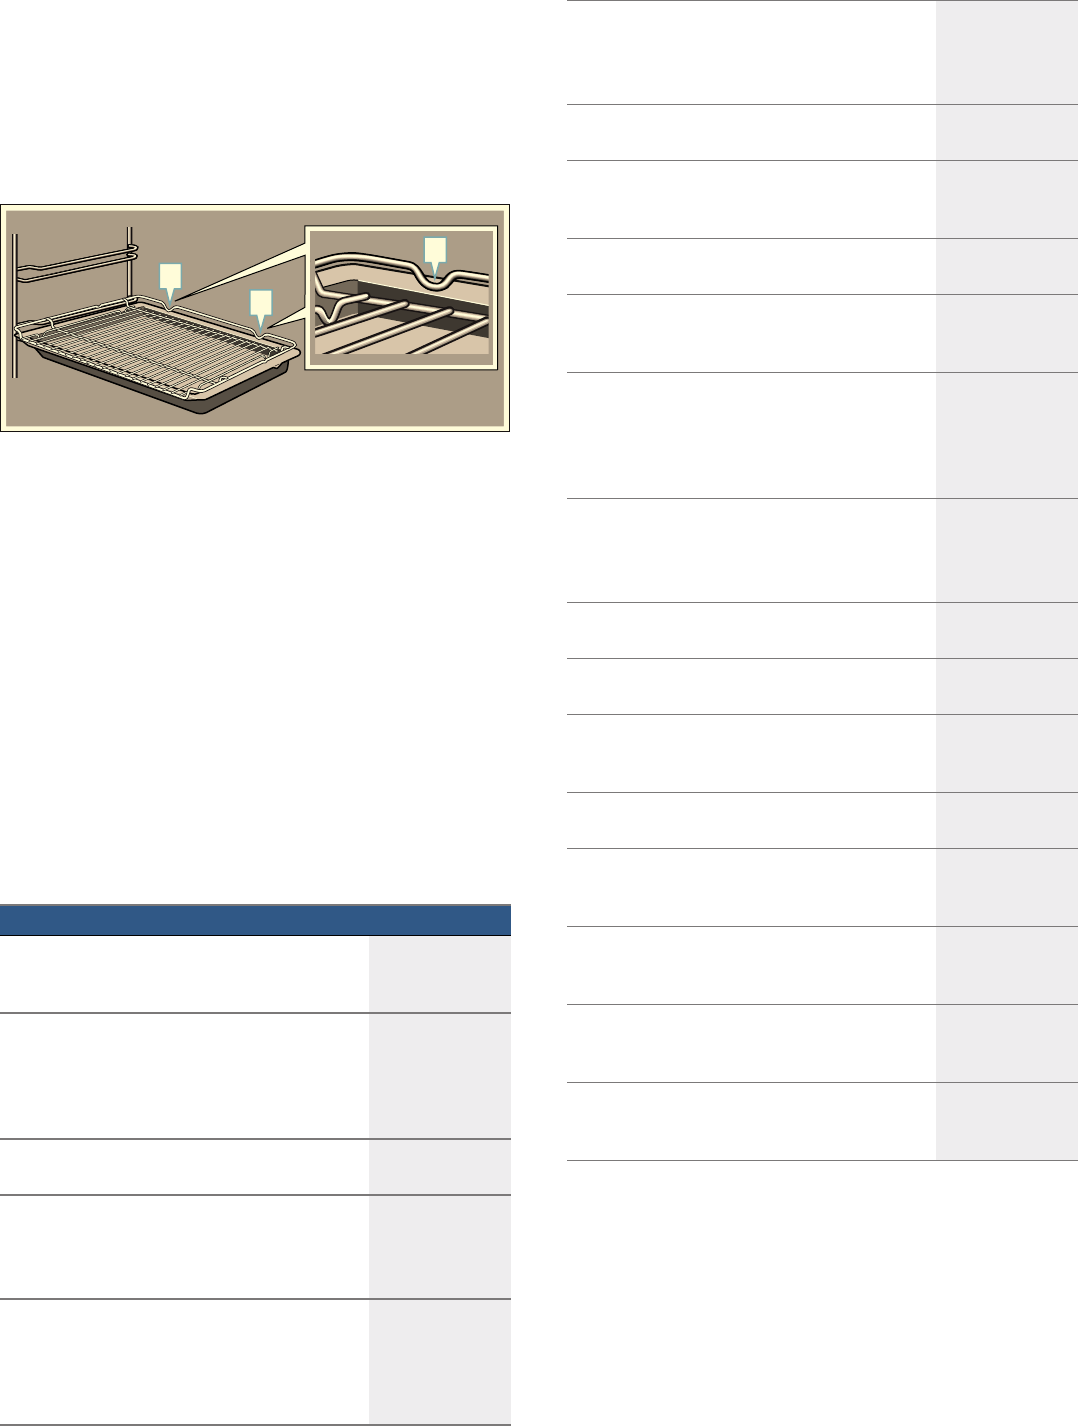
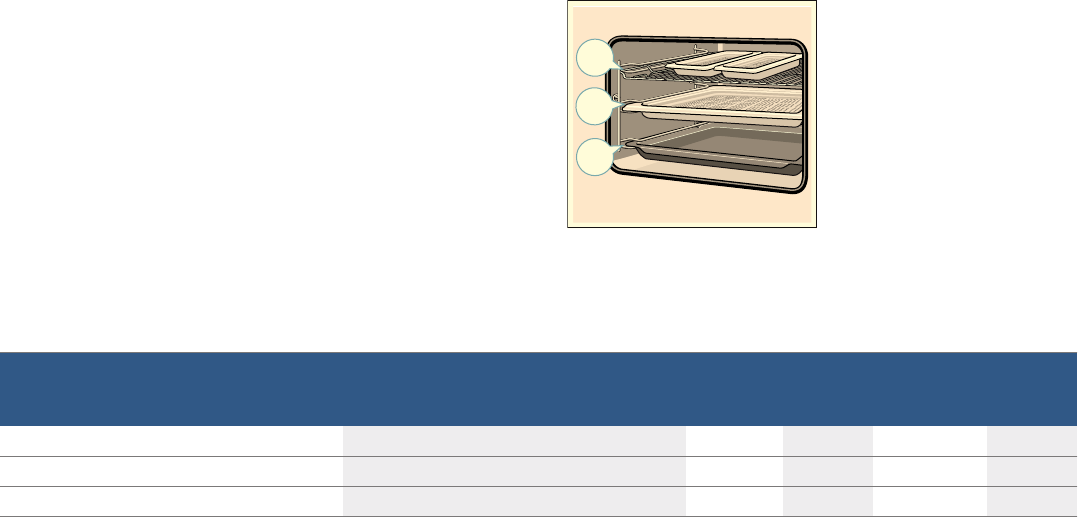
Roasting and grilling on the wire rack
Slide the universal pan into the oven at the indicated
shelf position with the wire rack attached. Ensure that
the wire rack is correctly positioned on the universal
pan. ~ "Accessories" on page 12
Note: When grilling very fatty items, do not slide the
universal pan in directly under the wire rack, but rather
at level 1.
Pour up to ^ litres of water into the universal pan,
depending on the size and type of the fish. Dripping
liquid is caught. Less steam is generated and the
cooking compartment stays cleaner.
Keep the appliance door closed when using the grill.
Never grill with the appliance door open.
When grilling, try wherever possible to use pieces of
food which are of a similar thickness and weight. This
will allow them to brown evenly and remain succulent
and juicy. Place the food to be grilled directly onto the
wire rack.
Use tongs to turn the pieces of food you are grilling. If
you pierce the fish with a fork, the juices will run out and
it will become dry.
Notes
■ The grill element switches itself on and off
continuously; this is normal. The grill setting
determines how frequently this occurs.
■ Smoke may be produced when grilling.
Roasting and stewing in cookware
Only use cookware which is suitable for use in an oven.
Check whether the cookware fits in the cooking
compartment.
Glass cookware is most suitable. Place hot glass
cookware onto a dry mat after cooking. If the surface is
damp or cold, the glass may crack.
Shiny roasting dishes made from stainless steel or
aluminium reflect heat like a mirror and are therefore
not particularly suitable. The fish cooks more slowly and
browns less. Use a higher temperature and/or a longer
cooking time.
Observe the manufacturer's instructions for your
roasting cookware.
Uncovered cookware
To cook a whole fish, it is best to use a deep roasting
tin/dish. Place the tin/dish onto the wire rack. If you do
not have any suitable cookware, use the universal pan.
Covered cookware
When cooking with covered cookware, the cooking
compartment remains considerably cleaner. Ensure that
the lid fits well and closes properly. Place the cookware
onto the wire rack.
When stewing, add two to three tablespoons of liquid
and a little lemon juice or vinegar into the cookware.
Very hot steam may escape when opening the lid after
cooking. Lift the lid at the rear, so that the hot steam
can escape away from you.
Fish can also become crispy in a covered roasting dish.
Here, use a roasting dish with a glass lid and set a
higher temperature.
Steam- assisted roasting
Certain dishes become crispier if cooked using steam,
and do not dry out as much.
Use uncovered cookware. Cookware must be heat- and
steam-resistant.
The fish does not have to be turned.
Use steam-assisted cooking if it is indicated in the
settings table. Some dishes turn out best if they are
cooked in several stages. These are indicated in the
table.
Steaming
The fish is cooked more gently using the steaming
function, and remains particularly succulent.
Larger pieces require a longer heating-up time and a
longer cooking time. If you are using several pieces
which are the same weight, the heating-up time is
increased, and not the cooking time.
Fish does not need to be turned.
Use the perforated steam container, size XL, and slide
the universal pan in underneath. You can also use a
glass tray and place this onto the wire rack.
Food which would normally be prepared in a water bath
should always be covered with foil.
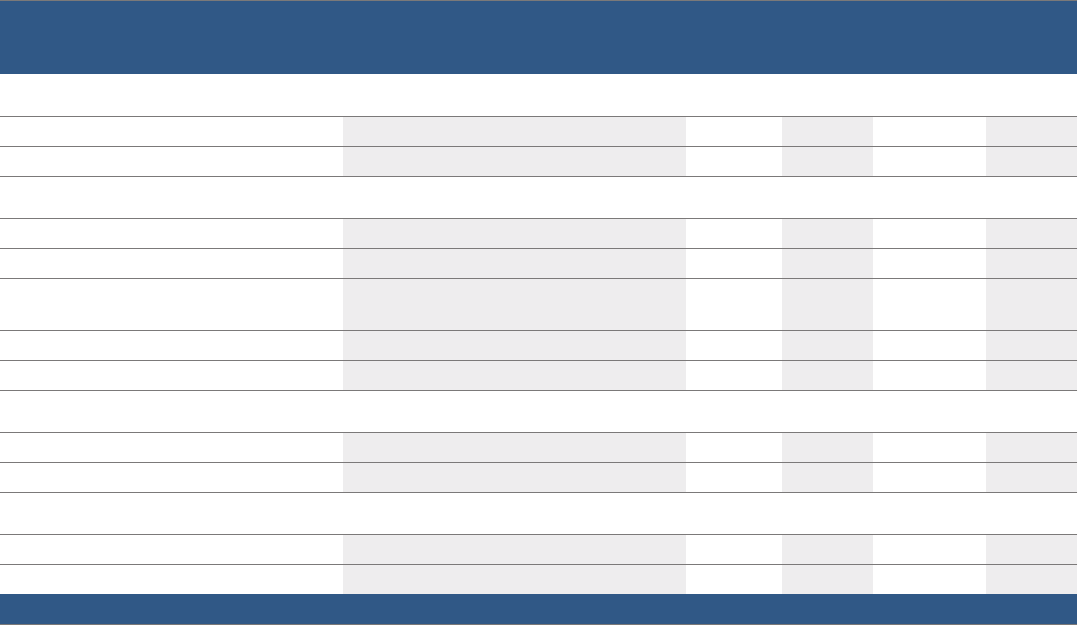
Recommended setting values
You can find the ideal heating type for your fish dishes
in the table. The temperature and cooking time depend
on the amount, composition and temperature of the
food. Settings ranges are indicated for this reason. Try
using lower setting values first. You can use a higher
setting next time if necessary.
The setting values are based on the assumption that
chilled fish is placed into a cold cooking compartment.
By doing so, you can make energy savings of up to 20
per cent. If you preheat the oven, you can reduce the
indicated cooking times by several minutes.
In the table, you can find information for fish with default
values for the weight. If you want to cook a heavier fish,
you should definitely use the lower temperature. If
cooking several fish, you should use the weight of the
heaviest fish as a reference for determining the cooking
time. The individual fish should be approximately the
same size.
As a general rule: the larger a fish, the lower the
cooking temperature and the longer the cooking time.
Turn any fish which is not in swimming position after
approx. ^ to Z of the indicated time.