380026
75
Verklein
Vergroot
Pagina terug
1/88
Pagina verder
Gebruikershandleiding snelle broodbakmachine
Gebrauchsanweisung Schneller Brotbackautomat
Machine à pain expresse, mode d'emploi
User's instructions, Automatic breadmaking machine
Macchina per pane - Istruzioni per l'uso
Manual del usuario - Panera automática super-rápida
DBM400
v 090410-05
IT
ES
NL
DE
FR
EN
Gebruikershandleiding Broodbakmachine
DBM400
NL v 090410-05 1
Snelle Broodbakmachine
Gefeliciteerd met de aankoop van deze broodbakautomaat. U kunt het begin van de
baktijd instellen met een timer waardoor het brood op ieder gewenst moment klaar is,
en uw huis is vervuld van de heerlijke geur van versgebakken brood.
Veiligheidsvoorschriften
Algemeen
Lees de gebruiksaanwijzing goed door en bewaar deze zorgvuldig.
Gebruik dit apparaat alleen zoals beschreven in deze gebruiksaanwijzing.
Dit apparaat mag niet gebruikt worden door kinderen en personen die door een
lichamelijke, zintuiglijke of geestelijke beperking, of gebrek aan ervaring en kennis
het apparaat niet veilig kunnen gebruiken, tenzij ze instructies hebben gehad over het
gebruik van het apparaat door een persoon die verantwoordelijk is voor hun veiligheid.
Kinderen moeten in de gaten gehouden worden om er zeker van te zijn dat ze niet
met het apparaat spelen.
Laat reparaties uitvoeren door een gekwalificeerde monteur. Probeer nooit zelf het
apparaat te repareren.
Elektriciteit en warmte
Controleer voordat u het apparaat gebruikt of de netspanning overeenkomt met
de aangegeven netspanning op het typeplaatje van het apparaat.
Sluit het apparaat altijd aan op een geaard stopcontact.
Haal altijd de stekker uit het stopcontact wanneer u het apparaat niet gebruikt.
Als u de stekker uit het stopcontact neemt, trek dan aan de stekker zelf, niet aan
het snoer.
Controleer regelmatig of het snoer van het apparaat nog intact is. Gebruik het
apparaat niet als het snoer beschadigingen vertoont. Laat een beschadigd snoer
vervangen door een gekwalificeerde servicedienst.
Zorg er bij gebruik van een verlengsnoer voor dat dit volledig uitgerold wordt.
Gebruik uitsluitend een goedgekeurd verlengsnoer.
Het apparaat moet zijn warmte kwijt kunnen om brandgevaar te voorkomen. Zorg
er dus voor dat het apparaat voldoende vrij is en niet in contact kan komen met
brandbaar materiaal.
Zorg ervoor dat het apparaat, het snoer en de stekker niet in aanraking komen
met hittebronnen, zoals een hete kookplaat of open vuur.
Zorg ervoor dat de binnenkant van het apparaat, het snoer en de stekker niet in
aanraking komen met water.
Gebruik
Gebruik het apparaat nooit buitenshuis.
Gebruik het apparaat nooit in vochtige ruimten.
Plaats het apparaat op een stabiele en vlakke ondergrond, op een plaats waar het
niet kan vallen.
Laat het snoer niet over de rand van het aanrecht, werkblad of een tafel hangen.
Zorg ervoor dat uw handen droog zijn als u het apparaat, het snoer of de stekker
aanraakt.
Schakel het apparaat uit en verwijder de stekker uit het stopcontact als u tijdens
het gebruik storingen ondervindt, het apparaat gaat reinigen of klaar bent met het
gebruik.
Dompel het apparaat, het snoer en de stekker nooit onder in water of een andere
vloeistof.
Gebruikershandleiding Broodbakmachine
DBM400
NL v 090410-052
LET OP
Raak het apparaat niet meer aan als het in het water is gevallen. Trek onmiddellijk de
stekker uit het stopcontact. Gebruik het apparaat niet meer.
Inleiding
De geur van zelfgebakken brood is een onvergetelijke ervaring. Warm, vers
zelfgebakken brood is een echte sensatie. Geniet er elke dag van met uw Bestron
Broodbakautomaat DBM400. Bovendien helpt de broodbakautomaat u om elke dag
weer dit genot te beleven zonder dat het u veel moeite kost. Hij is voorzien van een
kleine computer die al het werk voor u verricht.
U kunt zelf alle speciale soorten brood bakken. Bovendien kunt u zelf deeg voor
broodjes, pizza’s en cakes maken. Het is allemaal heel eenvoudig en het
resultaat smaakt alsof het ambachtelijk bereid is.
Vóór het eerste gebruik
Voordat u de automaat voor het eerst gebruikt, kunt u het beste eerst even de tijd
nemen om deze gebruiksaanwijzing te bestuderen. Besteed speciale aandacht aan de
volgende aanwijzingen.
1. Haal uw nieuwe broodbakautomaat voorzichtig uit de verpakking en verwijder alle
verpakkingsmaterialen.
2. Verwijder eventueel stof dat tijdens het inpakken is ingesloten.
3.
Poets uw broodbakautomaat na met een vochtige doek. Houd in gedachten dat
de bakvorm is voorzien van een anti-aanbaklaag. Gebruik geen schuurmiddelen.
4. Vet de bakvorm vóór het eerste gebruik in met olie of margarine.
5. Plaats de bakvorm, zonder de kneedhaak, en laat het apparaat 3 tot 5 minuten
werken zonder inhoud. (Gebruik daarvoor bakprogramma “cuisson/bakken”, zie
de toelichting bij programma “cuisson/bakken”.)
6. Laat uw apparaat afkoelen en herhaal de reiniging.
7. Plaats bakvorm waarmee u brood wilt gaan bakken.
8. Vet de as licht in met een beetje bakboter of olie, en plaats de kneedhaak op
de aandrijfas.
Tijdens de productie van dit apparaat is het noodzakelijk om componenten te smeren
en daarom is het mogelijk dat het apparaat bij het eerste bakken een beetje rook
afgeeft. Dit is echter volkomen normaal.
Gebruikershandleiding Broodbakmachine
DBM400
NL v 090410-05 3
Over de broodbakmachine DBM400
Met deze broodbakautomaat kunt u broden van ca. 900 g bakken (gewichtsinformatie
bij benadering, afhankelijk van de recepten).
Componenten
Figuur 1 Overzicht
Bedieningspaneel
Figuur 2 Bedieningspaneel
14. Programmakeuzes
15. Display
16. SELECTIE-toets
17. TIMER-toetsen
18. KORST KLEUR-toets
19. START/STOP-toets
11.
1.
10.
9.
7.
2.
8.
12.
6.
5.
4.
3.
13.
1. Kijkvenster
2. Deksel
3. Hendel
4. Aandrijfas
5. Kneedblad
6. Bakpan
7. Ventilatieopening
8. Dekselgreep
9. Behuizing
10. Bedieningspaneel
11. Snoer en stekker
12. Maatbeker voor water en meel
13. Maatschepje voor zout en gist
15.
18.
19.
16.
17.
14.
Gebruikershandleiding Broodbakmachine
DBM400
NL v 090410-054
Display
Display:
geeft de geselecteerde stevigheid van de broodkorst weer
geeft het geselecteerde programmanummer weer
geeft de resterende tijd weer
geeft de temperatuur waarschuwing weer (zie hoofdstuk probleemoplossing)
Toets “sélection/selectie” (16): Kiezen van het menuprogramma.
Toets “couleur croûte/korst kleur” (18): voor de instelling van de broodkorst (licht,
middel, donker)
Toets “minuterie/timer”
(17) (vertraagd bakken): om een vertraagd begin van
het bakken in te stellen (instelling voor de programma’s basis, frans, volkoren, zoet en
snel).
Toets “marche-arrêt/start-stop” (19): Druk de toets Start minstens 1 seconde in. Er is
een signaaltoon te horen en de dubbele punt in het display knippert; het programma
start. Druk de toets Stop minstens 1 seconde in. Er is een signaaltoon te horen en de
dubbele punt in het display houdt op met knipperen.
Programmabeschrijving (14)
Base/basis (wit- of bruinbrood) (3:00)
Voor wit- en bruinbrood. Tevens voor broden met kruiden en rozijnen.
Super rapide/snel (Extra snelbakprogramma) (0:58)
Om in zeer korte tijd broden te bakken. Broden die met dit programma worden
gebakken, kunnen vrij hard en stevig zijn. De watertemperatuur dient 35 tot 45°C te
bedragen.
Français/frans (Frans brood) (3:50)
Voor luchtig en krokant brood zoals bijvoorbeeld Frans brood. Dit brood moet
langer rijzen, de bewerkingstijd is dan ook langer dan bij andere programma’s.
Complet/volkoren (Volkorenbrood) (3:40)
Voor volkorenbrood met een hoog aandeel aan volkoren meel. Dit programma heeft
een langere voorwarmtijd om beter water op te nemen en om het deeg verder te laten
rijzen. De kneedhaak is tijdens deze rusttijd van 15 minuten niet in werking. Het is
bovendien niet aan te raden om een vertraagde start van het bakken in te stellen. Dat
kan een slechter resultaat tot gevolg hebben.
Brioché/zoet (Zoete broodsoorten) (2:50)
Voor zoete broodsoorten die een krokante korst moeten krijgen. Deze ontstaat bij
een sterke verhitting van suiker.
Rapide/snel (Snelbakprogramma) (1:34)
Om in een kortere tijd broden te bakken. Broden die met dit
programma worden gebakken, kunnen vochtiger en dichter van structuur zijn. De
watertemperatuur dient 35 tot 45°C te bedragen.
Pâte/deeg (1:20)
Voor het kneden van diverse degen. Geen bakfunctie. Haal het deeg uit het
apparaat en vorm uw pizzadeeg of broodjes. Maak niet meer dan 900g deeg
tegelijk.
Gebruikershandleiding Broodbakmachine
DBM400
NL v 090410-05 5
Cuisson/bakken
Deze instelling kan worden gebruikt om enkel te verhitten of om de baktijd te
verlengen en komt onder andere van pas bij het maken van confiture. Bij selectie
van dit programma is de minimale verlengingstijd 10 minuten (0:10). De weergave
telt in stappen van 1 minuut af. Wanneer het bakproces vroegtijdig moet worden
beëindigd, moet u daarvoor de toets Stop gebruiken. U kunt het bakproces in
stappen van 10 minuten met max. 1 uur verlengen. Druk daartoe op de toets en
vervolgens op de toets Start.
Proces
kneden
1
(min)
rijzen
1
(min)
kneden
2
(min)
rijzen
2
(min)
pauze
(sec)
rijzen
3
(min)
bakken
(min)
totale
tijd
signaal
tijd
Programma
1 Base/basis 10 20 15 20 30 55 60 3:00 2:25
2 Super rapide/
snel
13 10 35 0:58 0:57
3
Français/frans
18 40 22 20 30 60 70 3:50 2:47
4
Complet/volkoren
10 25 20 30 30 70 65 3:40 3:00
5 Brioché/zoet 10 5 20 30 30 57 48 2:50 2:30
6 Rapide/snel 14 5 75 1:34
7 Pâte/deeg 7 5 18 50 1:20
8 Cuisson/
bakken
10 min. tot 1 uur
Tabel 1
Tijdvertraging instellen
1. Kies een tijd waarop het brood klaar moet zijn.
2. Bereken het tijdsverschil tussen de gekozen tijd en de actuele tijd.
3. Voer het tijdverschil in met de toetsen
en .
Voorbeeld: U wilt uw brood de volgende ochtend om 8.00 uur gereed hebben en het is
nu 21.00 uur in de avond. Het tijdsverschil is dan 11 uur. U stelt dus in op het display:
11:00
LET OP
U kunt maximaal 13 uur vertraging instellen in stappen van 10 minuten. Houdt de toets
TIME ingedrukt om de tijd sneller te doen lopen.
Het werken met de broodbakmachine
NB Exact afwegen van de ingrediënten is zeer belangrijk!
Om een goed product te verkrijgen, is het van het grootste belang dat u zich aan de
aangegeven hoeveelheden en gewichten houdt. Gebruik daarom de meegeleverde
maatbeker en schepje.
NB Let op de juiste hoeveelheid gist!
Wanneer het deeg in het apparaat te ver uitzet en meteen weer inzakt, of helemaal
niet uitzet, dan ligt de oorzaak waarschijnlijk in de hoeveelheid gist. Probeer een nieuw
brood te bakken met de juiste hoeveelheid gist.
Gebruikershandleiding Broodbakmachine
DBM400
NL v 090410-056
Een brood bakken
1. Bakvorm uitnemen
Open het deksel, til de greep omhoog en trek de bakvorm stevig naar buiten. Het
is belangrijk dat u de bakvorm buiten het apparaat vult, zodat er geen
ingrediënten in de motor of andere componenten terechtkomen.
2. Kneedhaak plaatsen
Steek de kneedhaak heel eenvoudig op de daarvoor bedoelde aandrijfas. Vet de
as licht in met bakboter, zodat de haken later eenvoudig te verwijderen zijn.
3. Ingrediënten afmeten/afwegen
Meet alle ingrediënten nauwkeurig af in overeenstemming met het recept en doe
ze in de juiste volgorde in de bakvorm:
1. Doe het water of melk onderin de bakvorm. Gebruik lauwwarm water of melk
(21-28°C)
2. Voeg voorzichtig zout, suiker en meel/broodmix toe.
3. Maak een klein kuiltje bovenin het meel, en leg het stukje gist of het bakpoeder
er bovenop.
LET OP
Let erop dat het toe te voegen gist niet met water in aanraking komt. Dat
zet het gistingsproces meteen in gang.
Wanneer uw recept ingrediënten bevat die niet kapot mogen worden gekneed,
dan voegt u deze pas op een later tijdstip toe, bijvoorbeeld aan het eind van de 2e
kneding. Als de 2e kneding bijna is afgelopen geeft de automaat een signaal, ten
teken dat u de ingrediënten bij het deeg kunt voegen.
4. Inzetten van de bakvorm
Druk de bakvorm stevig op zijn plaats. U hoort een klikgeluid, wanneer hij in zijn
borging valt.
5. Steek de stekker in het stopcontact.
Het display aan de bovenzijde van het apparaat licht op. Het display geeft
automatisch het 1e menu weer en een normale tijd. Bij elke druk op een toets
hoort u een signaaltoon.
6. Menukeuze
Kies een programma door op de toets “selectie” (16) te drukken.
7. Kleur van het brood
Druk deze toets (18) in om de kleur van het brood te kiezen.
8. Vertraagde start instellen
Wilt u vers brood voor uw ontbijt, dan stelt u nu de tijdsvertraging in zoals
beschreven in het volgende hoofdstuk.
9. Start (19)
Start nu de broodbakautomaat door op de toets Start/Stop te drukken. Het
programma begint, en in het display wordt de resterende tijd weergegeven. De
dubbele punt in de tijdsaanduiding knippert ten teken dat het programma loopt.
10. Programmavolgorde
De broodbakautomaat doorloopt nu automatisch alle stappen van het vooraf door
u ingestelde programma. Op het display kunt u zien met welk stap van het
programma het apparaat bezig is. Tijdens het bakproces kan er damp door de
ventilatieopeningen naar buiten komen. Dit is volkomen normaal.
Gebruikershandleiding Broodbakmachine
DBM400
NL v 090410-05 7
11. Programma-einde
Wanneer het programma klaar is, ziet u in het display 0:00 en er is een
signaaltoon te horen. Vervolgens geeft het display de oorspronkelijke looptijd van
het programma weer.
12. Warmhouden
Bij de warmhoudfunctie circuleert er ongeveer 1 uur lang hete lucht door de
bakruimte. Dit geldt bij de meeste programma’s. Voor de beste resultaten moet u
de bakvorm binnen de aangegeven tijd verwijderen. Er is een signaaltoon te
horen, wanneer de warmhoudfunctie beëindigd is. Door te drukken op de toets
Start/Stop stopt u de functie.
13. Verwijderen van de producten
Druk op de toets Start/Stop en trek de bakvorm eruit.
LET OP
Gebruik steeds ovenhandschoenen bij het openen van het deksel en het
aanraken van de bakvorm.
14. Het brood uit de bakvorm halen.
Laat het brood 5 tot 10 minuten in de bakvorm afkoelen en laat het vervolgens uit
de vorm vallen op een rooster. Als de kneedhaak nog in de bakvorm zit, vult u
de bakvorm met warm water en verwijdert u de kneedhaak na enige inweektijd.
Gewoonlijk blijft de kneedhaak in het brood zitten. Nadat het brood volledig
afgekoeld is, verwijdert u deze met een voorwerp dat de anti-aanbaklaag op de
deeghaken niet beschadigt (houten lepel of spatel).
15. Druk na elk gebruik op de toets Start/Stop en trek de stekker uit het stopcontact.
Open bij voorkeur nooit het deksel van de broodbakautomaat, wanneer er een
programma loopt. Dit kan van invloed zijn op de kwaliteit van het brood. Als u toch
het deksel moet openen om ingredienten toe te voegen, doe dit dan snel zodat de
temperatuur in de broodbakautomaat niet teveel zakt.
Signaaltoon
De signaaltoon is te horen:
bij het indrukken van elke willekeurige toets;
wanneer een programma afgelopen is;
wanneer de warmhoudfunctie afgelopen is;
tijdens de 2e kneedfase in bepaalde programma’s om u eraan te herinneren dat er
nog bepaalde ingrediënten moeten worden toegevoegd (noten, chocolade et cetera).
Stroomonderbreking of -uitval
Na een stroomonderbreking van maximaal 10 minuten zal de broodbakmachine weer
automatisch verder werken. Bij een langere stroomuitval gaat het display weer terug
naar de starttijd van het betreffende programma en moet u de broodbakautomaat
opnieuw starten.
Het bewaren en het snijden van het brood
Om het brood goed te kunnen snijden moet u het brood minstens 20 tot 40 minuten
laten afkoelen. Gebruik bij voorkeur een scherp elektrisch mes of een gekarteld
broodmes.
Omdat er aan uw verse brood geen conserveringsmiddelen zijn toegevoegd, kunt u
het niet te lang bewaren; bij normale kamertemperatuur ongeveer 3 dagen. Als u het
brood langer wilt bewaren, kunt u het invriezen.
Gebruikershandleiding Broodbakmachine
DBM400
NL v 090410-058
Probleemoplossingstabel
Probleem Oorzaak Oplossing
Broodkorst is te dik. Het brood is te lang
warmgehouden en
daardoor uitgedroogd.
Haal het brood sneller na
afloop van de baktijd
uit de
bakvorm.
Ingrediënten zijn niet
goed
gemengd en/of gebakken.
Verkeerd programma
gekozen.
Kies het juiste programma
bij het brood.
Deeg te dik zodat er niet
goed geroerd kon
worden.
Voeg voldoende vocht
toe.
Het display laat E:01 zien De temperatuur in de
broodbakautomaat is te
hoog.
Druk op de toets Start/
Stop om te stoppen, en
open het deksel om het
inwendige te laten
afkoelen.
Motor maakt geluiden
maar deeg wordt niet
gekneed.
De bakvorm is niet goed
bevestigd of het deeg is
te stijf om te kneden.
Controleer of de bakvorm
goed is bevestigd, en
weeg altijd de
ingrediënten van het deeg
zorgvuldig af
Het brood blijft te klein. Geen gist, of de werking
van de gist is
onvoldoende.
Zorg voor de goede
omgevingsfactoren voor
gist.
Het deeg rijst de bakvorm
uit.
Teveel vocht en/of gist
aanwezig.
Verminder de
hoeveelheden vocht en/of
gist.
Brood zakt in tijdens het
bakken.
Teveel water of gist maakt
het deeg te zacht en slap
Verminder de
hoeveelheden vocht en/of
gist.
Het midden van het brood
blijkt hol te zijn bij het
snijden.
teveel water en/of gist,
geen zout gebruikt.
Verminder de
hoeveelheden vocht en/of
gist en gebruik meer zout.
Er is poeder
achtergebleven in de
bakvorm.
Te weinig water gebruikt. Gebruik meer water.
Tabel 2
Gebruikershandleiding Broodbakmachine
DBM400
NL v 090410-05 9
Reiniging en onderhoud
LET OP
Trek vóór alle reinigingswerkzaamheden de stekker van het apparaat uit het
stopcontact.
Wacht tot de broodbakautomaat volledig afgekoeld is.
BELANGRIJK! De deksel en/of de behuizing niet bespuiten met of onderdompelen
in vloeistoffen of water.
Reinig de buitenzijde van de broodbakautomaat alleen met een vochtige doek.
Vlekken aan de binnenkant van het deksel of in de luchtsleuven zijn alleen
uiterlijke verschijnselen en ontstaan tijdens het bakproces. Zij hebben geen
invloed op de werking van het apparaat. Poets deze vlekken na elk gebruik weg
met een vochtige doek en een beetje afwasmiddel.
Poets de binnenzijde van de broodbakautomaat alleen schoon met een vochtige
doek.
Om het deksel van het apparaat te nemen, moet u het uit de bevestigingssleuf
schuiven en omhoog tillen (tekening).
U kunt het in de omgekeerde volgorde terugplaatsen.
Figuur 2
Gebruik alleen warm water voor het reinigen van de bakvorm. Voorkom krassen
op de anti-aanbaklaag.
Controleer of de broodbakautomaat volledig afgekoeld is, voordat u hem opbergt.
LET OP
Gebruik nooit de onderstaande reinigingshulpmiddelen:
Verfverdunners;
Wasbenzine of benzine;
Schuursponsjes;
Politour;
Chemische reinigingsdoekjes.
Bijzondere verzorging van de bakvormen
Voorkom beschadigingen van of krassen in de anti-aanbaklaag. Gebruik nooit scherpe
voorwerpen zoals bijvoorbeeld metalen spatels, messen of vorken. De coatinglaag
kan in de loop van de tijd van kleur veranderen. Dat is het gevolg van de frequente
hitte en vochtigheid. Dit is niet van invloed op de kwaliteit van het brood en van de
broodbakautomaat. Het gat in het midden van de kneedhaken moet regelmatig worden
gereinigd en met een druppel voor consumptie geschikte olie worden gesmeerd. Dat
voorkomt dat de kneedhaak aan de aandrijfas vast komt te zitten.
Opbergen van de broodbakautomaat
Verzeker u ervan dat alle componenten droog zijn. Let erop dat er zich geen vocht in
het apparaat bevindt. Sluit het deksel en let erop dat er geen andere dingen op het
deksel worden gestapeld.
Gebruikershandleiding Broodbakmachine
DBM400
NL v 090410-0510
Technische gegevens
Type: DBM400
Vermogen: 660W
Netspanning: 230V ~ 50Hz
Milieu
Werp verpakkingsmateriaal zoals plastic en dozen in de daarvoor bestemde
containers.
Dit product aan het eind van de gebruiksduur niet inleveren als normaal huishoudelijk
afval, maar bij een inzamelpunt voor hergebruik van elektrische en elektronische
apparatuur. Let op het symbool op het product, de gebruiksaanwijzing of de
verpakking.
De materialen kunnen hergebruikt worden zoals aangegeven. Door uw hulp
bijhergebruik, de verwerking van de materialen of ander vormen van de benutting van
oude apparatuur levert u een belangrijke bijdrage aan de bescherming van ons milieu.
Informeer bij de gemeente naar het juiste inzamelpunt bij u in de buurt.
Garantiebepalingen
De importeur geeft onder de volgende voorwaarden 60 maanden na aankoopdatum
garantie op deze apparatuur tegen defecten die zijn ontstaan door fabricage- en/of
materiaalfouten.
1. In de genoemde garantieperiode zullen geen kosten worden berekend voor
arbeidsloon en materiaal. De onder garantie uitgevoerde reparatie verlengt de
garantietermijn niet.
2. Defecte onderdelen of bij remplace (omruiling) de defecte apparaten zelf,
worden automatisch eigendom van de importeur.
3. Elke aanspraak op garantie dient vergezeld te gaan van het aankoopbewijs van
de firma.
4. Aanspraken op garantie moeten worden gedaan bij de dealer waar het
apparaat is gekocht of bij de importeur.
5. De garantie is uitsluitend geldig voor de eerste koper en niet overdraagbaar.
6. De garantie is niet geldig voor schade die is ontstaan door:
a. ongevallen, verkeerd gebruik, slijtage en/of verwaarlozing;
b. foutieve installatie en/of gebruik op een manier die in strijd is met de
geldende wettelijke, technische of veiligheidsnormen;
c. aansluiting op een andere netspanning dan die op het typeplaatje staat
vermeld;
d. een ongeautoriseerde wijziging;
e. een reparatie die is uitgevoerd door derden;
f. een onzorgvuldige transportwijze zonder geschikte verpakking
respectievelijk bescherming.
7. Op deze garantiebepalingen zal geen aanspraak gemaakt kunnen worden bij:
a. verliezen die zich tijdens het transport voordoen;
b. het verwijderen of wijzigen van het serienummer van het apparaat.
8. Uitgezonderd van garantie zijn snoeren, lampen en glazen onderdelen.
9. De garantie geeft geen enkel recht op vergoeding van eventuele schade, buiten
de vervanging respectievelijk reparatie van de defecte onderdelen. De
importeur kan nooit aansprakelijk gesteld worden voor eventuele vervolgschade of
enigerlei andere consequenties die door of in relatie met de door hem
geleverde apparatuur zijn ontstaan.
Gebruikershandleiding Broodbakmachine
DBM400
NL v 090410-05 11
10. Om aanspraak te maken op garantie kunt u zich wenden tot uw winkelier.
Bestron biedt ook de mogelijkheid om het apparaat rechtstreeks ter reparatie
aan te bieden aan de Bestron Service Dienst. Stuur echter nooit zomaar iets op.
Het pakket kan dan namelijk geweigerd worden en eventuele kosten zijn voor
uw rekening. Neem contact op met de Service Dienst en zij zullen u vertellen
hoe u het apparaat moet inpakken en verzenden.
11. Het apparaat is niet voor professioneel gebruik geschikt.
Service
Mocht zich onverhoopt een storing voordoen, dan kunt u zich in verbinding stellen met
de BESTRON-servicedienst:
NEDERLAND: BELGIE:
BESTRON NEDERLAND BV WILLEMEN SERVICE BVBA
BESTRON SERVICE BESTRON SERVICE
Moeskampweg 20 Lambrechtshoekenlaan 337-339
5222 AW ’s-Hertogenbosch 2170 Merksem - Antwerpen
Tel: 073 - 623 11 21 Tel: 03 - 321 78 48
Fax: 073 - 621 23 96 Fax: 03 - 321 28 50
Email: info@bestron.com Email: info@wilservice.be
Internet: www.bestron.com Internet: www.wilservice.be
CE-conformiteitsverklaring
Dit product voldoet aan de bepalingen in de volgende Europese richtlijnen op het
gebied van veiligheid:
EMC-richtlijn 2004/108/EC
Laagspanningsrichtlijn 2006/95/EC
R Neyman
Quality control
Gebruikershandleiding Broodbakmachine
DBM400
NL v 090410-0512
Recepten
Maateenheden
ml: mililiter
g: gram
TL: theelepel
EL: eetlepel
Basisrecept Ingrediënten Eenheid
Gewicht: ca 900g
Insteltijd: mogelijk
Gewicht
Water
Roggemeel
Suiker
Zout
Gedroogde gist
9
ml
g
EL
TL
g
900
400
610
1
2
10
Programma: 3 Ingrediënten in bovenstaande volgorde
toevoegen.
Witbrood Ingrediënten Eenheid
Gewicht: ca 900g
Insteltijd: niet mogelijk door de
toevoeging van melk
Melk
Witmeel
Boter (zacht)
Suiker
Zout
Gedroogde gist
ml
g
g
TL
TL
g
290
570
35
1
2
8
Programma: 1 Ingrediënten in bovenstaande volgorde
toevoegen.
Kruidenbrood Ingrediënten Eenheid
Gewicht: ca 900g
Insteltijd: mogelijk
Water
Zuurdesem
Roggemeel
Suiker
Zout
Zwarte peper (gemalen)
Gemixte kruiden
Gedroogde gist
ml
g
g
TL
EL
TL
g
g
360
90
360
1
1
1
23
6
Programma: 3 Ingrediënten in bovenstaande volgorde
toevoegen.
Volkorenbrood Ingrediënten Eenheid
Gewicht: ca 900g
Insteltijd: mogelijk
Water
Dennenhoning
Volkorenmeel
Zout
Gedroogde gist
ml
EL
g
TL
g
315
590
2
10
Programma: 3 Ingrediënten in bovenstaande volgorde
toevoegen.
Gebruikershandleiding Broodbakmachine
DBM400
NL v 090410-05 13
Hartig hambrood Ingrediënten Eenheid
Gewicht: ca 900g
Insteltijd: mogelijk
Water
Zuurdesem
Roggemeel
Witmeel
Suiker
Zout
Gedroogde gist
Toevoegen na signaaltoon:
Hamblokjes
ml
g
g
g
TL
TL
g
g
325
120
300
30
1
1
8
160
Programma: 3 Ingrediënten in bovenstaande volgorde
toevoegen.
Driegranenbrood Ingrediënten Eenheid
Gewicht: ca 900g
Insteltijd: niet mogelijk door
toevoeging van melk en ei
Melk
Dikke zure melk
Ei
Boter of margarine
Witmeel
Kruidenzout
Gedroogde gist
Toevoegen na signaaltoon:
Lijnzaad
Tarwekorrels
Zonnebloempitten
ml
EL
stuk
g
g
TL
g
g
g
g
900
1
45
450
3
6
23
45
23
Programma: 3 Opmerking: In plaats van tarwekorrels
kunt u ook sesamzaad of
pompoenpitten gebruiken.
Uienbrood Ingrediënten Eenheid
Gewicht: ca 900g
Insteltijd: mogelijk
Water
Zonnebloemolie
Witmeel
Suiker
Kruidenzout
Geroosterde uien
Gedroogde gist
ml
EL
g
TL
TL
g
g
290
2
570
1
3
70
8
Programma: 1 Ingrediënten in bovenstaande volgorde
toevoegen.
Gebruikershandleiding Broodbakmachine
DBM400
NL v 090410-0514
Bierbrood Ingrediënten Eenheid
Gewicht: ca 900g
Insteltijd: niet aan te raden
Water
Bier
Zuurdesem (vloeibaar)
Moutsiroop
Witmeel
Boekweitmeel
Zemelen
Sesamzaad
Zout
Gedroogde gist
ml
ml
ml
EL
g
EL
EL
EL
TL
g
135
135
135
1½
490
3
3
2
6
Programma: 1 Ingrediënten in bovenstaande volgorde
toevoegen.
Rozijnenbrood met kaneel Ingrediënten Eenheid
Gewicht: ca 900g
Insteltijd: niet mogelijk
Melk
Zachte boter
Witmeel
Suiker
Zout
Kaneel
Gedroogde gist
Toevoegen na signaaltoon:
Rozijnen
ml
g
g
g
TL
TL
g
g
240
30
430
60
1
8
70
Programma: 1 Tip: Spoel de rozijnen af met heet
water, daarna bestuiven met meel
voordat de rozijnen aan het deeg
worden toegevoegd. Dit om te
voorkomen dat alle rozijnen naar de
bodem zakken.
Amandelbrood Ingrediënten Eenheid
Gewicht: ca 900g
Insteltijd: niet mogelijk
Melk
Zachte boter
Ei
Witmeel
Suiker
Zout
Gedroogde gist
Toevoegen aan signaaltoon:
Abrikozen (gedroogd/
fijngesneden)
Amandelen (fijngehakt)
ml
g
stuk
g
g
TL
g
g
g
180
55
1
540
70
½
8
45
45
Programma: 4 Ingrediënten in bovenstaande volgorde
toevoegen.
Gebrauchsanweisung Brotbackautomat
DBM400
DE v 090410-0515
Gebrauchsanweisung Brotbackautomat
DBM400
DE v 090410-05 15
Schneller Brotbackautomat DBM400
Wir gratulieren Ihnen zum Kauf dieses Brotbackautomaten. Sie können den Beginn der
Backzeit mit einem Timer einstellen, wodurch das Brot zu jedem vom Ihnen gewünschten
Zeitpunkt fertig ist und Ihr Haus mit dem herrlichen Duft frisch gebackenen Brots erfüllt.
Sicherheitsbestimmungen
Allgemein
Lesen Sie die Bedienungsanleitung gut durch und bewahren Sie diese sorgfältig auf.
Verwenden Sie dieses Gerät nur so wie in dieser Bedienungsanleitung
beschrieben.
Kinder oder Personen, denen es an Wissen oder Erfahrung im Umgang mit dem
Gerät mangelt, oder die in ihren körperlichen, sensorischen oder geistigen
Fähigkeiten eingeschränkt sind, dürfen das Gerät nicht ohne Aufsicht oder
Anleitung durch eine für ihre Sicherheit verantwortliche Person benutzen.
Kinder müssen beaufsichtigt werden, damit sie nicht mit dem Gerät spielen.
Lassen Sie Reparaturen von einem qualifizierten Mechaniker ausführen.
Versuchen Sie nie, das Gerät selbst zu reparieren.
Elektrizität und Wärme
Bevor Sie das Gerät verwenden, prüfen Sie, ob die Netzspannung mit der auf
dem Typenschild des Geräts angegebenen Stromstärke übereinstimmt.
Schließen Sie das Gerät immer an eine geerdete Steckdose an.
Ziehen Sie immer den Stecker aus der Steckdose, wenn Sie das Gerät nicht
benutzen.
Ziehen Sie beim Entfernen des Steckers aus der Steckdose am Stecker und nicht
am Kabel.
Überprüfen Sie regelmäßig, ob das Gerätekabel noch intakt ist. Benutzen Sie das
Gerät nicht, wenn das Kabel beschädigt ist. Lassen Sie ein beschädigtes Kabel
von einem qualifizierten Wartungsdienst ersetzen.
Bei Benutzung eines Verlängerungskabels muss das Kabel immer ganz ausgerollt
werden.
Verwenden Sie ausschließlich zugelassene Verlängerungskabel.
Um Brandgefahr zu verhindern, muss das Gerät seine Wärme abgeben können.
Sorgen Sie also dafür, dass das Gerät ausreichend frei steht und nicht in Kontakt
mit brennbarem Material kommen kann.
Sorgen Sie dafür, dass das Gerät, das Kabel und der Stecker nicht mit
Hitzequellen wie heißen Kochplatten oder offenem Feuer in Berührung kommen.
Sorgen Sie dafür, dass das Innere des Geräts, das Kabel und der Stecker nicht
mit Wasser in Berührung kommen.
Verwendung
Benutzen Sie das Gerät nie im Freien.•Benutzen Sie das Gerät nie in feuchten
Räumen.
Stellen Sie das Gerät auf einen stabilen und ebenen Untergrund und an eine
Stelle, wo es nicht herunterfallen kann.
Lassen Sie das Kabel nicht über den Rand der Anrichte, einer Arbeitsplatte oder
eines Tisches hängen.
Sorgen Sie dafür, dass Ihre Hände trocken sind, wenn Sie das Gerät, das Kabel
oder den Stecker berühren.
Schalten Sie das Gerät aus und ziehen Sie den Stecker aus der Steckdose, wenn
bei der Benutzung Störungen auftreten, Sie das Gerät reinigen oder es nicht mehr
benutzen.
Tauchen Sie das Gerät, das Kabel und den Stecker nie in Wasser oder andere
Flüssigkeiten.
Gebrauchsanweisung Brotbackautomat
DBM400
DE v 090410-0516
ACHTUNG!
Fassen Sie das Gerät nicht mehr an, wenn es ins Wasser gefallen ist. Ziehen Sie
sofort den Stecker aus der Steckdose. Benutzen Sie das Gerät nicht mehr.
Einleitung
Der Duft von selbst gebackenem Brot ist eine unvergessliche Erfahrung. Warmes,
frisches selbst gebackenes Brot ist eine echte Sensation. Genießen Sie diese
Sensation jeden Tag mit Ihrem Bestron Brotbackautomaten DBM400. Darüber hinaus
hilft der Brotbackautomat Ihnen dabei, jeden Tag aufs Neue in diesen Genuss zu
kommen, ohne dass es Sie viel Mühe kostet. Der Automat ist mit einem kleinen
Computer ausgestattet, der die ganze Arbeit für Sie übernimmt.
Sie können selbst alle speziellen Brotsorten backen. Darüber hinaus können Sie selbst
Marmelade sowie Teig für Brötchen, Pizzen und Kuchen zubereiten. Das geht alles
ganz einfach und das Ergebnis schmeckt, als wäre es handwerklich zubereitet.
Vor dem ersten Gebrauch
Bevor Sie das Gerät zum ersten Mal verwenden, nehmen Sie sich zuerst kurz die Zeit,
diese Bedienungsanleitung durchzulesen. Beachten Sie bitte besonders die folgenden
Anweisungen.
1. Nehmen Sie Ihren neuen Brotbackautomaten vorsichtig aus der Verpackung und
entfernen Sie sämtliches Verpackungsmaterial.
2. Entfernen Sie eventuell vorhandenen Staub, der beim Einpacken eingeschlossen
wurde.
3. Reinigen Sie Ihren Brotbackautomaten anschließend mit einem feuchten Tuch.
Denken Sie daran, dass die Backform mit einer Antihaftschicht ausgestattet ist.
Verwenden Sie keine Scheuermittel.
4. Fetten Sie die Backform vor der ersten Verwendung mit Öl oder Margarine ein.
5. Setzen Sie die Backform ohne Knethaken ein und lassen Sie das Gerät 3 bis 5
Minuten ohne Inhalt arbeiten. (Verwenden Sie hierfür Backprogramm “cuisson/
bakken”, siehe dazu die Erläuterung bei Programm “cuisson/bakken”).
6. Lassen Sie das Gerät abkühlen und reinigen Sie es erneut.
7. Setzen Sie die Backform ein, mit der Sie Brot backen wollen.
8. Fetten Sie die Antriebsachse leicht mit etwas Backbutter oder Öl ein und bringen
Sie die Knethaken auf der Antriebsachse an.
Während der Herstellung dieses Geräts ist es notwendig, Komponenten einzufetten
und daher ist es möglich, dass das Gerät beim ersten Backvorgang etwas Rauch
abgibt. Das ist jedoch vollkommen normal.
Gebrauchsanweisung Brotbackautomat
DBM400
DE v 090410-0517
Gebrauchsanweisung Brotbackautomat
DBM400
DE v 090410-05 17
Über den Brotbackautomaten DBM1400
Mit diesem Brotbackautomaten können Sie Brote von maximal ca. 900 g backen
(Gewichtsinformation geschätzt, hängt von den Rezepten ab).
Bestandteile
Abbildung 1 Übersicht
Abbildung 2 Bedienfeld
14. Menuprogramm
15. Display
16. Auswahl-Taste
17. Schaltuhrtaste für die Brotkurste
18. Farb-Taste
19. Start/Stop-Taste
11.
1.
10.
9.
7.
2.
8.
12.
6.
5.
4.
3.
13.
15.
18.
19.
16.
17.
14.
1. Sichtfenster
2. Deckel
3. Griff
4. Antriebsachse
5. Knetblatt
6. Backform
7. Ventilationsöffnung
8. Deckelgriff
9. Gehäuse
10. Display
11. Kabel und Stecker
12. Messbecher für Wasser und Mehl
13. Messlöffel für Salz und Hefe
Gebrauchsanweisung Brotbackautomat
DBM400
DE v 090410-0518
Display und Funktionen, Kontrollpaneel
Display:
zeigt die gewählte Stärke der Brotkruste an
zeigt die gewählte Programm Nummer an
zeigt die verbleibende Restzeit an
zeigt die Temperatur Warnung an (siehe Kapitel Problembehandlung).
Taste “Sélection/selectie” (16): Zur Auswahl des Menuprogramms
Taste “Couleur croûte/korst kleur” (18) (Brotkursten Farbe): zur Einstellung der
Brotkruste (hell, mittel, dunkel)
Taste “Minuterie/timer” (17) (Zeitverzögerung): zur Einstellung des zeitverzögerten
Backens (Einstellung für die Programme Basis, Französisch, Vollkorn, Süß und Schnell).
Taste “Marche-arrêt/Start-Stop” (19): Drücken Sie die Start Taste für min. 1 Sek. bis ein
Signal ertönt und der Doppel-Punkt in der Anzeige blinkt, das Programm startet.Drücken Sie
die Stop Taste für min.1 Sek. bis ein Signal ertönt und der Doppel-Punkt In der Anzeige hört
auf zu blinken.
Programmbeschreibungen (14)
Base/basis (Weiß- oder Graubrot) (3:00)
Für Weiß- und Graubrot. Ebenfalls für Kräuter- und Rosinenbrote.
Super rapid/snel (Extra schnelles Backprogramm) (0:58)
Zum Backen in sehr kurzer Zeit von Broten. Mit diesem Programm gebackene Brote
können recht hart und fest sein. Die Wassertemperatur des einzufüllenden Wassers
sollte, 35 bis 45 °C betragen.
Français/frans (Französisches Brot) (3:50)
Für lockeres und knuspriges Brot wie zum Beispiel französisches Brot. Dieses Brot muss
länger gehen, daher ist die Bearbeitungszeit auch länger als bei anderen Programmen.
Complet/Volkoren (Vollkornbrot) (3:40)
Für Vollkornbrot mit einem hohen Anteil an Vollkornmehl. Dieses Programm hat
eine längere Vorwärmzeit, damit das Wasser besser aufgenommen wird und
der Teig weiter aufgehen kann. Der Knethaken arbeitet während dieser 15-minütigen
Ruhezeit nicht. Darüber hinaus ist es nicht empfehlenswert, eine Zeitvorwahl für den
Backvorgang einzustellen. Das kann ein schlechtes Backergebnis zur Folge haben.
Brioché/zoet (Süße Brotsorten) (2:50)
Für süße Brotsorten, die eine knusprige Kruste bekommen sollen. Diese entsteht
bei einer starken Erhitzung von Zucker.
Rapide/snel (Schnellbackprogramm) (1:34)
Zum Backen in kürzerer Zeit sowie auch zum Backen von Broten. Mit diesem
Programm können gebackene Brote feuchter sein und eine festere Struktur haben. Die
Wassertemperatur sollte 35 bis 45 °C betragen.
Pâte/deeg (Teig) (1:20)
Zum Kneten verschiedener Teigsorten. Keine Backfunktion. Nehmen Sie den fertig
gekentenen Teig aus dem Gerät heraus und stellen Sie einen Pizzateig oder Brötchen
her. Bereiten Sie nicht mehr als 900g Teig gleichzeitig zu.
Cuisson/bakken (Backen)
Bei dieser Einstellung wird lediglich erhitzt.Sie kann zur Verlängerung der Backzeit
verwendet werden und ist sinnvoll zur Fertigstellung von Marmeladen. Bei Auswahl
Gebrauchsanweisung Brotbackautomat
DBM400
DE v 090410-0519
Gebrauchsanweisung Brotbackautomat
DBM400
DE v 090410-05 19
dieses Programms ist die minimale Verlängerungszeit 10 Minuten (0:10). Die Anzeige
zählt in 1 Minuten Takten rückwärts.Wenn der Backprozess frühzeitig beendet werden
soll, müssen Sie diesen mit der Stopp Taste beenden. Sie können den Backvorgang
jeweils um 10 Minuten bis hin zu 1 Stunde verlängert. Dazu drücken Sie Taste und
anschließend die Start Taste.
Tabelle 1
Zeitverzögerung einstellen
1. Wählen Sie eine Zeit aus, zu der das Brot fertig sein soll.
2. Berechnen Sie den Zeitunterschied zwischen der
gewünschten Zeit und der
aktuellen Zeit.
3. Geben Sie die Zeit mit der Taste
und ein.
Zum Beispiel: Sie möchten, dass das Brot morgens um 08.00 Uhr fertig ist und jetzt ist
es 21.00 Uhr abends, der Zeitunterschied beträgt dann 11 Stunden. Geben Sie
11:00
ein auf den Display.
ACHTUNG!
Sie können eine maximalen Startverzögerung von 13 Stunden einstellen in Schritten
von 10 Minuten. Halten Sie die Taste “Minuterie/timer” gedrückt, damit die Zeit
schneller weiterläuft.
Das Arbeiten mit dem Brotbackautomaten
Hinweis Es ist sehr wichtig, die Zutaten genau abzuwiegen!
Um ein gutes Produkt zu erhalten, ist es äußerst wichtig, dass Sie sich an die
genannten Mengen und Gewichte halten. Verwenden Sie daher den mitgelieferten
Messbecher und -löffel.
Hinweis Achten Sie auf die richtige Hefemenge!
Wenn der Teig im Gerät zu sehr aufgeht und sofort wieder zusammenfällt oder
überhaupt nicht aufgeht, dann ist die Ursache wahrscheinlich in der Menge der Hefe.
Versuchen Sie, ein neues Brot zu backen mit der richtigen Menge an Hefe.
Prozess
kneten
1
(min)
aufgehen
1
(min)
kneten
2
(min)
aufgehen
2
(min)
pauze
(sek.)
aufgehen
3
(min)
backen
(min)
Total
Zeit
Signal
Zeit
Programm
1 Base/Basis 10 20 15 20 30 55 60 3:00 2:25
2
Super rapide/
snel
13 10 35 0:58 0:57
3 Français/frans 18 40 22 20 30 60 70 3:50 2:47
4
Complet/Volkoren
10 25 20 30 30 70 65 3:40 3:00
5 Brioché/zoet 10 5 20 30 30 57 48 2:50 2:30
6 Rapide/snel 14 5 75 1:34
7 Pâte/deeg 7 5 18 50 1:20
8 Cuisson/
bakken
10 Min. bis 1 Uhr
Gebrauchsanweisung Brotbackautomat
DBM400
DE v 090410-0520
Brot backen
1. Backform herausnehmen
Öffnen Sie den Deckel, heben Sie den Griff hoch und ziehen Sie die Backform
heraus. Es ist wichtig, dass Sie die Backform außerhalb des Geräts
befüllen, sodass keine Zutaten in den Motor oder andere Bestandteile gelangen.
2. Knethaken einsetzen
Stecken Sie der Knethaken ganz einfach auf die dafür vorgesehenen
Antriebsachse. Fetten Sie die Achse leicht mit Backbutter ein, damit sich der
Haken später problemlos herausnehmen läßt.
3. Zutaten abmessen/abwiegen
Messen Sie alle Zutaten genau gemäß dem Rezept ab und geben Sie sie in der
richtigen Reihenfolge in die Backform:
1. Geben Sie das Wasser oder die Milch in die Backform. Verwenden Sie
lauwarmes Wasser oder lauwarme Milch (21-28 °C).
2. Fügen Sie vorsichtig Salz, Zucker und Mehl/Brotmischung hinzu.
3. Formen Sie auf dem Mehl eine kleine Mulde und geben Sie das Hefestück oder
das Backpulver darauf.
Achtung!
Achten Sie darauf, dass die Hefe nicht mit Wasser in Berührung kommt.
Dann setzt sofort der Gährungprozess ein.
Wenn Ihr Rezept Zutaten enthält, die nicht geknetet werden sollen, dann geben
Sie diese zu einem späteren Zeitpunkt dazu, zum Beispiel am Ende des 2.
Knetvorgangs. Wenn der 2. Knetvorgang fast fertig ist, lässt der Automat ein
Signal ertönen zum Zeichen, dass Sie weitere Zutaten zum Teig geben können.
4. Einsetzen der Backform
Drücken Sie die Backform fest auf ihren Platz. Es ertönt ein Klicken, wenn sie in
ihre Sicherung einrastet.
5. Stecken Sie den Stecker in die Steckdose.
Das Display an der Oberseite des Gerät leuchtet auf. Das Display zeigt automatisch
das 1. Menü und eine normale Zeit an. Bei jedem Tastendruck ertönt ein Signalton.
6. Menüwahl
Wählen Sie ein Programm durch Drücken der Taste “Sélection/selectie” (16) aus.
7. Farbe des Brotes
Drücken Sie die Taste zur Auswahl (18) der Farbe des Brotes oder zur Auswahl
des schnelleren Brotbackvorganges.
8. Zeitvorwahl einstellen
Wollen Sie frisches Brot zum Frühstück haben, dann stellen Sie jetzt
die Zeitverschiebung, wie diese im nächsten Kapitel beschrieben wird, ein.
9. Start (19)
Starten Sie jetzt den Brotbackautomaten, indem Sie die Taste Start/Stop
drücken. Das Programm startet und im Display wird die Restzeit angezeigt. Der
Doppelpunkt in der Zeitangabe blinkt und zeigt damit an, dass das Programm läuft.
10. Programmreihenfolge
Der Brotbackautomat durchläuft jetzt automatisch alle Schritte des zuvor von Ihnen
eingestellten Programms. Im Display können Sie ablesen, mit welchem Schritt des
Programms das Gerät beschäftigt ist. Während des Backvorgangs kann Dampf durch
die Lüftungsöffnungen nach draußen gelangen. Das ist vollkommen normal.
Gebrauchsanweisung Brotbackautomat
DBM400
DE v 090410-0521
Gebrauchsanweisung Brotbackautomat
DBM400
DE v 090410-05 21
11. Programmende
Wenn das Programm fertig ist, wird im Dispaly 0:00 angezeigt und es erklingt ein
Signalton. Anschließend wird im Display die ursprüngliche Laufzeit des
Programms angezeigt.
12. Warmhalten
Bei der Warmhaltefunktion zirkuliert ungefähr 1 Stunde lang Heißluft den
Backraum. Dies gilt für die meisten Programme. Um die besten Ergebnisse zu
erzielen, müssen Sie die Backform innerhalb der angegebenen Zeit
herausnehmen. Es ertönt ein Signalton, wenn die Warmhaltefunktion beendet ist.
Durch Drücken der Taste Start/Stop stoppen Sie die Funktion.
13. Herausnehmen der Backform
Drücken Sie die Taste Start/Stop und ziehen Sie die Backform heraus.
VORSICHT!
Verwenden Sie beim Öffnen des Deckels und zum Anfassen der Backform immer
Ofenhandschuhe.
14. Das Brot aus der Backform lösen.
Lassen Sie das Brot 5 bis 10 Minuten in der Backform abkühlen und lassen Sie
es anschließend aus der Form auf einen Rost fallen. Wenn sich der Knethaken
noch in der Backform befinden, füllen Sie die Backform mit warmem Wasser
und nehmen Sie dem Knethaken nach dem Einweichen heraus. Normalerweise
bleibt der Knethaken im Brot stecken. Nachdem das Brot vollständig ausgekühlt
ist, entfernen Sie diesen mit einem Gegenstand, der die Antihaftschicht am
Knethaak nicht beschädigt (Holzlöffel oder -spatel).
15. Drücken Sie nach jedem Gebrauch die Taste Start/Stop (19) und ziehen Sie den
Stecker aus der Steckdose.
Öffnen Sie vorzugsweise keinesfalls den Deckel des Brotbackautomaten, wenn
ein Programm läuft. Das kann die Qualität des Brots beeinflussen. Wenn Sie
trotzdem den Deckel zum Zufügen von Zutaten öffnen müssen, dann tun Sie dies
bitte schnell, damit die Temperatur im Brotbackautomaten nicht zu sehr fällt.
Signalton
Der Signalton ertönt:
beim Drücken auf eine beliebgie Taste;
wenn ein Programm abgelaufen ist;
wenn die Warmhaltefunktion abgelaufen ist;
während der 2. Knetphase in bestimmten Programmen, um Sie daran zu erinnen,
dass noch bestimme Zutaten hinzugefügt werden müssen (Nüsse, Schokolade etc.).
Stromunterbrechung oder -ausfall
Nach einer Stromunterbrechung von höchstens 10 Minuten arbeitet der
Brotbackautomat automatisch weiter. Bei längerem Stromausfall springt das Display
wieder auf die Startzeit des betreffenden Programms zurück und Sie müssen den
Brotbackautomaten erneut starten.
Aufbewahren und schneiden von Brot
Damit Sie das Brot gut schneiden können, müssen Sie es mindestens 20 bis 40
Minuten abkühlen lassen. Verwenden Sie vorzugsweise ein scharfes elektrisches
Messer oder ein Brotmesser mit Wellenschliff.
Da Ihr frisches Brot keine Konservierungsmittel enthält, können Sie es nicht zu lange
aufbewahren; bei normaler Zimmertemperatur ungefähr 3 Tage. Wenn Sie das Brot
länger aufbewahren wollen, können Sie es einfrieren.
Gebrauchsanweisung Brotbackautomat
DBM400
DE v 090410-0522
Problemlösungstabelle
Problem Ursache Lösung
Die Brotrinde ist zu dick. Das Brot wurde zu lange
warmgehalten und ist
dadurch ausgetrocknet.
Nehmen Sie das Brot
nach Ablauf der Backzeit
schneller aus der
Backform.
Die Zutaten wurden nicht
richtig vermischt und/oder
gebacken.
Falsches Programm
gewählt.
Wählen Sie das richtige
Programm für das Brot aus.
Der Teig ist zu dick,
sodass nicht richtig
gerührt werden kann.
Geben Sie ausreichend
Flüssigkeit hinzu.
Im Display erscheint E:01 Die Temperatur im
Brotbackautomaten ist
zu hoch.
Drücken Sie die Taste
Start/Stop , um zu stoppen
und öffnen Sie den
Deckel, um das Innere
abkühlen zu lassen.
Der Motor macht
Geräusche, aber der Teig
wird nicht geknetet.
Die Backform ist nicht
richtig eingesetzt oder
der Teig ist zu fest, um
geknetet zu werden.
Überprüfen Sie, ob
die Backform richtig
eingesetzt wurde
und wiegen Sie die
Teigzutaten immer
sorgfältig ab.
Das Brot bleibt zu klein. Keine Hefe oder die Hefe
arbeitet nicht richtig.
Sorgen Sie für richtigen
Umgebungsfaktoren für
Hefe.
Der Teig steigt höher als
die Backform.
Zu viel Feuchtigkeit und/
oder Hefe.
Verringern Sie die Menge
an Feuchtigkeit und/oder
Hefe.
Das Brot fällt während
des Backvorgangs
zusammen.
Zu viel Wasser oder Hefe
machen den Teig zu
weich und schlaff.
Verringern Sie die Menge
an Feuchtigkeit und/oder
Hefe.
Die Mitte des Brots
scheint hohl zu sein.
Zu viel Wasser und/oder
Hefe, Salz vergessen.
Verringern Sie die Menge
an Feuchtigkeit und/oder
Hefe und verwenden Sie
mehr Salz.
In der Backform ist Pulver
zurückgeblieben.
Zu wenig Wasser
verwendet.
Nehmen Sie mehr
Wasser.
Gebrauchsanweisung Brotbackautomat
DBM400
DE v 090410-0523
Gebrauchsanweisung Brotbackautomat
DBM400
DE v 090410-05 23
Reinigung und Wartung
VORSICHT!
Ziehen Sie bei allen Reinigungsarbeiten am Gerät den Netzstecker.
Wachten Sie bis der Brotbackautomat vollständig abgekühlt ist
WICHTIG! Tauchen oder bespritzen Sie weder den Deckel noch das Gehäuse in
Flüssikeiten oder Wasser.
Reinigen Sie die Außenseite des Brotbackautomaten nur mit einem feuchten Tuch.
Flecken an der Innenseite des Deckels oder den Luftschlitzen sind nur äußerlich
und entstehen während des Backvorgangs und haben keinen Einfluss auf die
Funktionsweise des Gerätes. Wischen Sie diese nach jedem Gebrauch mit einem
feuchten Tuch und etwas Spülmittel ab.
Innenseite des Brotbackautomaten wischen Sie bitte nur mit einem feuchten Tuch ab.
Um den Deckel heraus zu nehmen schieben Sie Ihn aus der Befestigungsrinne
und heben ihn nach oben ab.
Verfahren Sie im umgekehrten Sinne um Ihn wieder einzusetzen.
Abbildung 2
Zum Reinigen der Backform benutzen Sie lediglich warmes Wasser. Vermeiden
Sie Kratzer auf der Antihaft-Beschichtung.
Überprüfen Sie ob der Brotbackautomat vollständig abgekühlt ist bevor Sie Ihn
wegräumen.
Benutzen Sie niemals unten aufgeführte Reinigungsmittel, -helfer.
Verdünnung für Farben
Reinigungsbenzin oder Benzine
Schwämme aus Stahlwolle
Politur
Chemische Reinigungstücher
Besondere Pflege der Antihaft Beschichtung
Verhindern Sie das Verkratzen oder Beschädigen der Antihaft-Versiegelung.
Benutzen Sie niemals scharfe Gegenstände wie z.B. Metall Spatel, Messer oder
Gabeln.Die Versiegelung kann im Laufe der Zeit Ihre Farbe verändern. Dieses liegt
an der dauernden Hitzeund Feuchtigkeit. Es hat weder Einfluss auf die Qualität
des Brotes und des Brotbackautomaten.Das Loch in der Mitte der Knethaken sollte
regelmäßig gereinigt werden und mit einem Tropfen Speiseöl versehen werden.
Dieses verhindert das festsitzen der Knethaken an den Antriebsachsen.Halten Sie alle
Lüftungsöffnungen Staubfrei.
Verstauen des Brotbackautomaten
Stellen Sie sicher das alle Teile trocken sind. Achten Sie darauf das sich keine
Feuchtigkeit im Gerät befindet. Schließen den Deckel und achten Sie darauf das nichts
auf dem Deckel gleagert wird.
Gebrauchsanweisung Brotbackautomat
DBM400
DE v 090410-0524
Technische Daten
Type: DBM400
Leistung: 660W
Netzspannung: 230V ~ 50Hz
Umwelt
Werfen Sie Verpackungsmaterial wie Kunststoff und Kartons in die dafür
vorgesehenen Container.
Geben Sie dieses Produkt am Ende der Nutzungsdauer nicht als normalen
Haushaltsabfall ab, sondern bei einem Sammelpunkt für die Wiederverwendung
elektrischer und elektronischer Geräte. Achten Sie auf das Symbol auf dem Produkt,
der Gebrauchsanweisung oder der Verpackung.
Die Materialien können wie angegeben wieder verwendet werden. Durch Ihre Hilfe
bei der Wiederverwendung, der Verarbeitung der Materialien oder anderen Formen
der Benutzung alter Geräte liefern Sie einen wichtigen Beitrag zum Schutz unserer
Umwelt.
Erkundigen Sie sich bei den Stadtverwaltungen nach dem richtigen Sammelpunkt in
Ihrer Nähe.
Garantiebestimmungen
Der Importeur gewährt für dieses Gerät unter den folgenden Bedingungen 60
Monate Garantie ab Kaufdatum auf Schäden, die aufgrund von Herstellunks- und/
oder Materialfehlern entstanden sind.
1. Innerhalb der genannten Garantiefrist werden keine Kosten für Arbeitslohn und
Material berechnet. Die Garantiefrist wird durch die unter Garantie ausgeführte
Reparatur nicht verlängert.
2. Schadhafte Teile oder, im Falle eines Umtauschs, die schadhaften Geräte
selbst werden automatisch Eigentum des Importeurs.
3. Bei jedem Garantieanspruch muss ein Kaufbeleg der Firma vorgelegt werden.
4. Garantieansprüche müssen entweder beim Händler, bei dem das Gerät gekauft
wurde, geltend gemacht werden oder beim Importeur.
5. Die Garantie gilt nur für den ersten Käufer und ist nicht übertragbar.
6. Die Garantie gilt nicht für Schäden, die entstanden sind durch:
a. Unfälle, verkehrte Benutzung, Abnutzung und/oder Verwahrlosung
b. falsche Montage und/oder Benutzung, die gegen die einschlägigen
gesetzlichen und technischen Normen oder gegen Sicherheitsnormen
verstößt
c. Anschluss an eine andere Netzspannung als die auf dem Typenschild
angegebene
d. eine ungenehmigte Veränderung
e. eine Reparatur, die durch Dritte ausgeführt wurde
f. nachlässigen Transport ohne geeignete Verpackung bzw. ohne geeigneten
Schutz
7. Auf diese Garantiebestimmungen kann kein Anspruch erhoben werden im Falle
von:
a. Verlusten, die während des Transports auftreten
b. Entfernung oder Änderung der Geräteseriennummer
8. Ausgenommen von der Garantie sind Kabel, Lampen und Glasteile.
9. Außer einem Ersatz bzw. einer Reparatur der schadhaften Teile räumt die
Garantie kein Recht auf Erstattung eines eventuellen Schadens ein. Der
Importeur kann in keinem Fall für eventuelle Folgeschäden oder irgendwelche
anderen Folgen haftbar gemacht werden, die durch das von ihm gelieferte oder
in Verbindung mit dem von ihm gelieferten Gerät entstanden sind.
Gebrauchsanweisung Brotbackautomat
DBM400
DE v 090410-0525
Gebrauchsanweisung Brotbackautomat
DBM400
DE v 090410-05 25
10. Um Garantieleistungen in Anspruch zu nehmen, wenden Sie sicht direkt an
Ihren Händler. Bestron bietet auch die Möglichkeit direkt mit dem
Werkskundendienst abzuwickeln. Voraussetzung hierfür ist, dass Sie sich
zunächst telefonisch, per Fax oder Mail an den Werkskundendienst wenden.
Bitte schicken Sie keine Geräte unaufgefordert. Insbesondere dürfen Pakete
niemals unfrei eingesendet werden. Sprechen Sie daher zuerst mit uns. Wir
sagen Ihnen wie Sie Ihr Gerät an uns einsenden sollen.
11. Das Gerät eignet sich nicht für die professionelle Verwendung.
Kundendienst
Sollte unerwartet eine Störung auftreten dann können Sie sich mit dem
BESTRON Kundendienst in Verbindung setzen:
DEUTSCHLAND:
SERVICE CENTER FRENZ
BESTRON SERVICE
Kleikstraße 94-96
D-52134 Herzogenrath
Tel: 02406 97 999 15
Fax: 02406 97 999 13
E-mail: info@bestron-service.de
Internet: www.bestron-service.de
CE-Konformitätserklärung
Dieses Produkt entspricht den Sicherheitsbestimmungen der folgenden europäischen
Richtlinien:
EMC-Richtlinie 2004/108/EC
Niederspannungsrichtlinie 2006/95/EC
R. Neyman
Qualitätskontrolle
Gebrauchsanweisung Brotbackautomat
DBM400
DE v 090410-0526
Rezepte
Maßeinheiten
ml: Milliliter
g: Gramm
TL: Teelöffel
EL: Esslöffel
Grundrezept Zutaten Einheit
Gewicht: ca. 900 g
Einstellzeit: möglich
Gewicht
Wasser
Roggenmehl
Zucker
Salz
Trockenhefe
9
ml
g
EL
TL
g
900
400
610
1
2
10
Programm: 3 Zutaten in oben stehender Reihenfolge
hinzufügen.
Weißbrot Zutaten Einheit
Gewicht: 900 g
Einstellzeit: nicht möglich
aufgrund der Zugabe von Milch.
Milch
Weißmehl
Butter (weich)
Zucker
Salz
Trockenhefe
ml
g
g
TL
TL
g
290
570
35
1
2
8
Programm: 1 Zutaten in oben stehender Reihenfolge
hinzufügen.
Kräuterbrot Zutaten Einheit
Gewicht: ca. 900 g
Einstellzeit: möglich
Wasser
Sauerteig
Roggenmehl
Zucker
Salz
Schwarzer Pfeffer (gemahlen)
Gemischte Kräuter
Trockenhefe
ml
g
g
TL
EL
TL
g
g
360
90
360
1
1
1
23
6
Programm: 3 Zutaten in oben stehender Reihenfolge
hinzufügen.
Vollkornbrot Zutaten Einheit
Gewicht: ca. 900 g
Einstellzeit: möglich
Wasser
Tannenhonig
Vollkornmehl
Salz
Trockenhefe
ml
EL
g
TL
g
315
590
2
10
Programm: 3 Zutaten in oben stehender Reihenfolge
hinzufügen.
Gebrauchsanweisung Brotbackautomat
DBM400
DE v 090410-0527
Gebrauchsanweisung Brotbackautomat
DBM400
DE v 090410-05 27
Herzhaftes Schinkenbrot Zutaten Einheit
Gewicht: ca. 900 g
Einstellzeit: möglich
Wasser
Sauerteig
Roggenmehl
Weißmehl
Zucker
Salz
Trockenhefe
Nach Signalton hinzufügen:
Schinkenwürfel
ml
g
g
g
TL
TL
g
g
325
120
300
30
1
1
8
160
Programm: 3 Zutaten in oben stehender Reihenfolge
hinzufügen.
Dreikornbrot Zutaten Einheit
Gewicht: ca. 900 g
Einstellzeit: nicht möglich
aufgrund der Zugabe von Milch
und Ei.
Milch
Dickmilch
Ei
Butter oder Margarine
Weißmehl
Kräutersalz
Trockenhefe
Nach Signalton hinzufügen:
Leinsamen
Weizenkörner
Sonnenblumenkerne
ml
EL
stuck
g
g
TL
g
g
g
g
900
1
45
450
3
6
23
45
23
Programm: 3 Anmerkung: Anstelle von
Weizenkörnern können Sie auch
Sesam oder Kürbiskerne verwenden.
Zwiebelbrot Zutaten Einheit
Gewicht: ca. 900 g
Einstellzeit: möglich
Wasser
Sonnenblumenöl
Weißmehl
Zucker
Kräutersalz
Geröstete Zwiebeln
Trockenhefe
ml
EL
g
TL
TL
g
g
290
2
570
1
3
70
8
Programm: 1 Zutaten in oben stehender Reihenfolge
hinzufügen.
Gebrauchsanweisung Brotbackautomat
DBM400
DE v 090410-0528
Bierbrot Zutaten Einheit
Gewicht: ca. 900 g
Einstellzeit: nicht empfehlenswert
Wasser
Bier
Sauerteig (flüssig)
Malzsirup
Weißmehl
Buchweizenmehl
Kleie
Sesam
Salz
Trockenhefe
ml
ml
ml
EL
g
EL
EL
EL
TL
g
135
135
135
1½
490
3
3
2
6
Programm: 1 Zutaten in oben stehender Reihenfolge
hinzufügen.
Rosinenbrot mit Zimt Zutaten Einheit
Gewicht: ca. 900 g
Einstellzeit: nicht möglich
Milchweiche
Butter
Weißmehl
Zucker
Salz
Zimt
Trockenhefe
Nach Signalton hinzufügen:
Rosinen
ml
g
g
g
TL
TL
g
g
240
30
430
60
1
8
70
Programm: 1 Tipp: Spülen Sie die Rosinen mit
viel Wasser ab und bestäuben Sie
sie danach mit Mehl, bevor diese
dem Teig zugefügt werden. Dadurch
verhindern Sie, dass die Rosinen zum
Boden sinken.
Mandelbrot mit Aprikosen Zutaten Einheit
Gewicht: ca. 900 g
Einstellzeit: nicht möglich
Milchweiche
Butter
Ei
Weißmehl
Zucker
Salz
Trockenhefe
Nach Signalton hinzufügen:
Aprikosen (getrocknet/fein
geschnitten)
Mandeln (fein gehackt)
ml
g
stuk
g
g
TL
g
g
g
180
55
1
540
70
½
8
45
45
Programm: 4 Zutaten in oben stehender Reihenfolge
hinzufügen.
Machine à pain, mode d’emploi
DBM400
FR v 090410-05 29
Machine à pain DBM400
Nous vous félicitons de votre achat! Vous réglez l’heure à laquelle débute la cuisson
avec une minuterie qui garantit que le pain sera prêt exactement au moment voulu,
emplissant votre maison du délicieux parfum de la boulangerie.
Consignes de sécurité
Généralités
Lisez soigneusement le mode d’emploi et conservez-le précieusement.
Utilisez cet appareil uniquement suivant les instructions décrites dans le mode
d’emploi.
Cet appareil ne peut être utilisé par des enfants ou des personnes avec des
capacités physiques, mentales ou sensorielles limitées, manquant d’expérience
ou de connaissance; à moins qu’elles n’aient eu des instructions et ne soient
encadrées par des personnes responsables de leur sécurité.
Cet appareil n’est pas un jouet. En présence d’enfants, il est important de
s’assurer qu’ils ne jouent pas avec l’appareil.
Faites effectuer les réparations par un technicien qualifié. Ne tentez jamais de
réparer vous-même l’appareil.
Électricité et chaleur
Avant d’utiliser cet appareil, assurez-vous que la tension du réseau correspond à
la tension du réseau indiquée sur la plaquette type de l’appareil.
Branchez toujours l’appareil sur une prise raccordée à la terre.
Débranchez toujours l’appareil lorsque vous ne l’utilisez pas.
Lorsque vous débranchez la fiche, saisissez la fiche elle-même; ne tirez pas sur le
cordon.
Vérifiez régulièrement que le cordon de l’appareil est intact. N’utilisez pas
l’appareil si vous constatez que le cordon est endommagé. Faites remplacer le
cordon endommagé par un service technique qualifié.
Si vous utilisez une rallonge, assurez-vous qu’elle est complètement déroulée.
Utilisez uniquement une rallonge agréée.
Pour éviter tout risque d’incendie, l’appareil doit pouvoir évacuer la chaleur
produite. Laissez donc suffisamment d’espace autour de l’appareil et évitez tout
contact avec des matériaux inflammables.
Assurez-vous que ni l’appareil, ni le cordon, ni la fiche n’entre en contact avec une
source de chaleur telle qu’une plaque électrique chaude ou une flamme.
L’intérieur de l’appareil, le cordon et la fiche ne doivent pas entrer en contact avec
l’eau.
Utilisation
N
’utilisez jamais l’appareil à l’extérieur.•N’utilisez jamais l’appareil dans une pièce
humide.Placez l’appareil sur une surface stable et plane, là où il ne risque pas de tomber.
Ne laissez pas le fil pendre sur le bord de l’évier, du plan de travail ou d’une table.
Assurez-vous que vos mains sont sèches avant de toucher l’appareil, le cordon
ou la fiche.
Éteignez l’appareil et débranchez la fiche en cas de problème durant l’utilisation,
pour le nettoyage, et dès que vous avez fini de l’utiliser.
N’immergez jamais l’appareil, le cordon ni la fiche dans l’eau ou tout autre liquide.
ATTENTION
Si l’appareil est tombé à l’eau, ne le rattrapez pas. Débranchez immédiatement la
fiche. Cessez d’utiliser l’appareil.
Machine à pain, mode d’emploi
DBM400
FR v 090410-0530
Introduction
Humer le délicieux parfum du pain frais que vous avez fait vous-même est un
plaisir irremplaçable. Le pain frais, encore chaud, fait maison, est une expérience
sensationnelle. Savourez chaque jour le pain maison fait avec votre Machine à pain
Bestron DBM400! Votre machine à pain vous offre ce plaisir avec un minimum d’effort.
Il est équipé d’un petit ordinateur qui fait le travail pour vous.
Vous cuirez vous-même toutes sortes de pains spéciaux. L’appareil permet également
de préparer des confitures, ainsi que des pâtes pour petits pains, pizzas et cakes. Tout
est parfaitement simple, et le résultat semble artisanal.
Avant la première utilisation
Avant d’utiliser votre appareil pour la première fois, il vaut la peine de prendre le temps
d’étudier ce mode d’emploi. Lisez avec attention les indications qui suivent.
1. Sortez avec précaution votre machine à pain et enlevez tout l’emballage.
2. Enlevez la poussière qui pourrait avoir été prise dans l’emballage.
3. Essuyez votre machine à pain avec un chiffon humide. N’oubliez jamais que le
moule est couverts d’un revêtement antiadhésif. N’utilisez pas de récurants.
4. Avant la première utilisation, graissez le moule avec de l’huile ou de la margarine.
5. Placez le moule dans l’appareil, sans le crochet à pétrir, et mettez l’appareil en
marche, à vide, pendant 3 à 5 minutes. (Utilisez le programme de cuisson, voir
l’explication qui s’y rapporte).
6. Laissez refroidir l’appareil et répétez le nettoyage.
7. Mettez en place le moule dans lequel vous allez cuire le pain.
8. Graissez légèrement le axe d’entraînement avec un peu de beurre ou d’huile, puis
montez le crochet à pétrir sur le axe.
Pendant la fabrication de l’appareil, il est nécessaire de graisser certaines parties, ce
qui fait que durant la première cuisson, un peu de fumée peut se dégager. C’est un
phénomène normal.
Machine à pain, mode d’emploi
DBM400
FR v 090410-05 31
À propos de la machine à pain DBM1400
Cette machine à pain vous permet de faire cuire pains de 900 g environ (les poids sont
approximatifs, ils dépendent des recettes).
Composants
Figure 1 Aperçu
Panneau de commande
14. Menu des programmes
15. Écran LED
16. Touche sélection
17. Touches minuterie
18. Touche la couleur de la croûte
19. Touche marche-arrêt
11.
1.
10.
9.
7.
2.
8.
12.
6.
5.
4.
3.
13.
15.
18.
19.
16.
17.
14.
1. Hublot de contrôle
2. Couvercle
3. Poignée
4. Arbre moteur
5. Pale de malaxage
6. Cuve
7. Ouverture de ventilation
8. Poignée du couvercle
9. Boîtier
10. Panneau de commande
11. Cordon et fiche
12.
Godet de mesure pour l’eau et la farine
13. Cuillère de dosage pour le sel et la
levure
Machine à pain, mode d’emploi
DBM400
FR v 090410-0532
Affichage et functions
Affichage:
indique la dureté de la croûte sélectionnée
indique le numéro du programme sélectionné
indique le temps qu´il reste
affiche l´avertissement relatif à la température (voir le chapitre sur la résolution
des problèmes).
Touche “Sélection/selectie” (16): Pour sélectionner le menu des programmes.
Touche “Couleur croûte/korst kleur” (18): pour le réglage de la couleur de la croûte
(claire, moyenne, foncée).
Touche “Minuterie/timer”
(17) (Cuisson différée): pour déterminer un début
de cuisson différé (réglage pour les programmes base, français, complet, brioché et
rapide).
Touche “Marche-arrêt/start-stop” (19) (Marche-Arrêt): Appuyez au moins 1 seconde
sur la touche Start. Vous entendez un signal sonore et le deux point sur l´affichage
clignote; le programme commence. Appuyez au moins 1 seconde sur la touche Stop.
Vous entendez un signal sonore et le deux point sur l´affichage arrête de clignoter.
Descriptions des programmes (14)
Base/basis (Pain blanc ou bis) (3:00)
Pour le pain blanc et bis. Également pour les pains additionnés d’épices ou de raisins.
Super rapide/snel - (Programme de cuisson super rapide) (0:58)
Pour cuire des pains le plus rapidement possible. Les pains cuits avec ce programme
seront généralement assez compacts. L’eau doit avoir une température de 35 à 45°C.
Français/frans (Pain à la française) ( 3:50)
Pour un pain léger et croquant. Ce pain doit lever plus longtemps, la durée de
préparation est plus longue que pour les autres programmes.
Complet/volkoren (Pain complet) (3:40)
Pour le pain complet, contenant une grande proportion de farine complète. Ce
programme a une durée de préchauffage plus longue, pour que la pâte absorbe plus
facilement l’eau et lève mieux. Le crochet à pétrir est immobiles pendant ce repos de
15 minutes. De plus, il est déconseillé de retarder le démarrage. Le résultat risque
d’être moins satisfaisant.
Brioché/zoet (Pains sucrés) (2:50)
Pour les pains sucrés dont la croûte doit être croquante. Elle se forme par l’action
d’une température élevée le sucre.
Rapide/snel (Programme rapide) (1:34)
Pour cuire en moins de temps des pains. Les pains cuits avec ce programme peuvent
être plus humides et de avoir une texture plus dense. L’eau doit avoir une température
de 35 à 45° C.
Pâte/deeg (1:20)
Pour faire pétrir différentes pâtes. Pas de cuisson. Vous sortez la pâte de l’appareil et
vous la formez à la main pour faire des petits pains ou de la pizza. Ne préparez pas
plus de 900 g de pâte à la fois.
Machine à pain, mode d’emploi
DBM400
FR v 090410-05 33
Cuisson/bakken
Ce paramètre peut être utilisé pour chauffer ou pour prolonger le temps de cuisson et est
notamment pratique lors de la préparation de confiture. La durée de prolongation minimale
lors de la sélection de ce programme est de 10 minutes (0:10). Laffichage indique le
temps restant par palier de 1 minute. Si vous devez prématurément mettre fin à la cuisson,
utilisez la touche Stop. Vous pouvez prolonger la cuisson au maximum d’une heure par
paliers de 10 minutes. Pour cela, appuyez sur la touche
puis sur la touche Start.
Opération
pétrir
1
(min)
lever
1
(min)
pétrir
2
(min)
lever
2
(min)
pause
(sec)
lever
3
(min)
cuisson
(min)
heure
totale
heure
signal
Programme
1 Base 10 20 15 20 30 55 60 3:00 2:25
2
Super rapide
13 10 35 0:58 0:57
3 Français 18 40 22 20 30 60 70 3:50 2:47
4 Complet
10 25 20 30 30 70 65 3:40 3:00
5 Sucré 10 5 20 30 30 57 48 2:50 2:30
6 Rapide 14 5 75 1:34
7 Pâte 7 5 18 50 1:20
8 Cuisson
10 min. jusqu’à 1 heure
Retardement du démarrage
1. Choisissez l’heure à laquelle le pain doit être prêt.
2. calculez la durée qui va s’écouler entre l’heure actuelle et l’heure à laquelle le
pain doit être prêt.
3. Réglez la durée avec les touc
hes et .
Par example: en supposant que vous voulez sortir votre pain frais à 08.00 heures du
matin, et qu’il est 21.00 heures. La différence est de 11 heure
s. Réglez l’écran sur
11:00
ATTENTION
Vous augmentez la durée jusqu’à un maximum de 13 heures par incréments de 10
minutes. Maintenez la touche “Minuterie/timer” enfoncée pour faire défiler les durées
plus vite.
L’utilisation de la machine à pain
Remarque Il est très important d’utiliser les quantités exactes!
Pour un bon résultat, il est très important de respecter les quantités données dans les
recettes. Utilisez donc le godet et la cuillère de mesure fournis avec l’appareil.
Remarque Attention à la bonne quantité de levure!
Si la pâte, dans l’appareil, lève et s’effondre immédiatement, ou ne lève pas du tout,
ensuite, la cause en est probablement la quantité de levure. Essayez une nouvelle
cuisson de pain avec la bonne quantité de levure.
La cuisson d’un pain
1. Retirer le moule
Ouvrez le couvercle, soulevez la poignée et attirez le moule de cuisson hors de
l’appareil. Veillez toujours à remplir le moule hors de l’appareil, pour ne rien laisser
tomber dans le moteur ou les autres parties de l’appareil.
Machine à pain, mode d’emploi
DBM400
FR v 090410-0534
2. Montage de crochet à pétrir
Vous enfoncez simplement le crochet à pétrir sur axe moteurs. Graissez
légèrement le axe avec un peu de beurre, pour que le crochet s’enfoncent
facilement.
3. Mesure des quantités d’ingrédients
Mesurez les ingrédients avec soin, selon la recette, et placez-les dans le moule
de cuisson dans l’ordre prescrit.
1. Mettez l’eau ou le lait au fond du moule. Utilisez de l’eau ou du lait tiède
( 21-28°C).
2. Ajoutez le sel, le sucre et la farine ou le mélange de farines.
3. Faites une petite fontaine au sommet de la farine et mettez-y le morceau de
levure, ou la poudre à lever.
ATTENTION
La levure que vous ajoutez ne doit pas entrer en contact avec de l’eau. Elle
commencerait alors à lever tout de suite.
Si votre recette comprend des ingrédients qui seraient endommagés par le pétrissage,
vous les ajoutez plus tard, après que l’appareil a fini de pétrir pour la deuxième fois.
Lorsque l’appareil a presque fini le deuxième pétrissage, il fait entendre un signal
sonore qui vous avertit d’ajouter ces ingrédients.
4. Mise en place du moule
Enfoncez fermement le moule à sa place. Un déclic s’entend lorsqu’il se bloque
en place.
5. Branchez la fiche sur la prise.
L’écran en haut de l’appareil s’allume. L’écran affiche automatiquement le 1er
menu et une durée normée. Un signal sonore se fait entendre chaque fois que
vous appuyez sur une touche.
6. Sélection du menu
Sélectionnez un programme en appuyant le nombre de fois nécessaire sur la
touche “Sélection/selectie” (16).
7. Couleur du pain
Appuyez sur cette touche (18) pour sélectionner la couleur du pain ou le
processus de cuisson accéléré.
8. Retarder le démarrage
Si vous voulez du pain frais au petit déjeuner, vous retardez le démarrage de la
préparation du pain comme décrit ci-dessous.
9. Démarrage (19)
Mettez en marche la machine à pain en appuyant sur Start/Stop. Le programme
commence, et l’écran affiche la durée restante jusqu’à la fin du programme. Le
double point au milieu de l’indication de la durée indique que le programme est en
cours d’exécution.
10. Ordre du programme
La machine à pain exécute une à une, dans l’ordre, les étapes du programme que
vous avez sélectionné. L’écran indique quelle étape est en cours. Pendant la
cuisson, de la vapeur s’échappe par les ouvertures d’aération. C’est un
phénomène normal.
11. Fin du programme
Lorsque le programme est terminé, l’écran affiche 0:00, et un signal sonore se fait
entendre. Ensuite, l’écran affiche de nouveau la durée totale du programme que
vous aviez sélectionné au départ.
Machine à pain, mode d’emploi
DBM400
FR v 090410-05 35
12. Tenir au chaud
La fonction qui permet de tenir le pain au chaud fait circuler de l’air chaud à
l’intérieur de l’appareil pendant environ 1 heure. Elle s’utilise avec la plupart des
programmes. Pour avoir un bon résultat, il faut sortir le moule dans les délais
indiqués. Un signal sonore se fait entendre quand l’appareil a fini de garder le
pain au chaud. Appuyez sur la touche Start/Stop pour interrompre le programme.
13. Sortir le produit
Appuyez sur la touche Start/Stop et retirez le moule.
ATTENTION
Protégez-vous toujours les mains d’un torchon ou d’une manique lorsque vous
ouvrez le couvercle ou que vous touchez le moule.
14. Démoulage du pain.
Laissez le pain reposer dans le moule pendant 5 à 10 minutes, puis retournez le
moule et transférez le pain sur une grille. Si le crochet à pétrir sont restés dans
le moule, vous remplissez le moule d’eau tiède et vous le laissez tremper jusqu’à
ce que le crochet se laissent sortir facilement. En général, les crochets à pétrir
restent pris dans le pain. Une fois que le pain est refroidi, vous sortez le crochet
à l’aide d’un ustensile qui n’abîmera pas le revêtement antiadhésif des crochets à
pétrir (une cuillère ou spatule, en bois).
15. Après chaque utilisation, appuyez sur la touche Start/Stop et débranchez la fiche.
Évitez d’ouvrir le couvercle de la machine à pain pendant qu’un programme est
en cours. Vous risquez de diminuer la qualité du résultat. S’il est nécessaire
d’ouvrir le couvercle pour ajouter des ingrédients, refermez-le le plus rapidement
possible pour que la température à l’intérieur de la machine à pain ne baisse pas trop.
Signal sonore
Le signal sonore se fait entendre:
chaque fois que vous appuyez sur une touche;
à la fin du programme;
quand l’appareil a fini de garder le pain au chaud;
durant le 2e pétrissage, dans certains programmes, pour vous avertir d’ajouter les
ingrédients ne devant être pétris (noix, chocolat, etc.).
Coupure de courant
En cas de coupure de courant, la machine à pain se remet en marche
automatiquement, si la coupure ne dure pas plus de 10 minutes. Si la coupure dure
plus longtemps, l’écran affiche de nouveau l’heure de démarrage du programme en
question, et vous devez le remettre en route.
Conserver et couper le pain
Le pain doit refroidir 20 à 40 minutes pour que vous puissiez le couper normalement.
Utilisez une scie à pain ou un couteau électrique.
Votre pain maison ne contient pas d’agents conservateurs; vous le conserverez à
température ambiante pendant environ 3 jours. Pour conserver le pain plus longtemps,
mettez-le au congélateur.
Machine à pain, mode d’emploi
DBM400
FR v 090410-0536
Problèmes et solutions
Problème Cause Solution
La croûte du pain est trop
épaisse.
Le pain a été gardé au
chaud trop longtemps et
s’est desséché.
Démoulez le pain assez
rapidement après la fin de
la cuisson.
Les ingrédients ne
sont pas suffisamment
mélangés, ou ne sont pas
suffisamment cuits.
Vous avez mal choisi
votre programme.
Sélectionnez le programme
approprié au pain que vous
voulez faire.
La pâte était trop épaisse
et n’a pas été pétrie
correctement.
Ajoutez suffisamment de
liquide.
L’écran affiche E:01
La température est trop
élevée à l’intérieur de la
machine à pain.
Appuyez sur la touche
Start/Stop pour
interrompre le programme,
et ouvrez le couvercle
pour laisser échapper la
chaleur.
Le moteur s’entend, mais
la pâte n’est pas pétrie.
Le moule est mal fixé, ou
la pâte est trop épaisse.
Contrôlez que le moule
est bien enfoncé et
bloqué ; mesurez toujours
avec soin vos ingrédients.
Le pain est trop petit, trop
compact.
La levure est de quantité
ou de qualité insuffisante.
Mesurez et traitez
soigneusement votre
levure.
La pâte lève trop et
déborde du moule.
Trop de liquide et/ou trop
de levure.
Diminuez les quantités de
liquide et/ou de levure.
Le pain retombe pendant
la cuisson.
La pâte contient trop de
liquide ou de levure, ce
qui la rend molle.
Diminuez les quantités de
liquide et/ou de levure.
Le centre du pain est
creux.
Trop de liquide et/ou trop
de levure, ou pas (assez
de) sel.
Diminuez les quantités de
liquide et/ou de levure,
augmentez la quantité
de sel.
Restes de farine dans le
moule.
Pas assez de liquide. Diminuez la quantité de
liquide.
Machine à pain, mode d’emploi
DBM400
FR v 090410-05 37
Nettoyage et entretien
ATTENTION
Débranchez l’appareil avant de procéder à tout nettoyage.
Attendez que la machine à pain ait complètement refroidi.
IMPORTANT! N’aspergez pas le couvercle ni le boîtier et ne les immergez pas
dans du liquide ou de l’eau.
Nettoyez l’extérieur de la machine à pain avec un chiffon humide uniquement.
Les taches à l’intérieur du couvercle ou dans les ouvertures d’aération ne sont
que des manifestations esthétiques et se produisent lors de la cuisson. Elles
n’ont aucune influence sur le fonctionnement de l’appareil. Enlevez ces taches
après chaque utilisation à l’aide d’un chiffon humide et d’un peu de produit pour
laver la vaisselle.
Nettoyez l’intérieur de la machine à pain avec un chiffon humide uniquement.
Pour pouvoir enlever le couvercle de l’appareil, vous devez le faire glisser de la
rainure de fixation et le soulever (voir dessin).
Pour le remettre en place, procédez inversement.
Figure 2
Utilisez uniquement de l’eau chaude pour nettoyer le moule. Évitez de rayer le
revêtement antiadhésif.
Avant de ranger la machine à pain, vérifiez que cette dernière a complètement
refroidi.
ATTENTION
N’utilisez jamais les produits de nettoyage et accessoires ci-dessous:
diluants;
benzine ou essence;
éponge à récurer;
Liquide à polir;
chiffons pour nettoyage chimique.
Entretien particulier du revêtement antiadhésif
Évitez de rayer ou d’endommager le revêtement antiadhésif. N’utilisez jamais d’objets
tranchants tels qu’une spatule en métal, un couteau ou une fourchette. Au fil du temps,
la couche de revêtement peut changer de couleur. Cela est dû au chauffage fréquent et
à l’humidité. Cela n’influence pas la qualité du pain préparé par la machine. L’ouverture
au centre des crochets pétrisseurs doit régulièrement être nettoyée et lubrifiée d’une
goutte d’huile alimentaire. Cela évite que le crochet pétrisseur se grippe sur son axe.
Assurez-vous que toutes les ouvertures de ventilation sont dépoussiérées.
Rangement de la machine à pain
Assurez-vous que tous les éléments sont secs. Faites attention qu’aucun liquide ne
pénètre dans l’appareil. Fermez le couvercle et assurez-vous de ne rien empiler sur le
couvercle.
Machine à pain, mode d’emploi
DBM400
FR v 090410-0538
Données techniques
Type: DBM400
Puissance : 660W
Tension réseau : 230V ~ 50Hz
Environnement
Jetez le matériel d’emballage, tel que le plastique et les boîtes, dans les conteneurs
prévus à cet effet.
Lorsque l’appareil est usé, ne le mettez pas aux ordures ménagères, mais portez-
le dans un centre de collecte agréé pour les appareils électriques et électroniques.
Attention au symbole figurant sur le produit, le mode d’emploi ou l’emballage.
Les matériaux peuvent être recyclés selon les indications. Votre collaboration au
recyclage des appareils et/ou au retraitement des matériaux, sous quelle forme
que ce soit, est une contribution précieuse à la sauvegarde de notre environnement.
Les autorités de votre commune vous renseigneront sur le centre de collecte le plus
proche.
Conditions de garantie
À compter de la date d’achat de cet appareil, l’importateur donne, aux conditions
suivantes, 60 mois de garantie couvrant tous les défauts consécutifs à des défauts
de pièce et main d’œuvre.
1. Pendant la période de garantie aucun frais ne sera facturé pour les pièces et la
main d’œuvre. Les réparations effectuées sous garantie ne prolongent pas le
délai de garantie.
2. En cas d’échange, les pièces défectueuses ou les appareils défectueux
deviennent automatiquement la propriété de l’importateur.
3. Toute demande de garantie doit être assortie de la preuve d’achat de
l’entreprise.
4. Toute demande de garantie doit être faite auprès du revendeur où l’appareil a
été acheté ou auprès de l’importateur.
5. La garantie est uniquement valable pour le premier acheteur et ne peut être
transférée.
6. La garantie ne couvre pas les dommages causés par:
a. les accidents, l’utilisation impropre, l’usure et / ou la négligence ;
b. l’installation incorrecte et/ou une utilisation contraire aux normes de
sécurité, aux normes techniques ou aux dispositions légales en vigueur ;
c. le branchement sur un réseau d’une tension autre que celle figurant sur la
plaquette type ;
d. toute modification non autorisée ;
e. toute réparation effectuée par des tiers ;
f. le transport sans précautions suffisantes, telles que la protection et
l’emballage appropriés.
7. Les présentes conditions de garantie ne peuvent pas être invoquées dans les
cas suivants:
a. pertes survenues pendant le transport;
b. effacement ou modification du numéro de série de l’appareil.
8. Les cordons, ampoules et pièces en verre ne sont pas couverts par la garantie.
9. La garantie ne donne aucun droit d’indemnisation pour des dommages
éventuels, autres que le remplacement ou la réparation de pièces
défectueuses. L’importateur ne peut être tenu responsable d’aucun dommage
indirect, ni d’aucune conséquence quelle qu’elle soit, causé par ou ayant un
quelconque rapport avec l’appareil qu’il a fourni.
Machine à pain, mode d’emploi
DBM400
FR v 090410-05 39
10. Pour pouvoir faire appel à la garantie, vous pouvez vous adresser à votre
revendeur. Bestron offre aussi la possibilité de faire réparer l’appareil
directement par le service après-vente de Bestron. Toutefois, n’envoyez jamais
rien sans avoir reçu d’instructions au préalable. Le colis pourrait en effet être
refusé et les frais éventuels seraient à votre charge. Prenez contact avec le
service après-vente qui vous expliquera comment vous devez emballer et
expédier l’appareil.
11. L’appareil n’est pas destiné à l’usage professionnel.
Maintenance
Si, par malheur, une panne se produisait, veuillez contacter le service de
maintenance de BESTRON :
BELGIQUE: FRANCE:
WILLEMEN SERVICE BVBA Si le produit ne fonctionne pas comme
BESTRON SERVICE il faut, contactez le distributeur ou un
Lambrechtshoekenlaan 337-339 centre de service autorisé.
2170 Merksem – Antwerpen
Tél. : 03 - 321 78 48
Télecopie : 03 - 321 28 50
Email : info@wilservice.be
Internet : www.wilservice.be
Déclaration de conformité
Le présent produit répond aux dispositions des directives européennes suivantes en
matière de sécurité.
Directive EMC 2004/108/EC
Directive sur la basse tension 2006/95/EC
R. Neyman
Contrôle de la qualité
Machine à pain, mode d’emploi
DBM400
FR v 090410-0540
Recettes
Unités de mesure
ml: millilitre
g: gramme
CC: cuillerée à café
CS: cuillerée à soupe
Recette de base Ingrédients Unité
Poids: environ 900 g
Retardement: possible
Poids
Eau
Farine de seigle
Sucre
Sel
Levure lyophilisée
9
ml
g
CS
CC
g
900
400
610
1
2
10
Programme: 3 Ajouter les ingrédients selon l’ordre
ci-dessus.
Pain blanc Ingrédients Unité
Poids: 900 g
Retardement: non, à cause du
lait
Lait
Farine blanche
Beurre (ramolli)
Sucre
Sel
Levure lyophilisée
ml
g
g
CC
CC
g
290
570
35
1
2
8
Programme: 1 Ajouter les ingrédients selon l’ordre
ci-dessus.
Pain aux herbes Ingrédients Unité
Poids: environ 900g
Retardement: possible
Eau
Levain
Farine de seigle
Sucre
Sel
Poivre noir moulu
Mélange d’herbes
Levure lyophilisée
ml
g
g
CC
CS
CC
g
g
360
90
360
1
1
1
23
6
Programme: 3 Ajouter les ingrédients selon l’ordre
ci-dessus.
Pain complet Ingrédients Unité
Poids : environ 900g
Retardement : possible
Eau
Miel de conifères
Farine à pain complète
Sel
Levure lyophilisée
ml
CS
g
CC
g
315
590
2
10
Programme: 3 Ajouter les ingrédients selon l’ordre
ci-dessus.
Machine à pain, mode d’emploi
DBM400
FR v 090410-05 41
Pain au jambon Ingrédients Unité
Poids : environ 900 g
Retardement : possible
Eau
Levain
Farine de seigle
Farine blanche
Sucre
Sel
Levure lyophilisée
Après le signal sonore,
ajouter encore :
Cubes de jambon
ml
g
g
g
CC
CC
g
g
325
120
300
30
1
1
8
160
Programme: 3 Ajouter les ingrédients selon l’ordre
ci-dessus.
Pain aux trois céréales Ingrédients Unité
Poids: environ 900 g
Retardement: non, à cause du
lait et des oeufs
Lait
Lait aigre épais
Oeufs
Beurre ou margarine
Farine blanche
Sel aux herbes
Levure lyophilisée
Après le signal sonore,
ajouter encore :
Graines de lin
Grains de blé
Graines de tournesol
ml
CS
pièce
g
g
CC
g
g
g
g
900
1
45
450
3
6
23
45
23
Programme: 3 Remarque: Les grains de blé peuvent
être remplacés par des grains de
sésame ou des graines de potiron.
Pain à l’oignon Ingrédients Unité
Poids : environ 900 g
Retardement : possible
Eau
Huile de tournesol
Farine blanche
Sucre
Sel aux herbes
Oignon grillé
Levure lyophilisée
ml
CS
g
CC
CC
g
g
290
2
570
1
3
70
8
Programme: 1 Ajouter les ingrédients selon l’ordre
ci-dessus.
Machine à pain, mode d’emploi
DBM400
FR v 090410-0542
Pain à la bière Ingrédients Unité
Poids: environ 900 g
Retardement : déconseillé
Eau
Bière
Levain (liquide)
Extrait de malt
Farine blanche
Farine de sarrasin
Son de blé
Graines de sésame
Sel
Levure lyophilisée
ml
ml
ml
CS
g
CS
CS
CS
CC
g
135
135
135
1½
490
3
3
2
6
Programme: 1 Ajouter les ingrédients selon l’ordre
ci-dessus.
Pain au raisins et à la cannelle Ingrédients Unité
Poids : environ 900 g
Retardement : non
Lait
Beurre (ramolli)
Farine blanche
Sucre
Sel
Cannelle
Levure lyophilisée
Après le signal sonore,
ajouter encore :
Raisins secs
ml
g
g
g
CC
CC
g
g
240
30
430
60
1
8
70
Programme: 1 Conseil : Rincez les raisins secs à
l’eau chaude et roulez-les dans de
la farine, avant de les ajouter à la
pâte. Ceci empêche les raisins de
s’accumuler tous au fond du moule.
Pain aux amandes et aux
abricots
Ingrédients Unité
Poids : environ 900 g
Retardement : non
Lait
Beurre (ramolli)
Oeufs
Farine blanche
Sucre
Sel
Levure lyophilisée
Après le signal sonore,
ajouter encore :
Abricots secs coupés en
petits dés
Amandes hâchées
ml
g
stuk
g
g
TL
g
g
g
180
55
1
540
70
½
8
45
45
Programme: 4 Ajouter les ingrédients selon l’ordre
ci-dessus.
Users instructions, Bread making machine
DBM400
EN v 0090410-05 43
Bread making machine DBM400
Congratulations with the purchase of your breadmaker. You can set the breadmaker to
start baking bread at any time you wish, thereby ensuring that the loaf is ready at the
time you need it – and that your house is filled with the delicious smell of freshly-baked
bread.
Safety instructions
General
Please read these instructions carefully and retain them for future reference.
Use this appliance solely in accordance with these instructions.
This appliance is not intended for use by persons (including children) with reduced
physical,sensory or mental capabilities, or lack of experience and knowledge,
unless they have been given supervision or instruction concerning use of the
appliance by a person responsible for their safety.
Children should be supervised to ensure that they do not play with the appliance.
Have any repairs carried out solely by a qualified electrician. Never try to repair
the appliance yourself.
Electricity and heat
Before use please verify that the mains voltage is the same as indicated on the
rating plate of the appliance.
Make sure that you always use an earthed wall socket to connect the appliance.
Always remove the plug from the wall socket when the appliance is not in use.
Remove the plug from the wall socket by pulling the plug, not the power cord.
Check the appliance’s power cord regularly to make sure it is not damaged. Do
not use the appliance if the power cord is damaged. Have a damaged power cord
replaced by a qualified repair service.
When using an extension lead always make sure that the entire cable is unwound
from the reel.
Use solely approved extension leads.
To prevent the risk of fire the appliance needs space to allow it to loose heat.
Make sure that it has sufficient space around, and that it makes no contact with
flammable material. Do not cover the appliance. Also make sure that the air vents
are not covered or blocked.
Make sure that the appliance, the power cord or the plug do not make contact with
heat sources, such as a hot hob or naked flame.
Make sure that the appliance, the power cord and plug do not make contact with
water.
Use
Never use the appliance outdoors.
Never use the appliance in humid rooms.
Place the appliance on a flat, stable surface.
Do not let the power cord hang over the edge of the draining board, worktop or table.
Make sure that your hands are dry when you touch the appliance, the power cord
or the plug.
Switch off the appliance and remove the plug from the wall socket in the event of a
malfunction during use, and before cleaning the appliance or storing it after use.
Never immerse the appliance, the cord or the plug in water or any other liquid.
PLEASE NOTE
Do not touch the appliance if it falls into water. Remove the plug from the wall socket
immediately. Do not use the device again.
Users instructions, Bread making machine
DBM400
EN v 090410-0544
Introduction
The delicious smell of homemade bread is an unforgettable experience. Warm, fresh
homemade bread is a tremendous sensation – and with your Bestron Breadmaker
DBM400 you can enjoy the sensation every day! Moreover the breadmaker will enable
you to experience the enjoyment of homemade bread every day – and prepared with
the greatest of ease. The appliance is fitted with a small computer that does all the
work for you.
You can use your breadmaker to bake many different types of bread. Moreover you
can also use the appliance to make jams – and dough for rolls, pizzas, and cakes. It’s
all very simple, and the result tastes like the produce prepared by a traditional baker.
Before use for the first time
We recommended that you read these instructions carefully before you use your
breadmaker for the first time. In particular, please give attention to the following
instructions.
1. Carefully take your new breadmaker out of the packaging, and remove all
packaging materials.
2. Remove any dust from the appliance that may have been trapped in the
packaging.
3. Clean your breadmaker with a damp cloth. Bear in mind that the baking tin is
finished with a non-stick coating. Consequently do not clean the tin with scouring
agents.
4. Grease the baking tin with oil or margarine before you use it for the first time.
5. Fit the baking tin to the appliance. Do not fit the dough hook, and do not add any
ingredients. Allow the appliance to operate for between 3 and 5 minutes (use
baking program “cuisson/bakken”, see the notes to program “cuisson/bakken”)
6. Allow the appliance to cool down, and repeat the procedure.
7. Fit the baking tin you wish to use.
8. Lightly grease the shaft with a little baking butter or oil, and fit the dough hook to
the drive shaft.
It was necessary to lubricate the components of this appliance during its manufacture,
and for this reason the breadmaker may release traces of smoke when used for the
first time. However, this is absolutely normal.
Users instructions, Bread making machine
DBM400
EN v 0090410-05 45
About the breadmaker DBM400
You can use this breadmaker to bake loaves with a maximum of about 900 g (the
weights are approximate, and depend on the recipe).
Features
Figure 1 Features
Operating panel
Figure 2 Operating panel
14. Program menu
15. Display
16. Select-button
17. Timer-buttons
18. Crust colour-button
19. Start-stop-button
11.
1.
10.
9.
7.
2.
8.
12.
6.
5.
4.
3.
13.
15.
18.
19.
16.
17.
14.
1. Viewing window
2. Lid
3. Handle
4. Drive shaft
5. Kneading blade
6. Baking tin
7. Ventilation opening
8. Lid handle
9. Housing
10. Control panel
11. Power cord and plug
12. Measuring cup for water and flower
13. Measuring spoon for salt and yeast
Users instructions, Bread making machine
DBM400
EN v 090410-0546
Display and functions, control panel
Display:
shows the selected firmness of the crust
shows the selected program number
shows the remaining time
shows the temperature warning (see the Troubleshooting section).
“Sélection/selectie” button (16): used to select the program from the menu.
“Couleur croûte/korst kleur” button (18): used to select the required colour of the crust
(light, medium, dark).
Delayed baking buttons (17): used to delay the baking process (setting for the
programs basic, french, whole wheat, sweet and quick).
Start/Stop button (19): Press the Start button for at least 1 second. A beep will be
heard, and the colon in the display begins to flash; the program has started. Press the
Stop button for at least 1 second. A beep will be heard, and the colon in the display
stops flashing.
Programs
Base/Basis (White or brown bread) (3:00)
For white and brown bread. Also for bread containing herbs and raisins.
Super rapide/snel (Rapid) (0:58)
For baking loaves of bread in a very short period of time. Bread baked using this
program can be quite hard and firm. The temperature of the water should be between
35 and 45°C.
Français/frans (French bread) (3:50)
For light and crusty bread such as, for example, French bread. This bread needs to
rise for a longer period of time, and consequently the preparation time is longer than
for other programs.
Complet/volkoren (wholemeal bread) (3:40)
For wholemeal bread containing a high proportion of wholemeal flour.This program
uses a longer preheating time. This offers extra time for the dough to absorb water,
and for the dough to rise. The kneader blade is stationary during this 15-minute resting
time. The use of a delayed start is not recommended when baking wholemeal bread;
this can yield a poorer result.
Brioché/zoet (Sweet bread) (2:50)
For sweet breads with a crisper crust. The crispy crust is obtained by heating the
dough containing sugar to a higher temperature.
Rapide/snel (Quick) (1:34)
For baking loaves of bread in a short period of time. Bread baked using this program
can be moister and have a denser structure. The temperature of the water should be
between 35 and 45°.
Pâte/deeg (Dough) (1:20)
Used to knead various types of dough. The dough is not baked. Remove the dough
from the appliance, and use it to form the pizza dough or rolls. Prepare portions of
dough of a maximum of 900g.
Users instructions, Bread making machine
DBM400
EN v 0090410-05 47
Cuisson/bakken (Bake)
This setting can be used either to heat the baking tin or to extend the baking time;
this can be of use when preparing products such as jams. This program enables you
to extend the baking time for a minimum of 10 minutes (0:10). The time shown in the
display decreases in 1-minute increments. Press the Stop button if you wish to stop
the baking process. The baking time can be extended in 10-minute increments, to a
maximum of 1 hour. To do so, press the
button and then press the Start button.
Process
knead
1
(min)
rise
1
(min)
knead
2
(min)
rise
2
(min)
pause
(sec)
rise
3
(min)
bake
(min)
total
time
signal
time
Program
1 Base/basis 10 20 15 20 30 55 60 3:00 2:25
2 Super rapide/
snel
13 10 35 0:58 0:57
3 Français/frans 18 40 22 20 30 60 70 3:50 2:47
4 Complet/volkoren
10 25 20 30 30 70 65 3:40 3:00
5 Brioché/zoet 10 5 20 30 30 57 48 2:50 2:30
6 Rapide/snel 14 5 75 1:34
7 Pâte/deeg 7 5 18 50 1:20
8
Cuisson/bakken
10 min. till 1 hour
Setting the delayed start
1. Determine the time at which the bread is to be ready.
2. Calculate the difference between the
required time and the current time.
3. Set the time using the Timer buttons
and .
For example: You wish your bread to be ready at 08.00, and it is now 21.00 on the
previous evening. The difference in time is 11 hours. Set the display on
11:00
ATTENTION
You can increase a maximum time delay of 13 hours in 10-minute steps.
Keep the
“Minuterie/timer” buttons pressed in to speed the increase time.
Using the breadmaker
Note Measuring the precise amount of each ingredient is of great
importance!
A good product can be obtained only by using the indicated quantities and weights,
and consequently you should use the measuring cup and spoon supplied with your
breadmaker.
Note Make sure you add the correct quantity of yeast!
If the dough in the appliance rises excessively and collapses immediately – or fails to
rise – then the likely cause is the amount of yeast. Try a new bread baking with the
right amount of yeast.
1. Remove the baking tin
Open the lid, lift the handle, and pull firmly to remove the baking tin. Always
remove the baking tin from the breadmaker before filling the tin; this will avoid
ingredients falling into the motor, or into the appliance.
Users instructions, Bread making machine
DBM400
EN v 090410-0548
2. Fit the dough hook
Fitting the dough hook is very simple; just slide it onto the drive shaft. Lightly
grease the shaft with baking butter; it will be easier to remove the hook later on.
3. Measuring/weighing ingredients
Measure the amounts of the ingredients given in the recipe accurately, and pour
into the baking tin in the correct sequence:
1. Pour the water or milk into the baking tin; use lukewarm water or milk (21-28°C).
2. Carefully add salt, sugar and flour/bread mix.
3. Make a small hollow in the surface of the flour, and put the piece of yeast or
baking powder in the hollow.
ATTENTION
Make sure that the yeast does not come into contact with water; this will
immediately start the fermentation process.
Add ingredients that would be broken down by kneading later during the
preparation process, for example at the end of KNEAD2. The breadmaker sounds
a beep when KNEAD2 is almost finished, so that you know when you can add the
ingredients.
4. Fitting the baking tin
Press the baking tin firmly into place. A click will be heard when the tin locks into
position.
5. Put the plug in the wall socket.The display on the top of the appliance will now
illuminate. The display will automatically show the 1st menu and the standard
time. A beep will sound each time any button is pressed.
6. Menu selection
Select a program by pressing the “Selection/selectie” button (16).
7. Bread colour
Press this button (18) to select the colour of the bread, or to select the faster
baking process.
8. Setting delayed start
When you wish to enjoy fresh bread for breakfast you will now need to set the
delayed start using the procedure given in the next Section.
9. Starting the process (19)
Start the breadmaker by pressing the Start/Stop button. The program begins,
and the remaining time is shown in the display. The colon between the hours and
minutes flashes to show that the program is running.
10. Program sequence
The breadmaker will now automatically work through all the steps of the program
as set before starting the appliance. The display shows which step in the program
is currently in progress. Water vapour may be seen escaping from the ventilation
openings whilst the breadmaker is in operation; this is absolutely normal.
11. End of program
At the end of the program the display will show 0:00, and a beep will be heard.
The display will then change to show the original duration of the program.
Users instructions, Bread making machine
DBM400
EN v 0090410-05 49
12. Keep-warm function
The keep-warm function circulates hot air through the baking section for an
additional approximately 1 hour. This is applicable to the majority of the programs;
best results will be achieved when the baking tin is removed within the indicated
time. A beep will sound at the end of the keep-warm period. Press the Start/Stop
button to stop the function.
13. Removing the product
Press the Start/Stop button, and remove the baking tin.
PLEASE NOTE
Always wear oven gloves when opening the lid and when touching the baking tins.
14. Removing the loaf from the baking tin.
Allow the loaf in the baking tin to cool for about 5 to 10 minutes, and then turn
the tin upside down to allow the loaf to drop onto a rack. The dough hook may
be left behind in the baking tin. If so, fill the baking tin with hot water and leave to
soak before removing the dough hook. However, the dough hooks will usually
remain in the loaf. Once the loaf has cooled completely remove the dough hook
with a utensil that will not damage the non-stick layer (such as a wooden spoon or
spatula).
15. Once you have finished using the breadmaker always press the Start/Stop button
and remove the plug from the wall socket.
Whenever possible, try to avoid opening the breadmaker’s lid while a program is
running. This may be detrimental to the quality of the bread. When you have
to open the lid to add ingredients then try to close the lid again as quickly as
possible. This will reduce the temperature drop in the appliance.
Beep
The beep is heard:
on pressing any of the buttons;
at the end of any program;
at the end of the keep-warm period;
during the 2nd kneading period used in certain programs, as a reminder that it is
time to add certain specific ingredients (nuts, chocolate, etc.).
Interruptions to the power supply and power cuts
After interruptions to the power supply of a maximum of 10 minutes the breadmaker
will automatically continue to work through the program.
With longer power cuts the display will automatically return to the starting time of the
relevant program; it will then be necessary to start the breadmaker again.
Storing and cutting bread
The loaf will need to cool for at least 20 to 40 minutes before it can be cut properly.
Preference is given to the use of a sharp electric knife, or a serrated bread knife.
Since your bread does not contain any preservatives you will not be able to keep it for
long; you can keep the bread for about three days at room temperature. You can store
bread in a deep-freeze if you wish to keep it for a longer period of time.
Users instructions, Bread making machine
DBM400
EN v 090410-0550
Troubleshooting table
Problem Cause Solution
The crust is too thick. The bread has been kept
warm for too long, and it
has dried out.
Remove the loaf from the
baking tin shortly after the
end of the baking time.
IThe ingredients are not
evenly mixed and/or
baked properly.
Incorrect program
selected.
Select the correct
program for the bread.
The dough is too thick to
be kneaded properly.
Add sufficient water.
The display shows E:01 The temperature in the
breadmaker is too high.
Press the Start/Stop
button to stop the
breadmaker, and open
the lid to allow the interior
to cool.
The motor makes a
sound, but the dough is
not being kneaded.
The baking tin has not
been fitted correctly, or
the dough is too stiff to be
kneaded.
Check that the baking
tin has been added
properly; always take care
when weighing out the
ingredients for the dough.
The loaf is too small. No yeast, or the yeast is
not working properly.
Make sure that the
conditions are right for the
yeast.
The dough rises above
the baking tin.
Too much yeast and/or
water added.
Reduce the quantity of
moisture and/or yeast.
The loaf collapses whilst it
is baking.
Too much water or yeast
makes the dough too soft
and weak.
Reduce the quantity of
moisture and/or yeast.
On cutting the loaf the
centre is found to be
hollow.
Too much water and/or
yeast added, no salt
added.
Reduce the quantity of
moisture and/or yeast,
and add more salt.
Powder remaining in the
baking tin.
Too little water added. Use more water.
Table 2
Users instructions, Bread making machine
DBM400
EN v 0090410-05 51
Cleaning and maintenance
ATTENTION
Always remove the plug from the wall socket before cleaning the appliance.
Wait until the breadmaker has cooled down completely.
IMPORTANT! The lid and/or housing must never be sprayed with or immersed in
water or other liquids.
Clean the exterior of the breadmaker solely with a damp cloth.
Any stains on the interior of the lid or in the air slits will be on the surface only;
these stains develop during the baking process. They have no influence on the
performance of the appliance. After each use of the appliance remove these stains
using a damp cloth with a little washing-up liquid.
Clean the interior of the breadmaker solely with a damp cloth.
Remove the breadmaker’s lid by sliding it upwards in the attachment slots and
lifting it clear (see drawing).
Replace the lid in the reverse sequence.
Figure 3
Use only warm water to clean the baking tin. Avoid scratching the non-stick layer.
Verify that the breadmaker has cooled down completely before storing it in a
cupboard.
ATTENTION
Never use the following cleaning agents utensils:
Paint thinners;
White spirit or petrol;
Scourers;
Polish;
Chemical cleaning cloths.
Care of the non-stick coating
Avoid damage to or scratches in the non-stick coating. Never use sharp objects such
as metal spatulas, knives or forks. The colour of the coating can change over the
course of time. This is caused by the repeated moistening and heating of the coating.
However, it has no influence on the quality of the bread baked by the breadmaker.
The opening in the centre of the kneading blades must be cleaned at regular intervals;
after cleaning, lubricate with a drop of edible oil. This will prevent the kneading blades
from sticking to the drive shafts. Remove any dust from the ventilation openings.
Storing of the breadmaker
Make use that all parts are dry. Check that there is no moisture inside the appliance.
Close the lid; do not put anything on the lid.
Users instructions, Bread making machine
DBM400
EN v 090410-0552
Technical details
Type: DBM400
Output: 660W
Power supply: 230V ~ 50Hz
The environment
Dispose of packaging material, such as plastic and boxes, in the appropriate waste
containers.
When this product reaches the end of its useful life do not dispose of it by putting it
in a dustbin; hand it in at a collection point for the reuse of electrical and electronic
equipment. Please refer to the symbols on the product, the user’s instructions or the
packaging.
The materials can be re-used as indicated. Your help in the re-use, recycling or other
means of making use of old electrical equipment will make an important contribution to
the protection of the environment.
Contact your municipality for the address of the appropriate collection point in your
neighbourhood.
Warranty terms
The importer guarantees the appliance against defects caused by manufacturing
and/or material faults for 60 months from the date of purchase, subject to the
following conditions.
1. No charges will be made for labour costs or materials during the warranty
period. Any repairs carried out during the warranty period do not extend the
warranty period.
2. The importer automatically becomes the owner of any faulty parts that he
replaces or a faulty appliance (in the event of replacement of the appliance).
3. All claims submitted under warranty must be accompanied by the original bill of
sale.
4. Claims under warranty must be submitted to the dealer where the appliance
was purchased or to the importer.
5. The warranty is issued solely to the first purchaser and cannot be transferred.
6. The warranty does not cover damage caused by:
a. Accidents, incorrect use, wear and/or neglect.
b. Faulty installation and/or use in a manner contravening the prevailing legal,
technical or safety regulations.
c. Connection to a mains voltage other than the voltage specified on the type
plate.
d. Unauthorized modifications.
e. Repairs carried out by third parties.
f. Careless transport, i.e. without suitable packaging materials or protection.
7. No claims may be made under this warranty for:
a. Losses incurred during transport.
b. The removal or changing of the appliance’s serial number.
8. The guarantee does not cover power cords, lamps or glass parts.
9. No claims can be submitted under this warranty for damage other than the
repair or replacement of faulty parts. The importer can never be held
responsible for any consequential loss or damage or any other consequences,
resulting either directly or indirectly from the appliance supplied by the importer.
Users instructions, Bread making machine
DBM400
EN v 0090410-05 53
10. In case of claims under guarantee you can contact your dealer where the
appliance is purchased. Bestron offers you also the possibility to send the
appliance directly to our Service Department. Do not send your appliance
without consulting us. The package may be refused and any any costs will be
for your account. Please contact the Service Department and they will tell you
how to pack and send the appliance.
11. This appliance is not suitable for professional use.
Service
If a fault should occur please contact the BESTRON service department:
THE NETHERLANDS:
BESTRON NEDERLAND BV
BESTRON SERVICE
Moeskampweg 20
5222 AW ’s-Hertogenbosch
Tel: +31 (0) 73 - 623 11 21
Fax: +31 (0) 73 - 621 23 96
Email: info@bestron.com
Internet: www.bestron.com
CE Declaration of conformity
This product conforms to the essential requirements of the following EU safety
directives:
EMC Directive 2004/108/EC
Low Voltage Directive 2006/95/EC
R. Neyman
Quality control
Users instructions, Bread making machine
DBM400
EN v 090410-0554
Recipes
Units of measure
ml: millilitre
g: gram
tsp: teaspoon
Tbsp: tablespoon
Basic recipe Ingredients Unit
Weight: approx. 900 g
Time setting: possible
Weight
Water
Rye flour
Sugar
Salt
Dried yeast
9
ml
g
Tbsp
tsp
g
900
400
610
1
2
10
Program: 3 Add the ingredients in the above
sequence.
White bread Ingredients Unit
Weight: 900 g
Time setting: not possible, in
view of the addition of milk
Milk
White flour
Butter (soft)
Sugar
Salt
Dried yeast
ml
g
g
tsp
tsp
g
290
570
35
1
2
8
Program: 1 Add the ingredients in the above
sequence.
Herb bread Ingredients Unit
Weight: approx. 900 g
Time setting: possible
Water
Leaven
Rye flour
Sugar
Salt
Black pepper (ground)
Mixed herbs
Dried yeast
ml
g
g
tsp
Tbsp
tsp
g
g
360
90
360
1
1
1
23
6
Program: 3 Add the ingredients in the above
sequence.
Wholemeal bread Ingredients Unit
Weight: approx. 900 g
Time setting: possible
Water
Pine honey
Wholemeal flour
Salt
Dried yeast
ml
Tbsp
g
tsp
g
315
590
2
10
Program: 3 Add the ingredients in the above
sequence.
Users instructions, Bread making machine
DBM400
EN v 0090410-05 55
Savoury ham bread Ingredients Unit
Weight: approx. 900 g
Time setting: possible
Water
Leaven
Rye flour
White flour
Sugar
Salt
Dried yeast
Add after beep:
Ham cubes
ml
g
g
g
tsp
Tbsp
g
g
325
120
300
30
1
1
8
160
Program: 3 Add the ingredients in the above
sequence.
Three-grain bread Ingredients Unit
Weight: approx. 900 g
Time setting: not possible,
because of addition of milk and
egg
Milk
Thick sour milk
Egg
Butter or margarine
White flour
Herbal salt
Dried yeast
Add after beep:
Linseed
Wheat grain
Sunflower seeds
ml
Tbsp
stuk
g
g
tsp
g
g
g
g
900
1
45
450
3
6
23
45
23
Program: 3 Note: you can also replace wheat grain
with sesame seed or pumpkin seeds.
Onion bread Ingredients Unit
Weight: approx. 900 g
Time setting: possible
Water
Sunflower oil
White flour
Sugar
Herbal salt
Grilled onions
Dried yeast
ml
Tbsp
g
tsp
tsp
g
g
290
2
570
1
3
70
8
Program: 1 Add the ingredients in the above
sequence.
Users instructions, Bread making machine
DBM400
EN v 090410-0556
Beer bread Ingredients Unit
Weight: approx. 900 g
Time setting: not recommended
Water
Beer
Leaven (liquid)
Malt syrup
White flour
Buckwheat flour
Bran
Sesame seed
Salt
Dried yeast
ml
ml
ml
Tbsp
g
Tbsp
Tbsp
Tbsp
tsp
g
135
135
135
1½
490
3
3
2
6
Program: 1 Add the ingredients in the above
sequence.
Raisin bread with cinnamon Ingredients Unit
Weight: approx. 900 g
Time setting: not possible
Milk
Soft butter
White flour
Sugar
Salt
Cinnamon
Dried yeast
Add after beep:
Raisins
ml
g
g
g
tsp
tsp
g
g
240
30
430
60
1
8
70
Program: 1 Tip: Rinse the raisins with hot water
and sprinkle with flour before adding
them to the dough. This will prevent all
the raisins sinking to the bottom.
Almond bread with apricots Ingredients Unit
Weight: approx. 900 g
Time setting: not possible
Milk
Soft butter
Egg
White flour
Sugar
Salt
Dried yeast
Add after beep:
Apricots (dried/finely cut)
Almonds (finely chopped)
ml
g
piece
g
g
tsp
g
g
g
180
55
1
540
70
½
8
45
45
Program: 4 Add the ingredients in the above
sequence.
Macchina per pane - Istruzioni per l’uso
DBM400
IT v 090410-05 57
Macchina per pane DBM400
Congratulazioni per l’acquisto di questa macchina elettrica per pane. Grazie al timer
programmabile il prodotto consente di impostare il momento in cui si desidera avviare il
processo di cottura per avere un pane fresco in qualsiasi occasione e riempire la casa
della deliziosa fragranza del pane appena sfornato.
Norme di sicurezza
Caratteristiche generali
Leggere attentamente le istruzioni d’uso e conservarle con cura.
Utilizzare questo apparecchio unicamente secondo le modalità descritte nelle
presenti istruzioni.
Questo apparecchio non può essere utilizzato da bambini e da persone che, a
causa di una limitazione fisica, sensoriale o mentale, o per mancanza di
esperienza e conoscenza, non siano in grado di utilizzare l’apparecchio in modo
sicuro, a meno che non abbiano ricevuto delle istruzioni sull’uso dell’apparecchio
da una persona che sia responsabile della loro sicurezza.
I bambini vanno sorvegliati per accertarsi che non si mettano a giocare con
l’apparecchio.
Far eseguire le riparazioni da un tecnico qualificato. Non cercare di riparare da
soli l’apparecchio.
Elettricità e calore
Prima di utilizzare l’apparecchio, verificare che la tensione di rete corrisponda alla
tensione di esercizio indicata sulla targhetta di identificazione dell’apparecchio.
Collegare l’apparecchio esclusivamente a una presa di rete provvista di messa a
terra.
Estrarre sempre la spina dalla presa quando l’apparecchio non è in uso.
Quando si estrae la spina dalla presa, esercitare la trazione sulla spina stessa e
non sul cavo.
Verificare regolarmente l’integrità del cavo dell’apparecchio. Non utilizzare
l’apparecchio qualora il cavo risultasse danneggiato. Per sostituire il cavo
danneggiato, rivolgersi a un servizio di assistenza qualificato.
Se si usa una prolunga assicurarsi che questa sia completamente srotolata.
Utilizzare soltanto cavi di prolunga omologati.
L’apparecchio deve essere in grado di dissipare il proprio calore onde evitare
eventuali rischi di incendio. Prestare dunque attenzione che l’apparecchio sia
sufficientemente libero e non possa venire in contatto con materiali incendiabili.
Assicurarsi che l’apparecchio, il cavo e la spina non entrino a contatto con fonti di
calore quali per es. piani di cottura caldi o fiamme libere.
Assicurarsi che la parte interna dell’apparecchio, il cavo e la spina non entrino a
contatto con l’acqua.
Utilizzo
Non utilizzare mai l’apparecchio in ambienti esterni.
Non utilizzare l’apparecchio in ambienti umidi.
Posizionare l’apparecchio su di una superficie piana e stabile, in un punto in cui
esso non possa cadere o ribaltarsi.
Assicurarsi che il cavo non penda dal bordo del piano di lavoro, di mensole o di
tavoli.
Assicurarsi di avere le mani asciutte prima di toccare l’apparecchio, il cavo o la spina.
Spegnere l’apparecchio e disinserire la spina dalla presa di corrente se durante
l’uso si verificano malfunzionamenti, quando si pulisce l’apparecchio o si è
terminato di utilizzarlo.
Non immergere mai l’apparecchio, il cavo e la presa in acqua o in altri liquidi.
Macchina per pane - Istruzioni per l’uso
DBM400
IT v 090410-0558
ATTENZIONE
Non tentare di toccare l’apparecchio qualora esso sia caduto in acqua. In tal caso,
disinserire subito la spina dalla presa di rete e non utilizzare più l’apparecchio.
Introduzione
La fragranza del pane fatto in casa rappresenta un’esperienza indimenticabile. Il pane
caldo e fatto in casa è una vera e propria sorpresa. Con la macchina per pane Bestron
DBM1400 sarà possibile rivivere ogni giorno questa sensazione. Inoltre, la macchina
per pane permette di gustare tutti i giorni la bontà del pane fresco con la massima
facilità. L’apparecchio è dotato di una piccola memoria computerizzata che provvede a
svolgere tutte le operazioni necessarie.
Il prodotto permette di preparare da soli qualsiasi tipo di pane speciale. Oltre a ciò,
l’apparecchio è adattissimo per la preparazione di confetture e di impasti per panini,
pizze e dolci, il tutto con estrema facilità e con un risultato uguale a quello del proprio
negozio di fiducia.
Operazioni preliminari al primo utilizzo
Prima di utilizzare l’apparecchio per la prima volta, si consiglia di familiarizzare con il
prodotto leggendo accuratamente le presenti istruzioni per l’uso. Prestare particolare
attenzione ai seguenti consigli.
1. Estrarre con cura la macchina per pane dalla confezione e rimuovere
accuratamente tutti gli imballaggi.
2. Eliminare la polvere eventualmente presente sull’apparecchio.
3. Ripulire la macchina per pane utilizzando un panno umido. Ricordare che i
cestello sono dotati di un rivestimento antiaderente. Non utilizzare pertanto
detergenti abrasivi.
4. Prima di procedere al primo utilizzo, oliare o imburrare il cestello desiderato con
una leggera quantità di olio o di margarina.
5. Inserire il cestello nell’apparecchio (senza le lame impastatrici) e lasciare in
funzione la macchina per 3 - 5 minuti senza ingredienti (utilizzare a tale scopo
il programma di cottura 8: vedere le ulteriori istruzioni per il programma “cuisson/
bakken”).
6. Lasciare raffreddare l’apparecchio e ripetere l’operazione di pulizia.
7. Inserire nell’apparecchio il cestello di cottura desiderato.
8. Lubrificare gli assi con una leggera quantità di burro o di olio e inserire le lama
impastatrici sugli appositi assi motori.
Durante la produzione degli apparecchi di questo tipo è necessario lubrificarne i
componenti: pertanto, è possibile che l’apparecchio emetta un leggero fumo quando si
esegue la prima cottura. Ciò è tuttavia perfettamente normale.
Macchina per pane - Istruzioni per l’uso
DBM400
IT v 090410-05 59
Informazioni sulla macchina per pane DBM400
La macchina per pane permette di preparare forme di pane di grandi dimensioni (ca.
900 g, dati indicativi a seconda delle ricette).
Elementi
Figura 1 Componenti del prodotto
Pannello di comando
Figura 2 Pannello di comando
14. Programma dal menù
15. Display LED
16. Tasto SÉLECTION/SELECTIE
17. Tasto MINUTERIE/TIMER
18. Tasto doratura crosta
19. Tasto MARCHE-ARRÊT/START-STOP
11.
1.
10.
9.
7.
2.
8.
12.
6.
5.
4.
3.
13.
15.
18.
19.
16.
17.
14.
1. Oblò
2. Coperchio
3. Manico
4. Asse motore
5. Lama impastatrice
6. Cestello di cottura
7. Presa di ventilazione
8. Maniglia del coperchio
9. Corpo dell’apparecchio
10. Pannello di comando
11. Cavo e spina
12. Bicchiere graduato per acqua e
farina
13. Misurino dosatore per sale e lievito
Macchina per pane - Istruzioni per l’uso
DBM400
IT v 090410-0560
Display e funzioni del pannelli di comando
Display
Indica la doratura della crosta selezionata
Indica il numero programma selezionato
Indica il tempo di cottura residuo
Segnala l’eccessiva temperatura (vedere il cap. “Risoluzione dei problemi”).
Tasto “Sélection/selectie” (16) Permette di selezionare il programma dal menù.
Tasto “couleur croûte/korstkleur” (18) (Doratura crosta) Permette di impostare la
doratura della crosta del pane (morbida, normale o croccante).
Tasto “Minuterie/timer” (17) (Cottura differita) Permette di impostare l’inizio posposto
della cottura (impostabile per i programmi base, francese, integrale, dolce e rapida).
Tasto “Marche-arrêt/start-stop” (19) Premere il tasto “Start” per almeno 1 secondo.
Verrà emesso un segnale acustico e il segno di due punti apparirà sul display: il
programma viene quindi avviato. Premere il tasto “Stop” per almeno 1 secondo. Verrà
emesso un segnale acustico e il segno di due punti cesserà di lampeggiare.
Descrizione dei programmi selezionabili (14)
Base/basis (pane bianco o integrale) (3:00)
Per la preparazione di pane bianco e integrale nonché di pane speciale (speziato e
con uvetta).
Super rapide/snel - (programma di cottura superrapido) (0:58)
Per la preparazione ultrarapida di pani. I pani preparati con questo programma
avranno una struttura alquanto dura e robusta. La temperatura dell’acqua dovrà
essere compresa tra i 35 e i 45 °C.
Français/frans (pane francese) (3:50)
Per la preparazione di pane leggero e croccante (come per es. la c.d. “baguette”).
Questo tipo di pane necessita di un maggior tempo di lievitazione: il tempo di
lavorazione risulterà pertanto più ampio rispetto agli altri programmi.
Complet/volkoren (pane integrale) (3:40)
Per la preparazione di pane con un elevato apporto di farina integrale. Questo
programma prevede un più ampio tempo di preriscaldamento per permettere un
migliore assorbimento dell’acqua e una maggiore lievitazione dell’impasto. Durante il
periodo di riposo (15 minuti) le lama impastatrici non funzioneranno. Si consiglia inoltre
di non impostare la cottura differita con questo programma: ciò potrebbe infatti sortire
effetti negativi sul risultato.
Brioché/zoet (pane dolce) (2:50)
Per la preparazione di pane dolce con crosta croccante. La crosta croccante si ottiene
mediante un elevato riscaldamento dello zucchero.
Rapide/snel (programma di cottura rapida) (1:58)
Per la preparazione rapida di pani. I pani preparati con questo programma avranno
una struttura più umida e densa. La temperatura dell’acqua dovrà essere compresa tra
i 35 e i 45 °C.
Pâte/deeg (impasto) (1:20)
Per la preparazione di impasti di vario tipo. La funzione non prevede alcuna cottura.
Estrarre l’impasto dall’apparecchio e preparare quindi per es. la pasta per pizza o i
panini. Permette la preparazione di 900 g di pasta per volta.
Macchina per pane - Istruzioni per l’uso
DBM400
IT v 090410-05 61
Cuisson/bakken (cottura)
Questo programma può essere utilizzato per il solo riscaldamento oppure per
aumentare il tempo di cottura e si rivela utile anche per la preparazione delle
confetture. Il tempo minimo selezionabile del programma è di 10 minuti (0:10). Il
tempo rimanente verrà visualizzato sul display in minuti (passi di 1 minuto). Qualora si
desideri interrompere prematuramente il processo di cottura, è necessario premere il
tasto “Stop”. Il processo di cottura può essere allungato in fasi di 10 minuti, fino a un
max. di 1 ora. A tale scopo, premere il pulsante
e quindi il tasto “Start”.
Impostazione della cottura differita
1. Selezionare l’orario in cui si desidera che il pane sia pronto e calcolare la
differenza di tempo tra l’orario attuale e l’orario desiderato (per es.: se il
pane deve essere pronto per le 8.00 di mattina e sono le 9.00 di sera, la
differenza di tempo risulterà quindi di 11 ore). Il tempo di cottura è ricompreso nel
calcolo del differimento dell’avvio: se per la cottura del pane sono necessarie
3 ore e si desidera fare colazione alle ore 8:00, la macchina per pane inizierà il
programma alle ore 5:00.
2. Impostare l’orario mediiante il tasti
. L’orario può essere incrementato
con intervalli di 10 minuti ed è programmabile per un’avvio ritardato fino a 13 ore.
Mantenere premuto il tasti per fare scorrere più rapidamente l’orario.
3. Il termine sarà sempre rappresentato dall’orario in cui deve essere pronto il pane.
Funzionamento della macchina per pane
Nota L’esatta pesatura degli ingredienti è molto importante.
Per ottenere un ottimo prodotto, è essenziale attenersi alle quantità e alle porzioni
indicate. Si consiglia pertanto di utilizzare sempre il bicchiere graduato e il misurino
dosatore forniti a corredo del prodotto.
Nota Impiegare sempre la giusta quantità di lievito.
Se l’impasto presente all’interno della macchina per pane si dilata troppo afflosciandosi
subito dopo, oppure qualora l’impasto non si dilati assolutamente, quindi la probabile causa
della quantità di lievito. Prova una nuova panificazione con la giusta quantità di lievito.
Cottura del pane
1. Estrazione del cestello di cottura
Aprire il coperchio, sollevare la maniglia ed estrarre il cestello dall’alloggiamento.
Assicurarsi sempre di riempire il cestello di cottura quando questo è estratto
dall’apparecchio, in modo tale da evitare qualsiasi versamento accidentale di
ingredienti nel motore o sugli altri componenti.
Processo
impasto
1
(min)
lievitazione
1
(min)
impasto
2
(min)
lievitazione
2
(min)
pausa
(sec)
lievitazione
3
(min)
cottura
(min)
tempo
totale
tempo
segnale
Programma
1 Base/basis 10 20 15 20 30 55 60 3:00 2:25
2 Super rapid/
snel
13 10 35 0:58 0:57
3
Français/frans
18 40 22 20 30 60 70 3:50 2:47
4
Complet/volkoren
10 25 20 30 30 70 65 3:40 3:00
5 Brioché/zoet 10 5 20 30 30 57 48 2:50 2:30
6 Rapide/snel 14 5 75 1:34
7 Pâte/deeg 7 5 18 50 1:20
8 Cuisson/
bakken
10 minuti a 1 ora
Macchina per pane - Istruzioni per l’uso
DBM400
IT v 090410-0562
2. Montaggio delle lama impastatrici
Inserire semplicemente le lama impastatrici sugli appositi assi motori. Lubrificare
gli assi con una leggera quantità di burro, in modo tale da facilitarne
successivamente la rimozione.
3. Misurazione e pesatura degli ingredienti
Assicurarsi sempre di dosare accuratamente tutti gli ingredienti secondo quanto
descritto dalle ricette e di aggiungerli nell’ordine corretto:
1. Inserire prima nel cestello dell’acqua o del latte. Utilizzare dell’acqua o del latte
tiepidi (ca. 21-28 °C).
2. Aggiungervi accuratamente del sale, dello zucchero e della farina o del mix per
la preparazione del pane.
3. Praticare una cavità sulla sommità della farina e collocarvi il pezzetto di lievito
naturale o in polvere.
ATTENZIONE
Assicurarsi che il lievito non entri a contatto con acqua: ciò darà
immediato avvio al processo di lievitazione.
Se la ricetta contiene ingredienti che non devono essere frantumati durante la
fase di impasto, sarà necessario aggiungerli soltanto in una fase successiva (per
es. al termine della seconda fase di impasto). Quando la seconda fase di impasto
volge al termine, la macchina emetterà un segnale acustico per indicare che sarà
possibile aggiungere gli ingredienti all’impasto.
4. Inserimento del cestello di cottura
Inserire il cestello premendolo nell’alloggiamento fino al suo perfetto
posizionamento. Quando il cestello entrerà in sede, si udirà uno scatto.
5. Inserimento della spina nella presa
Il display presente sulla parte superiore dell’elettrodomestico si illuminerà. Il
display visualizzerà automaticamente il 1° menù e un tempo. Alla pressione di
qualsiasi tasto viene emesso un segnale acustico.
6. Selezione del menù (16)
La selezione dei programmi avviene premendo il tasto “Sélection/selectie” .
7. Doratura della crosta del pane
Premere questo tasto (18) per selezionare la doratura della crosta del pane o il
processo di cottura rapida.
8. Impostazione della cottura differita
Se, per es., si desidera avere del pane fresco per la propria colazione, è possibile
impostare la cottura differita seguendo le istruzioni illustrate nel
capitolo successivo.
9. Avvio (19)
Mettere in funzione la macchina per pane premendo il tasto “Start/Stop”. Verrà
avviato il programma: sul display viene visualizzato il tempo residuo di
preparazione. Il segno di due punti presente nell’indicazione del tempo sul display
inizierà a lampeggiare per segnalare che il programma è stato avviato.
10. Sequenza del ciclo di preparazione
La macchina per pane eseguirà automaticamente tutte le fasi del ciclo di
preparazione impostato. Sul display verrà di volta in volta visualizzata la fase del
programma in cui si trova l’apparecchio. Durante la cottura può fuoriuscire del
vapore attraverso la presa di ventilazione. Ciò è perfettamente normale.
Macchina per pane - Istruzioni per l’uso
DBM400
IT v 090410-05 63
11. Fine del programma
Quando il programma ha terminato la cottura, il display visualizzerà “0:00” e verrà
emesso un chiaro segnale acustico. Successivamente, il display visualizzerà la
durata originaria del ciclo di cottura.
12. Mantenimento in caldo
La funzione di mantenimento in caldo prevede il ricircolo di aria calda nel vano
cottura per ca. 1 ora. Questa funzione può essere selezionata per la maggior
parte dei programmi. Per ottenere un risultato ottimale, è necessario rimuovere il
cestello di cottura entro il tempo indicato. Al termine del ciclo di mantenimento
in caldo verrà emesso un segnale acustico. Questa funzione può essere interrotta
premendo il tasto “Start/Stop”.
13. Rimozione dei prodotti
Premere il tasto “Start/Stop” ed estrarre il cestello di cottura.
ATTENZIONE
Utilizzare sempre dei guanti da forno quando si apre il coperchio e si maneggiano
i cestelli di cottura.
14. Estrazione del pane dal cestello di cottura.
Lasciare raffreddare il pane nel cestello per ca. 5 - 10 minuti prima di estrarlo dal
cestello e collocarlo su un ripiano apposito. Se le lama impastatrici si trovano
ancora all’interno del cestello, riempire quest’ultimo di acqua calda e rimuovere le
lame impastatrici dopo averle tenute in bagno per un certo lasso di tempo.
Solitamente le lama impastatrici rimangono nel pane. Quando il pane è
completamente raffreddato, assicurarsi di estrarlo dal cestello con l’ausilio di
un utensile da cucina che non danneggi il rivestimento antiaderente delle lama
impastatrici (per es. un cucchiaio o una paletta in legno).
15. Premere il tasto “Start/Stop” ed estrarre la spina dalla presa elettrica quando si
termina l’utilizzo del prodotto.
Si consiglia di non aprire il coperchio della macchina per pane quando si sta
svolgendo un programma. Ciò può infatti pregiudicare la qualità del pane. Qualora
sia necessario aprire il coperchio per aggiungere degli ingredienti, assicurarsi di
eseguire velocemente le operazioni per non fare abbassare troppo
eccessivamente la temperatura all’interno della macchina.
Segnale acustico
Il segnale acustico viene emesso:
alla pressione di qualsiasi tasto;
al termine di qualsiasi programma;
al termine della funzione di mantenimento in caldo;
in alcuni programmi, durante la 2a fase di impasto per segnalare l’aggiunta di altri
ingredienti (per es. noci, cioccolata, ecc.).
Interruzioni o mancanza di corrente
Qualora si verifichino mancanze o cadute di corrente (max. 10 minuti), la macchina per
pane riprenderà automaticamente l’operazione interrotta.
Qualora l’interruzione duri più di 10 min., il display mostrerà nuovamente la durata o
l’orario di avvio del programma e sarà necessario riavviare la macchina per pane.
Conservazione e taglio del pane
Per ottenere un taglio perfetto del pane preparato, è necessario far raffreddare il pane
per almeno 20 - 40 minuti. Per il taglio si consiglia di utilizzare preferibilmente un
coltello elettrico ben affilato o un coltello per pane seghettato.
Macchina per pane - Istruzioni per l’uso
DBM400
IT v 090410-0564
Poiché al pane appena cotto non sono stati aggiunti conservanti, esso potrà essere
conservato solo per un periodo limitato (ca. 3 giorni alla normale temperatura
ambiente). Se si desidera conservare il pane per un periodo più prolungato, si
consiglia di riporlo nel congelatore.
Risoluzione dei problemi
Problema Causa Soluzione
La crosta del pane è
troppo spessa.
Il pane è stato tenuto
in caldo per un lasso di
tempo eccessivo e si è
essiccato.
Estrarre più rapidamente
il pane dal cestello una
volta scaduto il tempo di
cottura.
Gli ingredienti non sono
stati perfettamente
miscelati e/o cotti.
È stato selezionato un
programma errato.
Selezionare un
programma adeguato
alla tipologia di pane da
preparare.
La eccessiva densità
dell’impasto ha impedito
una ottimale miscelazione
da parte delle pale.
Aggiungere una quantità
di liquido sufficiente.
Sul display appare la
dicitura E:01.
La temperatura all’interno
della macchina per pane
è troppo elevata.
Premere il tasto “Start/
Stop” per arrestare
l’elettrodomestico e
aprire il coperchio per
fare raffreddare la parte
interna della macchina.
Il motore emette dei
rumori, ma l’impasto non
viene lavorato.
Il cestello di cottura
non è stato alloggiato
perfettamente oppure
l’impasto risulta troppo
duro per essere lavorato.
Verificare che il cestello di
cottura sia stato alloggiato
perfettamente e pesare
sempre accuratamente gli
ingredienti dell’impasto.
Il pane non lievita
rimanendo di piccole
dimensioni.
Non è stato aggiunto
lievito all’impasto o
l’efficacia del lievito non è
ottimale.
Realizzare le giuste
condizioni ambientali per
la lievitazione.
L’impasto fuoriesce dal
cestello di cottura.
L’impasto è troppo
bagnato e/o contiene
una quantità eccessiva
di lievito.
Ridurre l’umidità
dell’impasto e/o la
quantità di lievito.
Il pane si affloscia durante
la cottura.
L’impasto contiene una
quantità eccessiva di
acqua o di lievito.
Ridurre l’umidità
dell’impasto o la quantità
di lievito.
L’interno del pane risulta
cavo.
L’impasto contiene una
quantità eccessiva di
acqua e/o di lievito oppure
non è stato aggiunto del
sale all’impasto.
Ridurre l’umidità
dell’impasto e/o la
quantità di lievito
e aggiungere una
maggiore quantità di sale
all’impasto.
Nel cestello di cottura
è rimasta una quantità
residua di farina o di mix.
È stata utilizzata una
quantità insufficiente di
acqua.
Utilizzare una maggiore
quantità di acqua.
Macchina per pane - Istruzioni per l’uso
DBM400
IT v 090410-05 65
Pulizia e manutenzione
ATTENZIONE
Prima di eseguire qualsiasi operazione di pulizia, assicurarsi sempre di avere
staccato la spina dell’apparecchio dalla presa elettrica.
Attendere che la macchina per pane sia completamente fredda.
IMPORTANTE Il coperchio e/o il corpo del prodotto non vanno mai immersi in
acqua o liquidi né bagnati a spruzzo.
Pulire la parte esterna della macchina per pane servendosi unicamente di un
panno umido.
La formazione di eventuali macchie sulla parte interna del coperchio o nelle
aperture per l’aria rappresentano fenomeni di aspetto esterno e vengono
generati durante il processo di cottura. Tali fenomeni non sortiscono alcun effetto
sul funzionamento dell’apparecchio. Eliminare queste macchie dopo ogni
utilizzo del prodotto servendosi di un panno umido e di una piccola quantità di
detergente per piatti.
Pulire la parte interna della macchina per pane servendosi unicamente di un
panno umido.
Per rimuovere il coperchio dall’apparecchio, è necessario farlo scorrere
nell’apposita scanalatura di bloccaggio fino a poterlo sollevare (vedere il disegno).
Per riposizionare il coperchio, eseguire l’operazione in senso inverso.
Figura 2
Per la pulizia del cestello di cottura è necessario utilizzare unicamente dell’acqua
calda. Evitare di danneggiare il rivestimento antiaderente.
Assicurarsi che la macchina per pane sia completamente fredda prima di riporla.
ATTENZIONE
Non utilizzare mai i detergenti e/o gli utensili elencati qui sotto:
diluenti;
benzina o trielina;
spugne abrasive;
lucidanti;
panni per pulizia impregnati di agenti chimici.
Conservazione e cura del rivestimento antiaderente
Evitare di danneggiare o di graffiare il rivestimento antiaderente. Non utilizzare
mai oggetti acuminati (quali per es. spatole in metallo, coltelli o forchette). Il
rivestimento può assumere un colore diverso con l’andare del tempo. Ciò dipende
dal continuo riscaldamento e dall’umidità. Tale trascoloramento non sortisce alcun
effetto sulla qualità del pane e della macchina. Il foro presente al centro delle lame
impastatrici deve essere pulito a intervalli regolari e lubrificato con una goccia di
olio alimentare. Ciò permette di evitare che le lame impastatrici si blocchino negli
appositi alloggiamenti presenti negli assi motori. Assicurarsi di eliminare la polvere
eventualmente accumulatasi sulle prese di ventilazione.
Macchina per pane - Istruzioni per l’uso
DBM400
IT v 090410-0566
Come ripporre la macchina per pane
Assicurarsi che tutti gli elementi siano completamente asciutti. Verificare che
l’apparecchio non presenti umidità al proprio interno. Chiudere il coperchio ed evitare
di poggiarvi altri oggetti.
Specifiche tecniche
Tipo: DBM400
Potenza: 660W
Tensione di rete: 230V ~ 50Hz
Tutela dell’ambiente
Gettare i materiali d’imballaggio, come la plastica e le scatole, negli appositi
contenitori.
Al termine del suo ciclo di utilizzo, non smaltire il prodotto assieme ai normali rifiuti
domestici, ma consegnarlo presso un punto di raccolta per il riciclaggio di
apparecchi elettrici ed elettronici. Prestare attenzione al simbolo presente sul prodotto,
sulle istruzioni per l’uso o sull’imballaggio.
I materiali possono essere riutilizzati come indicato. Collaborando al riciclaggio, al
riutilizzo dei materiali o ad altre forme di utilizzo di vecchie apparecchiature è possibile
fornire un importante contributo alla tutela dell’ambiente.
Rivolgersi al proprio comune per informazioni sul punto di raccolta più vicino.
Condizioni di garanzia
Di seguito sono riportate le condizioni alle quali l’importatore fornisce la garanzia per
il presente apparecchio per un periodo di 60 mesi a decorrere dalla data d’acquisto,
a copertura dei difetti di materiale e/o di fabbricazione.
1. Durante la validità di tale periodo di garanzia non verrà addebitato alcun costo
di manodopera o di materiale. Le riparazioni effettuate nel corso di validità della
garanzia non prolungano la durata della stessa.
2. Le parti difettose o, in caso di sostituzione (cambio), l’apparecchio difettoso
stesso divengono automaticamente proprietà dell’importatore.
3. Qualsiasi ricorso alla garanzia dovrà essere accompagnato dalla prova
d’acquisto dell’azienda rivenditrice.
4. I ricorsi alla garanzia devono essere eseguiti presso il rivenditore ove
l’apparecchio è stato acquistato o presso l’importatore.
5. La garanzia è valida esclusivamente per il primo acquirente e non è trasferibile.
6. La garanzia non si applica ai danni derivanti da:
a. incidenti, uso improprio, usura e/o negligenza;
b. erronea installazione e/o utilizzo in contrasto con le disposizioni normative,
tecniche o di sicurezza vigenti;
c. collegamento del prodotto a una tensione di rete diversa da quella indicata
nella targhetta di identificazione;
d. modifiche non autorizzate;
e. riparazioni eseguite da terzi;
f. trasporto eseguito in modo improprio privo dell’imballaggio o delle
protezioni idonee.
7. Le presenti condizioni di garanzia non si applicano inoltre in caso di:
a. perdite che si verificano durante il trasporto;
b. rimozione o modifica del numero di serie dell’apparecchio.
Macchina per pane - Istruzioni per l’uso
DBM400
IT v 090410-05 67
8. Sono esclusi dalla garanzia i cavi, le spie luminose, le lampade e i componenti
in vetro.
9. La garanzia non riconosce alcun diritto al risarcimento di eventuali danni al di là
della mera sostituzione o riparazione delle parti difettose. In nessun caso
l’importatore potrà essere ritenuto responsabile per eventuali danni
consequenziali o per conseguenze di altro tipo verificatesi a causa delle
apparecchiature da questi fornite o a esse correlate.
10. Per reclamare la garanzia, potete rivolgervi al vostro negoziante. Bestron offre
anche la possibilità di far riparare l’apparecchio direttamente dal Centro
assistenza Bestron. Tuttavia, non spedite mai l’apparecchio senza aver fatto le
dovute considerazioni. Il pacco può infatti essere respinto e le eventuali spese
sono a vostro carico. Contattate il Centro assistenza e vi diranno come
imballare e spedire l’apparecchio.
11. L’apparecchio non è concepito per l’uso professionale.
Servizio
Nel malaugurato caso di un guasto è possibile mettersi in contatto con il servizio clienti
BESTRON:
PAESI BASSI:
BESTRON NEDERLAND BV
BESTRON SERVICE
Moeskampweg, 20
NL-5222 AW ’s-Hertogenbosch
Tel: +31(0) 73 - 623 11 21
Fax: +31(0) 73 - 621 23 96
Indirizzo e-mail: info@bestron.com
Sito internet: www.bestron.com
Dichiarazione di conformità CE
Questo prodotto soddisfa i requisiti e le seguenti norme europee nel campo della
sicurezza:
Direttiva EMC 2004/108/EC
Direttiva sulla bassa tensione 2006/95/EC
R. Neyman
Controllo qualità
Macchina per pane - Istruzioni per l’uso
DBM400
IT v 090410-0568
Ricette
Unità di misura
ml: millilitro
g: gramm
oc: cucchiaino
C: cucchiaio
Ricetta base Ingredienti Unità
Peso: ca. 900 g
Timer: impostabile
Peso
Acqua
Farina di segale
Zucchero
Sale
Lievito in forma secca (polvere)
9
ml
g
C
c
g
900
400
610
1
2
10
Programma: 3 Aggiungere gli ingredienti nell’ordine
riportato più sopra.
Pane bianco Ingredienti Unità
Peso: 900 g
Timer: non impostabile a
causa dell’aggiunta di latte
Latte
Farina bianca
Burro (morbido)
Zucchero
Sale
Lievito in forma secca (polvere)
ml
g
g
c
c
g
290
570
35
1
2
8
Programma: 1 Aggiungere gli ingredienti nell’ordine
riportato più sopra.
Pane speziato Ingredienti Unità
Peso: ca. 900 g
Timer: impostabile
Acqua
Lievito naturale
Farina di segale
Zucchero
Sale
Pepe nero (macinato)
Miscela di spezie
Lievito in forma secca (polvere)
ml
g
g
c
C
c
g
g
360
90
360
1
1
1
23
6
Programma: 3 Aggiungere gli ingredienti nell’ordine
riportato più sopra.
Pane integrale Ingredienti Unità
Peso: ca. 900 g
Timer: impostabile
Acqua
Miele di abete
Farina integrale
Sale
Lievito in forma secca (polvere)
ml
C
g
c
g
315
590
2
10
Programma: 3 Aggiungere gli ingredienti nell’ordine
riportato più sopra.
Macchina per pane - Istruzioni per l’uso
DBM400
IT v 090410-05 69
Pane al prosciutto Ingredienti Unità
Peso: ca. 900 g
Timer: impostabile
Acqua
Lievito naturale
Farina di segale
Farina bianca
Zucchero
Sale
Lievito in forma secca (polvere)
Da aggiungere dopo l’emissione
del segnale acustico:
prosciutto tagliato a cubetti
ml
g
g
g
c
c
g
g
325
120
300
30
1
1
8
160
Programma: 3 Aggiungere gli ingredienti nell’ordine
riportato più sopra.
Pane ai tre cereali Ingredienti Unità
Peso: ca. 900 g
Timer: non impostabile a
causa dell’aggiunta di latte
e di uova
Latte
Latte acido denso
Uova
Margarina o burro
Farina bianca
Sale speziato
Lievito in forma secca (polvere)
Da aggiungere dopo l’emissione
del segnale acustico:
Semi di lino
Germe di grano
Semi di girasole
ml
C
pz
g
g
c
g
g
g
g
900
1
45
450
3
6
23
45
23
Programma: 3 Nota: invece dei germi di grano è possibile
utilizzare semi di sesamo o di zucca.
Pane alle cipolle Ingredienti Unità
Peso: ca. 900 g
Timer: impostabile
Acqua
Olio di semi di girasole
Farina bianca
Zucchero
Sale speziato
Cipolle arrostite
Lievito in forma secca (polvere)
ml
C
g
c
c
g
g
290
2
570
1
3
70
8
Programma: 1 Aggiungere gli ingredienti nell’ordine
riportato più sopra.
Macchina per pane - Istruzioni per l’uso
DBM400
IT v 090410-0570
Pane alla birra Ingredienti Unità
Peso: ca. 900 g
Timer: non consigliabile
Acqua
Birra
Lievito naturale (in forma liquida)
Sciroppo di malto
Farina bianca
Farina di grano saraceno
Crusca
Semi di sesamo
Sale
Lievito in forma secca (polvere)
ml
ml
ml
C
g
C
C
C
c
g
135
135
135
1½
490
3
3
2
6
Programma: 1 Aggiungere gli ingredienti nell’ordine
riportato più sopra.
Pane all’uvetta e alla cannella Ingredienti Unità
Peso: ca. 900 g
Timer: non impostabile
Latte
Burro ammorbidito
Farina bianca
Zucchero
Sale
Cannella
Lievito in forma secca (polvere)
Da aggiungere dopo
l’emissione del segnale
acustico:
uva passa
ml
g
g
g
TL
TL
g
g
240
30
430
60
1
8
70
Programma: 1 Suggerimento: Sciacquare l’uva passa in
acqua calda e spolverizzarla quindi con
la farina prima di aggiungerla all’impasto.
Ciò serve a evitare che l’uva passa si
depositi sul fondo.
Pane mandorlato alle
albicocche
Ingredienti Unità
Peso: ca. 900 g
Timer: non impostabile
Latte
Burro ammorbidito
Uova
Farina bianca
Zucchero
Sale
Lievito in forma secca (polvere)
Da aggiungere dopo l’emissione
del segnale acustico:
albicocche (secche o tagliate
finemente)
mandorle (sminuzzate)
ml
g
pc
g
g
c
g
g
g
180
55
1
540
70
½
8
45
45
Programma: 4 Aggiungere gli ingredienti nell’ordine
riportato più sopra.
Manual del usuario - Panera automática
DBM400
ES v 090410-05 71
Panera automático DBM400
Felicitaciones por la compra de esta panera automática. Puede ajustar el inicio del
proceso de horneado mediante un temporizador para que el pan esté listo en el
momento en que usted lo desee y su casa se llene con ese delicioso olor a pan recién
horneado.
Normas de seguridad
Generalidades
Lea las instrucciones de uso con detenimiento y guárdelas cuidadosamente.
Utilice este aparato únicamente en la forma que se describe en las instrucciones.
Este aparato no puede ser utilizado por niños ni por personas que, debido a
alguna limitación física, sensorial o mental, o por falta de experiencia y
conocimientos, no puedan manejarlo de forma suficientemente segura, a menos
que hayan recibido instrucciones sobre el uso del aparato de una persona que se
haga responsable de su seguridad.
Es preciso vigilar que los niños no jueguen con el aparato.
Haga reparar el aparato únicamente por personal cualificado. No intente nunca
repararlo usted mismo.
Electricidad y fuentes de calor
Antes de utilizar el aparato, verifique que el voltaje de la red corresponda al
voltaje indicado en la placa.
Conecte siempre el aparato a una toma con conexión a tierra.
Desconecte siempre el aparato cuando no lo vaya a utilizar.
Al retirar el enchufe de la toma de corriente, asegúrese de tirar del enchufe y no
del cable.
Verifique regularmente que el cable del aparato esté en buenas condiciones.
No utilice el aparato si observa que el cable está dañado. Haga sustituir el cable
deteriorado por personal de servicio cualificado.
Si usa un cable de extensión, asegúrese de que está desenrollado
completamente.
Use únicamente un cable de extensión aprobado.
Es indispensable que el aparato pueda liberar el calor que produce para evitar
riesgos de incendio. Asegúrese de que el aparato esté completamente libre y de
que no haga contacto con materiales inflamables.
Procure que ni el aparato, ni el cable, ni el enchufe estén en contacto con fuentes
de calor, por ejemplo, con una placa caliente de la estufa o una llama.
Asegúrese de que ni la parte interior del aparato, ni el cable, ni el enchufe estén
en contacto con el agua.
Uso
No use nunca este aparato fuera del hogar.
No utilice nunca el aparato en lugares húmedos.
Coloque el aparato sobre una superficie plana y estable, en un lugar donde no
pueda caerse.
No deje que el cable quede colgando por el borde del fregadero, la encimera, o
una mesa.
Asegúrese de que tiene las manos secas cuando toque el aparato, el cable o el
enchufe.
Apague el aparato y retire el enchufe de la toma de corriente si se presentan
fallos durante el uso, cuando quiera limpiarlo, o después de usarlo.
No sumerja nunca el aparato, el enchufe, ni el cable en agua o en otro líquido.
No sumerja nunca la unidad, el enchufe, ni el cable en agua o en otro líquido.
Manual del usuario - Panera automática
DBM400
ES v 090410-0572
ATENCIÓN
No toque el aparato si éste ha caído en el agua. Retire inmediatamente el enchufe de
la toma de corriente. No vuelva a utilizar el aparato.
Introducción
El olor del pan fresco, horneado en casa, es una experiencia inolvidable. El pan
caliente, recién horneado, es una verdadera delicia. Disfrute diariamente de su Panera
automática Bestron DBM400. Con la panera automática usted disfrutará todos los días
de este gran placer sin que le cueste el más mínimo trabajo. La panera está equipada
con un pequeño ordenador que lo hace todo por usted.
Puede preparar toda clase de recetas para panes especiales. Además, puede hacer
mermelada y masa para panecillos, pizzas y tartas. Es muy fácil y el resultado tiene el
mismo sabor del producto fabricado artesanalmente.
Uso por primera vez
Antes de usar la panera automática por primera vez, dedique un poco de tiempo
a estudiar las instrucciones de uso. Preste especial atención a las siguientes
recomendaciones.
1. Saque cuidadosamente la panera automática de la caja y retire todos los
materiales de embalaje.
2. Limpie el polvo que hubiera podido acumularse durante el proceso de embalaje.
3. Limpie la panera con un paño húmedo. Tenga en cuenta que los molde están
provistos de una película antiadherente. No use productos abrasivos.
4. Engrase los molde con aceite o margarina antes de usarlos por primera vez.
5. Coloque el molde en el aparato, sin las paleta de amasar, y póngalo a funcionar
de 3 a 5 minutos sin ningún contenido. (Para ello, utilice el programa de
horneado, vea las indicaciones en la descripción del programa.)
6. Deje enfriar el aparato y repita el proceso de limpieza.
7. Coloque el molde en que desea hornear el pan.
8. Engrase un poco los eje con mantequilla de hornear o aceite y coloque las paleta
de amasar en los ejes de impulsión.
El proceso de producción de este aparato exige la lubricación de algunos
componentes; por eso, es posible que produzca un poco de humo la primera vez que
lo use. Esta situación es completamente normal.
Manual del usuario - Panera automática
DBM400
ES v 090410-05 73
Informatión sobre la primera eléctrica DBM400
Con esta panera eléctrica puede usted hornear panecillo de aprox. 900 g (la
información sobre el peso depende de la receta que vaya a preparar).
Partes del aparato
Figura 1 Partes del aparato
Panel de mando
Figura 2 Panel de mando
14. Menú de programas
15. Pantalla LED
16. Botón SÉLECTION/SELECTIE
17. Botón MINUTERIE/TIMER
18. Botón color de la corteza
19. Botón MARCHE-ARRÊT/START-STOP
1. Visor
2. Tapa
3. Asa
4. Eje de impulsión
5. Paleta de amasado
6. Molde
7. Abertura para ventilación
8. Hendidura para abrir la tapa
9. Carcasa
10. Panel de operación
11. Cable y enchufe
12. Medidor para agua y harina
13. Cucharilla medidora para sal y
levadura
11.
1.
10.
9.
7.
2.
8.
12.
6.
5.
4.
3.
13.
15.
18.
19.
16.
17.
14.
Manual del usuario - Panera automática
DBM400
ES v 090410-0574
Pantalla y funciones, panel de operación
Pantalla:
indica el grado de consistencia seleccionado de la corteza del pan
indica el programa seleccionado
indica el tiempo que falta para terminar el horneado
indica un aviso de alarma por temperatura (ver capítulo sobre solución de
problemas).
Botón “Sélection/selectie” (16): Para elegir el menú de programas.
Botón “Couleur croûte/korst kleur” (18): para seleccionar el color de la corteza (ligero,
medio, oscuro)
Botón “Minuterie/timer” (17): para programar el inicio del horneado en un momento
posterior (parámetro para los programas base, francés, integral, dulces y rápido).
Botón “Marche-arrêt/start-stop” (19): Pulse el botón Inicio durante al menos 1 segundo
consecutivo. Escuchará una señal acústica y en la pantalla parpadeará un doble
punto; el programa se pondrá en marcha. Pulse el botón Parada durante al menos 1
segundo consecutivo. Escuchará una señal acústica y el doble punto de la pantalla
dejará de parpadear.
Descripciones de los programas (14)
Base/basis (Pan blanco o integral) (3:00)
Para pan blanco e integral. Además, para panes con especias y pasas.
Super rapide/snel (Programa de horneado súper rápido) (0:58)
Para hornear panes en un tiempo muy corto. Los panes horneados con este programa
pueden ser duros y compactos. El agua debe tener una temperatura entre a 35 y
45°C.
Français/frans (Pan francés) ( 3:50)
Para hornear pan ligero y crocante como, por ejemplo, pan francés. La fermentación
de este pan debe ser más larga, el tiempo de preparación es también más largo que el
los demás programas.
Complet/volkoren (Pan integral) (3:40)
Para hornear pan integral con gran contenido de harina de sémola. Este programa
tiene un tiempo de precalentado más largo para asimilar mejor el agua y permitir
que la masa crezca más. Durante esta pausa, de 15 minutos, la paleta de amasar
no funcionan. No se recomienda tampoco programar un tiempo de horneado con
antelación. Esto puede producir resultados indeseados.
Brioché/zoet (Panes dulces) (2:50)
Para hornear panes dulces con corteza crocante. Ésta se forma por el fuerte
calentamiento del azúcar.
Rapide/snel (Programa de horneado rápido) (1:34)
Para hornear panes en un menor tiempo. Los panes horneados con este programa
pueden tener una estructura más húmeda y compacta. El agua debe tener una
temperatura entre 35 y 45°.
Pâte/deeg (Masa) (1:20)
Para amasar distintos tipos de masa. No use la función de horneado. Saque la masa
del aparato y moldéela para hacer pizzas o panecillos. No prepare más de 900g de
masa en una sola vez.
Manual del usuario - Panera automática
DBM400
ES v 090410-05 75
Cuisson/bakken (Hornear)
Esta opción se puede usar para calentar únicamente o para aumentar el tiempo
de horneado y se emplea, entre otros, para hacer mermelada. Al seleccionar este
programa la prolongación mínima del tiempo es de 10 minutos (0:10). La reducción del
tiempo se visualiza en intervalos de 1 minuto. Para suspender el proceso de horneado
antes de tiempo use el botón Parada (Stop). El proceso de horneado se puede
aumentar en intervalos de 10 minutos por un máximo de 1 hora. Para hacerlo, pulse el
botón y, a continuación, el botón Start (Inicio).
Programar horneado
1. Elija la hora en que debe estar listo el pan y calcule la diferencia de tiempo entre
la hora actual y la hora deseada (por ejemplo: usted desea tener listo el pan a las
08:00 horas y en este momento son las 21:00 horas, la diferencia es de 11 horas).
El tiempo de preparación está incluido en la postergación de la hora: si la
preparación de un pan dura 3 horas y usted desea desayunar a las 8:00, la
panera automática iniciará el programa a las 5:00 horas.
2. Ingrese la hora con el botóns
. El tiempo se ajusta en intervalos de 10
minutos y puede postergarse hasta un máximo de 13 horas. Pulse y sostenga
pulsado el botón para que el tiempo pase más rápido.
3. La hora final es siempre la hora en que el pan debe quedar horneado.
Funcionamiento de la panera automática
Nota ¡ El peso exacto de los ingredientes es de vital importancia!
Para obtener un producto de buena calidad, es importante que se ciña a las
cantidades y pesos indicados. Use para ello los medidores adjuntos.
Nota ¡ Asegúrese de usar la cantidad de levadura correcta!
Si el volumen de la masa en el aparato aumenta y vuelve a asentarse
inmediatamente, entonces la probable causa de la cantidad de levadura. Intente un
nuevo pan para hornear con la cantidad de levadura.
Hornear un pan
1. Retirar el molde de horneado.
Abra la tapa, levante la agarradera y saque el molde de la panera. Es importante
verter los ingredientes en el molde fuera de la panera para evitar que éstos entren
en contacto con el motor o con otros componentes.
Proceso
amasar
1
(min)
fermentar
1
(min)
amasar
2
(min)
fermentar
2
(min)
pausa
(seg.)
fermentar
3
(min)
hornear
(min)
tiempo
total
tiempo
señal
Programa
1 Base/basis 10 20 15 20 30 55 60 3:00 2:25
2 Super rapide/
snel
13 10 35 0:58 0:57
3 Français/frans 18 40 22 20 30 60 70 3:50 2:47
4
Complet/volkoren
10 25 20 30 30 70 65 3:40 3:00
5 Brioché/zoet 10 5 20 30 30 57 48 2:50 2:30
6 Rapide/snel 14 5 75 1:34
7 Pâte/deeg 7 5 18 50 1:20
8 Cuisson/
bakken
10 min. a 1 hora
Manual del usuario - Panera automática
DBM400
ES v 090410-0576
2. Colocar la paleta de amasar
La paleta se fijan fácilmente en eje. Engrase un poco los eje con mantequilla de
hornear de manera que pueda desprender las paletas fácilmente después.
3. Medir/pesar los ingredientes
Mida todos los ingredientes exactamente como lo dice la receta y viértalos en el
molde siguiendo el orden indicado:
1. Vierta agua o leche en el fondo del molde. Use agua o leche tibia ( 21-28°C).
2. Añada cuidadosamente la sal, el azúcar y la harina/mezcla para pan.
3.
Haga un hoyito en la harina y vierta allí un poco de levadura o polvo de hornear.
ATENCIÓN
Asegúrese de que la levadura no entre en contacto con agua. De
ocurrir, el proceso de fermentación se iniciará inmediatamente.
Si su receta contiene ingredientes que no se deben moler, agréguelos en un
momento posterior, por ejemplo, al finalizar el segundo proceso de amasado.
Cuando casi ha terminado de amasar por segunda vez, el aparato emite una
señal acústica indicando que es el momento de añadir los ingredientes a la masa.
4. Insertar el molde de horneado
Vuelva a colocar firmemente el molde en su lugar. Escuchará un ‘clic’ que indica
que el molde está en la posición correcta.
5. Introduzca el enchufe en la toma de corriente.
La pantalla en la parte superior del aparato se ilumina. Automáticamente aparece
en la pantalla el primer menú y el tiempo normal. Cada vez que usted pulse un
botón, escuchará una señal acústica.
6. Seleccionar el menú
Elija un programa pulsando el botón “Sélection/selectie” (16).
7. Color del pan
Pulse este botón (18) para elegir el color de la corteza del pan o para seleccionar
el proceso de horneado rápido.
8. Programar inicio de horneado con antelación
Si desea tener pan recién horneado para su desayuno, programe la hora de inicio
del horneado tal como se describe en el siguiente capítulo.
9. Inicio (19)
Encienda la panera automática pulsando el botón Start/Stop . El programa se
pone en marcha y en la pantalla aparece el tiempo restante. El doble punto de la
cifra que indica la hora parpadea indicando que el programa está en marcha.
10. Pasos del programa
La panera automática sigue ahora, en forma automática, todos los pasos del
programa elegido previamente por usted. En la pantalla puede ver que paso del
programa está ejecutando el aparato. Durante el proceso de horneado puede salir
vapor por los orificios de ventilación. Esta situación es completamente normal.
11. Fin de programaUna vez que el programa ha terminado, aparece 0:00 en la
pantalla y se escucha una señal acústica. Seguidamente, se visualiza en la
pantalla el tiempo original del programa.
Manual del usuario - Panera automática
DBM400
ES v 090410-05 77
12. Mantener calientes el productoCuando se elige esta función, circula aire caliente
en el espacio de horneado durante aproximadamente 1 hora. Esto aplica para la
mayoría de los programas. Para obtener el mejor resultado debe retirar el molde
de la panera en el lapso de tiempo indicado. Cuando la función de mantener
caliente el producto ha terminado, se escucha una señal acústica. Pulse el botón
Start/Stop para desactivar la función.
13. Sacar los productos de la panera
Pulse el botón Start/Stop y retire el molde de la panera.
ATENCIÓN
Use siempre guantes para hornear al abrir la tapa y hacer contacto con el molde
de horneado.
14. Sacar el pan del molde.
Deje enfriar primero el pan durante unos 5 a 10 minutos en el molde y,
seguidamente, colóquelo sobre una rejilla. Si la paleta de amasar aún están en el
molde, llénelo con agua caliente y déjelas remojar un rato antes de sacarlas. Por
lo general, la paleta de amasar salen junto con el pan. Después de que el pan se
haya enfriado completamente, retire la paleta de amasado con la ayuda de un
utensilio que no dañe la película antiadherente (una cuchara o una espátula de
palo, por ejemplo).
15. Después de cada uso pulse el botón de Start/Stop y retire el enchufe de la toma
de corriente.
Procure no abrir nunca la tapa de la panera mientras está en funcionamiento
un programa. Esto puede influir en la calidad del pan. Si tiene que abrir la tapa
para añadir ingredientes, hágalo de prisa de manera que la temperatura en la
panera no disminuya demasiado.
Señal acústica
La señal acústica se escucha:
al pulsar cualquier botón;•cuando ha finalizado un programa;
cuando ha finalizado la función de mantener caliente el producto;
durante la segunda fase de amasado en algunos programas para recordarle que
aún debe añadir algunos ingredientes (nueces, chocolate, etc.).
Corte o caída del fluido eléctrico
Tras un corte del fluido eléctrico por un tiempo máximo de 10 minutos, la panera
continuará funcionando automáticamente.
Si el corte se produce por un período más largo, la pantalla regresa al tiempo de
inicio original del programa en cuestión y usted debe poner en marcha nuevamente la
panera.
Guardar y cortar el pan
Para poder cortar el pan adecuadamente debe dejarlo enfriar, como mínimo, durante
20 a 40 minutos. Use, de preferencia, un cuchillo eléctrico afilado o un cuchillo
especial para cortar el pan.
Puesto que el pan fresco, horneado por usted, no lleva preservativos, no puede
guardarlo por largo tiempo; a temperatura ambiente su conservabilidad es de 3 días
aproximadamente. Si desea conservar el pan por un mayor tiempo, puede congelarlo.
Manual del usuario - Panera automática
DBM400
ES v 090410-0578
Solución de problemas
Problema Causa Solución
La corteza del pan es
demasiado gruesa.
El pan se ha mantenido
caliente durante mucho
tiempo y por eso ha
perdido humedad.
Saque el pan del molde
más rápidamente
después de concluir el
tiempo de horneado.
Los ingredientes no se
han mezclado u horneado
bien.
No ha elegido el
programa correcto.
Elija el programa
adecuado según el tipo
de pan.
La masa es muy gruesa
y no ha podido mezclarse
bien.
Añada líquido suficiente.
El texto E:01 aparece en
la pantalla.
La temperatura en la
panera es demasiado
alta.
Pulse el botón Start/
Stop para interrumpir el
programa y abra la tapa
para que se enfríe el
contenido.
El motor emite un ruido
pero no se amasa la
mezcla.
El molde no está bien
colocado o la masa es
demasiado gruesa para
amasarla.
Verifique que el molde
esté bien colocado y pese
siempre cuidadosamente
los ingredientes de la
masa.
El pan es demasiado
pequeño.
No ha añadido levadura,
o ésta no ha actuado lo
suficiente.
Asegúrese de que las
condiciones del ambiente
son óptimas para la
levadura.
La masa crece hasta
salirse del molde.
Demasiado líquido y/o
levadura.
Reduzca la cantidad de
líquido y/o levadura.
El pan se asienta durante
el horneado.
El exceso de agua o
de levadura ablandan
demasiado la masa.
Reduzca la cantidad de
líquido y/o levadura.
Al cortar el pan resulta
que el centro está hueco.
Ha usado demasiada
agua y/o levadura, no ha
usado sal.
Reduzca la cantidad de
líquido y/o levadura y
añada más sal.
Ha quedado polvo en el
molde.
Ha usado muy poca
agua.
Use más agua.
Manual del usuario - Panera automática
DBM400
ES v 090410-05 79
Limpieza y mantenimiento
ATENCIÓN
Retire el enchufe de la toma de pared siempre que vaya a limpiar el aparato.
Espere a que la panera se haya enfriado completamente.
¡IMPORTANTE! No pulverice nunca la tapa ni la carcasa con agua u otros
líquidos, ni las sumerja en ellos.
Limpie la parte exterior de la panera únicamente con un paño húmedo.
Las manchas en el interior de la tapa o en los orificios de ventilación son tan
sólo señas externas y se producen durante el proceso de horneado. Éstas no
tienen ninguna influencia sobre el funcionamiento del aparato. Limpie estas
manchas después de cada uso con un paño húmedo y un poco de detergente
líquido.
Limpie la parte interior de la panera únicamente con un paño húmedo.
Para separar la tapa del aparato, deslícela de la ranura de sujeción y tire hacia
arriba (ver gráfica).
Para volver a colocar la tapa, proceda en la forma contraria.
Figura 3
Use únicamente agua caliente para limpiar el molde de horneado. Evite rasguños
en la película antiadherente.
Verifique que la panera automática se haya enfriado completamente antes de
guardarla.
ATENCIÓN
No usa Nunca los siguientes productos para efectuar la limpieza:
Disolventes.
Gasolina para limpiar o gasolina corriente.
Estropajos.
Productos para pulir.
Paños limpiadores impregnados con productos químicos.
Cuidado especial de la pelicula antiadherente
Evite daños o rasguños en la película antiadherente. No use nunca objetos con
filo como espátulas metálicas, cuchillos o tenedores. La película puede cambiar de
color con el paso del tiempo. Esto se debe a que está sometida frecuente al calor
y a la humedad. Esto no influye en la calidad del pan, ni de la panera automática.
Es necesario limpiar frecuentemente el orificio que traen las paletas de amasado y
lubricarlas con una gota de aceite de cocina. De esta forma se evita que las paletas se
peguen a los ejes. Mantenga los orificios de ventilación libres de polvo.
Guardar la panera automática
Asegúrese de que todos los componentes están secos. Verifique que no haya
quedado humedad en el aparato. Cierre la tapa y asegúrese de no colocar otros
objetos sobre ella.
Manual del usuario - Panera automática
DBM400
ES v 090410-0580
Ficha técnica
Tipo: DBM400
Potencia: 660W
Tensión de la red: 230V ~ 50Hz
Medio ambiente
Tire el material de embalaje, como plástico y cajas, en los contenedores destinados
para ello.
No tire este producto al final de su vida útil con los residuos domésticos normales, en
su lugar llévelo a un centro de recolección para reutilización de aparatos eléctricos
y electrónicos. Tenga en cuenta el símbolo que aparece en el aparato, el manual de
instrucciones o el embalaje.
Los materiales pueden reutilizarse como se ha indicado. Su ayuda para reutilización,
procesamiento de materiales u otras formas de utilización de aparatos viejos es una
contribución importante a la conservación de nuestro medio ambiente.
Infórmese con las autoridades sobre los puntos de recolección en su localidad.
Disposiciones de garantía
Bajo las siguientes condiciones, y durante un período de 60 meses contado a partir
de la fecha de compra, el importador otorgará garantía de este aparato por defectos
ocasionados por deficiencias en la fabricación o en los materiales.
1. Durante el período de garantía mencionado no se cobrarán los costes de la
mano de obra ni el material. Una reparación que tenga lugar durante el período
de garantía no prolonga dicho período.
2. En caso de reemplazo, las piezas defectuosas o los aparatos defectuosos
mismos pasarán automáticamente a propiedad del importador.
3. Toda reclamación por garantía deberá ir acompañada de la factura de compra
de la empresa.
4. Toda reclamación por garantía deberá hacerse al distribuidor donde ha sido
comprado el aparato o al importador.
5. La garantía es válida únicamente para el comprador y no es susceptible de
transferencia.
6. La garantía no cubre los daños ocasionados por:
a. accidentes, mala utilización, desgaste y/o descuido;
b. mala instalación y/o uso en contradicción con las normas técnicas o de
seguridad legales vigentes;
c. conexión a una red eléctrica cuyo voltaje no corresponde al voltaje
indicado en la placa;
d. una modificación no autorizada;
e. una reparación ejecutada por terceros;
f. negligencia en el transporte del aparato sin el embalaje o protección
adecuados.
7. No podrá apelarse a estas disposiciones de garantía en los siguientes casos:
a. pérdida ocurrida durante el transporte;
b. remoción o modificación del número de serie del aparato.
8. La garantía no cubre los cables, las bombillas, ni las partes de cristal.
9. La garantía no concede derecho a reclamar indemnización alguna por daños,
diferente a la sustitución o reparación, respectivamente, de las partes
defectuosas. El importador no podrá ser responsabilizado por daños
consecuenciales o por cualquier otra clase de efectos causados por el aparato
suministrado por él o que guarden relación con el mismo.
Manual del usuario - Panera automática
DBM400
ES v 090410-05 81
10. Para hacer valer la garantía. Puede acudir a la tienda donde compró el
producto. Bestron también ofrece la posibilidad de entregar el aparato
directamente al servicio técnico Bestron para su reparación. Pero no podrá
enviarlo de cualquier manera. El paquete podría ser rechazado y los costes
asociados correrían de su cuenta. Póngase en contacto con el servicio técnico,
donde le indicarán cómo debe embalar y enviar el aparato.
11. Este aparato no es apto para uso profesional.
Servicio
Si se presenta un fallo inesperado, puede ponerse en contacto con el departamento
de servicios de BESTRON:
PAÍSES BAJOS :
BESTRON NEDERLAND BV
BESTRON SERVICE
Moeskampweg 20
5222 AW ’s-Hertogenbosch
Tel: +31(0) 73 - 623 11 21
Fax: +31(0) 73 - 621 23 96
Correo electrónico: info@bestron.com
Internet: www.bestron.com
Certificación de conformidad (CE)
Este producto satisface las disposiciones de las siguientes directivas de la Unión
Europea en el marco de la seguridad:
Directiva de compatibilidad electromagnética 2004/108/EC
Directiva de bajo voltaje 2006/95/EC
R. Neyman
Control de calidad
Manual del usuario - Panera automática
DBM400
ES v 090410-0582
Recetas
Unidades de medida
ml: mililitro
g: gramo
ctda.: cucharadita
cda.: cucharada
Receta básica Ingredientes: Medida
Peso: aprox. 900 g
Ajuste de tiempo: posible
Peso
Agua
Harina de centeno
Azúcar
Sal
Levadura seca
9
ml
g
cda
cdta
g
900
400
610
1
2
10
Programa: 3 Añada los ingredientes en el orden
indicado arriba.
Pan blanco Ingredientes: Medida
Peso: 900 g
Ajuste de tiempo: no es posible
debido a la adición de leche
Leche
Harina blanca
Mantequilla (blanda)
Azúcar
Sal
Levadura seca
ml
g
g
cdta
cdta
g
290
570
35
1
2
8
Programa: 1 Añada los ingredientes en el orden
indicado arriba.
Pan de especias Ingredientes: Medida
Peso: aprox. 900 g
Ajuste de tiempo: posible
Agua
Levadura
Harina de centeno
Azúcar
Sal
Pimienta negra (molida)
Mezcla de especias
Levadura seca
ml
g
g
cdta
cda
cdta
g
g
360
90
360
1
1
1
23
6
Programa: 3 Añada los ingredientes en el orden indicado
arriba.
Pan integral Ingredientes: Medida
Peso: aprox. 900 g
Ajuste de tiempo: posible
Agua
Miel de pino
Harina integral
Sal
Levadura seca
ml
cda
g
cdta
g
315
590
2
10
Programa: 3 Añada los ingredientes en el orden
indicado arriba.
Manual del usuario - Panera automática
DBM400
ES v 090410-05 83
Pan salado con jamón Ingredientes: Medida
Peso: aprox. 900 g
Ajuste de tiempo: posible
Agua
Levadura
Harina de centeno
Harina blanca
Azúcar
Sal
Levadura seca
Añadir después de la señal
acústica:
Jamón en bloquecitos
ml
g
g
g
cdta
cdta
g
g
325
120
300
30
1
1
8
160
Programa: 3 Añada los ingredientes en el orden
indicado arriba.
Pan tres cereales Ingredientes: Medida
Peso: aprox. 900 g
Ajuste de tiempo: no es posible
debido a la adición de leche y
huevo
Leche
Leche agria espesa
Huevo
Mantequilla o margarina
Harina blanca
Sal de especias
Levadura seca
Añadir después de la señal
acústica:
Linaza
Trigo en grano
Semillas de girasol
ml
cda
troz
g
g
cdta
g
g
g
g
900
1
45
450
3
6
23
45
23
Programa: 3 Nota: En lugar de trigo en grano puede
usar también ajonjolí o semilla de
calabaza.
Pan de cebolla Ingredientes: Medida
Peso: aprox. 900 g
Ajuste de tiempo: posible
Agua
Aceite de girasol
Harina blanca
Azúcar
Sal de especias
Cebolla tostada
Levadura seca
ml
cda
g
cdta
cdta
g
g
290
2
570
1
3
70
8
Programa: 1 Añada los ingredientes en el orden
indicado arriba.
Manual del usuario - Panera automática
DBM400
ES v 090410-0584
Pan de cerveza Ingredientes: Medida
Peso: aprox. 900 g
Ajuste de tiempo: no se aconseja
Agua
Cerveza
Levadura (líquida)
Jarabe de malta
Harina blanca
Trigo sarraceno
Salvados
Ajonjolí
Sal
Levadura seca
ml
ml
ml
cda
g
cda
cda
cda
cdta
g
135
135
135
1½
490
3
3
2
6
Programa: 1 Añada los ingredientes en el orden
indicado arriba.
Pan de pasas con canela Ingredientes: Medida
Peso: aprox. 900 g
Ajuste de tiempo: no es posible
Leche
Mantequilla blanda
Harina blanca
Azúcar
Sal
Canela
Levadura seca
Añadir después de la señal
acústica:
Pasas
ml
g
g
g
cdta
cdta
g
g
240
30
430
60
1
8
70
Programa: 1 Consejo: Lave las pasas con agua
caliente y espolvoréelas después con
harina antes de incorporarlas a la
masa. Esto para evitar que todas las
pasas se vayan al fondo.
Pan de almendras y
albaricoque
Ingredientes: Medida
Peso: aprox. 900 g
Ajuste de tiempo: no es posible
Leche
Mantequilla blanda
Huevo
Harina blanca
Azúcar
Sal
Levadura seca
Añadir después de la señal
acústica:
Albaricoque (deshidratado/
picado finamente)
Almendras (picadas
finamente)
ml
g
troz
g
g
cdta
g
g
g
180
55
1
540
70
½
8
45
45
Programa: 4 Añada los ingredientes en el orden
indicado arriba.
DBM400
v 090410-05
75

Hulp nodig? Stel uw vraag in het forum

Spelregels
1

Forum

Bestron-dbm-400
  • goedemorgen, ik wil de kneedhaak voor het bakken eruit halen, maar wanneer is het kneden eigenlijk klaar? Gesteld op 19-12-2024 om 09:34

    Reageer op deze vraag Misbruik melden
  • Mijn broodbakmachine geeft de letters LLL aan en doet verder niets. Wat betekenen deze letters? Gesteld op 2-1-2024 om 14:51

    Reageer op deze vraag Misbruik melden
  • Hallo, ik ben de kneedhaak van mijn Bestron DBM 400 kwijt. Heeft iemand een tip waar een nieuwe te bestellen of welk model ook past. Ik zie namelijk wel losse onderdelen maar niet voor dit model. Gesteld op 11-6-2021 om 01:18

    Reageer op deze vraag Misbruik melden
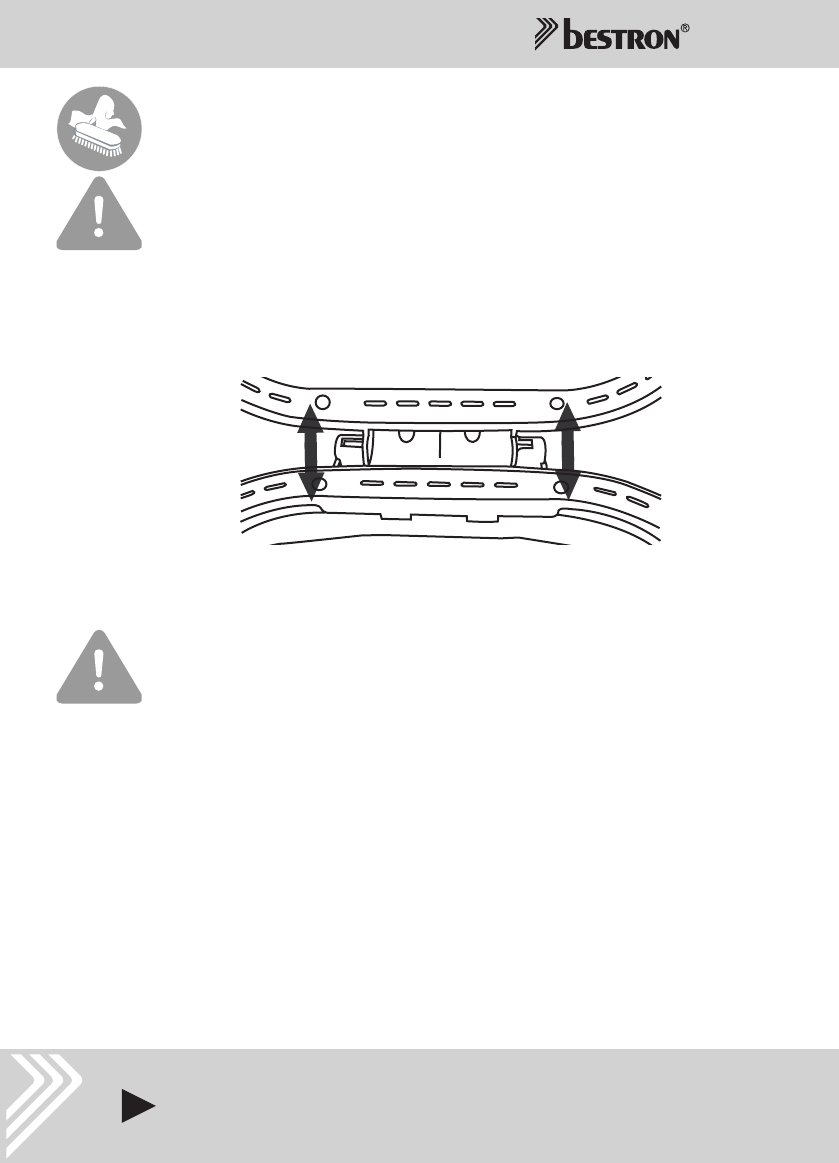
  • De bak lekt. Het pinnetje waarop de deeghaak wordt gezet kan er valt er uit.
    Hoe los ik dit op?
    Gesteld op 30-4-2021 om 16:39

    Reageer op deze vraag Misbruik melden
  • DBM398A is die nog repareerbaar en/of handleiding voorhanden Gesteld op 14-1-2021 om 20:35

    Reageer op deze vraag Misbruik melden
  • Net een bestron dbm 400 gekocht. Deksel sluit niet goed af, aan de rechter kant blijft er een kiertje van ca. 3 mm waardoor hete lucht ontsnapt. Wilde dit proberen te verhelpen door de deksel eruit te halen, maar dit lukt niet. Hoe kan ik dit oplossen? Is dit van invloed op het resultaat? Gesteld op 4-3-2014 om 14:26

    Reageer op deze vraag Misbruik melden
    • Ik heb precies hetzelfde probleem bij mijn nieuwe Bestron 4000. Is er een antwoord mogelijk op deze vraag?
      Marjolein65@hotmail.nl Geantwoord op 18-12-2014 om 16:53

      Waardeer dit antwoord Misbruik melden
6

Misbruik melden

Gebruikershandleiding.com neemt misbruik van zijn services uitermate serieus. U kunt hieronder aangeven waarom deze vraag ongepast is. Wij controleren de vraag en zonodig wordt deze verwijderd.

Product:

Bijvoorbeeld antisemitische inhoud, racistische inhoud, of materiaal dat gewelddadige fysieke handelingen tot gevolg kan hebben.

Bijvoorbeeld een creditcardnummer, een persoonlijk identificatienummer, of een geheim adres. E-mailadressen en volledige namen worden niet als privégegevens beschouwd.

Spelregels forum

Om tot zinvolle vragen te komen hanteren wij de volgende spelregels:

Belangrijk! Als er een antwoord wordt gegeven op uw vraag, dan is het voor de gever van het antwoord nuttig om te weten als u er wel (of niet) mee geholpen bent! Wij vragen u dus ook te reageren op een antwoord.

Belangrijk! Antwoorden worden ook per e-mail naar abonnees gestuurd. Laat uw emailadres achter op deze site, zodat u op de hoogte blijft. U krijgt dan ook andere vragen en antwoorden te zien.

Abonneren

Abonneer u voor het ontvangen van emails voor uw Bestron dbm 400 bij:


U ontvangt een email met instructies om u voor één of beide opties in te schrijven.


Ontvang uw handleiding per email

Vul uw emailadres in en ontvang de handleiding van Bestron dbm 400 in de taal/talen: Nederlands als bijlage per email.

De handleiding is 3,46 mb groot.


U ontvangt de handleiding per email binnen enkele minuten. Als u geen email heeft ontvangen, dan heeft u waarschijnlijk een verkeerd emailadres ingevuld of is uw mailbox te vol. Daarnaast kan het zijn dat uw internetprovider een maximum heeft aan de grootte per email. Omdat hier een handleiding wordt meegestuurd, kan het voorkomen dat de email groter is dan toegestaan bij uw provider.

Stel vragen via chat aan uw handleiding

Stel uw vraag over deze PDF

Andere handleiding(en) van Bestron dbm 400

Bestron dbm 400 Gebruiksaanwijzing - Nederlands, Deutsch, English, Français, Italiano, Espanõl - 68 pagina's


Uw handleiding is per email verstuurd. Controleer uw email

Als u niet binnen een kwartier uw email met handleiding ontvangen heeft, kan het zijn dat u een verkeerd emailadres heeft ingevuld of dat uw emailprovider een maximum grootte per email heeft ingesteld die kleiner is dan de grootte van de handleiding.

Er is een email naar u verstuurd om uw inschrijving definitief te maken.

Controleer uw email en volg de aanwijzingen op om uw inschrijving definitief te maken

U heeft geen emailadres opgegeven

Als u de handleiding per email wilt ontvangen, vul dan een geldig emailadres in.

Uw vraag is op deze pagina toegevoegd

Wilt u een email ontvangen bij een antwoord en/of nieuwe vragen? Vul dan hier uw emailadres in.


Info