To remove and install the BTS profile lens tubes:
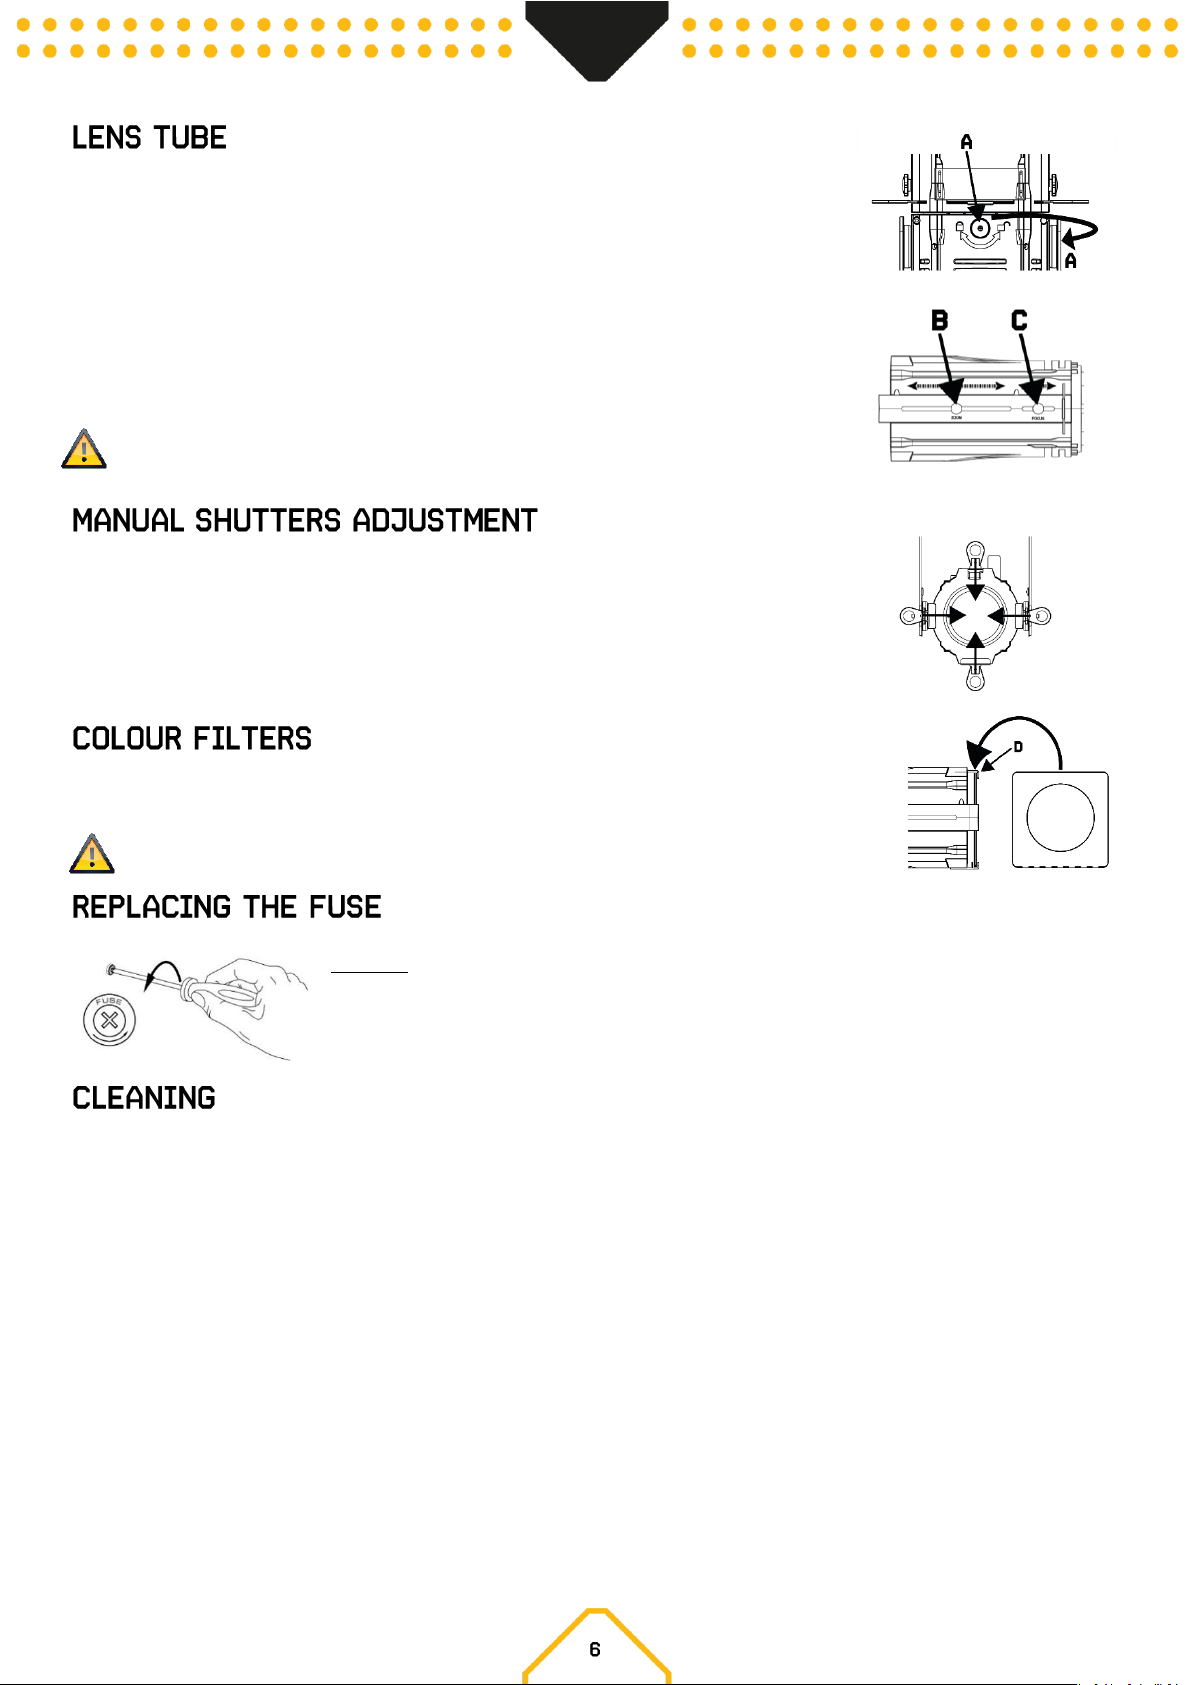
Step 1: Loosen (but do not remove) lens tube knobs (A) .
Step2: Slide lens tube little to left or right.
Step3: Lift lens tube assembly up and away from light source.
Step4: To install perform process in reverse.
The BTS profile tube has a manual zoom and focus system which allows you to easily make small focus
adjustments using a gear-based knob on side of the lens tube.
• To zoom in, loosen the thumb wheel bolts (B) on the sides of the lens barrel slightly and slide lens in or
out of the tube. Tighten the thumbwheel bolts again to hold the zoom setting.
• To focus in, loosen the thumb wheel bolts (C) on the sides of the lens barrel slightly and slide lens in or
out of the tube. Tighten the thumbwheel bolts again to hold the zoom setting.
Caution: Ensure the lens tube locking catch is fully fixed and safety cable is attached before putting
fixture into use.
This fixture has 4 manually operated shutters for adjusting the beam.
Using the colour filter frame you can add colour correction or diffusion filters to the front of the fixture. Push the
securing clip (D) to one side to release it. Ensure the securing clip (D) clicked back into place to prevent the colour filter
frame from falling out.
Caution: Ensure the filter holder securing clip is fully fixed and safety cable is attached before putting fixture
into use.
If the fuse is defective, replace the fuse with a fuse of the same type and value. Before replacing the fuse, unplug mains lead.
Procedure:
Step 1: Open the fuse holder on the rear panel with a fitting screwdriver.
Step 2: Remove the old fuse from the fuse holder.
Step 3: Install the new fuse in the fuse holder.
Step 4: Replace the fuse holder in the housing.
The buildup of dust, dirt and other airborne particles will reduce the fixture’s light output. It will also prevent the fixture from cooling correctly, and this
will reduce the fixture’s lifetime. The rate of dirt buildup will vary depending on environmental factors such as airborne dust, use of smoke machines,
airflow from ventilation systems, etc. The fixture’s cooling fans will accelerate buildup, and any smoke particles that are present in the atmosphere will
increase the tendency for dirt to clog.
To get the best performance and lifetime from the fixture, inspect it regularly and clean it as soon as you see signs of dirt buildup.
Assess the operating environment each time you begin to use the fixture. In dusty or smoky conditions, inspect the fixture after a few hours and check
it frequently the fixture may attract dirt faster than you expect. Draw up a cleaning schedule that will make sure that dirt is removed before it can build
up.
Use the following guidelines:
• Disconnect the fixture from power and allow it to cool completely before cleaning.
• Do not use solvents, abrasives or any other aggressive product to clean the fixture.
• Vacuum or use low-pressure compressed air to remove dust and loose particles from surfaces and air vents. Prevent the blades of cooling fans
from turning before you aim a vacuum or air jet at the fan, or you may spin the fan too fast and damage it.
• Clean glass components by wiping gently with a soft, clean, lint-free cloth moistened with a weak detergent solution. Put the solution on the
cloth and not on the surface to be cleaned. Avoid rubbing glass surfaces.
• Dry the fixture with a soft, clean, lint-free cloth or low-pressure compressed air before reapplying power.