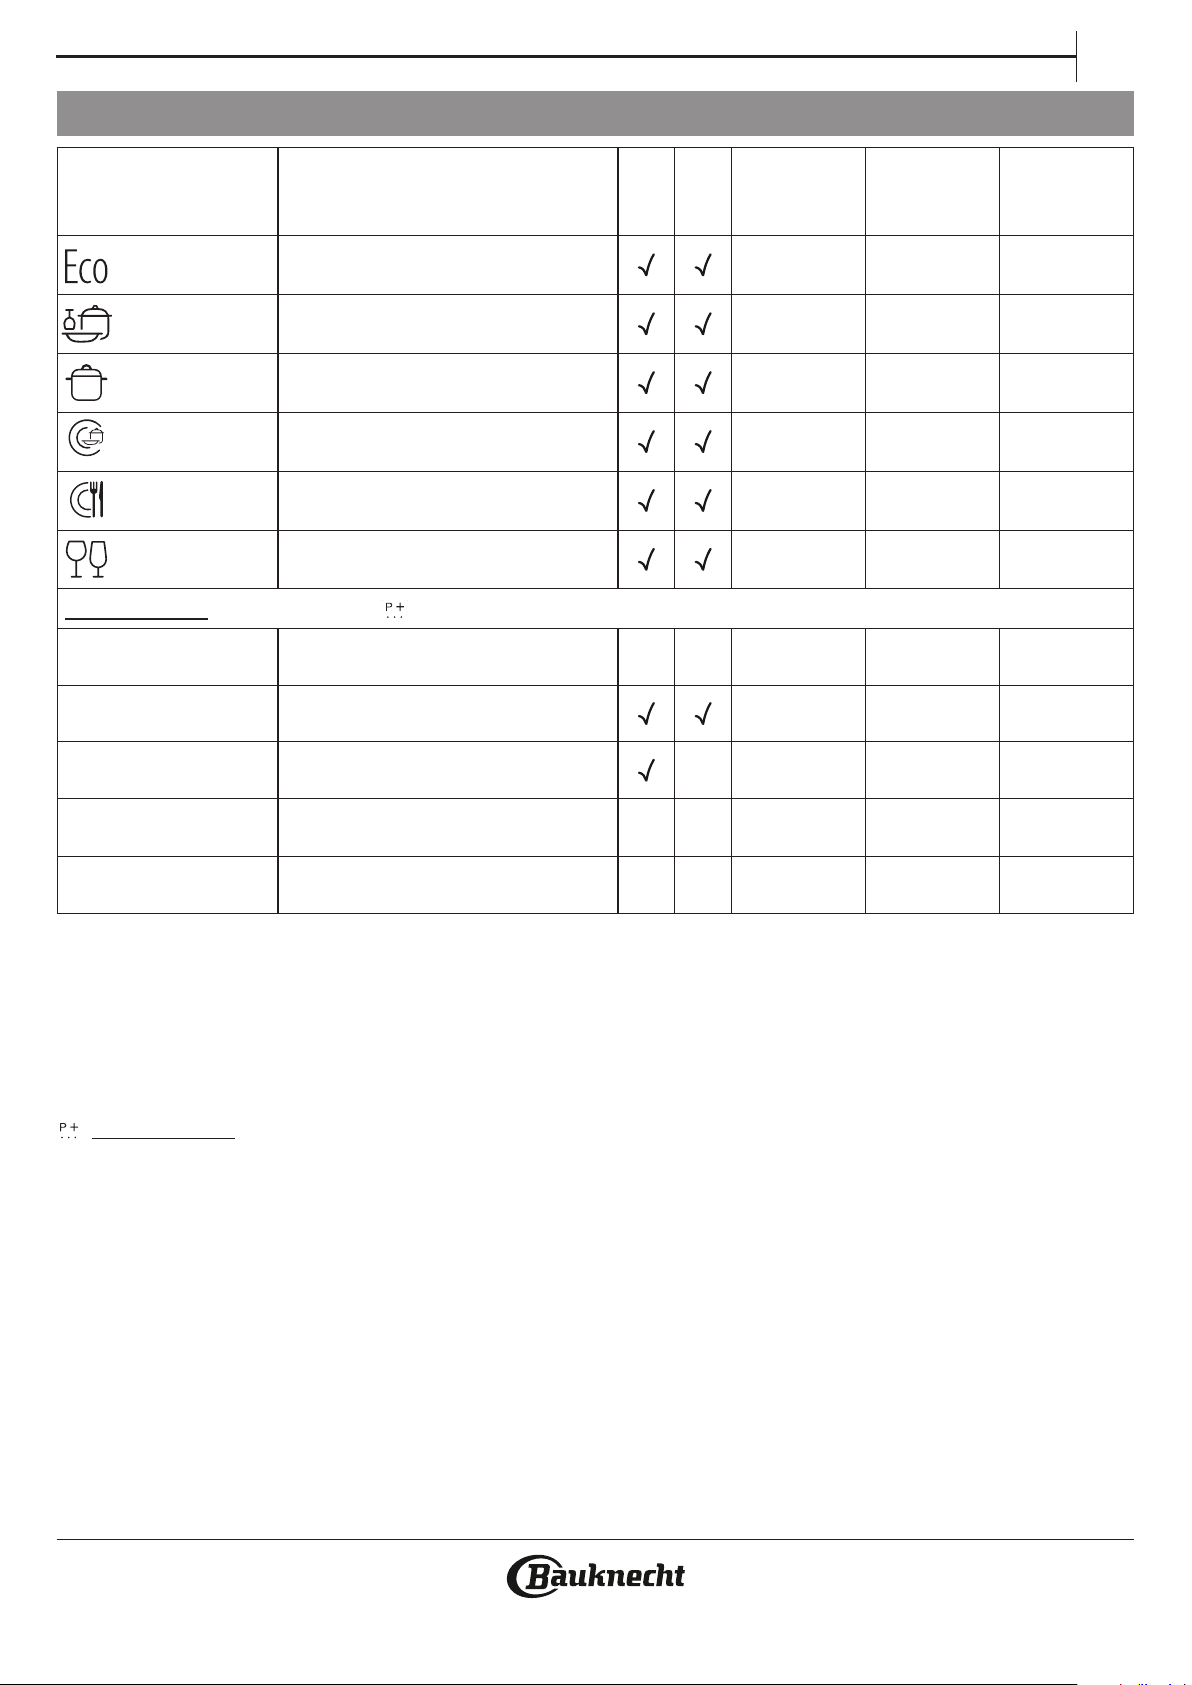
1. ECO - Eco programme is suitable to clean normally soiled tableware, that for this use, it is the most ecient programme in terms of its com-
bined energy and water consumption, and that it is used to assess compliance with the EU Ecodesign legislation.
2. AUTO SENSOR - For normally soiled dishes with dried food residues. Senses the level of soiling on the dishes and adjusts the program accordingly.
3. INTENSIVE -Program recommended for heavily soiled crockery, especially suitable for pans and saucepans (not to be used for delicate items).
4. MIXED - Mixed soil. For normally soiled dishes with dried food residues.
5. FAST WASH&DRY - Normally soiled crockery. Everyday cycle, that ensures optimal cleaning performance in shorter time.
6. GLASS - Program for delicate items, which are more sensitive to high temperatures, for example glasses and cups..
EXTRA CYCLES
7. EXPRESS 30’ - Program to be used for half load of lightly-soiled dishes with no dried food residues. Does not include drying phase.
8. GOOD NIGHT - Suitable for night-time operation of the appliance. Ensures optimal cleaning and drying performance with the lowest noise emission.
9. HYGIENE -Normally or heavily soiled crockery, with additional antibacterial wash. Can be used to perform maintenance of the dishwasher.
10. PRE-WASH - Use to refresh crockery planned to be washed later. No detergent to be used with this program
11. SELF CLEAN - Program to be used to perform maintenance of the dishwasher, to be carried out only when the dishwasher is EMPTY using
specic detergents designed for dishwasher maintenance.
Notes:
Please note that cycle Express 30’ is dedicated for lightly soiled dishes.
ECO program data is measured under laboratory conditions according to European Standard EN 60436:2020.
Note for Test Laboratories: for information on comparative EN testing conditions, please send an email to the following address: dw_test_support@whirlpool.com
Pre-treatment of the dishes is not needed before any of the programs.
* Not all options can be used simultaneously.
** Values given for programs other than the program Eco are indicative only. The actual time may vary depending on many factors such as temperature
and pressure of the incoming water, room temperature, amount of detergent, quantity and type of load, load balancing, additional selected options
and sensor calibration. The sensor calibration can increase program duration up to 20 min.
10
EN
OPTIONS AND SETTINGS
TABLET (All-in-one)
This setting allows you to optimise the performance of the cycle
according to the type of detergent used. Enable it if you use combined
detergents in tablet form (rinse aid, salt and detergent in 1 dose).
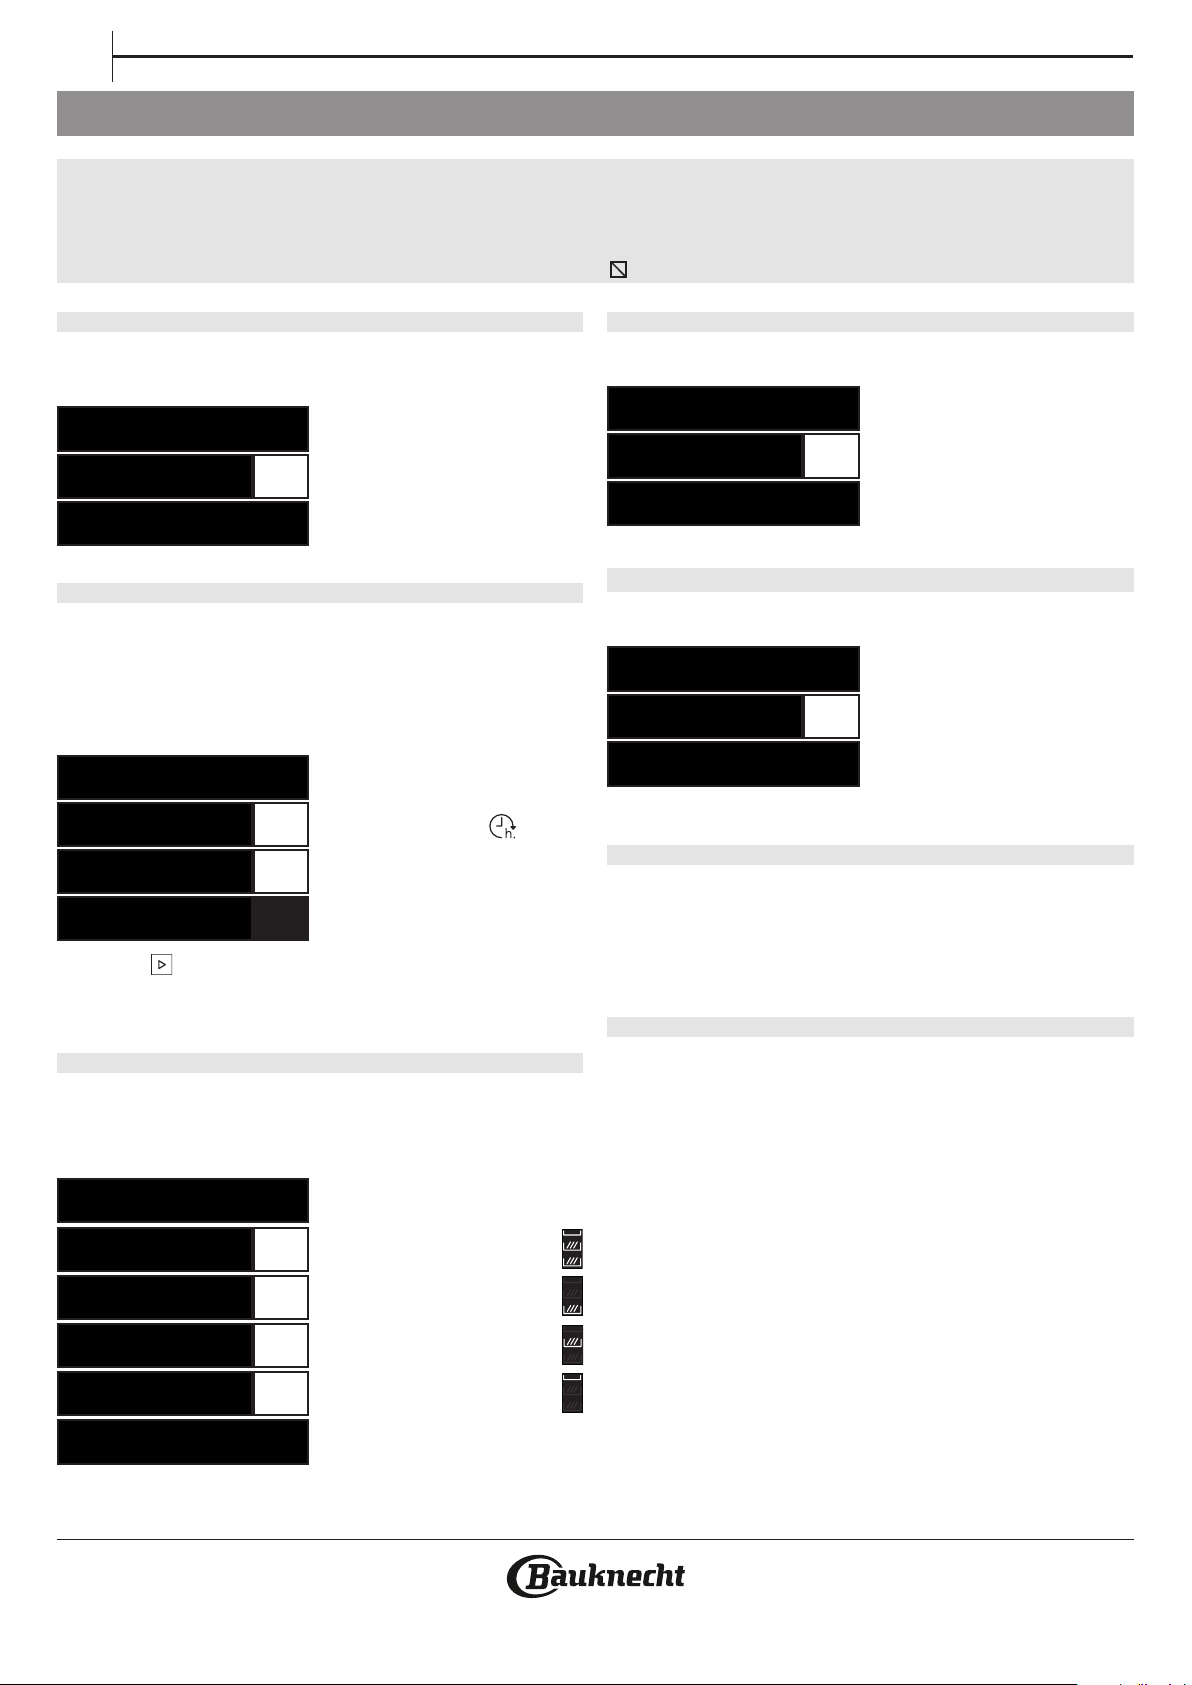
To set the Tablet, enter in the setting
menu by pressing „OK” button and
navigate with „< , >” until „TABLET”
is shown, then press „OK” button.
START DELAY
The start of the cycle may be delayed for a selected period of time.
To set a delay, enter in the setting menu by pressing „OK” button and na-
vigate with „< , >” until „START DELAY” is shown, then press „OK” button.
With each press of the button “>” or “<“, the delay start increases by:
• every 0:30 if selection below 4 hours,
• every 1:00 if selection is below 12 hours,
• every 2 hours if selection is above 12 hours.
Default value is OFF.
If delay is selected, the is lit.
Once „OK” button is pressed the
delay is conrmed and the machine
comes back to the cycle selection
screen with delay value visible.
Press „START” button and close the door within 4 sec. to start the delay.
To remove the delay, press „<” or „>” button until „OFF” is displayed.
MULTIZONE
If there are not many dishes to be washed it can be loaded in one rack
only. Using this option you can select which rack you want to wash.
To set the Multizone, enter in the setting menu by pressing „OK”
button and navigate with „< , >” until „MULTIZONE” is shown, then
press „OK” button.
By default the MULTIZONE is not
active and all racks icons are lit.
The multizone icon becomes lit.
The multizone icon becomes lit.
The multizone icon becomes lit.
POWER CLEAN
Thanks to additional water jets this option provides a more intensive
and powerful wash in the specic area of lower rack.
Default value is OFF.
To set the Power Clean, enter in
the setting menu by pressing „OK
button and navigate with „< , >”
until „POWER CLEAN” is shown,
then press „OK” button.
TURBO
This option can be used to reduce the duration of the main cycles
while maintaining washing and drying performance levels.
To set the Turbo, enter in the setting
menu by pressing „OK” button and
navigate with „< , >” until „TURBO”
is shown, then press „OK” button.
With each press of the button
„>” or „<“ option will be ON or OFF.
Conrm by pressing „OK” button.
FLOOR LIGHT
A LED light projected on the oor indicates that the dishwasher is
working. The light stays on during the cycle and switches o at the
end of the cycle.
This feature is active by default, but it is possible to deactivate it in the
“SETTINGS MENU”.
TUB LIGHT
When the feature is active the LEDs in the tub are automatically
switched on/o as soon as the user open/close the door respectively.
If the door remains opened for more than 10 min, the LEDs in the
tub switch o (to turn them on again, the door has to be closed and
opened again).
This feature is active by default, but it is possible to deactivate it in the
“SETTINGS MENU”.
This product contains a light source of energy eciency class C.
TABLET OFF
TABLETON
TABLET ON
START DELAY OFF
<STARTS IN h>OFF
<STARTS IN h>4:00
<STARTS IN h>4:00
MULTIZONE OK
<CUTLERY ONLY>
<ALL RACKS>< >
<LOW ONLY>< >
<CUTLERY ONLY>< >
<HIGH ONLY>< >
POWER CLEAN OFF
POWER CLEANON
POWER CLEAN ON
TURBO OFF
TURBOON
TURBO ON
With each cycle additional options can be used. A full list of available options working with specic cycles can be found in the Cycles Table on
the previous page. All active options are shown on the display.
To set an option press „OK” button. SET OPTIONSmessage is shown for a few seconds. Then use „<” or „>” button to navigate through the
option list. Press „OK” to select the option, in the setting menu the LED above „OK” button is lit.
If the option is not available, it will be still visible in its position but with „ ”
EN
11
SETTINGS MENU
Language
To change language, enter in the
setting menu by pressing „OK”
button and navigate with „< , >”
until „LANGUAGE” is shown, then
press „OK” button.
First cycle
You can choose which cycle is
selected by default when switching
on the appliance: ECO or the LAST
USED one.
To change rst cycle, enter in the
setting menu by pressing „OK” but-
ton and navigate with „< , >” until
„FIRST CYCLE” is shown, then press
„OK” button.
Sounds
To change sounds, enter in the
setting menu by pressing „OK”
button and navigate with „< , >”
until „SOUNDS” is shown, then press
„OK” button.
Choose between 2 levels: HIGH;
LOW. Can be also OFF.
Water Hardness
To change water hardness level,
enter in the setting menu by
pressing „OK” button and navigate
with „< , >” until „WATER HARDNESS”
is shown, then press „OK” button.
To setup correct level according to water hardness, see table on page 4.
Screen Brightness
To change screen brightness
level, enter in the setting menu by
pressing „OK” button and navigate
with „< , >” until „SCREEN BRIGHT.” is
shown, then press „OK” button.
Choose between ve levels: 1, 2, 3, 4 and 5.
Floor Light
To change oor light, enter in the
setting menu by pressing „OK”
button and navigate with „< , >”
until „FLOOR LIGHT” is shown, then
press „OK” button.
Tub Light
To change tub light, enter in the
setting menu by pressing „OK”
button and navigate with „< , >”
until „TUB LIGHT” is shown, then
press „OK” button.
ActiveDry
To set ActiveDry on or of, enter in the
setting menu by pressing „OK”
button and navigate with „< , >”
until „ACTIVEDRY” is shown, then
press „OK” button.
ActiveDry is a convection drying system which automatically opens the
door during/after drying phase to ensure exceptional drying perfor-
mance every day. Door opens at the temperature that is safe to your
kitchen furniture, thus door will not be opened when the option of
TURBO is on.
As additional steam protection, special designed protection foil is added
together with the dishwasher. To see how to mount protection foil
please refer to (INSTALLATION GUIDE).
Rinse Aid level
To change rinse aid level, enter in
the setting menu by pressing „OK”
button and navigate with „< , >”
until „RINSE AID LEV.” is shown, then
press „OK” button.
Choose between ve levels: 1, 2, 3, 4 and 5.
If the rinse aid level is set to 1, no rinse aid will be supplied. The LOW
RINSE AID indicator light will not be lit if you run out of rinse aid.
The factory setting is for (5) level .
• If you see bluish streaks on the dishes, set a low number (2-3).
• If there are drops of water or limescale marks on the dishes, set
a high number (4-5).
Demo mode
To see to demo mode, enter in the
setting menu by pressing „OK”
button and navigate with „< , >”
until „DEMO MODE” is shown, then
press „OK” button.
Reset to factory default
To reset to factory default, enter in
the setting menu by pressing „OK”
button and navigate with „< , >”
until „RESET TO DEF.” is shown, then
press „OK” button.
Exit
To exit the setting menu, press any
cycle button or press „< , >” button
untill EXIT is shown, then press
„OK” button.
1.LANGUAGE OK
1.ENGLISH
1.ITALIANO< >
2.FIRST CYCLE OK
2.<ECO>< >
3.SOUNDS OK
3.<OFF>
3.<HIGHT>< >
4.WATER HARDNESS 3
4.WATER HARDNESS 4
5.SCREEN BRIGHT. 5
5.SCREEN BRIGHT. 3
7.TUB LIGHT ON
7.TUB LIGHT OFF
8.ACTIVEDRY ON
8.ACTIVEDRY OFF
9.RINSE AID LEV. 5
9.RINSE AID LEV. 4
10.DEMO MODE SET
10.DEMO MODE OFF
11.RESET TO DEF. OK
11.OFF
11.ON< >
12.EXIT < >
To change machne settings you need to enter into the Settins Menu.
Press „OK” button and navigate with „< , >” until SETTINGSis shown, then press „OK” button.
To exit the setting menu, press any cycle button or press „< , >” button untill EXIT is shown, then press „OK” button.
2.<LAST USED>
6.FLOOR LIGHT ON
6.FLOOR LIGHT OFF
12
EN
CARE AND MAINTENANCE
ATTENTION: Always unplug the appliance when cleaning it and when
performing maintenance work.Do not use ammable liquids to clean
the machine.
CLEANING THE DISHWASHER
Any marks on the inside of the appliance may be
removed using a cloth dampened with water and a
little vinegar.
The external surfaces of the machine and the control
panel can be cleaned using a non-abrasive cloth
which has been dampened with water. Do not use
solvents or abrasive products.
PREVENTING UNPLEASANT ODOURS
Always keep the door of the appliance ajar in order to avoid moisture
from forming and being trapped inside the machine.
Clean the seals around the door and detergent dispensers regularly
using a damp sponge. This will avoid food becoming trapped in the se-
als, which is the main cause behind the formation of unpleasant odours.
CHEKING THE WATER SUPPLY HOSE
Check the inlet hose regularly for brittleness and cracks. If damaged,
replace it by a new hose available through our After-Sales Service or
your specialist dealer. Depending on the hose type:
If the inlet hose has a transparent coating, periodically check if the
colour intensies locally. If yes, the hose may have a leak and should
be replaced.
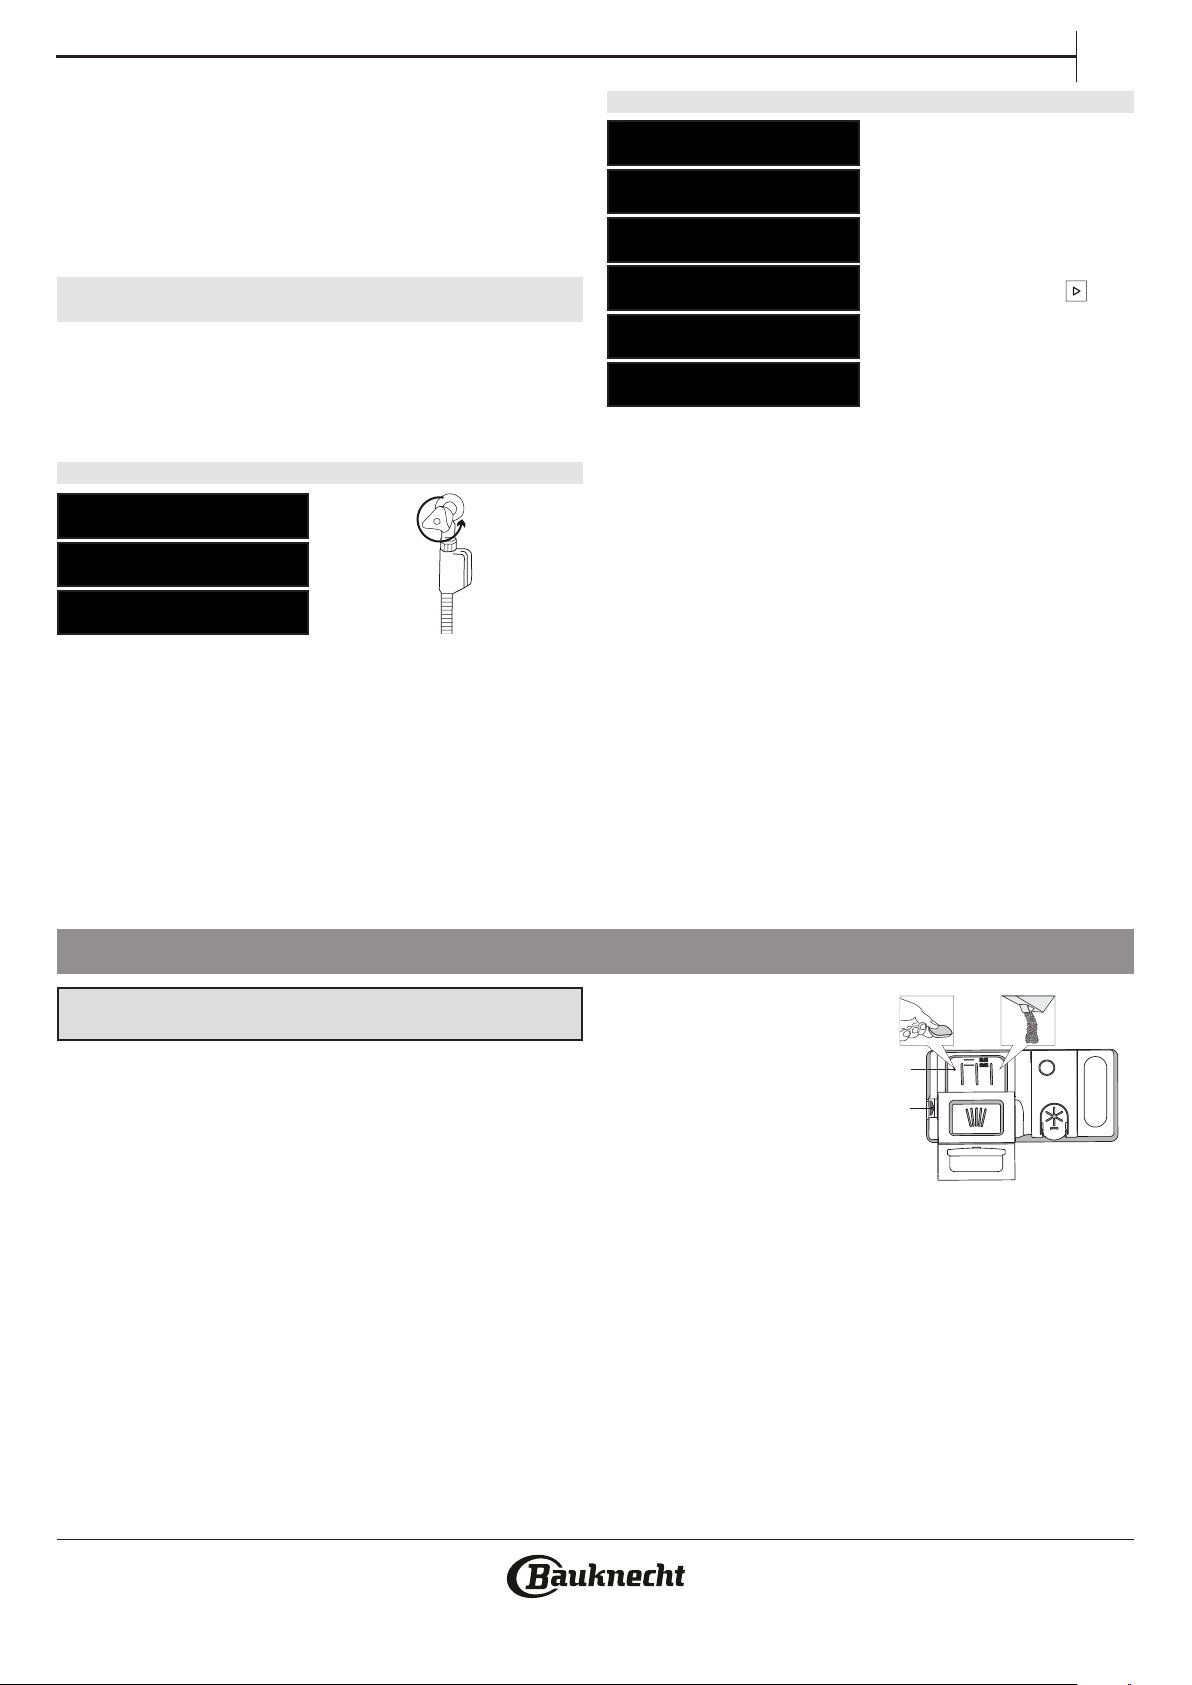
For water stop hoses: check the small safety valve inspection window
(see arrow). If it is red, the water stop function was triggered, and the
hose must be replaced by a new one.
For unscrewing this hose, press the release button while unscrewing
the hose.
CLEANING THE WATER INLET HOSE
If the water hoses are new or have not been used for an extended
period of time, let the water run to make sure it is clear and free of im-
purities before performing the necessary connections. If this precau-
tion is not taken, the water inlet could become blocked and damage
the dishwasher.
CLEANING THE FILTER ASSEMBLY
Regularly clean the lter assembly so that the lters do not clog and
that the waste water ows away correctly.
Using dishwasher with clogged lters or foreign objects inside ltration
system or sprayarms may cause unit malfunction resulting in lose of
performance, noisy work or higher resources usage.
The lter assembly consists of three lters which remove food residues
from the washing water and then recirculate the water.
The dishwasher must not be used without lters or if the lter is
loose.
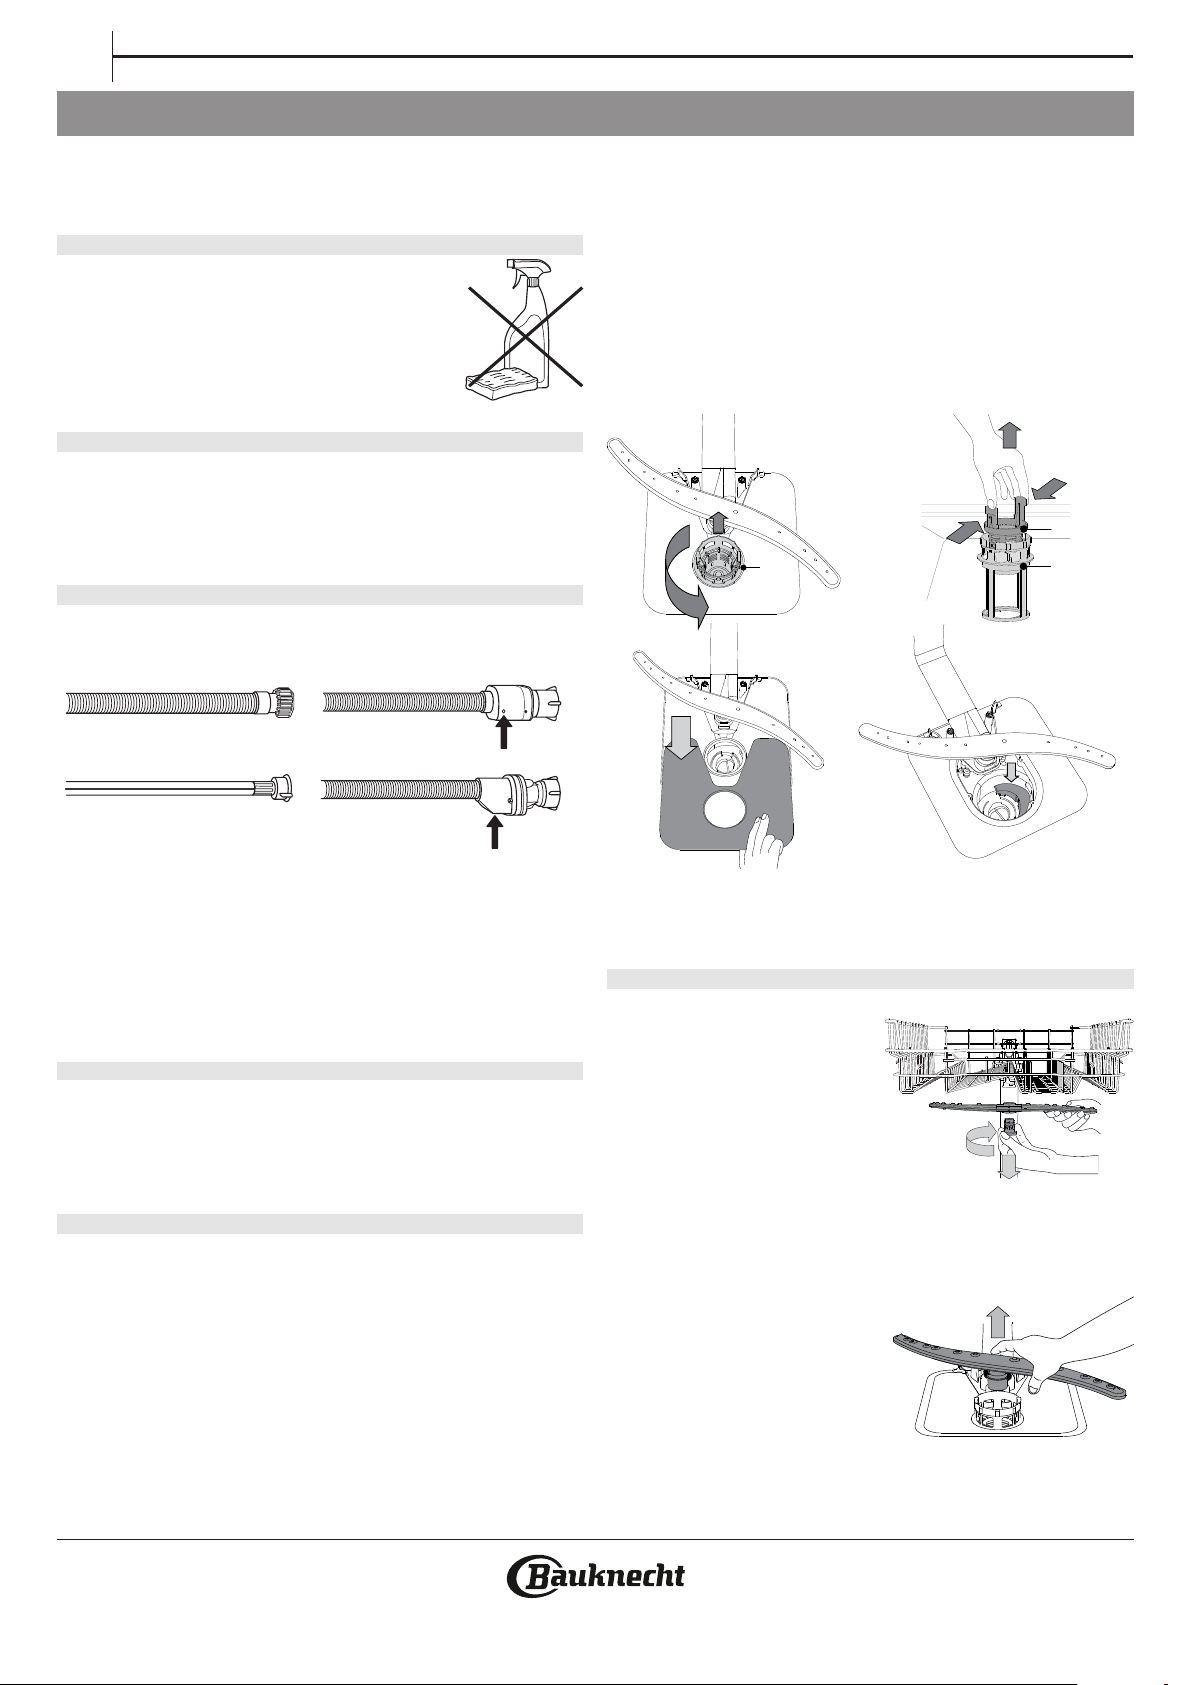
At least once per month or after each 30 cycles, check the lter assembly
and if necessary clean it thoroughly under running water, using a non-
-metallic brush and following the instructions below:
1. Turn the cylindrical lter A in an anti-clockwise direction and pull it
out (Fig 1).
2. Remove the cup lter B by exerting a slight pressure on the side
aps (Fig 2).
3. Slide out the stainless-steel plate lter C (Fig 3).
4. In case you nd foreign objects (such as broken glass, porcelain,
bones, fruit seeds etc.) please remove them carefully.
5. Inspect the trap and remove any food residues. NEVER REMOVE
the wash-cycle pump protection (black detail) (Fig 4).
After cleaning the lters, re-place the lter assembly and x it in po-
sition correctly; this is essential for maintaining the ecient operation
of the dishwasher.
CLEANING THE SPRAY ARMS
On occasions, food residue may be-
come encrusted onto the spray arms
and block the holes used to spray
the water. It is therefore recommen-
ded that you check the arms from
time to time and clean them with a
small non-metallic brush.
To remove the upper spray arm, turn
the plastic locking ring in a clockwi-
se direction. The upper spray arm
should be replaced so that the side with the greater number of holes
is facing upwards.
The lower spray arm may be remo-
ved by pulling it upwards.
21
43
A
C
A
B
EN
13
INSTALLATION
ATTENTION: If the appliance must be moved at any time, keep it in an
upright position; if absolutely necessary, it may be tilted onto its back.
CONNECTING THE WATER SUPPLY
Adaptation of the water supply for installation should only be perfor-
med by a qualied technician.
The water inlet and outlet hoses may be positioned towards the right
or the left in order to achieve the best possible installation.
Make sure the dishwasher does not bend or squash the hoses.
CONNECTING THE WATER INLET HOSE
• Run the water until it is perfectly clear.
• Screw the inlet hose tightly into position and turn on the tap.
If the inlet hose is not long enough, contact a specialist store or an
authorised technician.
The water pressure must be within the values indicated in the Techni-
cal Data table - otherwise the dishwasher may be function properly.
Make sure the hose is not bent or compressed.
SPECIFICATIONS FOR THE CONNECTION OF THE WATER SUPPLY HOSE:
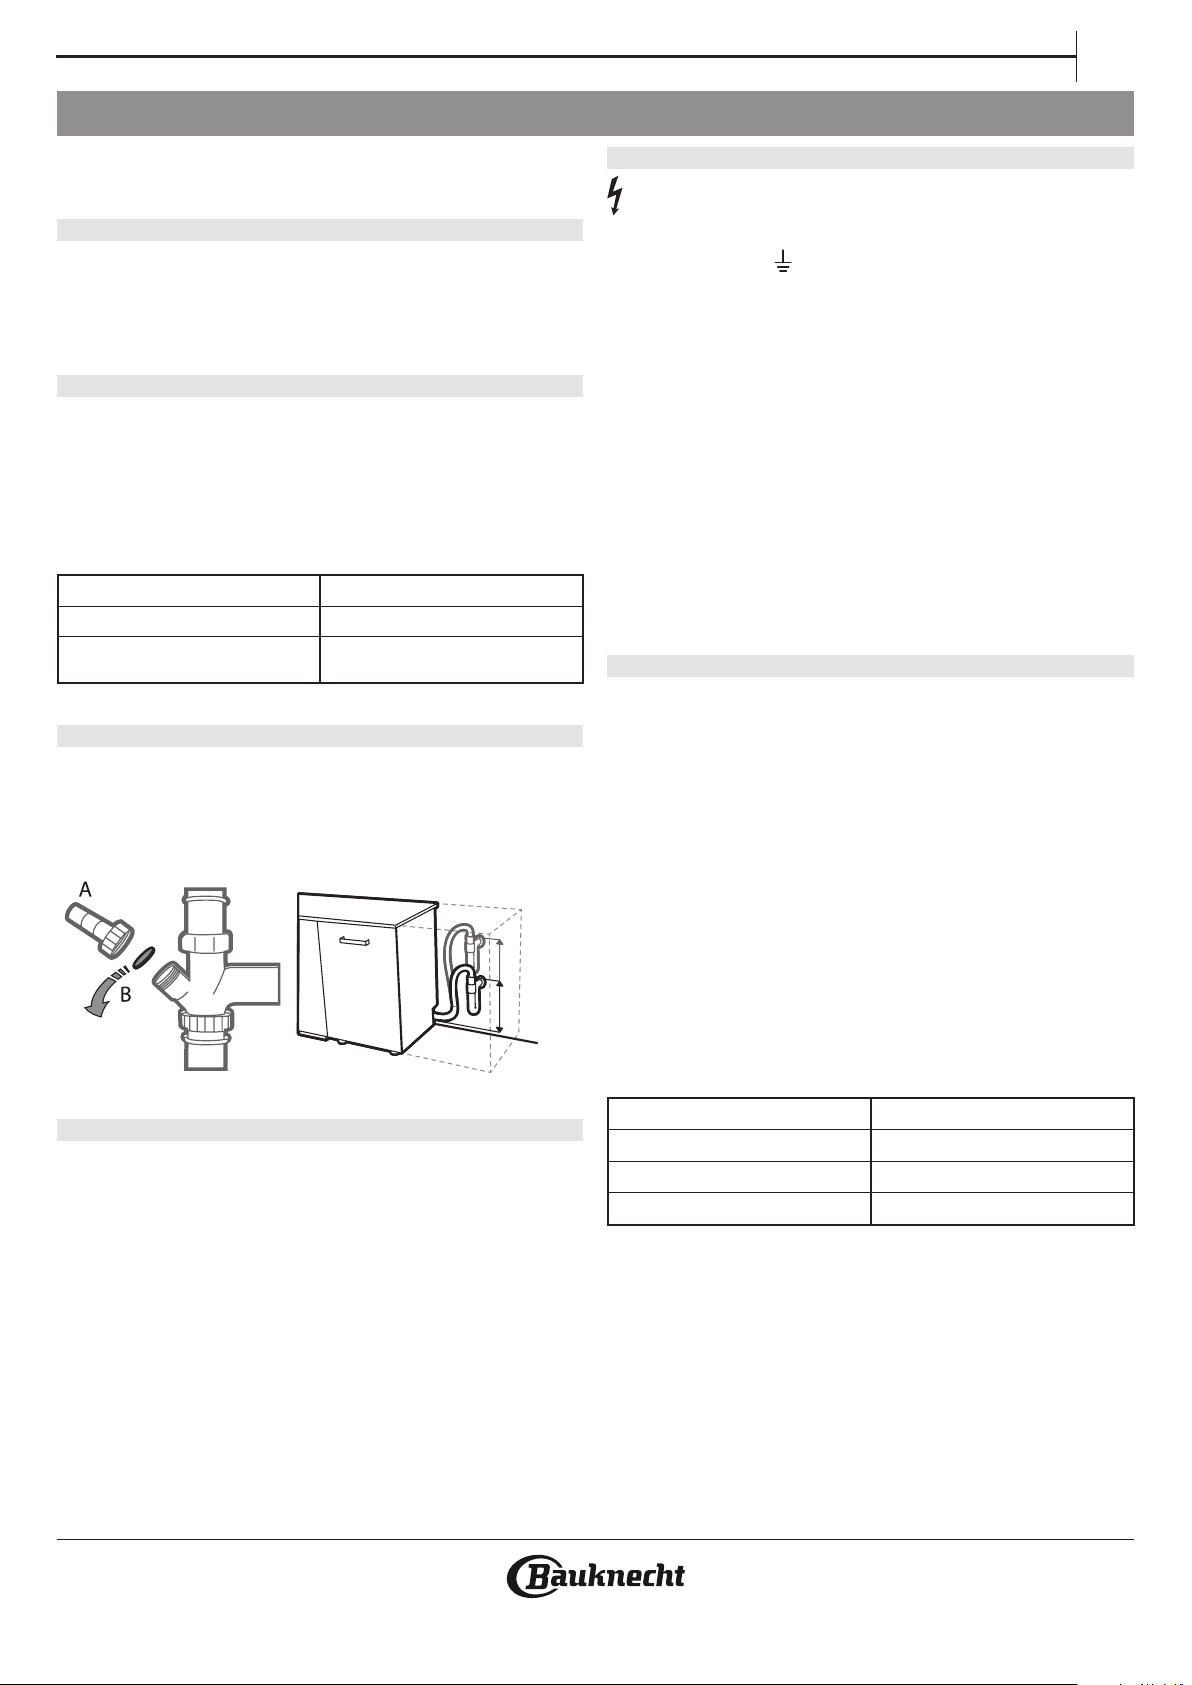
CONNECTING THE WATER OUTLET HOSE
Connect the outlet hose to a drain duct with a minimum diameter of
2 cm A.
The outlet hose connection must be at a height ranging from 40 to
80 cm from the oor or surface where the dishwasher rests.
Before connecting the water outlet hose to the sink drain, remove the
plastic plug B.
ANTI-FLOODING PROTECTION
Anti-ooding protection. To ensure oods do not occur, the dishwasher:
- is provided with a special system which blocks the water supply in
the event of anomalies or leaks from inside the appliance.
Some models are also equipped with the supplementary safety device
New Aqua Stop, which guarantees anti-ooding protection even in
the event of a supply hose rupture.
Under no circumstances should the water inlet hose be cut as it conta-
ins live electrical parts.
ELECTRICAL CONNECTION
WARNING: Under no circumstances should the water inlet hose
be cut as it contains live electrical parts.
Before inserting the plug into the electrical socket, make sure that:
• The socket is earth and complies with current regulations;
• The socket can withstand the maximum load of the appliance as
shown on the data plate located on the inside of the door (see
PRODUCT DESCRIPTION).
• The power supply voltage falls within the values indicated on the
data plate on the inside of the door.
• The socket is compatible with the plug of the appliance.
If this is not the case, ask an authorised technician to replace the plug
(see AFTER-SALES SERVICE). Do not use extension cables or multiple
sockets. Once the appliance has been installed, the power supply
cable and the electrical socket should be easily accessible.
The cable should not be bent or compressed.
If the power supply cable is damaged, have it replaced by the ma-
nufacturer or its authorised Technical Assistance Service in order to
prevent all potential hazards.
The Company shall not be held responsible for any incidents, if these
regulations are not observed.
POSITIONING AND LEVELLING
1. Position the dishwasher on a level sturdy oor. If the oor is uneven,
the front feet of the appliance may be adjusted until it reaches
a horizontal position. If the appliance is levelled correctly, it will be
more stable and much less likely to move or cause vibrations and
noise while it is operating.
2. Before recessing the dishwasher, stick the adhesive transparent strip
under the wooden shelf in order to protect it from any condensation
which may form.
3. Place the dishwasher so that its sides or back panel are in contact
with the adjacent cabinets or the wall. This appliance can also be
recessed under a single worktop.
4. To adjust the height of the rear foot, turn the red hexagonal bushing
on the lower central part at the front of the dishwasher using a
hexagonal spanner with an opening of 8 mm. Turn the spanner in
a clockwise direction to increase the height and in an anticlockwise
direction to decrease it.
DIMENSIONS AND CAPACITY:
MIN 40 cm
MAX 80 cm
WATER SUPPLYcold or hot (max. 60°C)
WATER INTAKE3/4”
POWER OF WATER PRESSURE0,05 ÷ 1 MPa (0.5 ÷ 10 bar)
Gebruikershandleiding.com neemt misbruik van zijn services uitermate serieus. U kunt hieronder aangeven waarom deze vraag ongepast is. Wij controleren de vraag en zonodig wordt deze verwijderd.
Product:
Spelregels forum
Om tot zinvolle vragen te komen hanteren wij de volgende spelregels:
lees eerst de handleiding door;
controleer of uw vraag al eerder door iemand anders is gesteld;
probeer uw vraag zo duidelijk mogelijk te stellen;
heeft u een probleem en al geprobeerd om dit op te lossen, vermeld dit erbij aub;
heeft u een oplossing gekregen van een bezoeker dan horen wij dat graag in dit forum;
wilt u een reactie geven op een vraag of antwoord, gebruik dan niet dit formulier maar klik op de knop 'reageer op deze vraag';
uw vraag wordt direct op de website gezet; vermijd daarom persoonlijke gegevens in te vullen;
Belangrijk! Als er een antwoord wordt gegeven op uw vraag, dan is het voor de gever van het antwoord nuttig om te weten als u er wel (of niet) mee geholpen bent! Wij vragen u dus ook te reageren op een antwoord.
Belangrijk! Antwoorden worden ook per e-mail naar abonnees gestuurd. Laat uw emailadres achter op deze site, zodat u op de hoogte blijft. U krijgt dan ook andere vragen en antwoorden te zien.
Abonneren
Abonneer u voor het ontvangen van emails voor uw Bauknecht BCIF 5O539 PLET bij:
nieuwe vragen en antwoorden
nieuwe handleidingen
U ontvangt een email met instructies om u voor één of beide opties in te schrijven.
Ontvang uw handleiding per email
Vul uw emailadres in en ontvang de handleiding van Bauknecht BCIF 5O539 PLET in de taal/talen: Engels als bijlage per email.
De handleiding is 7.57 mb groot.
U ontvangt de handleiding per email binnen enkele minuten. Als u geen email heeft ontvangen, dan heeft u waarschijnlijk een verkeerd emailadres ingevuld of is uw mailbox te vol. Daarnaast kan het zijn dat uw internetprovider een maximum heeft aan de grootte per email. Omdat hier een handleiding wordt meegestuurd, kan het voorkomen dat de email groter is dan toegestaan bij uw provider.
Stel vragen via chat aan uw handleiding
Stel uw vraag over deze PDF
Andere handleiding(en) van Bauknecht BCIF 5O539 PLET
Uw handleiding is per email verstuurd. Controleer uw email
Als u niet binnen een kwartier uw email met handleiding ontvangen heeft, kan het zijn dat u een verkeerd emailadres heeft ingevuld of dat uw emailprovider een maximum grootte per email heeft ingesteld die kleiner is dan de grootte van de handleiding.
Er is een email naar u verstuurd om uw inschrijving definitief te maken.
Controleer uw email en volg de aanwijzingen op om uw inschrijving definitief te maken
U heeft geen emailadres opgegeven
Als u de handleiding per email wilt ontvangen, vul dan een geldig emailadres in.
Uw vraag is op deze pagina toegevoegd
Wilt u een email ontvangen bij een antwoord en/of nieuwe vragen? Vul dan hier uw emailadres in.