erk - Marque - Marke - Brand - Марка - Značka - Mærke - Μάρκα - Marca - Kaubamärk - Tuotemerkki - robna marka - Márka -
Ž
enklas - Prečzīme - Merke - Marka - Marca -
M
arca - Značka - Znamka - Märke
B:
M
odel - Appliance model - Modell des Geräts - Appliance model - Модел на
у
реда - Model zařízení - Maskinens model - Μοντέλο συσκευ
ή
ς - Modelo de aparato - Seadme mudel - Laitteen malli - model uređaja -
A k
é
szül
é
k t
í
pusa - Modello apparecchio - Prietaiso modelis - Ierīces modelis - Modell - Model stosowania - Modelo do aparelho - Modelul aparatului - Model zariadenia - Model naprave - Anordningsmodell
C
:Gascategorie - Type de gaz - Gaskategorie - Gas category - Категория на газа - Kategorie plynu - Gas kategori - Κατηγορ
ί
α γκαζιο
ύ
- Categoría de gas - Gaasiliik - Kaasukategoria - kategorija plina - Gá
z
-
kate
g
ória -
C
ate
g
oria
g
as - Dujų kate
g
orija -
G
āzes kate
g
orija -
G
asskate
g
ori - Rodzaj
g
azu - Tipo de
g
ás -
C
ate
g
oria de
g
az - Kate
g
ória plynu - Kate
g
orija plina -
G
askate
g
or
i
D:
M
erk en type
g
asfles - Marque et type de bouteille - Marke und Typ der Gasflasche - Brand and type of
g
as cylinder - Марка и тип на газовата бутилка - Značka a typ plynové láhve - Mærke o
g
type på
g
as
c
ylinder - Μ
ά
ρκα και τύπος φι
ά
λης αερίου - Marca y tipo de bombona de
g
as - Gaasisilindri kaubamärk ja tüüp - Kaasusylinterin tuotemerkki ja tyyppi - robna marka i vrsta plinsko
g
cilindra - A
g
ázpalack márkája
é
s típusa - Marca e tipo di bombola del gas - Dujų cilindro rūšis ir tipas - Gāzes cilindra prečzīme un tips - Merke og type for gassylinder - Marka i typ cylindra gazowego - Marca e tipo da botija de gás - Marca
ş
i
tipul cilindrului de
g
az - Značka a typ plynového valca - Zna
m
ka in vrsta plinske
g
a valja - Gascylinderns märke och ty
p
I
nd
us
tri
e
laan 4
B
- 8501 KORTRIJK - Heule Belgium
0
461
/
08
4
EN
INSTALLATION, USE AND MAINTENANCE INSTRUCTIONS 5
FR
NOTICE DE MONTAGE, D'UTILISATION ET D'ENTRETIEN 9
DE
ANLEITUNG ZU MONTAGE, GEBRAUCH UND PFLEGE 13
NL
HANDLEIDING VOOR MONTAGE, GEBRUIK EN ONDERHOUD 17
ES
INSTRUCCIONES DE INSTALACIÓN, USO Y MANTENIMIENTO 21
IT
ISTRUZIONI DI INSTALLAZIONE, USO E MANUTENZIONE 25
PT
INSTRUÇÕES DE INSTALAÇÃO, UTILIZAÇÃO E MANUTENÇÃO 29
SV
INSTRUKTIONER FÖR INSTALLATION, ANVÄNDNING OCH UNDERHÅLL 33
DA
INSTRUKTIONER OM INSTALLATION, BRUG OG VEDLIGEHOLDELSE 37
FI
ASENNUS-, KÄYTTÖ- JA HUOLTO-OHJEET 41
HU
ÜZEMBEHELYEZÉSI, HASZNÁLATI ÉS KARBANTARTÁSI ÚTMUTATÓ 45
RO
INSTRUCŢIUNI DE INSTALARE, UTILIZARE ŞI ÎNTREŢINERE 49
EL
ΟΔΗΓΙΕΣ ΕΓΚΑΤΑΣΤΑΣΗΣ, ΧΡΗΣΗΣ ΚΑΙ ΣΥΝΤΗΡΗΣΗΣ 53
CS
NÁVOD K INSTALACI, POUŽÍVÁNÍ A ÚDRŽBĚ 57
BG
ИНСТРУКЦИИ ЗА МОНТАЖ, УПОТРЕБА И ПОДДРЪЖКА 61
ET
PAIGALDUS-, KASUTUS- JA HOOLDUSJUHISED 65
HR
UPUTE ZA UGRADNJU, UPORABU I ODRŽAVANJE 69
LT
MONTAVIMO, NAUDOJIMO IR PRIEŽIŪROS NURODYMAI 73
LV
UZSTĀDĪŠANAS, LIETOŠANAS UN APKOPES INSTRUKCIJA 76
NO
INSTRUKSER FOR INSTALLASJON, BRUK OG VEDLIKEHOLD 80
PL
WSKAZÓWKI DOTYCZĄCE MONTAŻU, UŻYTKOWANIA I KONSERWACJI 84
SK
POKYNY K MONTÁŽI, POUŽÍVANIU A ÚDRŽBE 88
SL
NAVODILA ZA NAMESTITEV, UPORABO IN VZDRŽEVANJE 92
5
EN
INSTALLATION, USE AND
MAINTENANCE INSTRUCTIONS
FOR YOUR SAFETY
Important: please read these instructions care-
fully to familiarise yourself with the unit prior
to connecting it to the gas cylinder. Keep these
instructions for future reference.
- This unit is for outdoor use onl
y
.
-
W
arn
i
n
g
: access
ibl
e
p
arts may
b
e very
h
ot.
K
eep young children away
f
rom the unit.
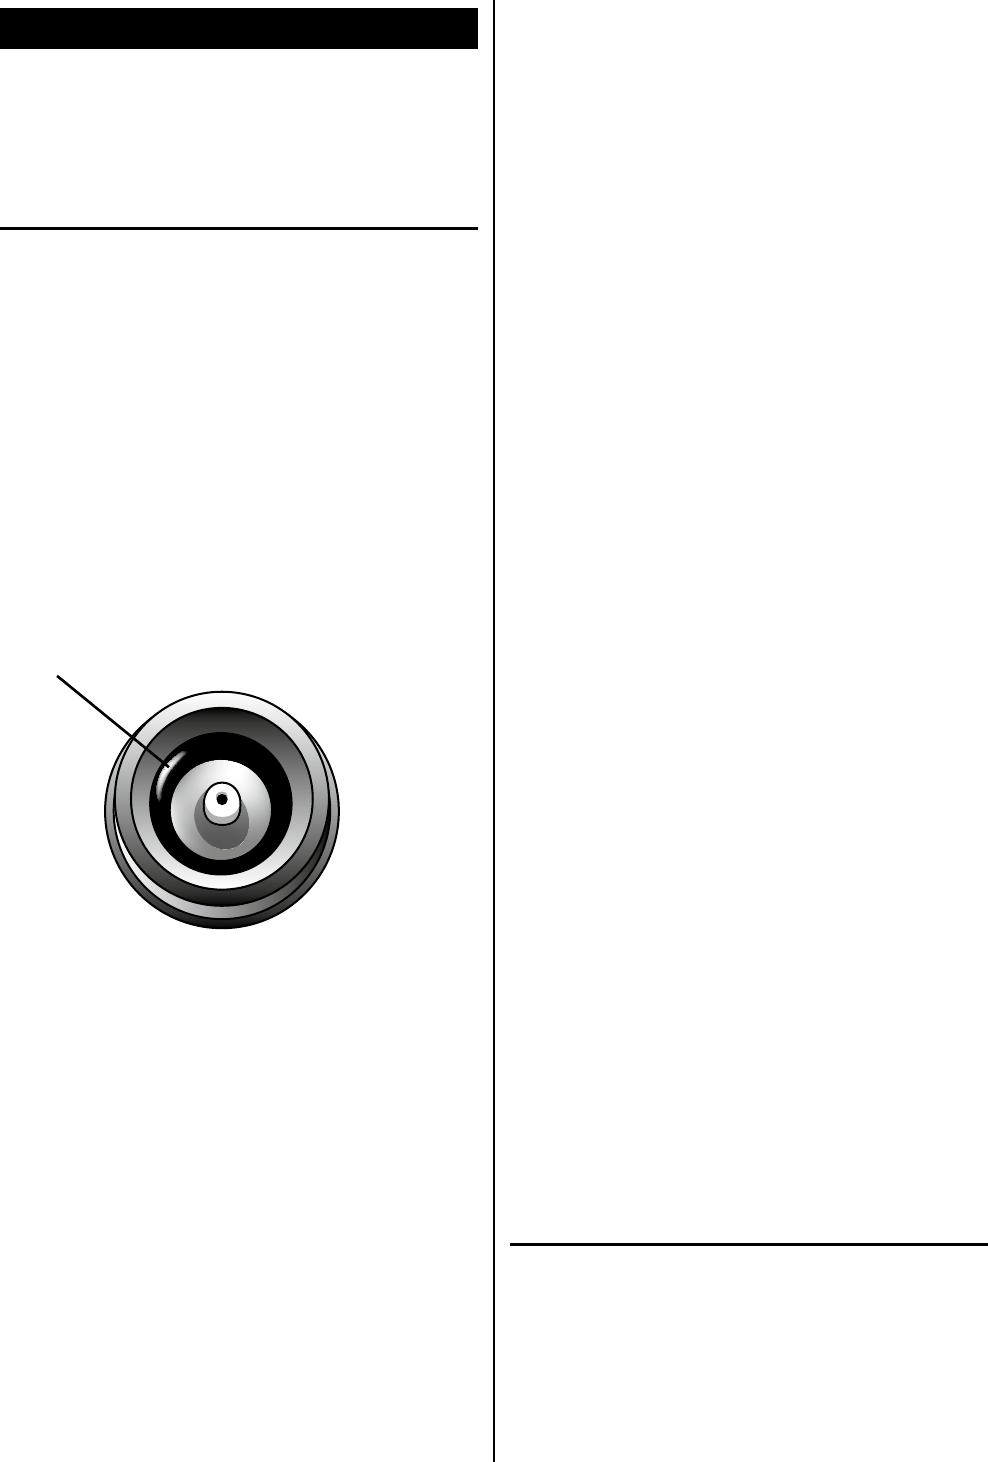
- Check that the gaskets
(
between the unit and
th
e gas cy
li
n
d
er
)
are
i
n p
l
ace an
d
i
ntact pr
i
or to
mount
i
ng t
h
e gas cy
li
n
d
er.
Rubber gasket
-
Do not use the unit i
f
the
g
askets are dama
g
ed
o
r w
o
rn.
-
Do not use the unit if there is a
g
as leak in the
c
ylinder or i
f
the cylinder is dama
g
ed or does
n
ot wor
k
proper
l
y
.
-
Alwa
y
s use the unit on a horizontal surface
.
-
Op
erate the unit at a safe distance from fla
m
-
m
abl
e
mat
e
rial
s
. Minim
u
m di
s
tan
ce
fr
o
m wall
s
o
r ceilin
g
s is 1 m.
-
Al
ways re
pl
ace cy
li
n
d
ers out
d
oors, an
d
not
i
n the vicinity of ignition sources such as fire,
p
ilot flames, electric fires, and away from other
p
ersons.
-
If there is a gas leak in your appliance (gas
o
dour
)
, immediately take it outside into a well-
ventilated area
f
ree o
f
o
p
en
f
ire, where the
g
as
l
eak can be located and stopped.
-
C
heckin
g
your a
pp
liance for
g
as leaks should
al
ways
b
e
d
one
i
n t
h
e open a
i
r
.
-
Never locate gas leaks with a gas flame, always
u
se soa
p
y water.
-
I
f
you smell gas:
1) Turn off the gas supply to the unit
2) Extinguish any open flame
3) Open lid
4) If odour continues, immediately call your
gas supplier or fire department
5) Never store or use gasoline or other flam-
mable liquids and vapours in the vicinity of
this or any other appliance
6) Store the cylinder outdoors in a well-ventilat-
ed area
-
Never store s
p
are
g
as cylinders or other
f
uels
c
loser than
3
m
f
rom the appliance.
-
Improper installation can be dangerous. Follow
the instructions care
f
ull
y.
-
I
f
the unit has not been used
f
or a prolonged
p
eriod of time, it must be checked for gas leaks
p
rior to use. Also check that the burner
p
orts
a
r
e
n
o
t
blocked
.
-
Ensure that the unit is not left unattended during
op
eration. Never move the unit durin
g
o
p
eration.
-
N
ever use c
h
arcoa
l
, woo
d
,
b
r
i
quettes,
l
ava
r
ocks or ceramic briquettes
.
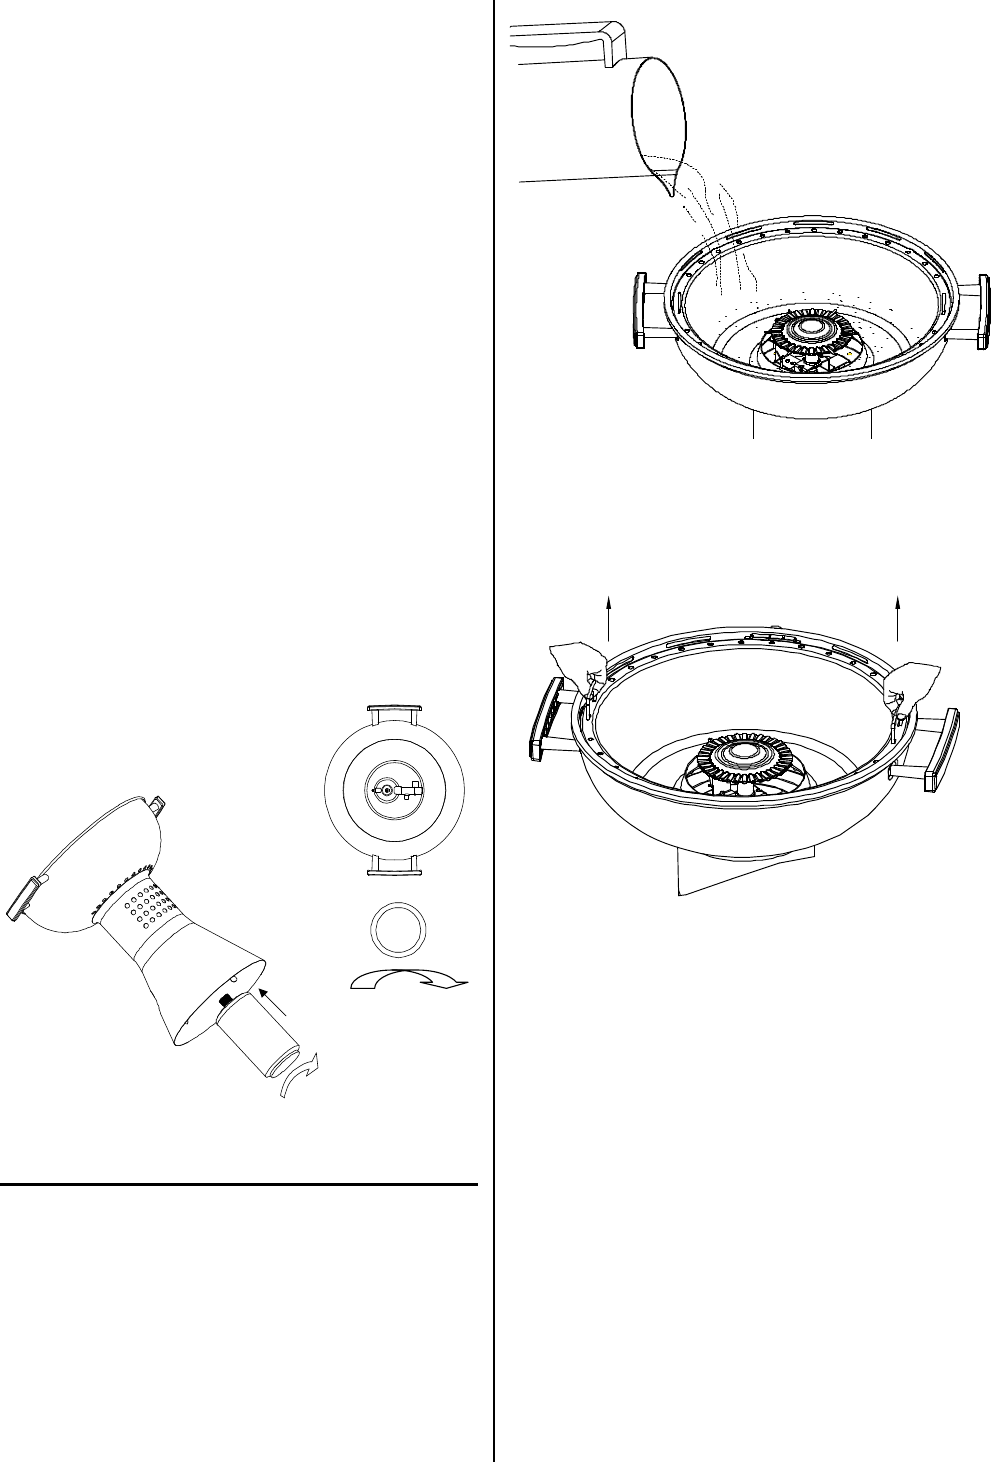
MOUNTING A GAS CYLINDER (GAS
CARTRIDGE)
Use only non-refillable gas cylinders with a screw
valve, filled with a butane
/p
ro
p
ane mix.
O
nly the
f
ollowing cylinders may be used
:
Ã$PMFNBOCVUBOFQSPQBOFNPEFM
C500 or C250
Ã$BNQJOHB[$(
Ã1SJNVT
Use of other cylinders can be dan
g
erous.
C
yli
n
-
d
ers must comply with European standard EN4
1
7
2
003
.
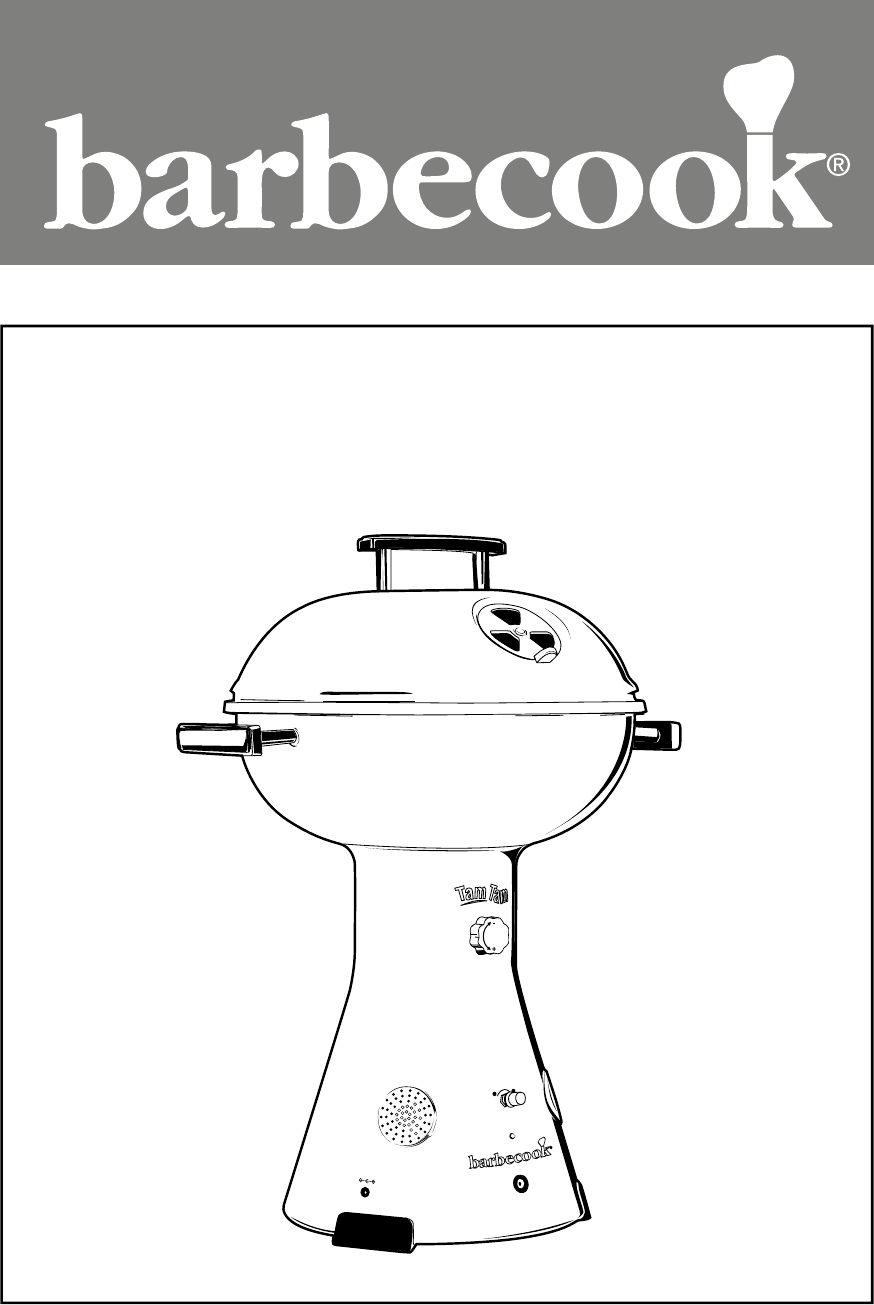
The Tam Tam has a nominal
p
ower of 3.4
2
kW
a
nd a consumption of 0.129 m³
/
h (244g
/
hr)
.
6
Method:
C
heck that the control knob is in the
‘
-’
p
osition
and the burner is extinguished, be
f
ore unscrewing
t
he cylinder. Inspect the gaskets before screwing
on a new cylinder. Re
p
lace the cylinder outdoors
and away
f
rom other persons.
S
crew the cylinder all the way down into the ba
r
-
becue.
C
heck for
g
as leaks, usin
g
a soa
p
solution.
A
pp
l
y soap so
l
ut
i
on to t
h
e var
i
ous gas-carry
i
ng
parts of the Tam Tam. The formation of air bub
-
bles indicates a
g
as leak
.
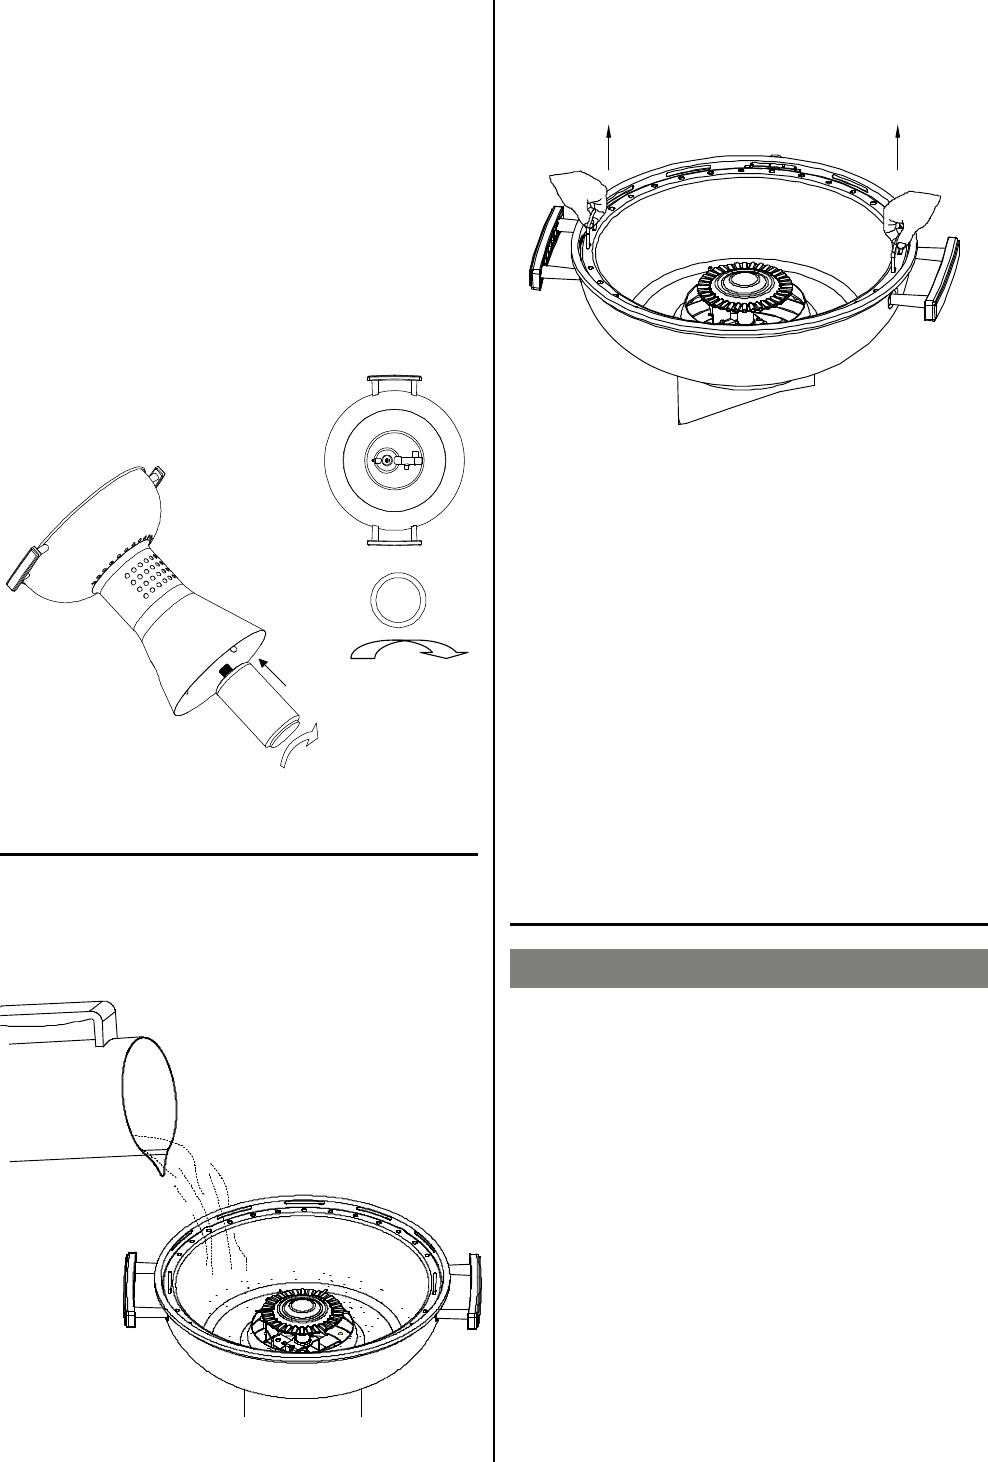
BEFORE AND AFTER EACH USE
1
SJPSUPV
TF
QP
VSXBUF
S
JOU
P
UI
F
G
B
U
E
SJ
Q
USB
Z
C
heck every 30 min. and top up, if necessary.
After use, when the fat drip tray has cooled suf
-
f
iciently, you can
p
our out the water to
g
ether with
th
e
f
at.
Allow the barbecue to warm up before placing any
f
ood on it. Avoid movin
g
the unit when it is hot. If
a
bsolutely necessary, move the unit only by li
f
ting
i
t with th
e
2 handl
es
o
n th
e
s
id
e.
Fi
r
s
t
use
When using your gas barbecue for the first time,
y
ou must
f
irst allow the unit to run in by o
p
erat
-
i
ng it
f
or a short period o
f
time without any
f
ood.
For this, you ignite the barbecue, close the lid and
k
ee
p
the tem
p
erature at
“
L
O
W” for
1
5 minutes.
Y
ou t
h
en open t
h
e
lid
an
d
a
ll
ow t
h
e
b
ar
b
ecue to
o
perate for another 5 minutes at ‘
)*
(
)
’.
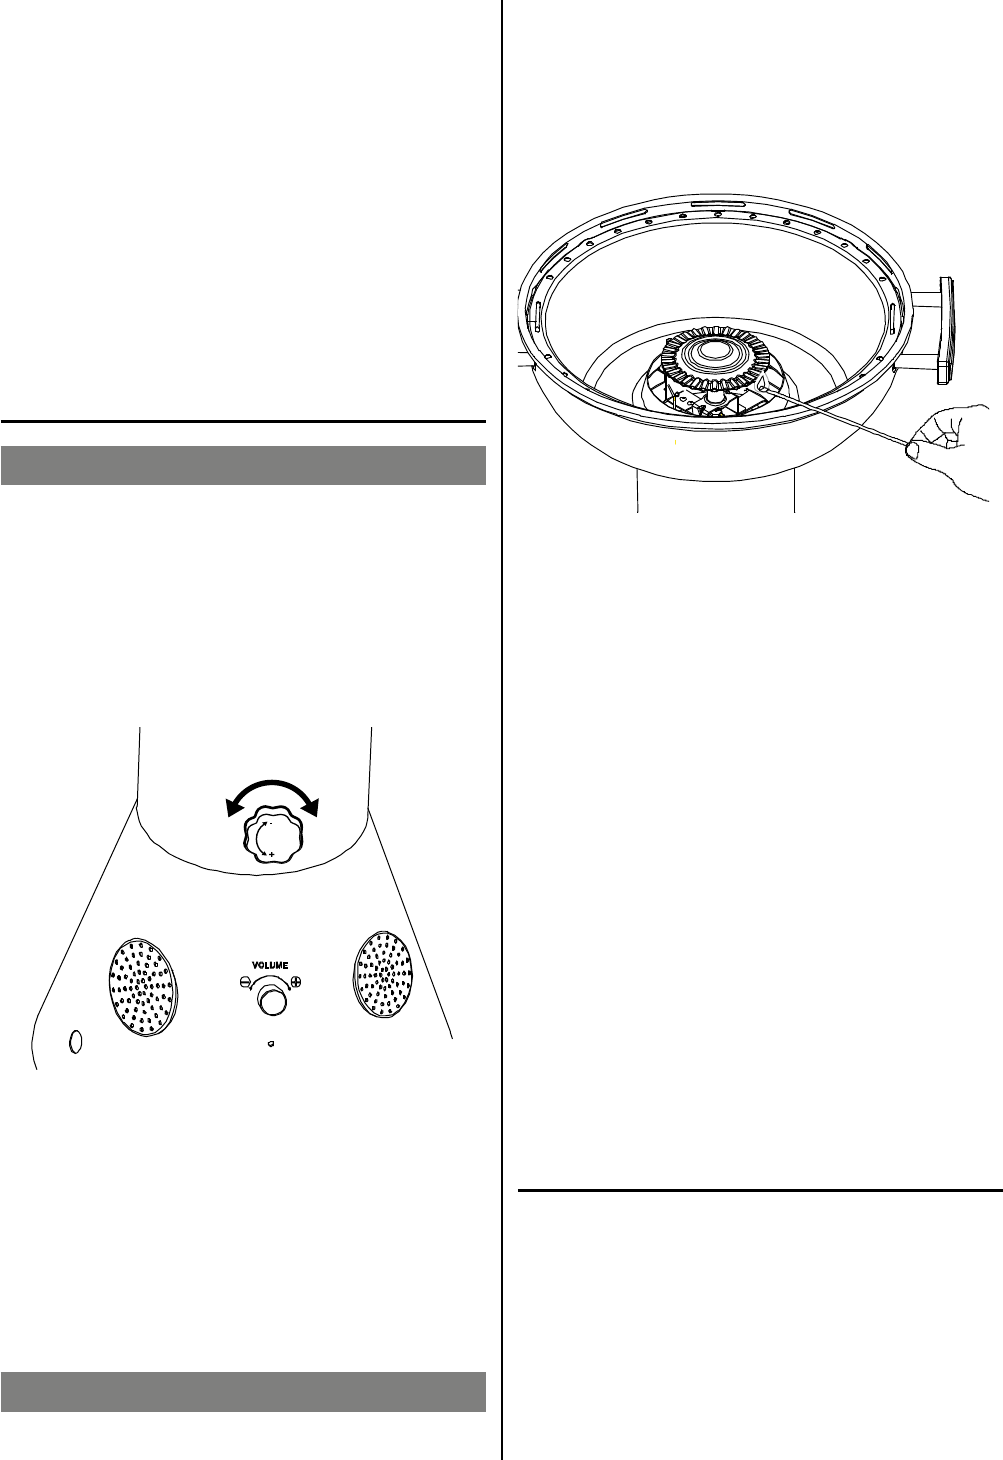
IGNITION
Automatic ignition
-
Open the li
d
-
M
a
k
e sure t
h
e
b
urner contro
l
k
no
b
i
s turne
d
'-'
-
T
u
rn b
u
rn
e
r
co
ntr
o
l kn
o
b d
o
wn t
o
‘
+’
.
-
Turn the button several times, so
y
ou hear it
cli
c
k
eac
h
t
i
me.
-
C
heck that the burner is lit. Looking through the
g
rid, you should see the flames.
7
No
t
e
:
T
o ext
i
ngu
i
s
h
, turn t
h
e contro
l
k
no
b
c
l
oc
k
-
wise to the '-'
p
osition.
W
arn
i
n
g:
- If the burner does not light, turn the control knob
t
o '-' and wait 5 minutes before tryin
g
a
g
ain
.
- Do not lean over the o
p
en
g
rill. Kee
p
your
f
ace
and body at least 40 cm away from the unit
when li
g
htin
g
it
.
Manual ignition
-
O
pen the lid
- Mak
e
su
r
e
th
e
b
u
rn
e
r
co
ntr
o
l kn
o
b i
s
t
u
rn
e
d '-'
- Turn the control knob to
'
+'
-
S
trike a match and hold the burning match close
to
th
e
b
u
rn
e
r
.
-
C
heck that the burner is lit. Lookin
g
throu
g
h the
grid, you should see the
f
lames.
No
t
e
:
T
o ext
i
ngu
i
s
h
, pus
h
i
n an
d
turn t
h
e contro
l
knob clockwise to the '-' position. During lighting
and
p
reheatin
g
, the
f
lames may li
f
t o
ff
the burner.
This phenomenon should not last longer than
6
0
seconds. If the phenomenon persists, the appli
-
ance must be switched o
ff
and ins
p
ected.
W
arnin
g
:
-
I
f
the burner does not light, turn the control knob
to '-' and wait 5 minutes before trying again.
-
Do not lean over the o
p
en
g
rill. Kee
p
your
f
ace
a
nd body at least
40
cm away
f
rom the unit
w
hen lighting it.
Th
e power can
b
e a
dj
uste
d
b
y turn
i
ng t
h
e contro
l
k
nob. To switch off the barbecue
,
turn the control
k
nob to '-'.
Do
n
o
t
close
t
he
lid
u
nt
il
t
he
co
ntr
ol
k
n
ob
is
i
n t
he
p
osition 'LOW'
REPLACING A GAS CYLINDER (GAS
CARTRIDGE)
Check that the gas cylinder is empty before
r
e
p
lacin
g
it.
S
hake the a
pp
liance to hear the sound
m
ade by the liquid gas.
C
heck that the burner is
e
xtinguished before unscrewing the gas cylinder.
C
heck the
g
askets before screwin
g
on a new
c
y
li
n
d
er.
R
ep
l
ace t
h
e cy
li
n
d
er out
d
oors an
d
away
f
rom other
p
ersons.
MAINTENANCE AND STORAGE
A
f
ouled injector or burner can be blown out with
c
ompressed air. Always inspect the gasket in the
s
crew ca
p
when re
p
lacin
g
the
g
as cylinder. I
f
it
i
s worn or
d
amage
d
,
i
t must
b
e rep
l
ace
d
.
D
o not
m
ake any alterations to the appliance.
Wh
en not
i
n use, store t
h
e un
i
t
i
n an u
p
r
igh
t
p
os
i
-
t
i
on
i
n a
d
ry, we
ll
-vent
il
ate
d
area.
GUARANTEE
Y
our barbecoo
k
®
appliance comes with a two
y
ear
g
uarantee a
g
ainst all manu
f
acturin
g
de
f
ects.
This guarantee applies
f
rom the date o
f
purchase,
p
rovided it is used in accordance with these
i
nstructions. Your till recei
p
t s
p
eci
f
yin
g
the date o
f
p
urchase is your certi
f
icate o
f
guarantee.
Thi
s
b
ar
b
ecoo
k
®
is not suitable
f
or commercial
use
.
8
This guarantee is limited to the repair or replac
e
-
ment o
f
p
arts which
p
rove de
f
ective under normal
use
an
d
se
rv
ice
.
This guarantee shall not apply to defects due to
i
mproper installation, incorrect use, alterations to
the a
pp
liance, disassembly o
f
the a
pp
liance, wear
a
nd tear
,
or lack o
f
maintenance.
TROUBLESHOOTING
1SPCMFN1SPCBCMFDBVTFSolution
(
B
T
P
E
PV
SEVSJOHJO
T
UB
M
-
lati
o
n
(BTM
F
BL
-
Screw cylinder all the way down onto unit
.
-
Check
p
resence and condition of
g
asket
b
etween c
yli
n
d
er an
d
c
yli
n
d
er
h
o
ld
er.
-
Close gas valve on unit
N
o s
p
ar
k
i
s
p
ro
d
uce
d
wh
en try
i
ng to
li
g
h
t t
h
e
barb
ecue
-
Ig
n
i
t
i
on e
l
ectro
d
e or
pi
ezo not connecte
d
to
le
a
d
w
i
r
e
- Electrode, lead wire or switch is de
f
ective
-
C
onnect lead wire between i
g
nition electrode
an
d
p
i
ezo
.
-
Re
p
lace de
f
ective
p
art.
Th
ere
i
s a spar
k
b
ut no
ignition when trying to
li
g
ht the barbecu
e
-
Ai
r st
ill
present
i
n t
h
e tu
b
e
b
etween
c
ylinder and burne
r
(
B
T
Q
S
FTT
VS
F
U
PP
L
O
W
(
B
T
W
B
M
WFEFGFDUJWF
-
Electrode not positioned correctl
y
-
T
ry to re
li
g
h
t
-
Replace gas cylinder
-
Re
p
lace
g
as valv
e
-
S
parks should be generated between electrode
and burner. Bend electrode into position
.
D
e
l
aye
d
ig
n
i
t
i
o
n
(
B
T
Q
SFTTVS
F
UPP
L
OW
-
Burner ports are fouled
-
Fouled injector
s
-
Defective
g
as valv
e
-
R
e
pl
ace
g
as cy
li
n
d
e
r
-
Clean burner ports
-
Clean injector
s
-
R
e
pl
ace
g
as va
l
v
e
B
urner i
g
nites but does
n
ot sta
y
li
t
-
No more
g
a
s
-
Defective
g
as valv
e
-
F
ou
l
e
d
b
urner ports
-
T
oo
m
uc
h wind
-
Replace gas cylinde
r
-
R
e
pl
ace
g
as va
l
v
e
-
C
lean burner ports
1
S
P
U
FD
U
V
OJ
U
G
S
PN
X
JO
E
E
xcessive flames on
b
u
rn
er
-
Incorrect mix of primary air and gas at
b
u
rn
e
r inl
e
t
-
Fouled in
j
ecto
r
-
Defective gas valv
e
-
U
nscrew
b
urner an
d
c
l
ean
b
urner
i
n
l
et an
d
net
loc
at
e
d at b
u
rn
e
r inl
et
-
C
lean in
j
ecto
r
-
R
ep
l
ace gas va
l
v
e
F
la
s
hba
c
k
f
ir
e
at b
u
rn
er
-
Blocked injector
-
F
ou
l
e
d
or
bl
oc
k
e
d
b
urner
p
orts
-
Incorrect primary air mix
-
Check injectors
-
C
lean burner
p
orts
-
U
nscrew burner and clean burner inlet and net
loc
at
e
d at b
u
rn
e
r inl
et
9
FR
NOTICE DE MONTAGE, D'UTILISATION
ET D'ENTRETIEN
POUR VOTRE SÉCURITÉ
I
m
p
ortant
:
li
sez attent
i
vement ces
i
nstruct
i
ons
a
f
in de vous
f
amiliariser avec l'appareil avant de
le raccorder à la bouteille de gaz. Conserver la
p
r
é
sente notice
p
our toute consultation ult
é
rieure.
- Utilisez l'appareil uniquement à l'air libre
-
A
vert
i
ssement : les
p
i
è
ces accessibles
p
euvent
ê
tr
e
br
û
lant
es
. T
e
n
e
z l
es
e
n
f
ant
s
à di
s
tan
ce
d
e
cet appareil.
-
C
ontrôlez que les joints
(
entre l'appareil et la
b
oute
ill
e
d
e gaz
)
sont en p
l
ace et qu'
il
s sont en
bon étant avant d'installer la bouteille de gaz
.
Joint en caoutchouc
-
N
'ut
ili
sez pas
l
'appare
il
s
i
l
es
j
o
i
nts sont en
d
om
-
m
a
g
és ou usés.
-
N'utilisez
p
as l'a
pp
areil en cas de
f
uite de
g
az ou
s
i la bouteille est endommagée ou ne fonctionne
p
as correc
t
emen
t
.
-
U
t
ili
sez
l
'a
pp
are
il
un
iq
uement sur un
pl
an
ho
r
i
z
o
nta
l
.
-
L'a
pp
areil doit être utilisé à distance suffisante
d
es matériaux in
f
lammables. La distance mini-
m
um par rapport aux murs ou aux plafonds est
d
e 1 m
.
-
L
e rem
pl
acement
d
e
l
a
b
oute
ill
e
d
e
g
az ne
p
eut
ê
tre effectué qu'à l'extérieur et à l'écart de toutes
s
ources d'inflammation, telles
q
u'un feu, une
veilleuse ou un
f
eu électri
q
ue, ainsi
q
ue d'autres
pe
r
so
nn
es.
-
En cas de
f
uite de gaz sur votre appareil
(
odeur
d
e gaz), transportez-le imm
é
diatement
à
l
'
e
xt
é
ri
eu
r dan
s
u
n
e
ndr
o
it
su
ffi
s
amm
e
nt v
e
ntil
é
à
l'écart de toutes sources d'in
f
lammation où la
f
uite pourra être recherchée et réparée
.
-
Contrôlez toujours la présence éventuelle de
f
uites de
g
az à l'extérieur.
-
Ne recherchez jamais des
f
uites de gaz au
m
oyen d'une flamme, mais utilisez toujours de
l
'eau savonneuse
.
-
S
i vous sentez une odeur de gaz
:
1) Coupez l'arrivée de gaz de l'appareil
2) Éteignez tout feu
3) Ouvrez le couvercle
4) Appelez immédiatement votre distributeur
de gaz ou le service d'incendie si l'odeur
persiste
5) Ne stockez pas et n'utilisez pas d'essence ou
autres gaz et liquides inflammables à proxi-
mité de cet appareil ou de tout autre appareil
6) Rangez la bouteille à l'extérieur de l'habita-
tion dans un local correctement ventilé
-
Les bouteilles de gaz de r
é
serve et autres co
m
-
b
ustibles ne peuvent pas être stockés à moins
d
e
3
m de l'a
pp
areil
.
-
Un montage n
é
gligent peut s'av
é
rer dangereux.
R
espectez scrupuleusement les instructions.
-
Lors
q
ue l'a
pp
areil n'a
p
as
é
t
é
utilis
é
p
endant une
pé
riode prolong
é
e, celui-ci doit
ê
tre contr
ô
l
é
p
our rechercher les fuites de gaz éventuelles. Il
e
st
ég
alement n
é
cessaire de contr
ô
ler
q
ue les
o
ri
f
ices du brûleur ne sont pas obstrués.
-
Ne laissez jamais l'appareil sans surveillance
p
endant son utilisation. Ne d
ép
lacez jamais
l
'appare
il
pen
d
ant
l
'ut
ili
sat
i
on
.
-
N'utilisez pas de charbon de bois, bois, briquet
-
tes,
p
ierres de lave ou bri
q
uettes en c
é
rami
q
ue
.
MONTAGE D'UNE BOUTEILLE DE GAZ
(CARTOUCHE DE GAZ)
Utilisez uni
q
uement des bouteilles de
g
az
à
usa
g
e
u
nique avec raccord
à
vis remplies d'un m
é
lange
d
e butane / propane. Seules les bouteilles suivan
-
tes
p
euvent
ê
tre utilis
é
es
:
Ã$PMFNBOCVUBOFQSPQBOFNPE¨MF
C500 ou C250
10
Ã$BNQJOHB[$(
Ã1SJNVT
Il peut
ê
tre dangereux d'utiliser d'autres bouteilles.
L
es
b
ou
t
e
ill
es
d
o
iv
e
nt
ê
tr
e
co
nf
o
rm
es
à la n
o
rm
e
e
uro
p
éenne EN 417:
2
003.
La puissance nominale du Tam Tam est de 3,4
2
k
W et sa consommation est de 0,129 m³/h (244
g/
h
).
Mode d'emploi :
V
éri
f
iez
q
ue le bouton de commande est en
p
osition '-' et que le br
û
leur est
é
teint avant de
d
évisser la bouteille de gaz usagée. Contrôlez les
j
oints avant de visser une nouvelle bouteille de
g
az. Remplacez la bouteille de gaz
à
l'ext
é
rieur et
à
l
'écart d'autres personnes
.
V
issez la bouteille de
g
az à
f
ond sur le barbecue.
C
ontrôlez qu'il n'y a pas de fuites de gaz à l'aide
d
'une solution savonneuse. Les différentes pièces
d
'alimentation du
g
az du Tam Tam doivent
ê
tre
s
avonn
é
es. La pr
é
sence de bulles d'air indique
u
ne fuite de gaz
.
AVANT ET APRÈS CHAQUE UTILISATION
Versez de l'eau dans la lèchefrite avant l'emploi
et vérifiez toutes les 30 minutes. Faites l'a
pp
oint
é
ventuellement
.
Après utilisation, vous pouvez vider l'eau et la
g
raisse dès
q
ue la lèche
f
rite a su
ff
isamment
ref
r
o
idi
.
Le barbecue doit être chauffé avant d'y poser les
aliments. Évitez de déplacer l'appareil lorsqu'il
est chaud. Si cela s'avère nécessaire, déplacez
l'appareil en le soulevant à l'aide des 2 poignées
Gebruikershandleiding.com neemt misbruik van zijn services uitermate serieus. U kunt hieronder aangeven waarom deze vraag ongepast is. Wij controleren de vraag en zonodig wordt deze verwijderd.
Product:
Spelregels forum
Om tot zinvolle vragen te komen hanteren wij de volgende spelregels:
lees eerst de handleiding door;
controleer of uw vraag al eerder door iemand anders is gesteld;
probeer uw vraag zo duidelijk mogelijk te stellen;
heeft u een probleem en al geprobeerd om dit op te lossen, vermeld dit erbij aub;
heeft u een oplossing gekregen van een bezoeker dan horen wij dat graag in dit forum;
wilt u een reactie geven op een vraag of antwoord, gebruik dan niet dit formulier maar klik op de knop 'reageer op deze vraag';
uw vraag wordt direct op de website gezet; vermijd daarom persoonlijke gegevens in te vullen;
Belangrijk! Als er een antwoord wordt gegeven op uw vraag, dan is het voor de gever van het antwoord nuttig om te weten als u er wel (of niet) mee geholpen bent! Wij vragen u dus ook te reageren op een antwoord.
Belangrijk! Antwoorden worden ook per e-mail naar abonnees gestuurd. Laat uw emailadres achter op deze site, zodat u op de hoogte blijft. U krijgt dan ook andere vragen en antwoorden te zien.
Abonneren
Abonneer u voor het ontvangen van emails voor uw Barbecook tam tam bij:
nieuwe vragen en antwoorden
nieuwe handleidingen
U ontvangt een email met instructies om u voor één of beide opties in te schrijven.
Ontvang uw handleiding per email
Vul uw emailadres in en ontvang de handleiding van Barbecook tam tam in de taal/talen: Nederlands, Duits, Engels, Frans, Italiaans, Portugees, Spaans, Pools, Deens, Zweeds, Noors, Fins als bijlage per email.
De handleiding is 4,29 mb groot.
U ontvangt de handleiding per email binnen enkele minuten. Als u geen email heeft ontvangen, dan heeft u waarschijnlijk een verkeerd emailadres ingevuld of is uw mailbox te vol. Daarnaast kan het zijn dat uw internetprovider een maximum heeft aan de grootte per email. Omdat hier een handleiding wordt meegestuurd, kan het voorkomen dat de email groter is dan toegestaan bij uw provider.
Stel vragen via chat aan uw handleiding
Stel uw vraag over deze PDF
Uw handleiding is per email verstuurd. Controleer uw email
Als u niet binnen een kwartier uw email met handleiding ontvangen heeft, kan het zijn dat u een verkeerd emailadres heeft ingevuld of dat uw emailprovider een maximum grootte per email heeft ingesteld die kleiner is dan de grootte van de handleiding.
Er is een email naar u verstuurd om uw inschrijving definitief te maken.
Controleer uw email en volg de aanwijzingen op om uw inschrijving definitief te maken
U heeft geen emailadres opgegeven
Als u de handleiding per email wilt ontvangen, vul dan een geldig emailadres in.
Uw vraag is op deze pagina toegevoegd
Wilt u een email ontvangen bij een antwoord en/of nieuwe vragen? Vul dan hier uw emailadres in.