and direct sunlight. Position the base station with a distance of 1 m to other electronic devices
or there is a risk of mutual disturbance.
Do not use the handset in potentially explosive areas.
1.3Power supply
Only use the power adapter plug supplied because other power supplies could da-
mage the telephone. Ensure access to the power adapter plug is not obstructed by
furniture or such.
1.4Telephone connection cable
If the telephone connection cable supplied needs to be replaced, ensure the pin assignment is
identical on the new one.
1.5Rechargeable batteries
Do not throw batteries into a fire or immerse them in water.
1.6Power failure
The telephone cannot be used to make calls in the event of a power failure. Always keep a
cord connected telephone which operates without an external power supply available in case
of emergency situations.
1.7Private branch exchanges
The telephone can be connected to a private branch exchange. There is no guarantee that
the telephone will work on every private branch exchange.
1.8Notes on medical equipment
Never use the telephone in the vicinity of medical equipment. It cannot be fully ruled out that
they will not affect heart pacemakers. DECT* telephones can cause an unpleasant humming
sound in hearing aids.
1.9Cleaning and upkeep
Clean the housing surfaces with a soft, fluff−free cloth. Never use cleaning agents or solvents.
The rubber footpads on the base station are not resistant to all cleaning agents.
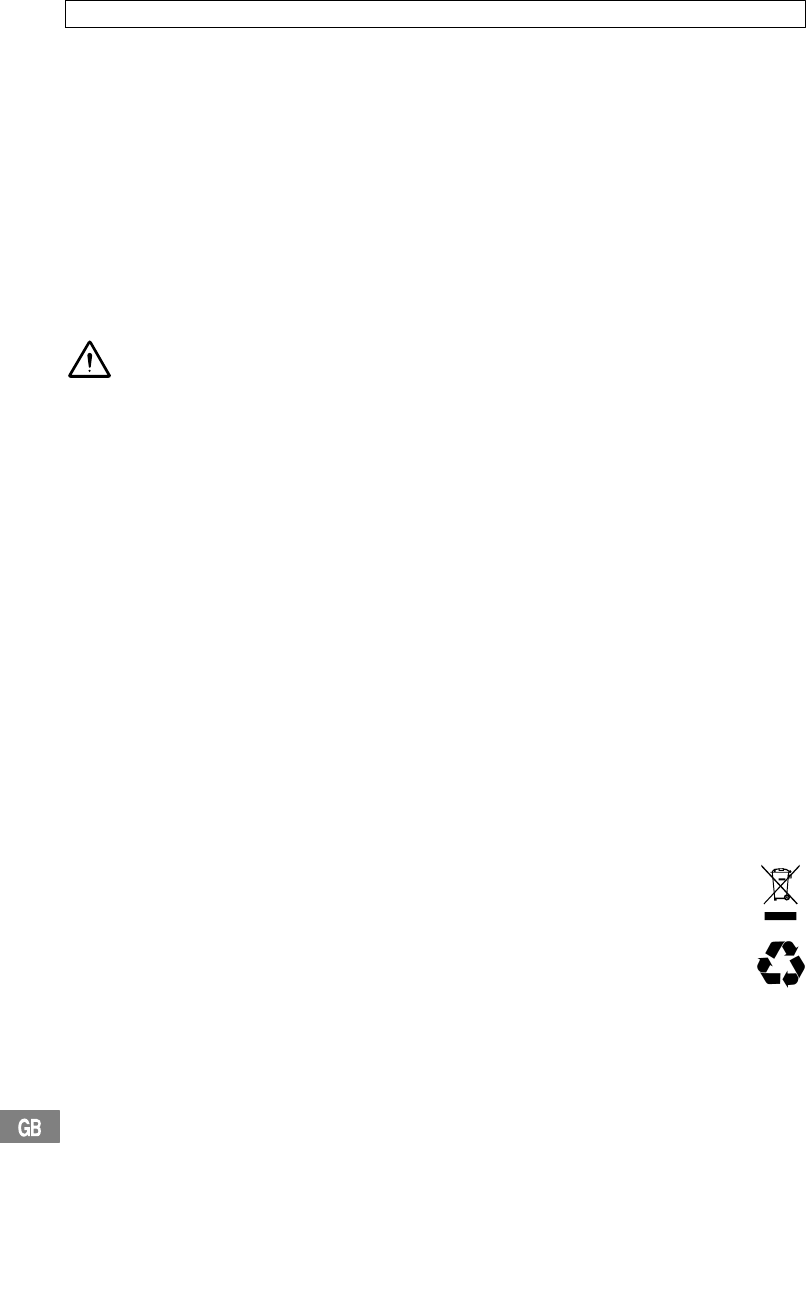
1.10Disposal
You are legally obliged to dispose of consumable goods according to the applicable
laws. The adjacent symbol on the telephone indicates that electrical and electronic
apparatus and batteries no longer required must be disposed of separate from
domestic waste.
Electrical and electronic devices must be disposed of
at a suitable collection point provided by the public waste authorities.
Batteries must be disposed of at the point of sale or at the appropriate collection
points provided by the public waste authorities.
Packaging materials must be disposed of according to local regulations.
* DECT: Digital Enhanced Cordless Telephone = Standard for cordless telephones.
− Starting Up −
33
2Starting Up
2.1Safety information
Caution: It is essential to read the Safety Information in Chapter 1 before starting up.
2.2Checking the contents of the package
The package contains:
a base station
a telephone connection cable
a handsettwo rechargeable batteries
a power adapter plugan operating manual
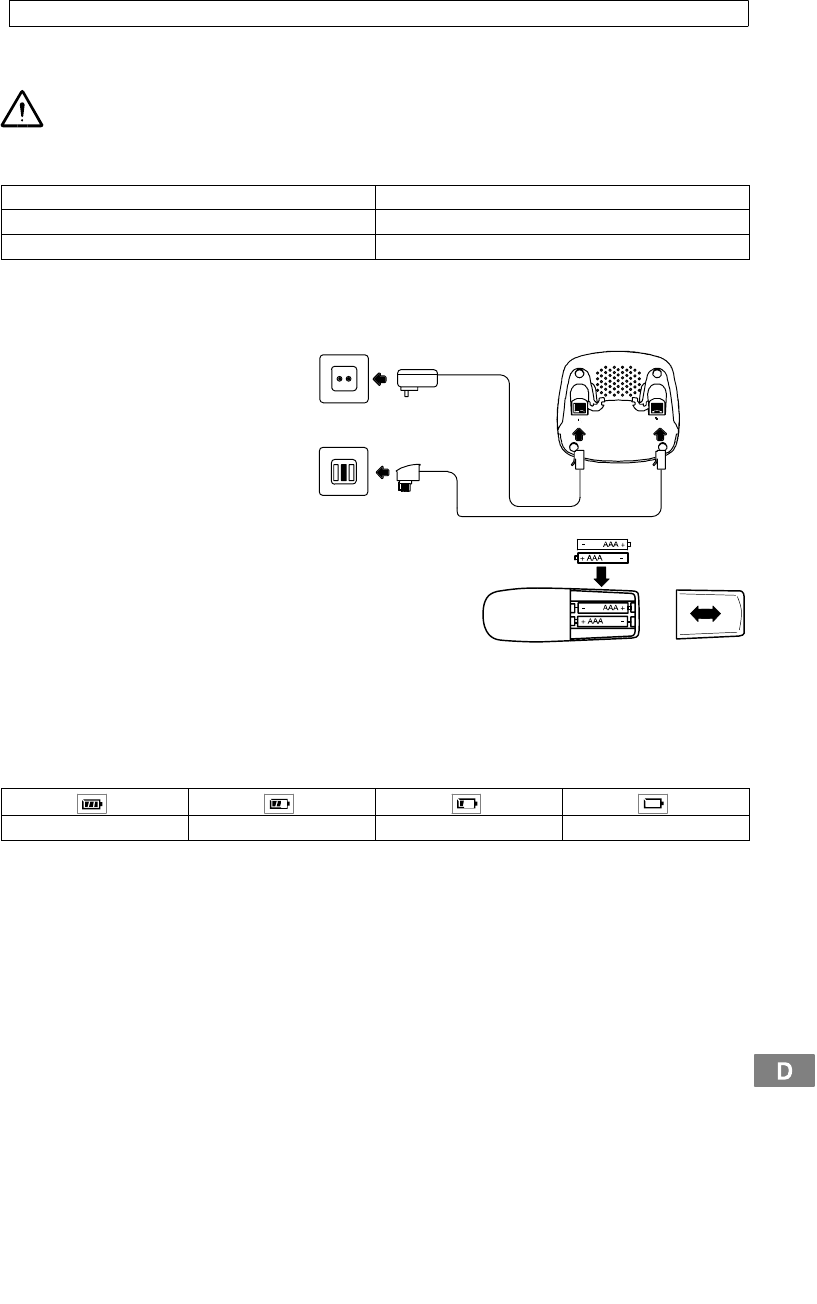
2.3Connecting the base station
Connect the base station as illustrated in the diagram. For reasons of safety, only use the
power adapter plug and telephone connection line supplied.
Plug the power adapter plug in a properly installed power outlet.
Telephone line socket
Mains power outlet
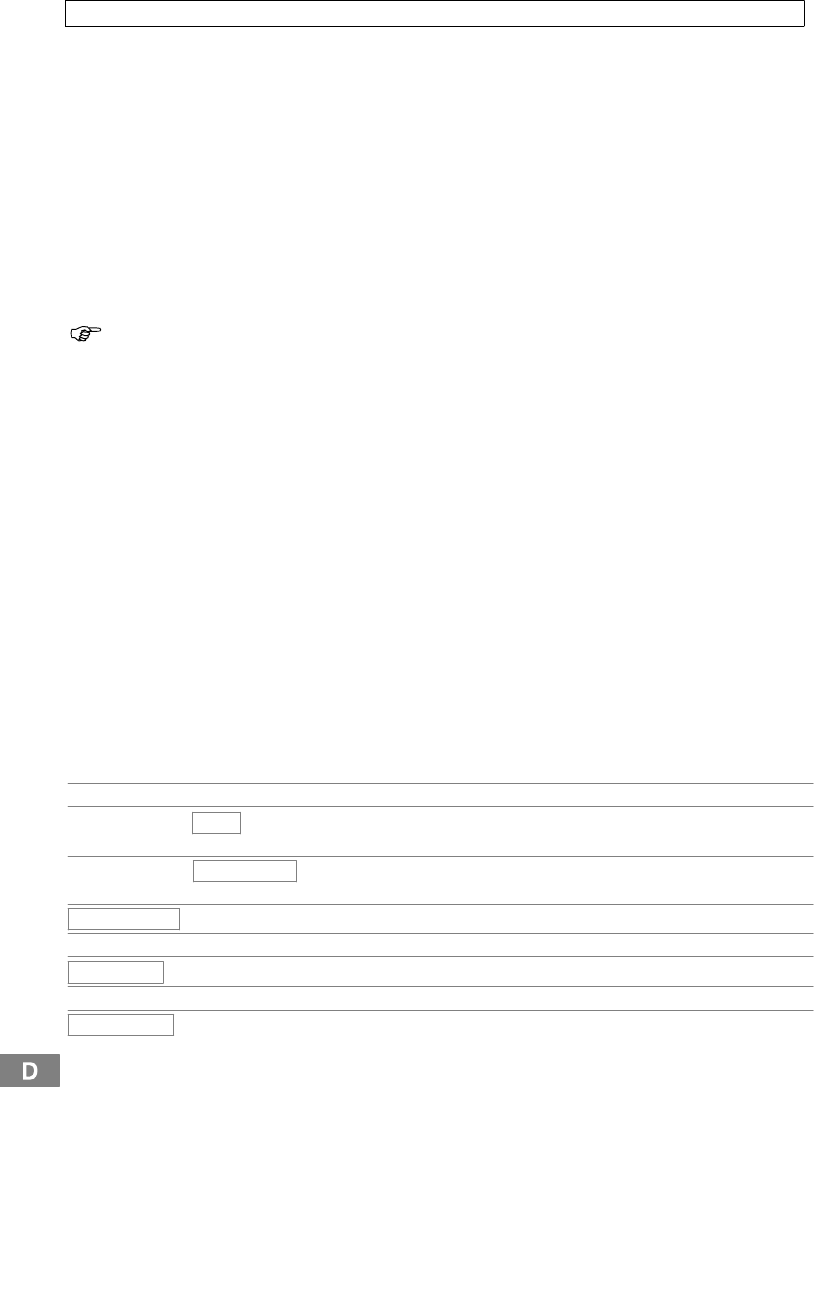
2.4Inserting the batteries
Insert two batteries of the type AAA Ni−MH 1.2 V 550 mAh
in the battery compartment after opening it. Pay attention
to correct polarity (refer to Fig.)! Close the battery compart-
ment cover.
Important: Do not use any other type of batteries.
2.5Charging the batteries
When preparing to use the handset for the first time, place it in the base station (display facing up-
wards) for at least 14 hours. The charging control lamp on the base station lights up. The handset
warms up during the charging process. This is normal and does not represent a risk. Do not
charge the handset with charging units from other manufacturers. Failure to charge the batteries
properly can lead to telephone malfunction.
The current battery charge status is indicated in the display:
FullHalf emptyLowEmpty
2.6Tone or Pulse dialling mode
The telephone can be connected to both analogue connections (pulse dialling) and digital con-
nections (tone dialling). The equipment is set to Tone dialling mode at the factory. If the telephone
does not work on your telephone connection, refer to Chapter 7.3 to learn how to switch the tele-
phone to analogue, pulse dialling mode.
2.7Operating on private branch exchanges
If your telephone is connected to a private branch exchange, the R button can be used to imple-
ment the transfer calls or automatic callback functions. When used on a private branch exchange,
a Recall time of 100 ms must be set. The dealer where you purchased the exchange can provide
information as to whether the telephone will work properly with the exchange.
− Operating Elements −
34
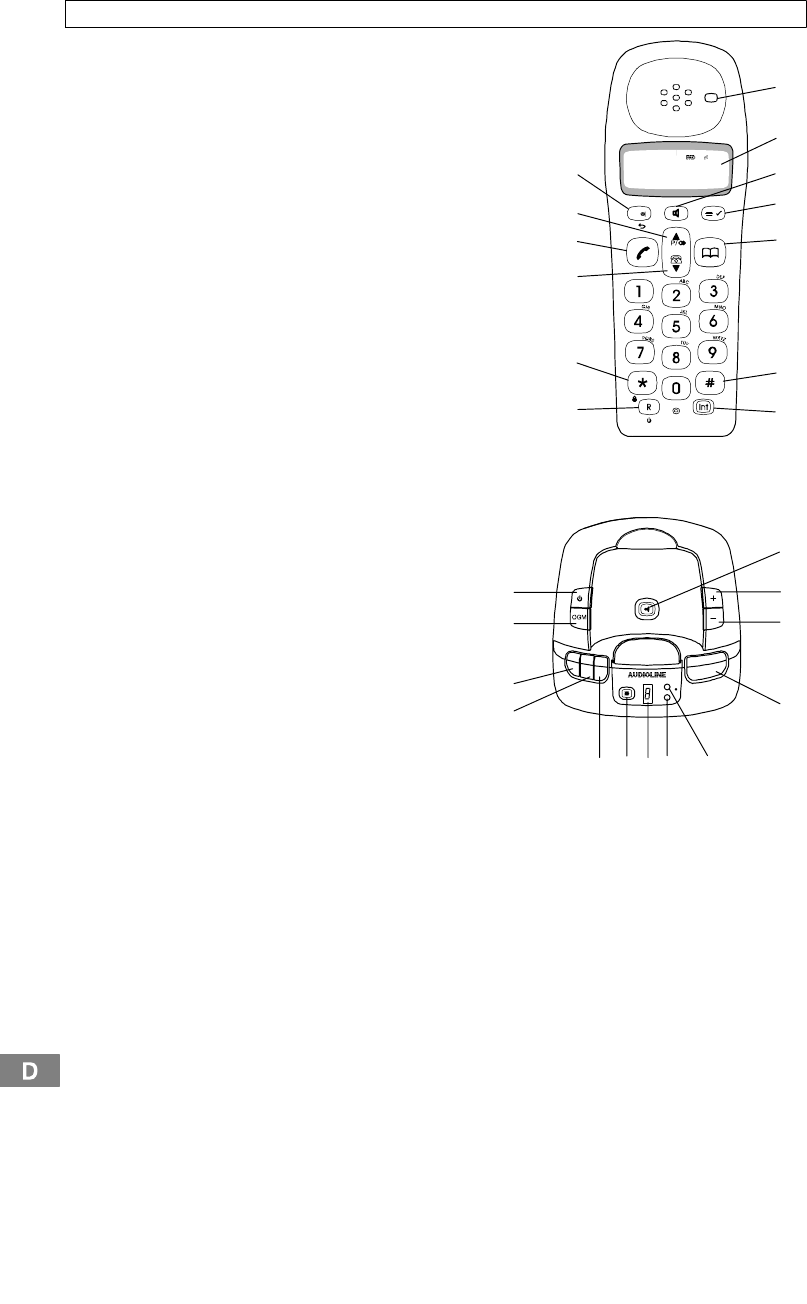
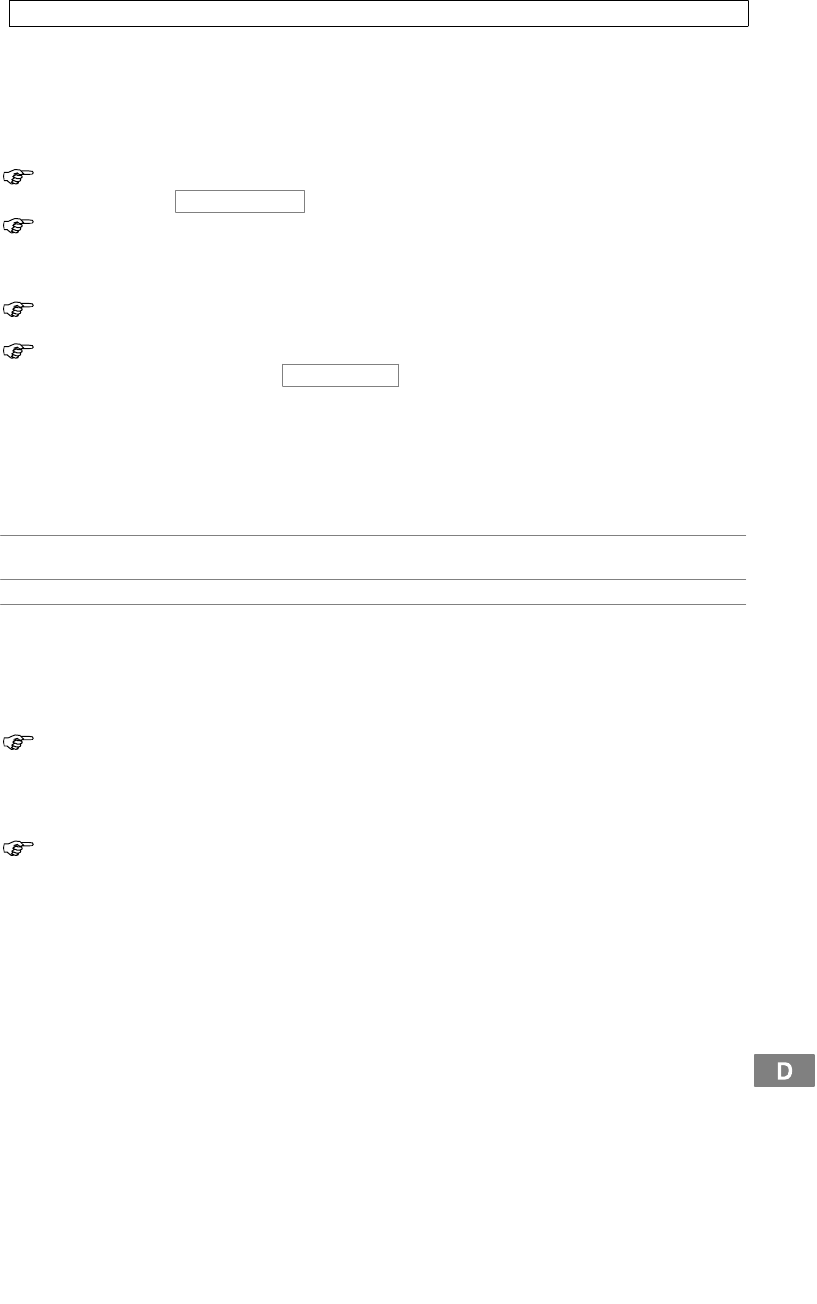
3Operating Elements
3.1Handset
1Call indicator
2Display
3Hands−free call
4Menu button and OK button
5Phone book
6Hash button (for conference calls)
7Internal and conference calls
8Muting function and delete / back
9Selection button:
Scroll upwards in the menu and calls list /
Redialling / dialling pause
10Call button
11Selection button:
Scroll downwards in the menu and calls list / calls list
12Key lock off/on
13R−signal button (on/off)
3.2Base station
1.Answering machine on/off
2.Play/Record outgoing message
3.Play previous message / Record memo
4.Stop
5.Play next message / Set ring delay
6.Delete
7.7−segment display
8.LED, charging control lamp
9.LED, power lamp
10.Play
11.Paging button
12.Volume + / Increase setting
13.Volume − / Lower setting
Notes on the depiction of button icons:
In order to read the manual more easily, the telephone buttons are depicted in a standardised rec-
tangular contour. The appearance of the icons in the buttons, therefore, deviates slightly from that
on the telephone. However, the buttons are clearly recognisable.
/C /
21-12 HS1
1
2
3
4
5
6
7
8
9
11
10
12
13
13
12
11
10
9
8
7
6
4
1
2
3
5
− Display Indicators −
35
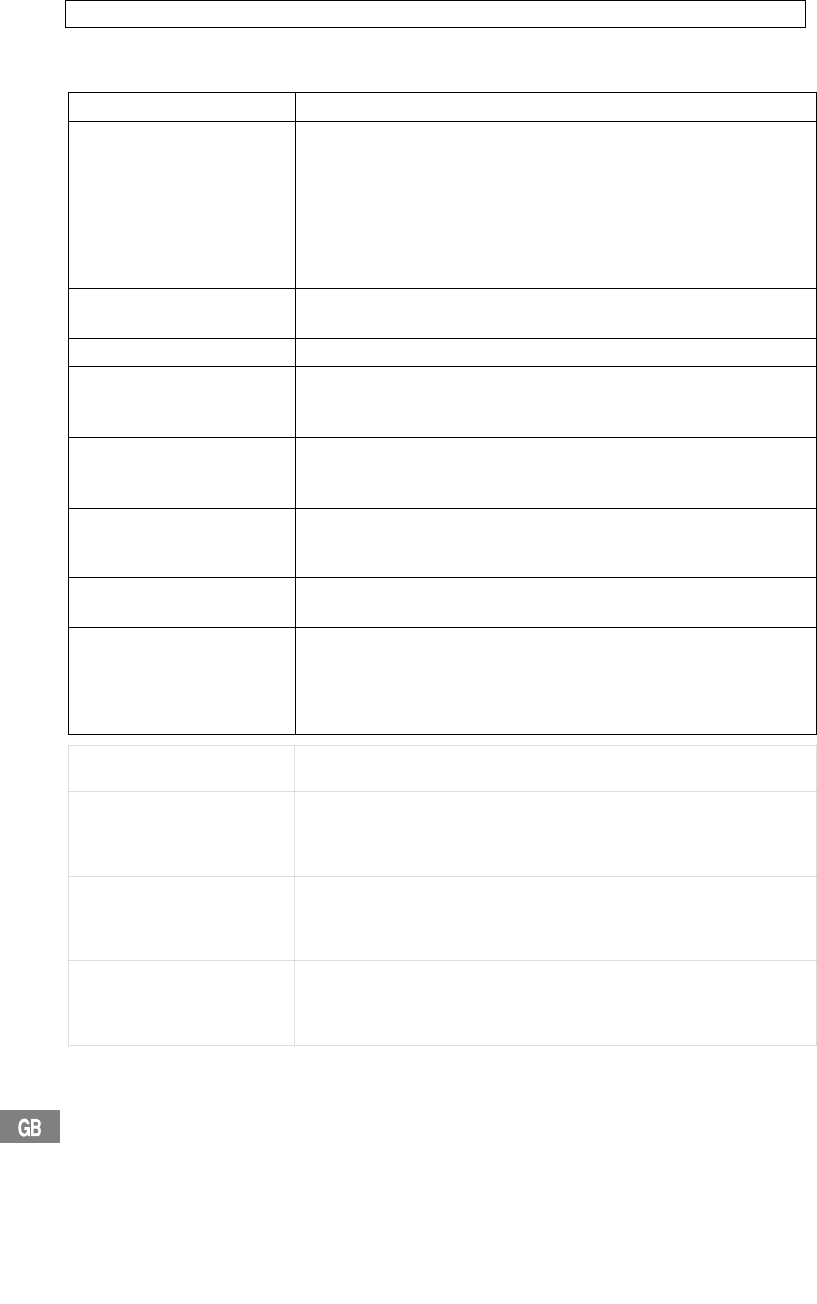
4Display Indicators
The display indicates all the important functions by means of various icons and messages.
IconDescription
12−10Time display
HS 1Handset identification
Constantly on: Displays battery capacity.
Indicator flashes: Batteries must be charged.
Run−through segments: Batteries are being charged.
Constantly on: The connection to the base station is good.
Indicator flashes: The handset is out of range of the base station.
A call is currently being made.
Constantly on: An external call is currently being made.
Indicator flashes: An external call has been received.
Constantly on: An internal call is currently being made.
Indicator flashes: An internal call has been received.
Constantly on: You have accessed the calls list. The call has not been viewed.
Indicator flashes: There are new calls in the calls list.
The phone number is longer than 12 digits.
This call was not taken.
The number is stored in the calls list.
This call was taken.
The number is stored in the calls list.
You have opened the main menu.
You have opened the phone book.
You have received a text message (SMS).
The key lock is activated.
5Telephoning
The way in which the telephone is operated is subsequently described by means of text and sym-
bols: If a button is depicted, it means that the respective button must be pressed.
In addition, the following symbols appear:
ëEnter digits or letters
2 sec Press the button depicted for 2 seconds
{í}Acoustic signal on the handset
{ì}Acoustic signal on the base station
EXAMPLE
or
Text or icon in the display
The ringing signals on the handset {í} and base station {ì} only function when they
have not been deactivated beforehand!
− Telephoning −
36
5.1Taking a call
{ì} and {í}, Take the call
End the call
When the handset is ringing, press the y or z button to adjust the ringing vo-
lume.
If the ringing tone has been deactivated on the handset, incoming calls are only indica-
ted by the base station (as long as the base ringer has not been deactivated).
5.2Handsfree
Use this function to telephone with your hands free.
Switch the function on or off during a call
5.3Taking two calls
You will hear acoustic signals (call waiting) if a second call is received while you are talking on the
telephone. The number of the second caller appears in the display. Press the buttons below in
the sequence described to switch between the two callers, the connection to the other caller is
put on hold.
R, 2Switch to the other caller
Caution: The functions for phone number display, holding calls and call waiting are
supplementary services offered by your telephone network provider. Contact your net-
work provider for further information.
To use the supplementary services offered by Deutsche Telekom, set the Recall
(Flash) time to 300 ms.
5.4Making a call
ëEnter the phone number (max. 32 digits)
Dial the phone number
If you enter a wrong digit:
Press briefly: Deletes the last entry.
2 sec Press longer: Deletes the entire phone number.
It is also possible to press the Call button first to obtain the dialling tone for an outside line.
Then enter the required telephone number. It is not possible to correct wrong digits individually
using this dialling procedure.
5.5Dialling pause
In the case of private branch exchanges, it is necessary to dial a specific number (e.g. 9" or 0")
in order to obtain the dialling tone for an outside line. When using some older private branch ex-
changes, it takes a little time before the dialling tone becomes audible. Particularly in the case of
such private branch exchanges, it is useful to insert an automatic pause after the number for the
outside line so that the number can be dialled in a continuous process without having to wait for
the dialling tone.
Between pressing the number for an outside line and the phone number required, press the £
button once. P" appears in the display. After dialling the number for the outside line, the telephone
then waits 3 seconds before dialling the actual phone number.
The pause can also be entered with the phone number in the phone book.
5.6Redialling
The telephone stores the last ten numbers dialled in a redialling list.
£Open the redialling list (the last phone number dialled
appears in the display)
y or z, Select an entry and dial the number
If a phone number has been stored in the phone book, the name associated with it ap-
pears in the display.
5.6.1Deleting all the numbers from the redialling list
£Open the redialling list
2 sec
, Delete the entire list
5.6.2Deleting a number from the redialling list
£, y or zSelect the entry to be deleted
, Delete the individual entry
− Telephoning −
37
5.7Calling back missed calls
The telephone stores the last ten calls in a calls list.
, y or zOpen and scroll through the entries stored
Dial the number
5.8Dialling phone numbers stored in the phone book
Phone numbers stored in the phone book (refer to Section 8.1) can be dialled quickly and
easily.
¤, y or zOpen the phone book and select the phone book entry
Dial the number
Phone book entries can be selected directly by opening the phone book and entering
the first letters of the entry required. Example: To access the number for Peter", for ex-
ample, press / once and use the y or z buttons, if necessary, to select the
stored entry.
5.9Adjusting the receiver volume
The volume can be adjusted to one of five settings during a call.
y or zPress the button during the call
5.10Muting the microphone in the handset
Switch the function on/off
The handset microphone can be switched on and off during a telephone call. This enables you
to confer with a third party, for example, without the caller being able to hear you. The handset
loudspeaker, however, remains on; i.e. you can still hear the caller.
5.11Talk time display
A few seconds after a call has been taken, the phone number dialled or that of the caller disap-
pears from the display and is replaced by the duration of call (hh−mm−ss).
5.12Key lock
3 sec *Activate the key lock function
*, *Deactivate the key lock function
Incoming calls can be taken as normal even when the key lock function is activated (also refer
to Section 7.4). The key lock function remains active after the call has been ended.
5.13Temporary tone dialling
If you only operate the telephone using the Pulse dialling method, you can still make use of the
advantages of the Tone dialling method (e.g.: for remote access of the answering machine).
*Switch to Tone dialling (for the duration of the call)
When the call is ended, the telephone automatically switches back to Pulse dialling.
5.14Notes on range
The handset has a range of approx. 50 meters in closed rooms and approx. 300 meters outdoors.
In the case of a good connection to the base station, the h icon lights up continuously in the dis-
play.
If the handset is moved too far from the base station, the h icon flashes and acoustic
warning signals are issued. Move towards the base station, otherwise the call will be di-
sconnected.
If the connection to the handset has been lost, the message BASE 1" appears in the
display.
5.15Searching for the handset (Paging)
If you have misplaced the handset, it can be located easily. Press the Paging button on the base
station; the handset rings for 30 seconds. To terminate the ringing function before the 30 seconds
has elapsed, simply press the Paging button again or the Call button on the handset.
All the handsets registered on the base station ring.
or Ends paging prematurely.
5.16Switching the handset on /off
3 sec RSwitch on/off
It is not possible to switch the handset on/off if the handset is in the base station.
− Navigating in the Main Menu −
38
6Navigating in the Main Menu
6.1Navigating in the menu
All the functions can be accessed via the various menus. Refer to the menu structure in Chapter
7 to find how to access the respective functions.
1.Open the required menu or phone book using the relevant button.
2.Press yor z to select the required submenu.
3.Press the button to open the submenu.
4.Press yor z to select the required function.
5.Press the button to open the function.
6.Press yor z to select the setting required.
7.Enter digits or letters using the relevant digit keys.
8.Press the button to confirm the input.
9.Press the button to move one menu level back.
Every process is automatically cancelled if there is no input within 20 seconds.
6.2Acoustic signals
To simplify operating the telephone, it is equipped with various confirmation, notification, warning
and others acoustic signals. Some of them can be activated or deactivated as required. These
include:
SKey beep: A short tone is issued each time a button on the handset is pressed.
SLow battery" warning signal: If the battery capacity is too low, a warning signal is
issued to remind you to charge the handset.
SRange warning signal: This acoustic warning signal is issued when the handset is
moved too far from the base station.
The way to switch the signals on and off is described in the menu structure in Section 7.4.
Other acoustic signals simplify navigating in the menu. They cannot be deactivated. The most im-
portant of these are:
SConfirmation signal {í}: Two short, ascending acoustic signals are issued when in-
put is completed successfully.
SNotification signal {í}: A longer, higher acoustic signal is issued on reaching the
end of a menu after scrolling up or down, indicating there are no further selection op-
tions.
6.3Example
Using the example of Writing an SMS", this section explains how to navigate in the main menu
and submenus and complete entries. Proceed as in this example for all the settings.
Open the main menu
y or z
SMS
, Select the SMS function and confirm
y or z
WRITE
, Select the function and confirm
(Menu SMS / WRITE)
MESSAGE ?
, Confirm the request for input
ë, Enter a message and confirm
NUMBER ?
, Confirm the request for input
ë, Enter a phone number and confirm
SENDING
Send process is started
− Menu Structure −
39
7Menu Structure
Access the Main Menu by pressing the button. Then use the y and z buttons to select the required submenu and confirm your selection by pressing
the button. Or, type in the required information (individual entries are subsequently printed in italics and identified by ë). Your entry is normally confirmed
*All PINs are set to 0000 at the factory. Press the button for two seconds to cancel the programming process.
**Attention: All
settings are reset to their default setting! All list entries are deleted!
− Menu Structure −
41
7.4Handset
HANDSETBEEPKEY TONEON{í}
yyzOFFı{í}
zzLOW BATTERYON{í}
zOFF{í}
OUT RANGEON{í}
zOFF{í}
INT RING VOLVOLUME 1, 2, 3, 4, 5, VOLUME OFFyz{í}
EXT RING VOLVOLUME 1, 2, 3, 4, 5, VOLUME OFFyz{í}
INT MELODYMELODY 1 − 10yz{í}
EXT MELODYMELODY 1 − 10yz{í}
CLOCK SET*ë hh−mm{í}
ALARM SET*ONë hh−mm{í}
zOFF{í}
AUTO ANSWER**ON{í}
zOFF{í}
NAMEëABC{í}
LANGUAGE***ENGLISH{í}
yFRANCAIS
zGERMAN
ITALIANO
KEY LOCK ?ON****
*Enter the time as four digits in 24−hour clock format. Example: Enter 5:53 p.m. as 1753".
**ON: An incoming call is taken by removing the handset from the base station (default setting). After removing the handset, all the buttons are inhibited
for four seconds.
OFF: An incoming call can only be taken by pressing the button.
***A total of 16 languages are available for selection: English, French, German, Italian, Spanish, Dutch,
Gebruikershandleiding.com neemt misbruik van zijn services uitermate serieus. U kunt hieronder aangeven waarom deze vraag ongepast is. Wij controleren de vraag en zonodig wordt deze verwijderd.
Product:
Spelregels forum
Om tot zinvolle vragen te komen hanteren wij de volgende spelregels:
lees eerst de handleiding door;
controleer of uw vraag al eerder door iemand anders is gesteld;
probeer uw vraag zo duidelijk mogelijk te stellen;
heeft u een probleem en al geprobeerd om dit op te lossen, vermeld dit erbij aub;
heeft u een oplossing gekregen van een bezoeker dan horen wij dat graag in dit forum;
wilt u een reactie geven op een vraag of antwoord, gebruik dan niet dit formulier maar klik op de knop 'reageer op deze vraag';
uw vraag wordt direct op de website gezet; vermijd daarom persoonlijke gegevens in te vullen;
Belangrijk! Als er een antwoord wordt gegeven op uw vraag, dan is het voor de gever van het antwoord nuttig om te weten als u er wel (of niet) mee geholpen bent! Wij vragen u dus ook te reageren op een antwoord.
Belangrijk! Antwoorden worden ook per e-mail naar abonnees gestuurd. Laat uw emailadres achter op deze site, zodat u op de hoogte blijft. U krijgt dan ook andere vragen en antwoorden te zien.
Abonneren
Abonneer u voor het ontvangen van emails voor uw Audioline OSLO 280 bij:
nieuwe vragen en antwoorden
nieuwe handleidingen
U ontvangt een email met instructies om u voor één of beide opties in te schrijven.
Ontvang uw handleiding per email
Vul uw emailadres in en ontvang de handleiding van Audioline OSLO 280 in de taal/talen: Duits, Engels als bijlage per email.
De handleiding is 1,01 mb groot.
U ontvangt de handleiding per email binnen enkele minuten. Als u geen email heeft ontvangen, dan heeft u waarschijnlijk een verkeerd emailadres ingevuld of is uw mailbox te vol. Daarnaast kan het zijn dat uw internetprovider een maximum heeft aan de grootte per email. Omdat hier een handleiding wordt meegestuurd, kan het voorkomen dat de email groter is dan toegestaan bij uw provider.
Uw handleiding is per email verstuurd. Controleer uw email
Als u niet binnen een kwartier uw email met handleiding ontvangen heeft, kan het zijn dat u een verkeerd emailadres heeft ingevuld of dat uw emailprovider een maximum grootte per email heeft ingesteld die kleiner is dan de grootte van de handleiding.
Er is een email naar u verstuurd om uw inschrijving definitief te maken.
Controleer uw email en volg de aanwijzingen op om uw inschrijving definitief te maken
U heeft geen emailadres opgegeven
Als u de handleiding per email wilt ontvangen, vul dan een geldig emailadres in.
Uw vraag is op deze pagina toegevoegd
Wilt u een email ontvangen bij een antwoord en/of nieuwe vragen? Vul dan hier uw emailadres in.