642208
4
Verklein
Vergroot
Pagina terug
1/70
Pagina verder
www.argonaudio.com
iNet3+v2
1
Dear Customer,
Quality has always been our driving force and founding Argon Audio is a natural
extension of this philosophy.
We have 20 years’ experience in creating and specifying high quality products,
manufacturing them and selling them on to end users with Value-for-Money as the
primary aim. And Argon Audio is a brand fully compliant with these values. Design,
features and quality standards are all specified in Denmark and manufacturing takes
place in the Far East, where quality vendors are highly competitive - and as a result
supply outstanding Value-for-Money products. To the delight of both ourselves and
our customers!
Congratulations with your iNet3+v2, may it bring years of enjoyment.
www.argonaudio.com
iNet3+v2
2
Table of content
1
Introduction 1
1.1 Safety 4
1.2 Features 5
1.3
Box contents
5
1.4
External resources
6
1.5
Conventions used in this manual
6
2
Controls, connectors and display
7
2.1
Main controls
7
2.2 Spotify Connect 10
2.3 Connectors 11
2.4 Screens 12
3
Getting started/setup 17
3.1
Setup wizard
18
3.2
Other settings
26
3.3
Internet radio portal registration
29
3.4
Setting up a music server
31
3.5
Sharing media with Windows Media
Player
31
3.6
Setting up iNet3+v2 for “Play To
Windows 7 streaming media feature.
33
4
Internet radio mode
35
4.1
Last listened
37
4.2
Presets
37
4.3
Favourites
37
4.4 Browse 38
4.5 Search 40
4.6 My added stations 42
4.7 Now playing information 42
5
Music player mode (network)
43
5.1
Shared media (UPnP media server)
44
5.2
Playlists
47
5.3
Repeat/shuffle
48
5.4
Now playing information
48
6
Using the “Play To” feature in
Windows 7 to stream media
49
6.1
Use “Play To” in Windows Media Player
49
6.2 Use “Play To” elsewhere in Windows 7 51
6.3 Now playing information 51
www.argonaudio.com
iNet3+v2
3
7
DAB radio mode
52
7.1
Scanning for stations
52
7.2
Selecting stations
53
7.3
Now playing information
53
7.4 Settings 54
8
FM radio mode
55
8.1 Selecting stations 55
8.2 Now playing information 56
8.3
Settings
56
9
Aux in mode
57
10
Alarms and sleep
58
10.1
Alarms
58
10.2
Sleep
59
11
UNDOK Wireless Remote Control
60
11.1 Obtaining and installing the UNDOK
Wireless Device Remote Control
application
61
11.2
Setting up the connection to the
iNet3+v2
64
12
Inactive standby 64
13
Software upgrade and factory reset
65
13.1
Software upgrade
65
13.2
Factory reset
65
14
Troubleshooting and error messages
66
14.1 Error messages 66
14.2 Troubleshooting 67
Glossary 70
www.argonaudio.com
iNet3+v2
4
1. Introduction
1.1 Safety
Safety Instructions
Please store this instruction manual for future
reference.
Do not use this product near water or
moisture.
Clean only with a dry cloth.
Unplug this product from the wall outlet before
cleaning.
Place the unit on a solid surface.
Do not put it in a closed bookcase or a cabinet
that may keep air from flowing through its
ventilation openings.
Do not install near any heat sources, such as
radiators, heat registers, stoves or other
appliances that produce heat.
Protect the power cord from being walked on
or pinched, particularly at plugs and the point
where they exit from the product.
Servicing is required when the product has
been damaged. Do not attempt to service this
product yourself. Opening or removing covers
may expose you to dangerous voltages or
other hazards. Please contact the
manufacturer to be referred to an authorized
service center near you.
To prevent risk of fire or electric shock, avoid
over loading wall outlets, extension cords, or
integral convenience receptacles.
Do not let objects or liquids enter the product.
Use proper power sources. Plug the product
into a proper power source, as described in
the operating instructions or as marked on the
product.
www.argonaudio.com
iNet3+v2
5
1.2 Features;
This manual describes how to use the Argon
iNet3+v2 Internet radio, an advanced but easy-to-
use Wi-Fi connected audio system with the following
modes:
Internet Radio with access to over 20,000
stations, ‘Listen again’ broadcasts and podcasts
Music player allowing easy navigation and
playback through a network-stored library of
music files including AAC+, MP3, WMA, WAV,
FLAC.
Mediaplayer, “Play To” feature allowing media
to be pushed from a PC running Windows 7 to
iNet3+v2 operating in Digital Media Renderer
(DMR) mode.
DAB/DAB+ digital radio with a wide choice of
channels and digital quality sound broadcast
free-to-air
FM with RDS (Radio Data System)
Spotify Connect play back and control. Via
Spotify app.
Aux in for external music sources such as MP3
players
iNet3+v2 also provides the following features:
• Large 2.7 inch display for easy control and
clear information display, with up to six lines of
text plus status icons.
Wi-Fi Remote control from an Apple iPhone, iPad
iPod touch and Android, using the Argon Audio
Wireless Device Remote Control application
Clock with auto-update capability and dual
independent alarms
Sleep/snooze
UPnP Music player modes
Multiple network profiles for easy setup and
portability
Multiple operating languages
1.3 Carton contents;
We have during production and packing carefully
checked and inspected the unit.
After unpacking please check for any damage from
transport.
We recommend that you keep the original carton
box and packing material for any future shipping.
In the carton box you will find:
ARGON iNet3+v2
DC12V 2A power adapter
User manual, Remote Control
www.argonaudio.com
iNet3+v2
6
1.4 External resources
To operate iNet3+v2, the following external resources are needed:
A power source (100-240 V mains supply)
A wireless (Wi-Fi) network (provided through a router) with appropriate permissions and
password if necessary (for Internet radio and Network Music player modes)
Broadband Internet access (for Internet radio mode and Internet Software Update)
A music library stored on the network
An Apple iPhone, iPad, iPod touch or Android device (for using the Wireless Device
Remote Control application)
An external audio source (for Aux in mode)
1.5 Conventions used in this manual
Button (press) Physical button on the keypad
Option (select) Menu option shown on the display
Name Menu, screen or other name
www.argonaudio.com
iNet3+v2
7
2. Controls, connectors and display
2.1 Main controls
www.argonaudio.com
iNet3+v2
8
Function/usage
Turn to scroll through a menu or station list. The chosen option is highlighted in
reverse text (dark characters on a white background). Press to select.
Turn to adjust the volume up or down
Function/usage[1]
Standby: Turn on or back to standby mode (showing clock and date). Cancels
sleep function.
Sleep/snooze: When playing, standby after a set time.
When alarm is sounding, snooze for a set time, by pressing the Snooze button on
top of the iNet3+v2
Mode: Cycle through the modes: Internet Radio, Music player, DAB, FM, Aux in
Enters alarm wizard, turns off alarm (when alarm is sounding) and toggles between
alarms in standby.
Info: View more information about the station or track playing. Press again to cycle
through further information screens then return to the normal Now playing screen.
www.argonaudio.com
iNet3+v2
9
Back
Back: Return to previous screen. In play mode, this button may be used to return to
the last track list or station list.
Menu
Menu: Show menu for the current mode. Press again to show Now playing screen.
Preset
Preset: Press for the Preset recall/Save menu;
4
Preset: stored station no.4
3/
Next: Select next track in Music Player mode and Preset 3 in Radio mode
2/
Previous: Select start of track, previous track Music Player mode and Preset 2 in
Radio mode
1/
Play/pause/stop in Music Player mode. Or Preset 1 in Radio mode
[1] Some buttons have alternate functions depending on whether they are pressed quickly or held down.
www.argonaudio.com
iNet3+v2
10
2.2 Spotify Connect Control and play back
Connect your iNet3+v2 and Spotify control device to your home wi-fi
All devices need to be on the same wi-fi.
Get the Spotify app/Premium free trial
Download the Spotify app for your mobile or tablet from your app store, and take the Premium free trial.
Log in to Spotify and start playing a track.
Play millions of songs on your iNet3+v2.
To start with, your mobile/tablet and iNet3+v2 need to be on the same wi-fi. Tap on the Now Playing bar to
reveal extra controls, and select the Speaker icon. On the Connect screen, just choose your iNet3+v2 and it'll
start playing. Adjust the volume at the volume bar below on the Connect screen.
Control oaf play back directly on iNet3+v2
Besides being able to control the volume, you can also pause/play and skip tracks directly in iNet3+v2. Use
the preset buttons 1, 2 and 3 (as shown on page 9) on the front of iNet3+v2.
Notice: When you stop Play back on your Spotify device, iNet3+v2 will show “no media” in the display. To get back to
Internet Radio, DAB, FM, Music Player or Aux, you need to press the MODE button on the iNet3+v2.
www.argonaudio.com
iNet3+v2
11
2.3 Connectors
As shown below has connectors (from left to right) for the following:
Headphones out
Line out (to connect to an external amplifier)
Aux in (to connect external media like iPod)
DC power in (12 V)
www.argonaudio.com
iNet3+v2
12
2.4 Screens
The screen shows various menus, dialogues and displays, as described below.
There are basically six types of screen:
Standby (clock)
Splash (mode)
Now playing
Dialogue
Error/Information
Menu
When text is too long to fit on the screen, it is first shown truncated, then, after a few
seconds, slowly scrolls so that you can read it all.
The Standby screen shows the
time, date and any active alarm
times.
www.argonaudio.com
iNet3+v2
13
As you cycle through the play
modes using Mode , Argon
iNet3+v2 shows a splash screen
for each mode. After one second,
Argon iNet3+v2 enters the selected
mode and tries to start playing the
last station or track that was playing
in that mode. If this is not possible,
Argon iNet3+v2 tries to connect to
the selected source by scanning for
stations, networks, or prompting for
user input as appropriate.
Now playing screens show
information about the audio source
and track now playing, where
available.
www.argonaudio.com
iNet3+v2
14
Dialogue screens are shown to
allow the user to change settings.
They vary in complexity from simple
Yes/No options up to the scrollable
network password input screen.
As with menus, the selected item is
shown with a white background.
Dialogue screens mark the current
setting with an asterisk (*).
Error/Information screens give
specific messages for a few
seconds, then change automatically
to another screen.
www.argonaudio.com
iNet3+v2
15
Menus
Argon iNet3+v2 has basically three types of menu. Use the Select control to step through and
select options. A scroll bar on the right of the screen shows if there are further options above or
below those visible.
Each mode has a Mode menu,
with options specific to that mode.
For example, the FM mode menu
has just two options: Scan setting
and Audio setting.
In addition, each mode menu has
two final options:
System settings > and Main menu >.
The ‘>’ indicates options leading to
further menus.
www.argonaudio.com
iNet3+v2
16
The System settings menu allows
access to system settings and
information such as network, time,
language and software update.
Menus with more options than will fit
on one screen have a scroll bar to the
right.
The Main menu allows access to all
modes
plus sleep and timer functions.
(note; Last FM and Pandora only
available in the US)
Some menus, for example the System settings menu, have several submenus.
www.argonaudio.com
iNet3+v2
17
3. Getting started/setup
Although the Argon iNet3+v2 is sophisticated, getting started is simple. To play DAB or FM radio,
all you need is a power source (a 100-240 V mains supply).
For Music Player mode, you need a wired/wireless Ethernet network and a UPnP music server
(e.g. a PC).
For Internet-connected modes such as Internet radio, you also need a broadband Internet
connection.
To set up the iNet3+v2:
1. Place iNet3+v2 on a suitable shelf or table
2. Connect the power adaptor between iNet3+v2 and the mains supply.
3. To receive broadcast radio (DAB and FM), extend the telescopic antenna.
The setup wizard starts.
www.argonaudio.com
iNet3+v2
18
3.1 Setup wizard
When iNet3+v2 is started for the first
time, it runs through a setup wizard to
configure settings for date/time and
network. Once this has finished, the
system is ready to use in most modes.
Note: To change these settings later,
select Menu > System settings >.
To run the setup wizard again, select
Menu > System settings > Setup
wizard.
Select Yes to start the setup wizard.
If you choose No, the next screen asks
if you would like to run the wizard next
time INet3+v2 is started. The system
then starts without configuring
time/date and network settings and
enters the Main Menu.
Note: If power is removed while the
wizard is in progress, the wizard will
run again next time iNet3+v2 is started.
www.argonaudio.com
iNet3+v2
19
3.1.1 12/24 hour display
To change between 12 and 24 hour display, select Set 12/24 hour and then select your preference.
3.1.2 Time/date
The time and date can be updated manually or automatically. With auto-update, the time and date are
automatically synchronised with external clocks. Auto-update is generally more accurate.
Auto-update
Auto-update works with data sent
over DAB, FM or the Internet. The
clock is only updated when in a
corresponding mode, so it is best to
select a mode you use regularly.
DAB and FM use time signals
broadcast with radio transmissions.
Network uses a time signal sent
from the Frontier Silicon Internet
radio portal when in any network-
connected mode.
www.argonaudio.com
iNet3+v2
20
1. Select Update from DAB, Update from FM, Update from Network or No update.
2. If you are updating from the network, set your time zone.
3. If your country uses daylight saving, the automatically updated time from the network may
be wrong by one hour. When daylight savings are in effect (during the winter), turn on the
Daylight savings option to rectify this.
Note that if you are updating the time from DAB or FM, the Daylight savings option has no
effect on the clock’s time.
iNet3+v2 will auto-update from the selected source when time information is available.
Manual set
If you set No update, the wizard now prompts you to set the time and date manually.
The date and time are displayed as
dd-mm-yyyy and hh:mm AM/PM
with the first value, dd, active
(flashing).
Adjust each value with the Select
control. As each value is set, the
next value becomes active and
flashes.
www.argonaudio.com
iNet3+v2
21
3.1.3 Network
iNet3+v2 is compatible with all common network protocols and encryption methods, including Wi-Fi Protected
Setup (WPS).
To connect iNet3+v2 to your network, you need a Wi-Fi wireless router, together with password key if set
Select WLAN region/country > Wi-Fi network
(SSID), and then select a network from the list.
If the network is open (non-encrypted), iNet3+v2 connects
without any further ado; see Completion below.
www.argonaudio.com
iNet3+v2
22
Standard encrypted network
To enter the network’s key (password), use the Select
control to move the cursor through the characters and
select.
As each character is selected, the key is built up near the
top
of the display.
There are three options accessible by turning Select
back before the first characters (0123…)
Backspace, OK and Cancel.
WPS encrypted network
WPS encrypted networks are identified by ‘[WPS]’ at the
start of the network name, and have three methods of
connection. Select one and follow the prompts:
www.argonaudio.com
iNet3+v2
23
Push Button >
iNet3+v2 prompts you to press the connect button
on the router. It then scans for a ready Push Button
Connect network and connects.
Pin > (code number)
iNet3+v2 generates an 8-digit code number which
you enter into the wireless router, access point, or
an external registrar (e.g. advanced versions
of Windows Vista).
Skip WPS >
Enter key as for a standard encrypted network, above.
For more information on setting up a WPS encrypted network, see your WPS router’s instructions.
www.argonaudio.com
iNet3+v2
24
Completion
iNet3+v2 tries to connect to the selected network.
If connecting fails, iNet3+v2 returns to a previous
screen to try again.
www.argonaudio.com
iNet3+v2
25
If the network connection is lost, iNet3+v2 automatically tries to reconnect.
www.argonaudio.com
iNet3+v2
26
3.2 Other settings
Settings for connecting to premium services such as Last.fm and Pandora are covered in the
sections for those modes. Common settings are covered below.
Notice Last.FM and Pandora are only available in the US.
3.2.1 Equalizer
Several preset EQ modes are
available; also a user-defined
setting.
To adjust the EQ, select Menu >
System settings > Equaliser.
You can then choose from a
variety of preset modes or create
your own, with custom bass, treble
and loudness settings.
www.argonaudio.com
iNet3+v2
27
Follow the steps here
www.argonaudio.com
iNet3+v2
28
3.2.2 Network
iNet3+v2 remembers the last four wireless networks it has connected to, and automatically tries to
connect to whichever one of them it can find.
You can see the list of registered networks through Menu > System settings > Network >
Network profile >. From here you can delete unwanted networks by turning and pressing Select
then confirming delete Yes.
There are also other options for viewing and manually altering network settings from Menu >
System settings > Network > (for example setting up a wired network). Users experienced with
networking may find these options useful for diagnosing and fixing network problems.
3.2.3 Language
The default language is English. To change, select Menu > System settings > Language >
then select your language.
www.argonaudio.com
iNet3+v2
29
3.3 Internet radio portal registration
Argon iNet3+v2 uses the Frontier Silicon Internet radio portal website that allows you to organise
your favourite’s lists and also listen to Internet radio on a computer.
www.argonaudio.com
iNet3+v2
30
To register your iNet3+v2 with the portal, switch to
Internet radio mode as described in Section 4, and
then obtain your radio’s unique portal access code
by selecting Menu > Station list > Help >
Get access code >.
Write down the access code.
Note: Do not confuse the portal access code with the Radio ID (from Menu > System settings > Info.)
Visit the portal website at www.wifiradio-frontier.com.
If this is your first visit to the portal, register for a new account, entering the following information:
access code,
your e-mail address,
password,
radio model (Argon iNet3+v2).
If you already have an account and wish to add an additional radio, log in to your account and
select My preferences > Add another Wi-Fi radio.
Once your radio is registered with the portal, you can immediately use the Internet radio
favourites and added stations features.
www.argonaudio.com
iNet3+v2
31
3.4 Setting up a music server
In order for iNet3+v2 to play music files from a computer, the computer must be set up to share
files or media.
UPnP media sharing allows devices like iNet3+v2 to play music from a shared media library,
navigating through tag menus such as Artist, Album or Genre. If you are running a suitable server
system such as a PC with Windows Media Player 10 or later (WMP), and your music library is
well-tagged, then it is recommended to use media sharing. Only the UPnP server needs to be set
up.
3.5 Sharing media with Windows Media Player
Notice: iTunes does not currently work as a UPnP media server, but there are add-ons available
to work with an iTunes library.
The most common UPnP server is Windows Media Player (10 or later). Alternatively, other UPnP
platforms and servers may be used. To set up WMP for media sharing, perform the following
steps:
1. Ensure that the PC is connected to the network.
2. Ensure that the radio is powered on and connected to the same network.
3. In WMP, add to the media library the audio files and folders you want to share with
iNet3+v2 (Library > Add to Library…).
4. In WMP, enable media sharing (Library > Media sharing).
Notice: setup can differ depending on which version of WMP you have
www.argonaudio.com
iNet3+v2
32
Notice; it may show; Argon iNet3+v2, Unknown device, Frontier Siliconor the Jupiter logo as shown below.
Make sure that the radio has access to the shared media by selecting it and clicking Allow. You can
also set a name for the shared media in Settings… Click OK to close the dialogue boxes.
The PC is now ready to stream the music to the radio. The WMP UPnP service runs in the background;
there is no need to start WMP explicitly.
www.argonaudio.com
iNet3+v2
33
3.6 Setting up iNet3+v2 for “Play To” Windows 7 streaming media feature.
To set-up Argon iNet3+v2 to be controlled and to stream music via Windows Media Player 12 (Windows 7
only), perform the following steps:
1. Ensure that the PC is connected to the network.
2. Ensure that iNet3+v2 is powered on and connected to the same network.
Note: iNet3+v2 must be in an Internet radio mode to be detected.
3. From the Windows 7 main screen,
select Start > Devices and Printers.
4. Select the Add a device tab in the top left of the Devices
and Printers window and follow the instruction prompts given
by the wizard.
www.argonaudio.com
iNet3+v2
34
In the Devices and Printers window a icon *) will appear and you are now ready to stream your
Windows media music files to iNet3+v2.
*) To change the name of your device, right click on icon and choose properties. Then choose UPnP and click
on “device webpage
www.argonaudio.com
iNet3+v2
35
4. Internet radio mode
iNet3+v2 can play thousands of radio stations and
podcasts from around the world though a broadband
Internet connection.
When you select Internet radio mode, iNet3+v2 contacts
the Frontier Silicon Internet radio portal to get a list of
stations, organised into different categories like Country,
Most popular and Genre. Once you select a station, INet3+v2
connects directly to that station.
The portal also enables multiple lists of favourite stations that you can personalise, for example Andy’s
stations, Jo’s favourites, Talkshows. To use the favourites feature, register your radio with the portal website
as described on page 29. If you have several Frontier Silicon radios, you can register them all on the same
account so that each radio has access to your favourite’s lists. It is possible to add favourites either directly
through iNet3+v2 or through any computer with a web browser.
To enter Internet Radio mode, either press Mode until the display shows Internet Radio or select Menu >
Main menu > Internet Radio.
Note: The station list menu is provided from the Internet radio portal, so it is only accessible when iNet3+v2 is
connected to the Internet. Station lists and submenus may change from time to time.
www.argonaudio.com
iNet3+v2
36
There are several ways of selecting stations.
Directly from the radio:
Last listened
Presets
From the portal through the Menu > Station list
> menu:
Favourites lists
Browse by Country, Genre, Most
popular, Newest
Search by keyword
My added stations
If you are already listening to an Internet radio station, you can press Back rather than Menu to
quickly return to the last visited branch of the menu tree. For example, suppose you were listening to
New Orleans Radio through the browse facility as described in section 4.4
below. Pressing Back
would return you to the Highlighted Blues stations menu. Pressing Back again would return you to
the Blues menu, and so on.
www.argonaudio.com
iNet3+v2
37
4.1 Last listened
When Internet radio mode restarts, the last-listened station is selected. To select another recently
used station, select Menu > Last listened then one of the stations listed. Most recent stations
appear at the top of the list.
4. 2 Presets
Presets are stored in the radio and cannot be accessed from other radios.
To store an Internet radio preset, press and hold Preset until the display shows the Save preset
screen. Select one of the presets to save the currently playing station.
To select a preset, press Preset briefly, then select one of the listed preset stations. When a preset
station is playing, it shows Pn (P1, P2 etc) in the bottom of the screen.
Note: Operation of presets is identical for Internet radio, DAB and FM.
4.3 Favorites
Favourites are stored on the Internet radio portal. Before you set up an account on the portal from its
Web interface (
www.wifiradio-frontier.com), the favourites are associated solely with the radio on
which you set them. After you set up a portal account, all the favourites from your different radios are
merged into a combined favourites list. This combined list is available to all the radios on your
account.
www.argonaudio.com
iNet3+v2
38
To store a playing station as a favourite, press and hold Select until the display shows ‘Favourite
added’. The station appears in the default favourites list Stations.
To select a favourite, select Menu > Station list > My favourites > [Favourites list] > [Station].
4. 4 Browse
To browse Internet broadcasts, select Menu > Station list
> then either Stations > or Podcasts >.
Browse through the menus to find broadcasts.
www.argonaudio.com
iNet3+v2
39
Note: BBC radio ‘Listen Again’ programmes are accessible through the Podcast menu, for example
Menu > Podcasts > Location > Europe > United Kingdom > All shows > BBC Radio 4 >
You and Yours > 20/10/2008 - October 2010.
www.argonaudio.com
iNet3+v2
40
4. 5 Search
You can also search through Internet broadcasts for stations or podcasts with particular keywords in their title.
To search, select Menu > Station list > then
either Stations > or Podcasts >
Enter a keyword by selecting characters then OK.
The search entry screens are similar in operation
to the Wi-Fi password entry screen.
www.argonaudio.com
iNet3+v2
41
Select a broadcast from the list.
For podcasts, you may be able to select a
particular episode.
www.argonaudio.com
iNet3+v2
42
4.6 My added stations
Even though the Internet radio portal contains thousands of stations, you may want to listen to stations not
listed. You can add your own stations via the portal. These added stations are accessible from iNet3+v2 by
selecting Menu > Station list > My added stations > [Station].
4.7 Now playing information
While the stream is playing, the screen shows its name and description. If artist and track information is
available, this is also shown. To view further information, press Info .
Each time you press Info , another set of information is displayed, cycling through the following details:
Artist and track name (default; where available)
Station description
Station genre and location
Signal reliability
Codec and sampling rate
Playback buffer
Today’s Date
www.argonaudio.com
iNet3+v2
43
5. Music player mode (network)
Music player mode plays audio files such as MP3s, AACs,
WMAs or FLACs from a computer on the local network.
To enter Music player mode, either press Mode until the display shows Music
player, or select Menu >
Main menu > Music player
Once in music player mode, press Menu , then select
Shared media.
Note: iNet3+v2 does not support USB playback
as shown in the picture.
www.argonaudio.com
iNet3+v2
44
If you are already playing a music file, you can press Back rather than Menu to quickly return to the last
visited branch of the menu tree. For example, suppose you were listening to the track Heat by the artist 50
Cent through browsing shared media as described in section
0 below. Pressing Back would return you to
the track listing for the album Get Rich or Die Tryin’. Pressing Back again would list all 50 Cent albums.
Pressing Back again would list all album artists, and so on.
You can use << and >> to move through tracks. Press and hold to rewind or fast forward and press quickly
to select previous or next track.
5.1 Shared media (from UPnP media server)
Select Menu > Shared media >
If you have set up shared media (as described on page 31), you should see an entry consisting of
<computer name>: <Shared media name>, for example JB-Laptop: Audio. If you have more than
one computer sharing media, the alternatives are listed. Select the shared media you want to play.
From this point on, the menus are generated
from the shared media server (typically
Windows Media Player). The first menu shows
a list of media types, for example Music,
Video, Pictures and Playlists. iNet3+v2 can
only play music and playlists.
There is also a search function, which finds
tracks in a similar way to Internet radio
search, as described on page 390.
www.argonaudio.com
iNet3+v2
45
From Music, there are numerous ways of
selecting tracks, including:
Genre
Artist
Album
Composer
Rating
Once you have found a track you want to play, press Select . A short press plays the track
immediately and a long press adds the track to the playlist. You can also add entire albums to the
playlist.
iNet3+v2 plays either the selected track or the playlist.
www.argonaudio.com
iNet3+v2
46
5.1.1 Wake-on-LAN
If shared media is selected a list of available music servers will be displayed.
If a question mark appears before the server name, this indicates that the server has been seen
before and supports Wake-on-LAN functionality, but cannot currently be found on the network.
If a server with a question mark is selected by the user, the device will try to wake the server up
and connect to it. In some instances this may not be possible as the server may not be connected
to the network any more or may be switched off.
5.1.2 Prune servers
From time to time it may be necessary to remove servers displaying question marks in front of the
server name from the server list. For example, if the device is moved to a new network or if a
Wake-on-LAN server is removed from your current network.
To perform this function go to Menu > Prune servers > Yes
www.argonaudio.com
iNet3+v2
47
5.2 Playlists
iNet3+v2 holds a queue of up to 500 tracks in the playlist.
Playlist tracks can be mixed from multiple UPnP servers.
To manage the playlist, select Menu > My playlist.
To view the playlist,
scroll though it by
turning Select . UPnP
tracks show their track
name.
To play the playlist
from a certain track,
quick Select .
To erase a track from
the playlist, long
Select . then confirm
YES.
If you select a track/album/folder for instant playback (without using the playlist), the playlist is preserved. The
playlist is also preserved during standby.
www.argonaudio.com
iNet3+v2
48
5.3 Repeat/shuffle
You can repeat tracks or play them in random order by selecting Menu > Repeat play or Menu
> Shuffle play.
5.4 Now playing information
While a track is playing, the screen shows its track and artist (UPnP). There is also a progress bar
with figures for elapsed and total track time. At the bottom of the screen, an icon indicates UPnP.
To view further information, press Info .
Each time you press Info , another set of information is displayed, cycling through:
UPnP: playback progress bar (default), album, codec/sampling rate, playback buffer
bar, today’s date
www.argonaudio.com
iNet3+v2
49
6. Using the “Play To” feature in Windows 7 to stream media
One of the new Windows 7 features includes a feature called “Play To” and this lets your PC running
Windows 7 control iNet3+v2 to push media and use as a universal remote control for your media collection.
iNet3+v2 supports the industry standard DLNA (Digital Living Network Alliance) 1.5 digital media renderer.
This allows you to "Play To" other devices around your home and combine media streaming with controlling a
connected media receiver while streaming content to it from another Windows 7 PC on a home network.
Before you can use the “Play To” feature you need the set-up iNet3+v2 for Windows 7 streaming media.
6.1 Use “Play To” in Windows Media Player
Windows Media Player makes it easy to manage your media, find items that you want to play, and open
Play To. To select items that you want to play, follow these steps:
1. Click the Start button, click All Programs, and then click Windows Media Player.
If the Player is currently open and you’re in Now Playing mode, click the Switch to Library
button in the upper-right corner of the Player.
2. If the list pane is closed or if the Burn or Sync tabs are exposed, click the Play tab.
3. Find the items that you want to play in the Player Library, and then drag those items from
the details pane into the list pane.
4. Click the Play to button at the top of the list pane, click the device on your network that will
receive the media.
www.argonaudio.com
iNet3+v2
50
5. In the Play To dialog box, use the playback controls to play, pause, or stop the media
stream, and to change to the next or previous item in the list.
www.argonaudio.com
iNet3+v2
51
6.2 Use “Play To” elsewhere in Windows 7
Outside of Windows Media Player, you can stream media to iNet3+v2 with “Play To” by right-clicking
music files. To select music files and stream them to iNet3+v2, follow these steps:
1. Click the files you want to stream to iNet3+v2.
2. Right-click the selected files, point to “Play to”, and then click the device on the network that
will receive the media.
3. In the Play To dialog box, use the playback controls to play, pause, or stop the media
stream, and to change to the next or previous item in the list.
6.3 Now playing information
While a track is playing, the screen shows its track
name (UPnP). There is also a progress bar with
figures for elapsed and total track time. At the
bottom of the screen, an icon indicates UPnP.
To view further information, press Info .
Each time you press Info , another set of
information is displayed, cycling through the
following:
Artist, album, codec/sampling rate, playback buffer
www.argonaudio.com
iNet3+v2
52
7. DAB radio mode
DAB radio mode receives DAB/DAB+ digital radio
and displays information about the station, stream
and track playing.
To enter DAB mode, either press Mode until the
display shows DAB Radio or select;
Menu > Main menu > DAB.
7.1 Scanning for stations
The first time you select DAB radio mode, or if the station
list is empty, iNet3+v2 automatically performs a full scan
to see what stations are available. You may also need to
start a scan manually to update the list of stations for one
of the following reasons:
Available stations change from
time to time.
If reception was not good for the
original scan (for example the
antenna was not up), this may
result in an empty or incomplete list of available stations.
If you have poor reception of some stations (burbling), you may wish to list only
stations with good signal strength.
www.argonaudio.com
iNet3+v2
53
To start a scan manually, select Menu > Scan.
Once the scan is complete, the radio shows a list of available stations.
To remove stations that are listed but unavailable, select Menu > Prune invalid.
7.2 Selecting stations
To listen to or change a station, turn the Select control to view a list of stations and press to select.
Once selected, the station plays and the screen shows information about the station, track or show
as broadcast.
Presets
To store a DAB preset, press and hold Preset until the display shows the Save preset screen.
Select one of the 10 presets (on the remote) to save the currently playing station.
To select a preset, press Preset briefly, then select one of the listed preset stations. When a preset
station is playing, it shows Pn (P1, P2 etc) in the bottom right of the screen.
7.3 Now playing information
While the stream is playing, the screen shows its name and DLS (Dynamic Label Segment) information
broadcast by the station giving real-time information such as programme name, track title and contact details.
Stereo broadcasts are indicated with an icon at the top of the screen. To view further information, press Info .
www.argonaudio.com
iNet3+v2
54
Each time you press Info , another set of information is displayed, cycling through DLS text, programme
type, ensemble name/frequency, signal strength/error rate, bit rate/codec/channels and today’s date.
7.4 Settings
Dynamic range compression
Some DAB broadcasts offer dynamic range compression (DRC). This feature allows radios to compress the
dynamic range of the output audio stream, so that the volume of quiet sounds is increased, and the volume of
loud sounds is reduced. This can be useful if you are listening to music with a high dynamic range in a noisy
environment (for example, classical music while cooking).
To change the DRC of the iNet3+v2, select Menu > DRC, and then DRC high, DRC low or DRC off.
Note: The iNet3+v2’s DRC setting does have any effect if DRC data is not included in the broadcast.
Station order
You can choose the order of the DAB station list to be either Alphanumeric, Ensemble or Valid. Ensemble
lists groups of stations that are broadcast together on the same ensemble, for example BBC or South Wales
local. Valid lists valid stations first, alphanumerically, then off-air stations.
To change station order, select Menu > Station order > then Alphanumeric, Ensemble or Valid.
www.argonaudio.com
iNet3+v2
55
8. FM radio mode
FM radio mode receives analogue radio from the
FM band and displays RDS (Radio Data System)
information about the station and show (where broadcast).
To enter FM mode, either press Mode until the display
shows FM Radio or select Menu > Main menu > FM.
8.1 Selecting stations
To find a station, press Select . The frequency display starts to run up as iNet3+v2 scans the
FM band. Alternatively, you can scan up or down by pressing and holding the >> or << buttons
or tune manually with quick presses, or by turning the Select control.
Presets
To store an FM preset, press and hold Preset until the display shows the Save preset screen.
Select one of the 10 presets to save the currently playing station.
To select a preset, press Preset briefly, then select one of the listed preset stations. When a preset
station is playing, it shows Pn (P1, P2 etc) in the bottom right of the screen.
www.argonaudio.com
iNet3+v2
56
8.2 Now playing information
While an FM station is playing, the screen shows one of the two following sets data:
If RDS information is available, by default the service name (i.e. station name) is
displayed.
You can cycle through further RDS information by pressing Info . Each time you
press Info , another set of information is displayed, cycling through RDS radio text,
RDS programme type, frequency and today’s date.
If no RDS information is available, the currently tuned frequency is shown.
8.3 Settings
Scan settings
By default, FM scans stop at any available station. This may result in a poor signal-to-noise ratio
(hiss) from weak stations. To change the scan settings to stop only at stations with good signal
strength, select Menu > Scan setting > Strong stations only? > Yes.
Audio settings
By default, all stereo stations are reproduced in stereo. For weak stations, this may result in a
poor signal-to-noise ratio (hiss). To play weak stations in mono, select Menu > Audio setting >
FM weak reception: Listen in mono only > Yes.
www.argonaudio.com
iNet3+v2
57
9. AUX mode
Aux in mode plays audio from an external source such as
an MP3 player.
To play audio with Aux in mode,
1. Turn the volume low on both iNet3+v2 and, if
adjustable, the audio source device.
2. Connect the external audio source to the Aux
In 3.5 mm stereo socket.
3. Either press Mode until the display shows
AUX in or select Menu > Main menu > AUX in.
4. Adjust the volume of iNet3+v2 (and, if necessary, the audio source device) as required.
www.argonaudio.com
iNet3+v2
58
10. Alarms and sleep
As well as a clock/calendar, there are two versatile
wake-up alarms with snooze facility, and a sleep function
to turn the system off after a set period. Each alarm can
be set to start in a particular mode. To set the
clock/calendar, see page 17 .
10.1 Alarms
To set or change an alarm, either press Alarm or select Menu > Main menu > Alarms.
Select the alarm number (1 or 2) then configure the
following parameters:
Enable: on/off,
Frequency: Daily, Once, Weekends or
Weekdays,
Time,
Mode: Buzzer, Internet radio, DAB, FM
Preset: Last listened or 1-10,
Volume: 0 max.
To activate the new settings, scroll down and select Save.
The screen shows active alarms with an icon at the bottom left.
www.argonaudio.com
iNet3+v2
59
At the set time, the alarm will sound. To
temporarily silence it, press Snooze . You can
change the snooze period with the Select
control if you like. The radio returns to standby
for the set period, with the silenced alarm icon
flashing.
10.2 Sleep
To set the sleep timer, select Menu > Main menu > Sleep then choose from Sleep OFF, 15 MINS,
30 MINS, 45 MINS or 60 MINS.
Once you select a sleep period, the system returns to the main menu. Press Menu to return to the
Now playing screen.
www.argonaudio.com
iNet3+v2
60
11. UNDOK Wireless Device Remote Control
The UNDOK Argon Audio Wireless Device Remote Control is an application for IOS and Android
devices that allows users to control Argon radios from these devices. Using the Wireless Device
Remote Control application, you can navigate between the radio’s music modes and browse and
play content remotely.
The UNDOK Wireless Device Remote Control works on all iPhones, iPod touch and iPad devices
running iOS 3.1.3 or later as well as Android devices running 2.2 or later. It is compatible with the
IR2.2 software running on the Argons’s Venice 6.2 module and all Venice 6.5 modules Wireless
Device Remote Control is not compatible with iNet1.
Note: For brevity, “Phone” is used to mean iPhone, iPod touch, iPad and Android” in this
chapter.
www.argonaudio.com
iNet3+v2
61
11.1 Obtaining and installing the UNDOK Wireless Device Remote Control application
To install the UNDOK Wireless Device Remote Control application on the Phone:
1. In the Phone’s main menu, open the App Store/Play store by clicking the App Store
icon:
App Store icon
www.argonaudio.com
iNet3+v2
62
2. In the App/Play Store, search for UNDOK
3. Select UNDOKwireless device remote control.
:
www.argonaudio.com
iNet3+v2
63
4. Tap the entry UNDOKWireless Device Remote Control.
The application details screen opens
5. Tap Install.
The UNDOK Wireless Device Remote
Control application is downloaded and
installed onto your Phone.
www.argonaudio.com
iNet3+v2
64
11.2 Setting up the connection to the iNet3+v2
After you download the UNDOK Wireless Device Remote Control application, you must set up a
connection between the Phone and the iNet3+v2. To do this, follow these steps:
1. On the iNet3+v2, navigate to Menu > Main menu > System settings > Network > Keep
network connected, and select YES.
The network connection now stays on when the device is in standby mode. This setting is
retained in the device’s memory after it is switched off and on again.
2. Set the Phone to use the same network access point as the iNet3+v2 as follows:
a. Select Settings > Wi-fi.
b. Choose the network of the iNet3+v2. from the list.
c. If asked for a PIN code the default PIN code is 1234
Notice: the feature: Set up audio system” in the UNDOK app only applies for Devices without display
(iNet3+V2 has a display so setup is done directly on the iNet3+V2)
12. Inactive standby
Out of the box, the iNet3+V2 come with an automatic standby function. If the product is not operated for two
hours it will automatically go into standby. This applies also if the product is playing music.
This “feature” is a result of an EU law taking effect as of January 1
st
2014.
To deactivate or change this “feature”, do the following:
- Choose “Menu”
- Go to “System settings”
- Scroll down to “inactive standby” and press select
- Choose your preferred setting and press select
www.argonaudio.com
iNet3+v2
65
13. Software upgrades and factory reset
13.1 Software upgrade
From time to time, Argon may make software upgrades available with bug fixes and/or additional
features. You can either check manually, or set iNet3+v2 to check periodically automatically (this
is the default). If iNet3+v2 detects that newer software is available, it asks if you want to go ahead
with an update. If you agree, the new software is then downloaded and installed. After a software
upgrade, all user settings are maintained.
CAUTION:
Before starting a software upgrade, ensure that iNet3+v2 is
plugged into a stable mains power connection. Disconnecting
power during a software update may permanently damage the
unit.
To turn automatic checking on or off, select Menu > System settings > Software update >
Auto-check setting.
13.2 Factory reset
A factory reset resets all user settings to default values, so time/date, network configuration and
presets are lost. However, the radio’s current software version is maintained, as is registration
with the Internet radio portal. Internet radio favourites therefore remain unless you re-register your
radio with another account on the portal website.
To perform a factory reset, select Menu > System settings > Factory reset Proceed > Yes.
www.argonaudio.com
iNet3+v2
66
14. Troubleshooting and error messages
14.1 Error messages
Message
Description
Example
Failed to connect Correct key entered, but
router rejects request
MAC filtering enabled on router
Format error
Cannot recognise file format -
independent of network
Received .wma, but found that the
stream wasn’t WMA when trying to
decode
Network error
Problem past router -
incorrect data being received
from network
Data obtained from server is
unreadable.
Network not ready Problem with connection to
router
Router switched off
Network timeout
Problem past router - no
response being received from
network
Streaming IR station and suddenly
station becomes unavailable
No UPnP media found No UPnP servers found
Service not available (DAB)
No DAB reception
Unauthorised Access not granted by UPnP
server
Allow access for iNet3+v2 in UPnP
server settings
Update failed
Software upgrade failed
www.argonaudio.com
iNet3+v2
67
14.2 Troubleshooting
Problem
Cause
Solutions
PRODUCT: the product turn off
by itself
Automatic inactive standby
function activated
See page 64
FM: Hiss Low signal strength Check/move antenna
DAB: burbling/intermittent cut-
out
Move radio
Rescan local (high-strength) stations only
For DAB, check local coverage
DAB: ‘No stations available’
message
Low signal strength
As above then rescan stations.
www.argonaudio.com
iNet3+v2
68
Problem Cause Solutions
Cannot connect
to network
Network down
Check that network is working between a computer
and the router
Router restricts access to
listed MAC addresses
Obtain the iNet3+v2 MAC address from Menu >
System settings > Network > View settings and
add to router list.
Note: iNet3+v2 has separate MAC addresses for
wired and wireless networks; only the current network
adaptor method address is displayed, but the other
address can be obtained by changing the first pair of
digits between ‘00’ (wireless) and ‘02’ (wired)
Insufficient Wi-Fi signal
strength
Check distance to router; see if a computer can
connect to the network in this location
Unknown encryption method
Change encryption method on router. iNet3+v2
supports WEP, WPA and WPA2
Unusual network
configuration
Setup network manually through Menu > System
settings > Network > Manual settings
Firewall preventing access
Check the following ports are open on the router: UDP
and TCP ports 80 and 123;
DNS port 53.
Windows shares: ports 135 139 and 445.
Windows Media Player: varies non-Microsoft
firewalls may require configuration for UPnP.
www.argonaudio.com
iNet3+v2
69
Problem Cause Solutions
Cannot connect
to Internet
Internet connection down
Check that Internet is working for a computer
connected to the same network
Firewall preventing access Check the following ports are open: UDP and TCP
ports 80 and 123;
DNS port 53.
Some Internet radio stations may require additional
ports to be opened.
Cannot play
particular Internet
radio station
Station not broadcasting,
overloaded or insufficient
bandwidth.
Try other stations; try listening on computer via
Internet radio portal website; try later.
Station broadcasting using
unknown codec.
Link out of date.
www.argonaudio.com
iNet3+v2
70
Glossary
DAB Digital Audio Broadcasting
DLS Dynamic Label Segment short text
information broadcast with DAB audio
FM Frequency Modulation
MSC (USB) Mass Storage Class (device)
RDS Radio Data System
UI User Interface
UPnP Universal Plug and Play
USB Universal Serial Bus
WLAN Wireless Local Area Network
Specifications:
Type: iNet, DAB+, FM tuner and streaming device
as well as Spotify Connect
Inputs: DAB/FM antenna, Ethernet, AUX in
Output: 3,5 mm audio mini-jack out, 3,5 mm head
phone
Main voltage: 220-240V, 50/60Hz
Output sensitivity: 720mV (RCA) analogue
Separation: >45dB
Output power: 7 watt
D/A conversion: Cirrus Logic CS4344 max.
24bit/192Khz.
4

Hulp nodig? Stel uw vraag in het forum

Spelregels
1

Forum

Argon-iNet3-plus-v2
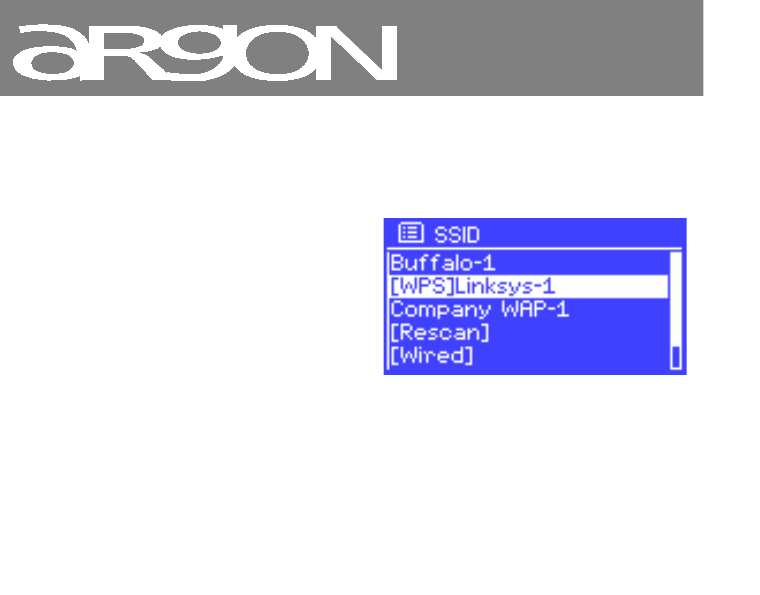
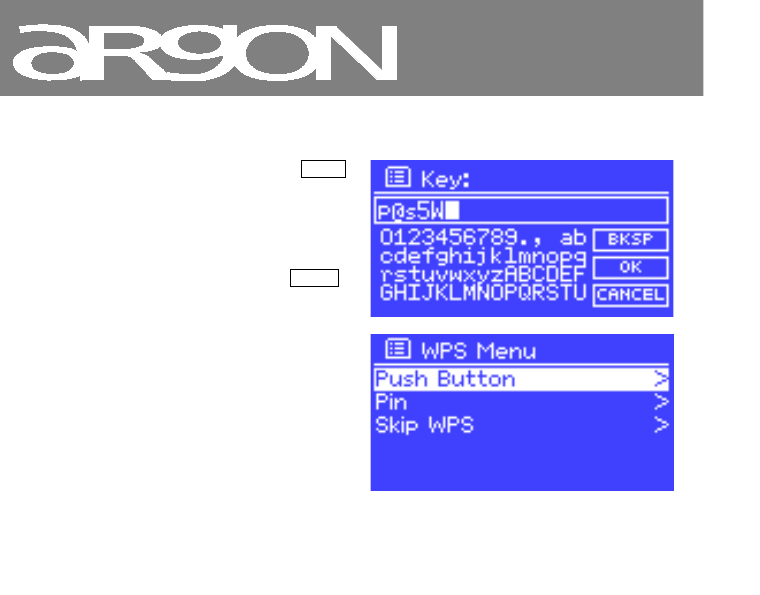
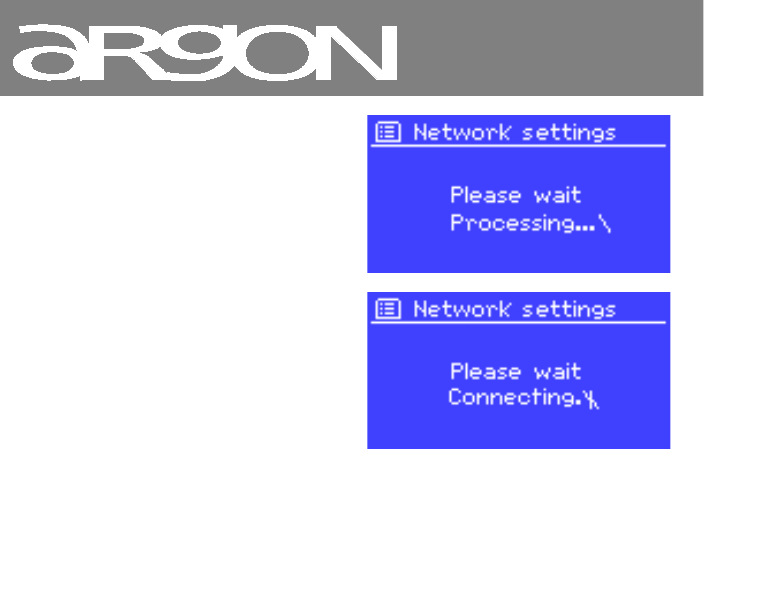
  • Een vraag aan de “professionals”: vandaag een stroomuitval van ongeveer een half uur in de stad waar ik woon. Moet ik de Argon iNet3 plus V2 voor ontvangst (draadloos) volledig opnieuw instellen? Moet de code van mijn internetprovider opnieuw handmatig worden ingevoerd? Wie kan mij, stap voor stap, zeggen, hoe te handelen?
    Met dank,
    Jacky Mol. Gesteld op 27-10-2020 om 19:08

    Reageer op deze vraag Misbruik melden
  • Spotify stopt met spelen en blijft hangen, wat moet ik doen Gesteld op 13-9-2020 om 16:47

    Reageer op deze vraag Misbruik melden
  • Hi waar zijn die schuimrubber cilindertjes voor die geleverd worden met de daab+3? Gesteld op 10-1-2020 om 08:13

    Reageer op deze vraag Misbruik melden
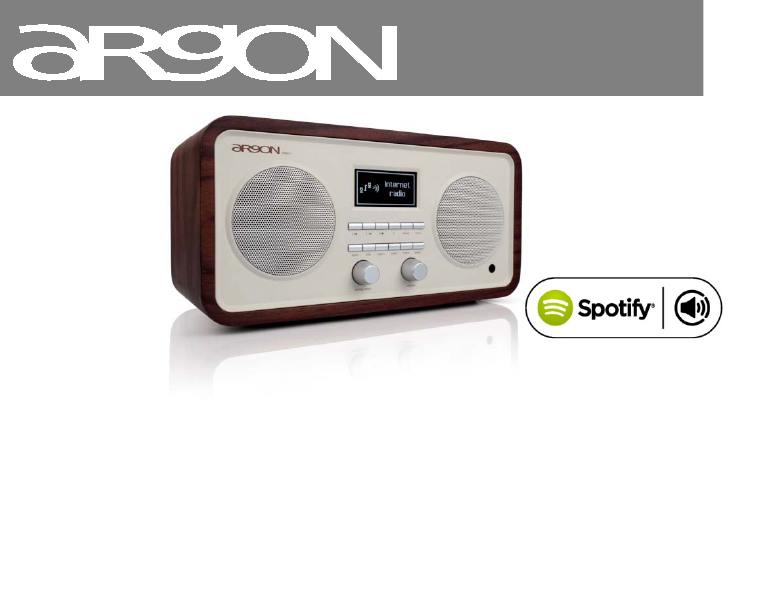
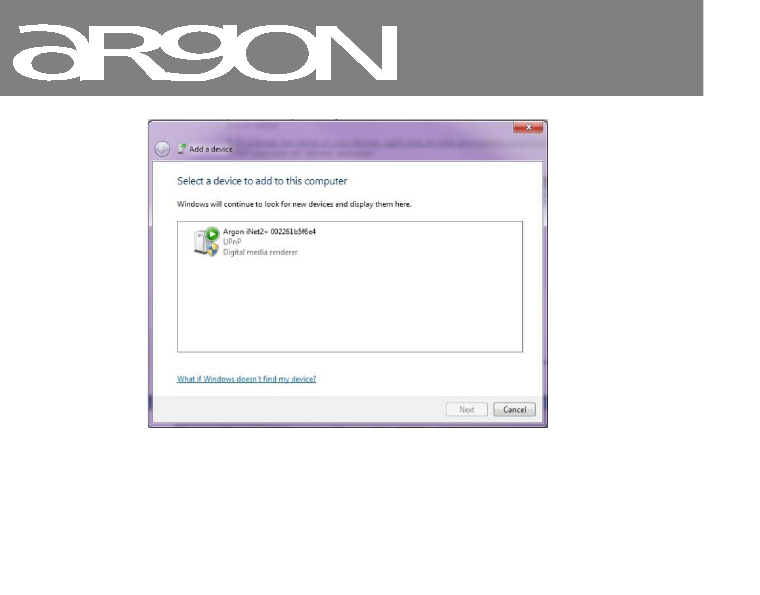
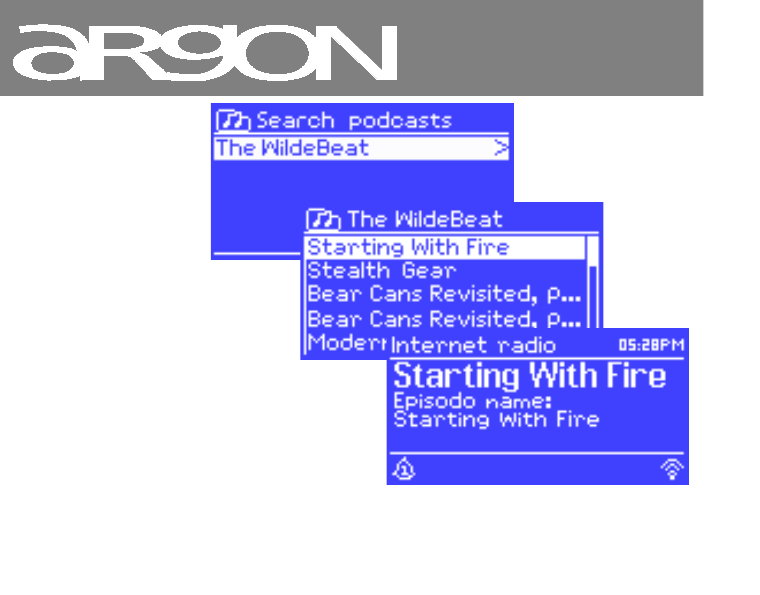
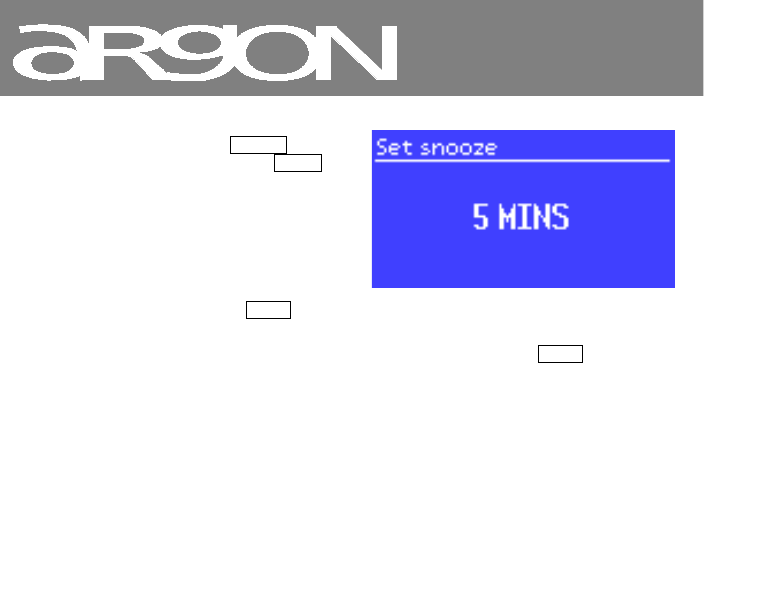
  • wanneer ik spotify probeer te spelen vanaf mijn telefoon zegt het apparaat alsmaar : press play; maar ik krijg hetr apparaat niet aan de praat.
    ik woon in een buitengebied met beroerd internet; is dat mogelijk de oorzaak?
    dank voor de evt reactie Gesteld op 28-9-2019 om 10:38

    Reageer op deze vraag Misbruik melden
    • De tekst "press play" is een beetje misleidend. U moet een PC of Smartphone hebben waarop Spotify is geïnstalleerd. Als u Spotify op een van die apparaten heeft opgestart ziet rechts onderaan het scherm: "Afspelen op". Als uw Argon radio en de PC of Smartphone zich in hetzelfde WiFi netwerk zijn opgenomen of ingesteld, dan heeft u de mogelijkheid om de Argon Inet3 te selecteren. Geantwoord op 2-10-2019 om 18:28

      Waardeer dit antwoord (1) Misbruik melden
  • Sinds kort gaat de inet3 na een tijdje vanzelf uit.
    Kan hem dan weer gewoon aanzetten, maar na een uurtje of zo stopt hij weer.
    Iemand een idee wat ik eraan kan doen? Gesteld op 26-5-2019 om 10:19

    Reageer op deze vraag Misbruik melden
  • Heeft u hier van ook de Nederlandse gebruiksaanwijzing Gesteld op 20-2-2019 om 21:31

    Reageer op deze vraag Misbruik melden
    • Neen, is volgens mij momenteel alleen in het Engels, Duits, Frans en andere talen beschikbaar, behalve in het Nederlands. Al hoewel goederen verkocht in België moeten voorzien zijn van een Nederlandstalige handleiding, dat zou normaal zijn. Geantwoord op 21-2-2019 om 15:46

      Waardeer dit antwoord Misbruik melden
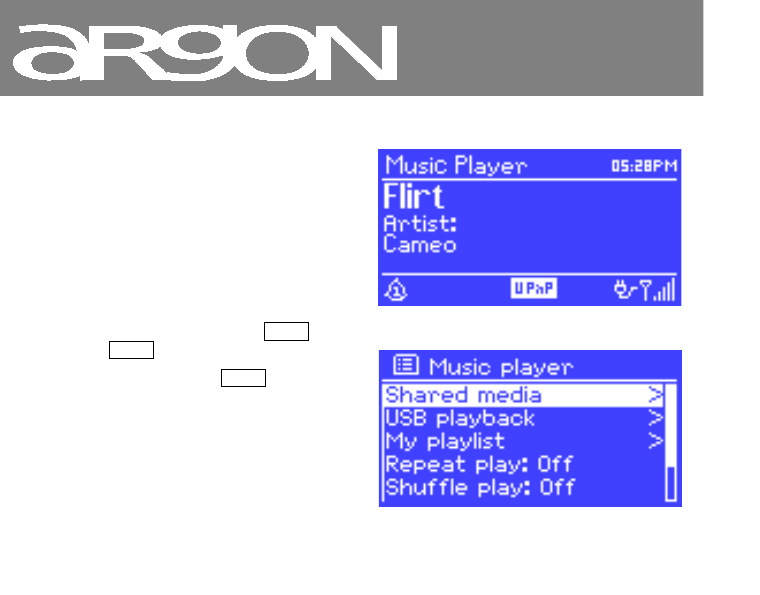
6

Misbruik melden

Gebruikershandleiding.com neemt misbruik van zijn services uitermate serieus. U kunt hieronder aangeven waarom deze vraag ongepast is. Wij controleren de vraag en zonodig wordt deze verwijderd.

Product:

Bijvoorbeeld antisemitische inhoud, racistische inhoud, of materiaal dat gewelddadige fysieke handelingen tot gevolg kan hebben.

Bijvoorbeeld een creditcardnummer, een persoonlijk identificatienummer, of een geheim adres. E-mailadressen en volledige namen worden niet als privégegevens beschouwd.

Spelregels forum

Om tot zinvolle vragen te komen hanteren wij de volgende spelregels:

Belangrijk! Als er een antwoord wordt gegeven op uw vraag, dan is het voor de gever van het antwoord nuttig om te weten als u er wel (of niet) mee geholpen bent! Wij vragen u dus ook te reageren op een antwoord.

Belangrijk! Antwoorden worden ook per e-mail naar abonnees gestuurd. Laat uw emailadres achter op deze site, zodat u op de hoogte blijft. U krijgt dan ook andere vragen en antwoorden te zien.

Abonneren

Abonneer u voor het ontvangen van emails voor uw Argon iNet3 plus v2 bij:


U ontvangt een email met instructies om u voor één of beide opties in te schrijven.


Ontvang uw handleiding per email

Vul uw emailadres in en ontvang de handleiding van Argon iNet3 plus v2 in de taal/talen: Engels als bijlage per email.

De handleiding is 1,11 mb groot.


U ontvangt de handleiding per email binnen enkele minuten. Als u geen email heeft ontvangen, dan heeft u waarschijnlijk een verkeerd emailadres ingevuld of is uw mailbox te vol. Daarnaast kan het zijn dat uw internetprovider een maximum heeft aan de grootte per email. Omdat hier een handleiding wordt meegestuurd, kan het voorkomen dat de email groter is dan toegestaan bij uw provider.

Stel vragen via chat aan uw handleiding

Stel uw vraag over deze PDF

Andere handleiding(en) van Argon iNet3 plus v2

Argon iNet3 plus v2 Snelstart handleiding - Nederlands - 2 pagina's

Argon iNet3 plus v2 Snelstart handleiding - Deutsch - 2 pagina's

Argon iNet3 plus v2 Gebruiksaanwijzing - Deutsch - 69 pagina's

Argon iNet3 plus v2 Snelstart handleiding - English - 2 pagina's


Uw handleiding is per email verstuurd. Controleer uw email

Als u niet binnen een kwartier uw email met handleiding ontvangen heeft, kan het zijn dat u een verkeerd emailadres heeft ingevuld of dat uw emailprovider een maximum grootte per email heeft ingesteld die kleiner is dan de grootte van de handleiding.

Er is een email naar u verstuurd om uw inschrijving definitief te maken.

Controleer uw email en volg de aanwijzingen op om uw inschrijving definitief te maken

U heeft geen emailadres opgegeven

Als u de handleiding per email wilt ontvangen, vul dan een geldig emailadres in.

Uw vraag is op deze pagina toegevoegd

Wilt u een email ontvangen bij een antwoord en/of nieuwe vragen? Vul dan hier uw emailadres in.


Info