


-
Hoe kan je doorscrollen naar een ander nummer op de iPod? Gesteld op 12-4-2021 om 23:24
Reageer op deze vraag Misbruik melden -
ik rip muziek van een cd zet de muziek over naar itunes ,vandaar doe ik overzetten naar ipod het liedje komt op mijn ipod dan doe ik een volgend liedje opdezelfde manier
Reageer op deze vraag Misbruik melden
dan veegt de ipod het vorige liedje weg zodat er altijd maar 1 liedje opstaat
doe ik kopieeren naar ipod dan zegt de pc dat de ipod niet verbonden is
Gesteld op 3-4-2020 om 18:07 -
Mijn iPod is geblokkeerd hoe krijg ik hem terug in werking. Gesteld op 29-1-2018 om 21:20
Reageer op deze vraag Misbruik melden-
Ga terug naar de winkel daar kunnen ze u helpen Geantwoord op 29-1-2018 om 21:45
Waardeer dit antwoord Misbruik melden
-
-
apple muziek afspeellijst.
Reageer op deze vraag Misbruik melden
Ik kies een nummer maar dit nummer wordt steeds herhaalt. Gesteld op 23-10-2017 om 15:27-
Je moet op shuffle klikken Geantwoord op 23-10-2017 om 16:53
Waardeer dit antwoord (1) Misbruik melden
-
-
Ik klik op shuffle, op speel af of op gelijk welke andere toets, het nummer wordt steeds herhaald.Ook het nummer waar ik laatst op klik wordt op zijn beurt steed herhaald.
Waardeer dit antwoord Misbruik melden
Ik heb tenslotte opp volledig herstel gekozen. Nu is het probleem opgelost.
Dank u
Geantwoord op 23-10-2017 om 17:01 -
mijn beeldscherm is vergroot hoe maak het weer klein
Reageer op deze vraag Misbruik melden
Gesteld op 31-7-2017 om 09:41-
met duim en wijsvinger schuiven
Waardeer dit antwoord (1) Misbruik melden
Geantwoord op 31-7-2017 om 10:17
-
-
Hallo, ik wil namelijk mijn ipod touch resetten, maar staat daar een maximum op? Want het is al de 3de keer dat ik mijn ipod touch wil resetten. Dankuwel! Gesteld op 11-5-2016 om 20:16
Reageer op deze vraag Misbruik melden-
na drie keer kun je hem niet meer reseten want drie keer is het maximum aantal keer dat je hem kunt reseten Geantwoord op 4-8-2016 om 13:42
Waardeer dit antwoord (1) Misbruik melden
-
-
mijn iPod is niet op mijn PC geïnstalleerd, hoe doe ik dat? Kan er nu geen muziek afhalen of bijzetten. Gesteld op 4-4-2016 om 11:20
Reageer op deze vraag Misbruik melden-
gewoon met kabel aansluiten op pc dan zie het vanzelf wat er gebeurd. Geantwoord op 4-4-2016 om 12:58
Waardeer dit antwoord (3) Misbruik melden
-
-
je moet op pc eerst afmelden en daarna weer aansluiten je moet ook even je muziek verwijderen en dan kun je er weer muziek op zetten Geantwoord op 4-8-2016 om 13:47
Waardeer dit antwoord (1) Misbruik melden -
Ik heb voor Sinterklaas en iPodlader van de action gekregen maar hij geeft steeds de foutmelding opladen niet ondersteunt met dit asociare hoe kan dat
Reageer op deze vraag Misbruik melden
Gesteld op 8-12-2014 om 22:21-
ik heb er deze week ook een gekocht en werkt prima, gaf echter eerst ook deze melding
Waardeer dit antwoord Misbruik melden
blijven proberen, maar het werkt succes Geantwoord op 9-12-2014 om 09:22
-
-
Hoe wordt ik lid van de Administratorgroep Gesteld op 15-12-2013 om 21:05
Reageer op deze vraag Misbruik melden-
Hoi, ik heb echt geen idee, sorry ik heb hetzelfde probleem. Please, HELP ONS! Geantwoord op 23-12-2013 om 17:39
Waardeer dit antwoord (3) Misbruik melden
-
-
Ik kan niet scrolle op mijn AppStore. Hoe komt dat Gesteld op 15-12-2013 om 19:40
Reageer op deze vraag Misbruik melden-
ik kan het ook niet! :(
Waardeer dit antwoord (1) Misbruik melden
Geantwoord op 1-1-2014 om 13:53
-
-
Is een apple ipod touch 4g kleiner dan een apple ipod touch 5g Gesteld op 15-12-2013 om 08:21
Reageer op deze vraag Misbruik melden-
ja ben er bijna helemaal zeker van.
Waardeer dit antwoord (1) Misbruik melden
Geantwoord op 1-1-2014 om 13:54
-
-
ja de de generatie heeft een langer scherm Geantwoord op 28-7-2014 om 20:32
Waardeer dit antwoord (1) Misbruik melden -
Wat moet ik doen als het geblockeerd is
Reageer op deze vraag Misbruik melden
Gesteld op 16-11-2013 om 22:26-
by het instaleren is mijn iPod touch geblockeerd wat moet ik doen. Geantwoord op 18-1-2014 om 19:49
Waardeer dit antwoord (13) Misbruik melden
-
-
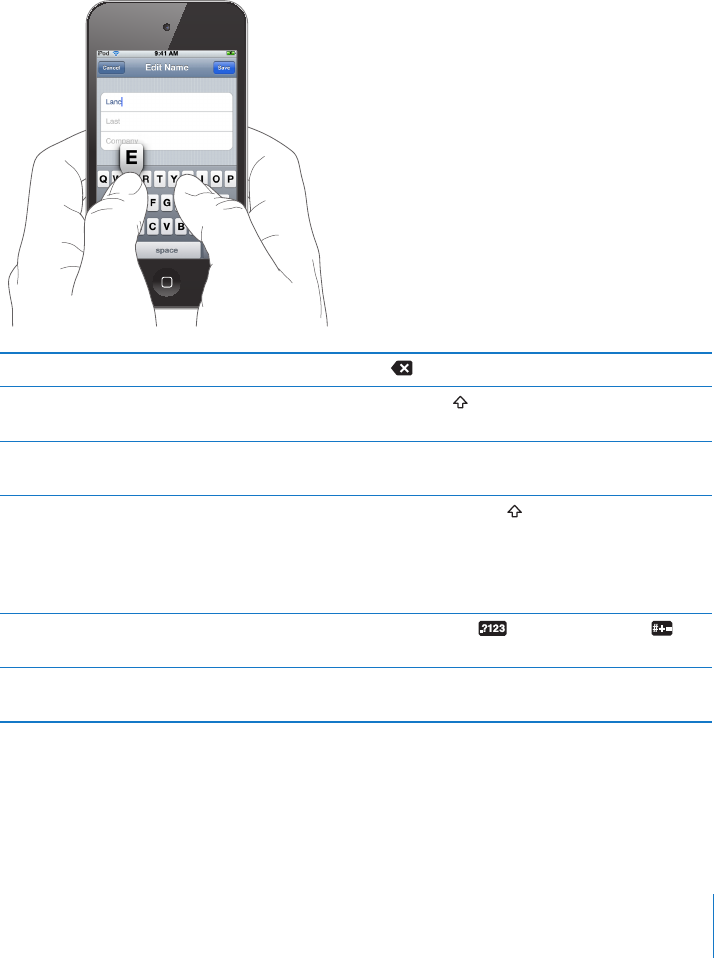
ik heb een iPod gekocht, maar ik kan de naam van de vorige eigenaar, boven in de balk niet wegkrijgen.
Reageer op deze vraag Misbruik melden
hoe moet ik dit doen???? het is een oude zonder camera.
wacht een antwoord af. alvast bedankt. Gesteld op 13-11-2013 om 18:28-
dat zou ik ook wel eens willen weten! Geantwoord op 1-2-2014 om 22:46
Waardeer dit antwoord (6) Misbruik melden
-
-
naar fabrieks instellingen gaan en het is er af
Waardeer dit antwoord (3) Misbruik melden
Geantwoord op 2-2-2014 om 11:24 -
ik wil graag inloggen op mijn message maar er staat dat het inloggen mislukt is omdat er geen verbinding is maar er is wel verbinding!! wat moet ik doen? Gesteld op 13-11-2013 om 13:20
Reageer op deze vraag Misbruik melden-
Heb ik ook voorgehad! Ik had vaak opnieuw geprobeerd, maar het lukte niet. Ik liet het dus gewoon voor wat het was en wanneer ik het een tijdje later nog eens opende ging het opeens! #geduldisdeboodschap!???? Geantwoord op 5-4-2015 om 21:57
Waardeer dit antwoord (1) Misbruik melden
-
-
Hoe schakel ik shuffle uit of aan Gesteld op 9-11-2013 om 15:35
Reageer op deze vraag Misbruik melden-
ga naar instellingen... Geantwoord op 13-11-2013 om 13:21
Waardeer dit antwoord (6) Misbruik melden
-
-
Mijn zoon heeft een ipad 2 gekocht, nu kan hij niet op de appstore want hij is te jong, wat moet ik doen Gesteld op 3-11-2013 om 10:34
Reageer op deze vraag Misbruik melden-
Zet de ipod op jou naam Geantwoord op 14-12-2013 om 22:04
Waardeer dit antwoord (6) Misbruik melden
-
-
als ik hem aan doe dan komt er een icoontje van I-Tunes en er staat dat ik hem aan de computer moet koppelen. Wat moet ik doen? Gesteld op 23-8-2013 om 11:52
Reageer op deze vraag Misbruik melden-
Je moet eerst naar Itunes en dan moet je naar overzicht. Geantwoord op 23-8-2013 om 12:15
Waardeer dit antwoord (1) Misbruik melden
-
-
Ik zit met hetzelfde probleem, wie kan zeggen wat nu te doen? Geantwoord op 4-11-2013 om 17:12
Waardeer dit antwoord (1) Misbruik melden -
Hoe ga je naar iTunes? Ik kan verder niks doen met de iPod, hij blijft gewoon hangen met de eerder genoemde afbeeldingen. Geantwoord op 4-11-2013 om 17:14
Waardeer dit antwoord Misbruik melden -
hoe verander ik de naam van een iPod Touch 2? Gesteld op 10-8-2013 om 13:42
Reageer op deze vraag Misbruik melden-
dat wil ik ook graag weten Geantwoord op 10-8-2013 om 13:55
Waardeer dit antwoord Misbruik melden
-
-
geef het terug aan de rechtmatige eigenaar,
Waardeer dit antwoord (1) Misbruik melden
of ga naar de winkel en vraag daar of ze je willen helpen. Geantwoord op 10-8-2013 om 20:34 -
gekocht van de rechtmatige eigenaar!!!!!!!!!!!!!!!!!!!!!!!!!!!
Waardeer dit antwoord Misbruik melden
en die wist het ook niet Geantwoord op 10-8-2013 om 20:38 -
Minimum leeftijd apple id Gesteld op 26-7-2013 om 09:06
Reageer op deze vraag Misbruik melden-
Waardeer dit antwoord (6) Misbruik melden
De minimum leeftijd is 13 jaar!!!! Geantwoord op 26-7-2013 om 20:42
-
-
wat is een administratiegroep bij de ipo touch 5g 16 gb Gesteld op 4-7-2013 om 18:29
Reageer op deze vraag Misbruik melden-
Het is ongelofelijk , het schijnt dat niemand het weet........................
Waardeer dit antwoord (8) Misbruik melden
Spit de gebruikershandleiding door, of ga naar de winkel
waar je de I-pod hebt gekocht en die helpen je verder.
SUCCES Geantwoord op 4-7-2013 om 20:44
-
-
Het lukt niet om mijn geboorte datum in te stellen bij mijn appel ID hierdoor zegt de store dat ik te jong ben Gesteld op 14-6-2013 om 15:31
Reageer op deze vraag Misbruik melden-
Je moet ouder zijn dan 13 jaar Geantwoord op 14-12-2013 om 22:06
Waardeer dit antwoord Misbruik melden
-
-
Opmijn Ipodschermzit steeds het tekentjevan geluid hoekrijg ik dit weg. Gesteld op 6-6-2013 om 12:16
Reageer op deze vraag Misbruik melden-
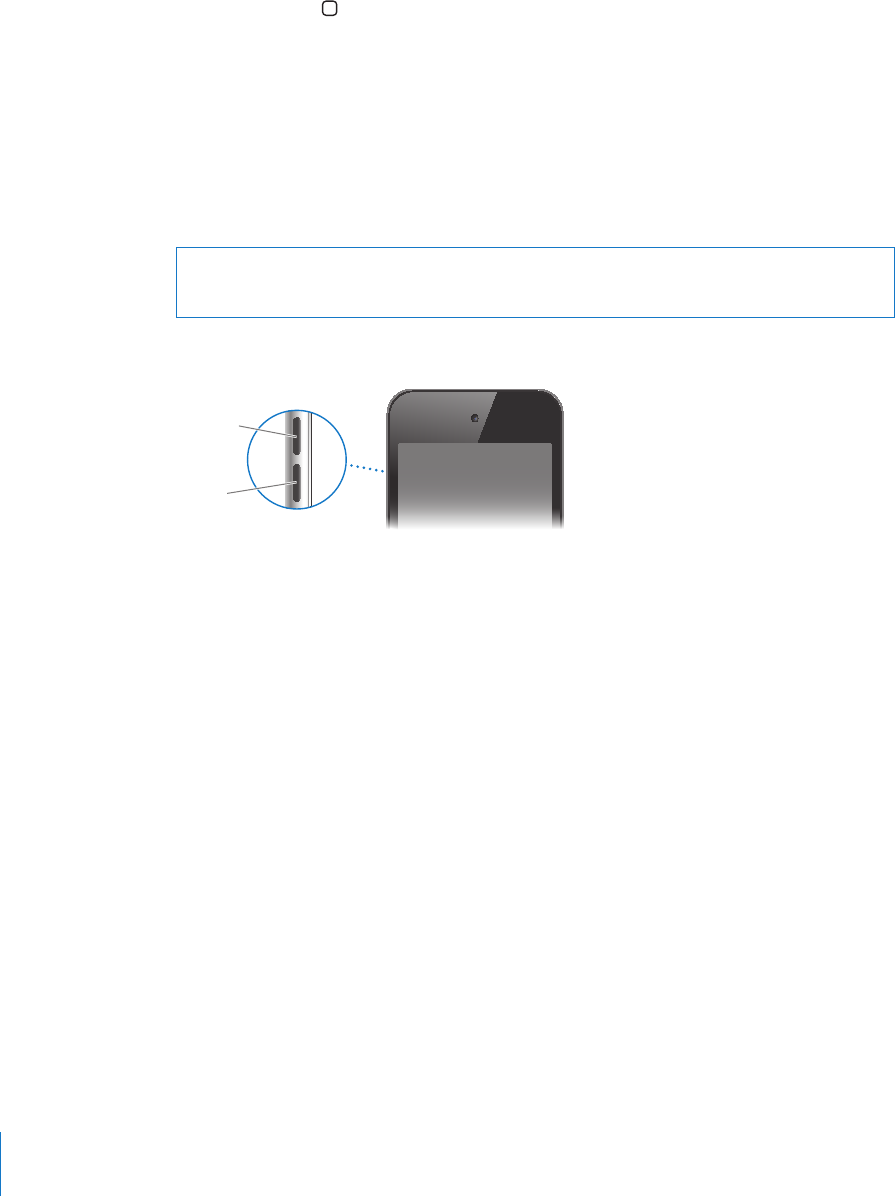
Er zit toch aan de zijkant twee ovale knopjes , daar moet je opdrukken.
Waardeer dit antwoord Misbruik melden
De bovenste voor harder, en de onderste voor zachter.
En dan verdwijnt het helemaal. HOPELIJK Geantwoord op 7-6-2013 om 19:26
-
-
Er zit toch aan de zijkant twee ovale knopjes , daar moet je opdrukken.
Waardeer dit antwoord Misbruik melden
De bovenste voor harder, en de onderste voor zachter.
En dan verdwijnt het helemaal. HOPELIJK Geantwoord op 7-6-2013 om 19:26 -
Er zit toch aan de zijkant twee ovale knopjes , daar moet je opdrukken.
Waardeer dit antwoord Misbruik melden
De bovenste voor harder, en de onderste voor zachter.
En dan verdwijnt het helemaal. HOPELIJK Geantwoord op 7-6-2013 om 19:26 -
Elke keer als ik mijn apple id intyp zeggen ze dat ik geen lid ben van de administratorgroep wat ik dat en hoe kan ik daar lid van worden
Reageer op deze vraag Misbruik melden
anoniempje
Gesteld op 30-5-2013 om 21:30-
Je moet toch een keer de gebruikershandleiding doorspitten....
Waardeer dit antwoord Misbruik melden
Maar ga even terug naar je verkoop adres, b.v. The Apple store daar weten
ze het wel . Geantwoord op 1-6-2013 om 19:44
-
-
ipod touch 16 gb is deze uit te berijden aan zijn gehougen Gesteld op 30-5-2013 om 18:36
Reageer op deze vraag Misbruik melden-
Nee helaas niet, ik heb hetzelfde probleem, maar er schijnt iets met I Cloud te kunnen,
Waardeer dit antwoord (2) Misbruik melden
maar dat weet ik niet zeker. Geantwoord op 1-6-2013 om 19:42
-
-
hoe verwijder ik een groep van berichten van mijn i pod touch Gesteld op 29-5-2013 om 13:36
Reageer op deze vraag Misbruik melden-
ik kon dat ook niet, dus voor de wielen van mijn auto gelegd en wat denk je alles eruit, de berichten en onderdelen!!!!!!!!!!!!!!!dus probleem opgelost! veel succes Geantwoord op 30-5-2013 om 18:48
Waardeer dit antwoord Misbruik melden
-
-
ik kon dat ook niet, dus voor de wielen van mijn auto gelegd en wat denk je alles eruit, de berichten en onderdelen!!!!!!!!!!!!!!!dus probleem opgelost! veel succes Geantwoord op 30-5-2013 om 18:49
Waardeer dit antwoord Misbruik melden -
Kijk bij instellingen, wel even door scrollen en dan wordt je geholpen.
Waardeer dit antwoord Misbruik melden
Stap voor stap en komt het prima in orde. Geantwoord op 1-6-2013 om 19:46 -
Hoi, mijn zoon heeft op de iPod een groep whatsapp. Deze is niet door hem aangemaakt.
Reageer op deze vraag Misbruik melden
Nu wil ik dat deze groep van zijn iPod gaat. Hoe kan ik deze verwijderen? Hoe kan ik zorgen dat hij er geen berichten meer van ontvangt? Gesteld op 26-5-2013 om 12:00-
Je moet lang op de groep drukken en dan naar onder scrollen en op groep verlaten drukken Geantwoord op 30-7-2013 om 16:21
Waardeer dit antwoord (1) Misbruik melden
-
-
hoe moet ik de ipod touch opstarten Gesteld op 18-5-2013 om 19:16
Reageer op deze vraag Misbruik melden-
Waardeer dit antwoord Misbruik melden
Breng hem maar terug naar de rechtmatige eigenaar. Geantwoord op 1-6-2013 om 19:47
-
-
Hoe oud moet je zijn voor een nieuw appleID Gesteld op 5-5-2013 om 08:42
Reageer op deze vraag Misbruik melden-
Minium leeftijd: 13 jaar Geantwoord op 14-5-2013 om 16:21
Waardeer dit antwoord Misbruik melden
-
-
Hoe wordt ik lid van de administratiegroep ? Gesteld op 1-5-2013 om 03:40
Reageer op deze vraag Misbruik melden-
Waarom ga je niet terug naar het aankoop adres, daar kunnen ze je helpen
Waardeer dit antwoord Misbruik melden
ze doen dat gratis en vlug.
SUCCES Geantwoord op 7-6-2013 om 19:32
-
-
Hoe word ik lid van de administratorgroep. Gesteld op 30-4-2013 om 20:05
Reageer op deze vraag Misbruik melden-
ik heb dat oooooooookkkkkkkk !!!!! ZO STOM nu kun je bijna niks doawnloaden of op facetime of wat dan ook Geantwoord op 30-5-2013 om 21:34
Waardeer dit antwoord Misbruik melden
-
-
ik heb dat oooooooookkkkkkkk !!!!! ZO STOM nu kun je bijna niks doawnloaden of op facetime of wat dan ook Geantwoord op 30-5-2013 om 21:34
Waardeer dit antwoord Misbruik melden -
ik heb dat oooooooookkkkkkkk !!!!! ZO STOM nu kun je bijna niks doawnloaden of op facetime of wat dan ook Geantwoord op 30-5-2013 om 21:34
Waardeer dit antwoord Misbruik melden -
op welke leeftijd kan je een apple-id aamaken? Gesteld op 28-4-2013 om 20:10
Reageer op deze vraag Misbruik melden-
dat is 13 jaar Geantwoord op 28-4-2013 om 21:30
Waardeer dit antwoord (3) Misbruik melden
-
-
kan ik een andere usb lader gebruiken ?
Reageer op deze vraag Misbruik melden
Gesteld op 27-4-2013 om 11:12-
jaaa dat kan! Geantwoord op 28-4-2013 om 20:08
Waardeer dit antwoord (2) Misbruik melden
-
-
jaaa dat kan! Geantwoord op 28-4-2013 om 20:08
Waardeer dit antwoord Misbruik melden -
hoe apple id wachtwoord aanmaken
Reageer op deze vraag Misbruik melden
Gesteld op 26-4-2013 om 14:22-
Het beste is, om terug te gaan naar de winkel waar je het gekocht hebt...
Waardeer dit antwoord Misbruik melden
En ze doen het graag voor je , en zeker in een Apple-winkel.... Geantwoord op 2-5-2013 om 21:31
-
-
nieuwe geboortedatum invoeren
Reageer op deze vraag Misbruik melden
Gesteld op 25-4-2013 om 21:04-
Ga naar instellingen en door scrollen, dan kom je er vanzelf, en het wijst zich zelf....
Waardeer dit antwoord Misbruik melden
of ga terug naar de winkel of A-store daar helpen ze je graag. Succes. Geantwoord op 25-4-2013 om 22:03
-
-
hallo heb een probleempje met mijn ipod touch mijn zoon heeft hem bij de app store ergens op chinees gezet en ik heb geen idee hoe ik dat eraf moet krijgen kan er iemand mij helpen
Reageer op deze vraag Misbruik melden
groeten jessica
ik hoop dat er iemand mij kan helpen want ik kan helemaal geen chinees dus ik kan ook niets meer downloaden Gesteld op 15-4-2013 om 13:54-
je moet terug gaan naar de winkel, als ze het daar op hebben gezet, moeten hun het er ook weer afhalen.
Waardeer dit antwoord Misbruik melden
En voor hun is het een kleinigheid, dus terug naar de winkel. Geantwoord op 27-4-2013 om 22:27
-
-
hoe kan ik lid worden van de administratorgroep? Gesteld op 5-4-2013 om 15:51
Reageer op deze vraag Misbruik melden-
Geen idee, maar.... of ga terug naar de winkel van aankoop, of spit de gebruikershandleiding door.
Waardeer dit antwoord (1) Misbruik melden
Succes Geantwoord op 5-4-2013 om 20:00
-
-
door diverse keren fout invoeren van wachtwoord is mijn iPod touch geblokkeerd, hoe krijg ik de blokkade eraf? Gesteld op 3-4-2013 om 13:59
Reageer op deze vraag Misbruik melden-
mevrouw u moet terug naar de appstore Geantwoord op 4-4-2013 om 10:04
Waardeer dit antwoord (5) Misbruik melden
-
-
Terug geven aan de rechtmatige eigenaar dan maar... Geantwoord op 6-5-2013 om 08:41
Waardeer dit antwoord Misbruik melden -
i, heb ook precies hetzlfd Geantwoord op 24-5-2013 om 07:10
Waardeer dit antwoord Misbruik melden -
ik heb de app fifa 13 gekocht via i tunes maar hij is al zo n 10 min bezig met laden wat kan ik doen Gesteld op 2-4-2013 om 20:44
Reageer op deze vraag Misbruik melden-
wachten Geantwoord op 4-4-2013 om 10:06
Waardeer dit antwoord (2) Misbruik melden
-
-
Hoe verander je je iPod wachtwoord Gesteld op 29-3-2013 om 13:19
Reageer op deze vraag Misbruik melden-
Ga naar instellingen, door scrollen dan kom je er vanzelf, en anders naar de winkel van aankoop...
Waardeer dit antwoord (1) Misbruik melden
Of spit de gebruikershandleiding door. Geantwoord op 2-5-2013 om 21:38
-
-
Als ik een Apple ID aan wil maken dan vul ik alles in, maar dan staat er als ik het jaar heb ingevoerd dat ik te jong ben welk jaartal ik ook invul. Kan iemand mij verder helpen? Ik had al iets gelezen over Instellingen, maar waar? Gesteld op 24-3-2013 om 16:04
Reageer op deze vraag Misbruik melden-
Das bij mij ook! Kan iemand helpen Geantwoord op 1-5-2013 om 16:59
Waardeer dit antwoord Misbruik melden
-
-
Hoe moet je bij de app store weer de nedelandse winkel doen? Gesteld op 23-3-2013 om 10:31
Reageer op deze vraag Misbruik melden-
Dit is een hele vreemde vraag stelling.. Geantwoord op 2-5-2013 om 21:50
Waardeer dit antwoord Misbruik melden
-
-
mijn ipod vraagt steeds om mijn inlognaam en wachtwoord hoekan ik di omzeilen Gesteld op 21-3-2013 om 01:56
Reageer op deze vraag Misbruik melden-
niet Geantwoord op 4-4-2013 om 10:09
Waardeer dit antwoord (1) Misbruik melden
-
-
Mijn dochter van 9 jaar heeft i pad ingesteld. Nu blijkt ze te jong om apple id te krijgen en kan ze geen apps downloaden. Hoe kan ik dit veranderen Gesteld op 13-3-2013 om 07:34
Reageer op deze vraag Misbruik melden-
Het beste is om terug te gaan naar de Amac of Apple winkel of waar u hem gekocht heeft, of kijk op instellingen.
Waardeer dit antwoord (10) Misbruik melden
De minimum leeftijd is 13 jaar .
Maar in de winkel helpen ze u graag en gratis, dus ...het proberen waard.
SUCCES Geantwoord op 13-3-2013 om 13:59
-
-
Mijn I-pod staat op tilt. heeft een vergroot scherm en is niet meer te besturen. wat nu? Gesteld op 11-3-2013 om 00:24
Reageer op deze vraag Misbruik melden-
doe met uw twee vingers op het scherm dan uw vingers naar elkaar schuiven dan kan het weer beter gaan.
Waardeer dit antwoord (2) Misbruik melden
en als het niet lukt dan ga je terug naar de winkel daar helpen ze je graag
Geantwoord op 14-3-2013 om 16:01
-
-
Hoe stel ik opnieuw de leeftijd in op een Ipod touch?
Reageer op deze vraag Misbruik melden
Gesteld op 3-3-2013 om 14:07-
Kijk op instellingen en goed door scrollen , dan kom je het vanzelf tegen....
Waardeer dit antwoord (3) Misbruik melden
SUCCES Geantwoord op 13-3-2013 om 14:00
-
-
hoe krijg ik de stem van de assistent van mijn ipod touch af, en mijn touchscreen kan ik niet meer bewegen wie kan mij helpen???? Gesteld op 28-2-2013 om 21:28
Reageer op deze vraag Misbruik melden-
tik er met drie vingers twee keer op Geantwoord op 7-3-2013 om 15:48
Waardeer dit antwoord (4) Misbruik melden
-
-
alles op mijn app store is in het frans, omdat we onze franse gegevens hebben ingevoerd, weet iemand hoe je dit kan veranderen naar het nederlands Gesteld op 20-2-2013 om 21:11
Reageer op deze vraag Misbruik melden-
Hebben ze dat in de winkel er opgezet, ga even terug naar de winkel daar veranderen ze het graag en gratis voor U.
Waardeer dit antwoord (2) Misbruik melden
Of kijk op instellingen.
SUCCES Geantwoord op 13-3-2013 om 14:03
-
-
leeftijd invullen bij registratie Gesteld op 19-2-2013 om 18:25
Reageer op deze vraag Misbruik melden-
De minimum leeftijd is 13 jaar, dus..... Geantwoord op 13-3-2013 om 14:09
Waardeer dit antwoord (3) Misbruik melden
-
-
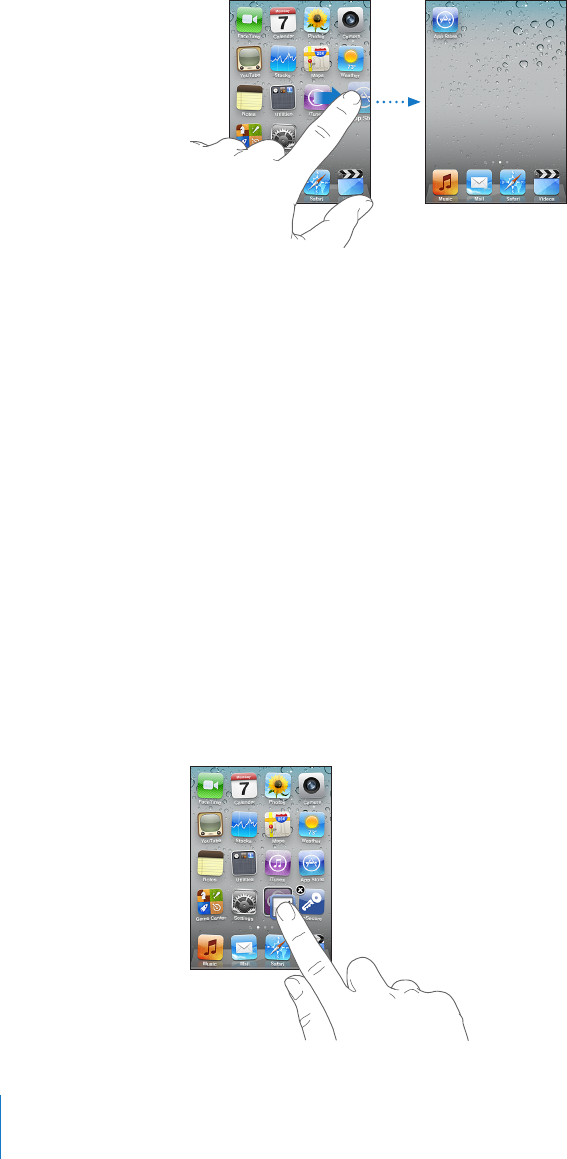
Afbeelding op beginscherm verwijderen Gesteld op 15-2-2013 om 19:05
Reageer op deze vraag Misbruik melden-
Als u ze er zelf op hebt gezet, houd u vinger heel lichtjes op de app, ze gaan dan een beetje dansen. Wat u er af wilt hebben zachtjes op het kruisje drukken,en dan komt er een klein schermpje of u het wil verwijderen of niet.
Waardeer dit antwoord (1) Misbruik melden
Zijn ze er in de winkel opgezet, dan is het meestal standaard, maar dat moet in de winkel
even gevraagd worden, en hun kunnen het dan veranderen.
SUCCSES Geantwoord op 13-3-2013 om 14:08
-
-
Minimumleeftijd app store Gesteld op 3-2-2013 om 15:58
Reageer op deze vraag Misbruik melden-
Het is te vinden onder instellingen en de minimumleeftijd is 13 (dertien ) jaar..... Geantwoord op 3-2-2013 om 19:34
Waardeer dit antwoord (9) Misbruik melden
-
