


-
Goedemiddag
Reageer op deze vraag Misbruik melden
Blokkeren op geven van en nummebij voorbaat dank Gesteld op 21-2-2025 om 12:41 -
Ontgrendelen sim sleuf, iemand die mij kan helpen? Gesteld op 2-6-2024 om 10:11
Reageer op deze vraag Misbruik melden -
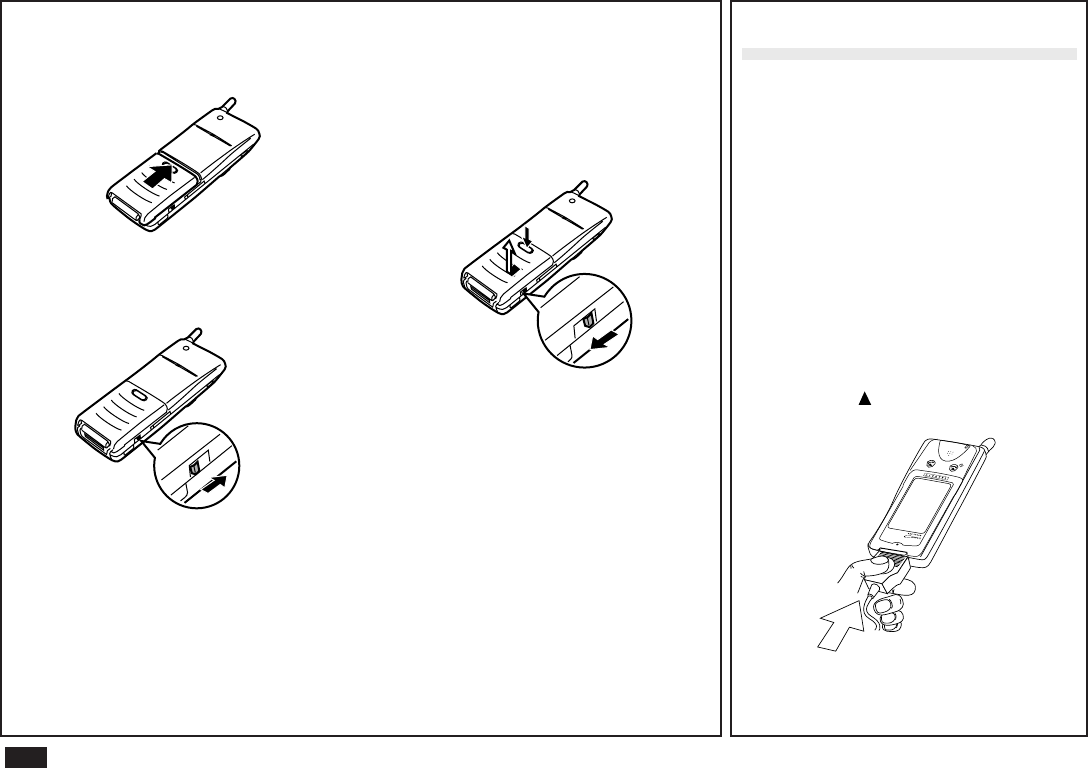
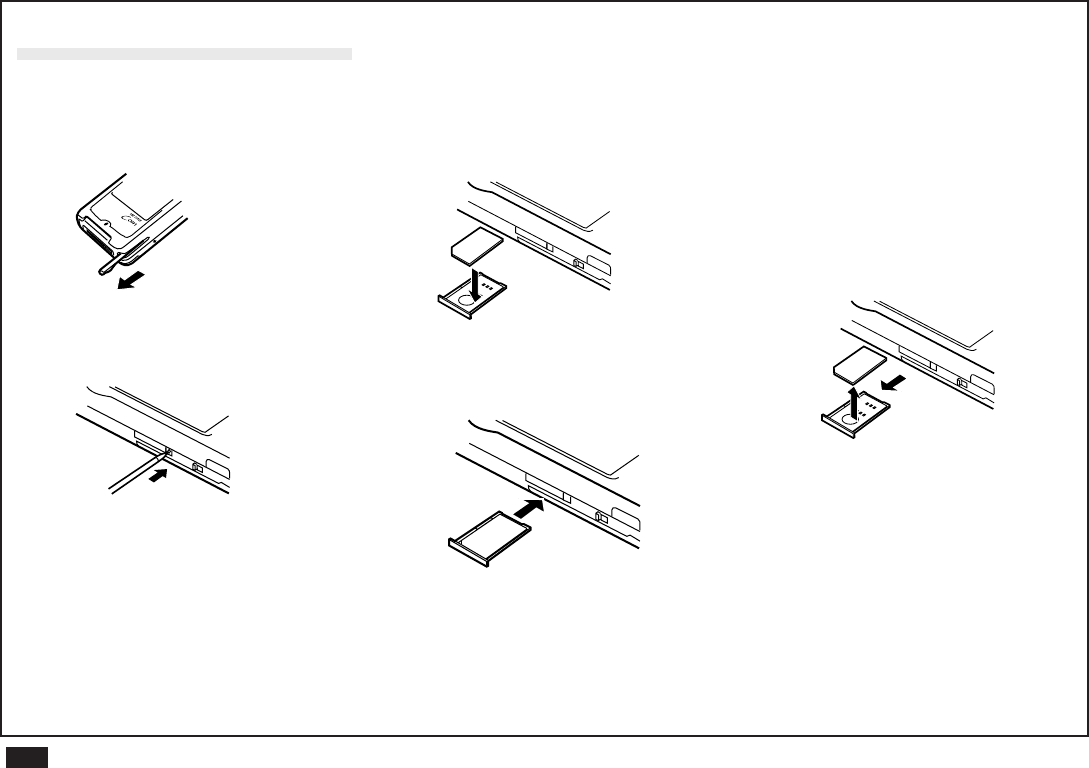
Hoe kan ik een simkaart en een geheugenkaart plaatsen in een Alcatel Tl1oo8CI?? Gesteld op 26-3-2024 om 12:44
Reageer op deze vraag Misbruik melden -
mijn telefoon staat in het vliegtuigmodes hoe kan ik dat herstellen
Reageer op deze vraag Misbruik melden
Gesteld op 31-7-2023 om 10:05 -
Hoe voer ik een nieuw contact in mijn telefoonboek?
Reageer op deze vraag Misbruik melden
Gesteld op 17-7-2023 om 12:37 -
Hoe maak je de alcatel TCL Communication Ltd open?Het scherm is zwart,aan en uit knop daar wordt niet op gereageerd... Gesteld op 8-1-2022 om 14:28
Reageer op deze vraag Misbruik melden
-
Hoe open ik het apparaat om batterij en sim kaart te plaatsen, type 2053 Gesteld op 6-10-2021 om 13:14
Reageer op deze vraag Misbruik melden -
Ik heb een Alcatel 1060. Als ik die gewoon in gebruik heb (staat dus aan) krijg ik telkens de melding dat ik lang op het sterretje links onder moet drukken om 'm te ontgrendelen, Heeft iedereen dat? Weet iemand hoe ik dat uitschakel? Alvast bedankt ! Gesteld op 8-9-2021 om 13:28
Reageer op deze vraag Misbruik melden -
Mijn GSM is nu opgeladen maar weet niet hoe ik hem mijn code indrukken Gesteld op 30-7-2021 om 09:30
Reageer op deze vraag Misbruik melden-
bij mijn doro apparaat gewoon op groene knop duwen, komtt de vraag uw pincode in te vullen, hiermee kunt U bellen Geantwoord op 30-7-2021 om 17:00
Waardeer dit antwoord (1) Misbruik melden
-
-
jij kan ook op de rode knop duwen zolang tot je een vraag krijgt! Geantwoord op 30-7-2021 om 17:01
Waardeer dit antwoord Misbruik melden -
Graag een antwoord op mijn vraag hoe stel ik mijn toestel in voor vraag als zoeken naar het begin van opzetten van het begin Gesteld op 9-7-2021 om 10:26
Reageer op deze vraag Misbruik melden -
hoe vind ik de handleiding van de alcatel 3080 mobiel met toetsen. Gesteld op 5-6-2021 om 20:53
Reageer op deze vraag Misbruik melden -
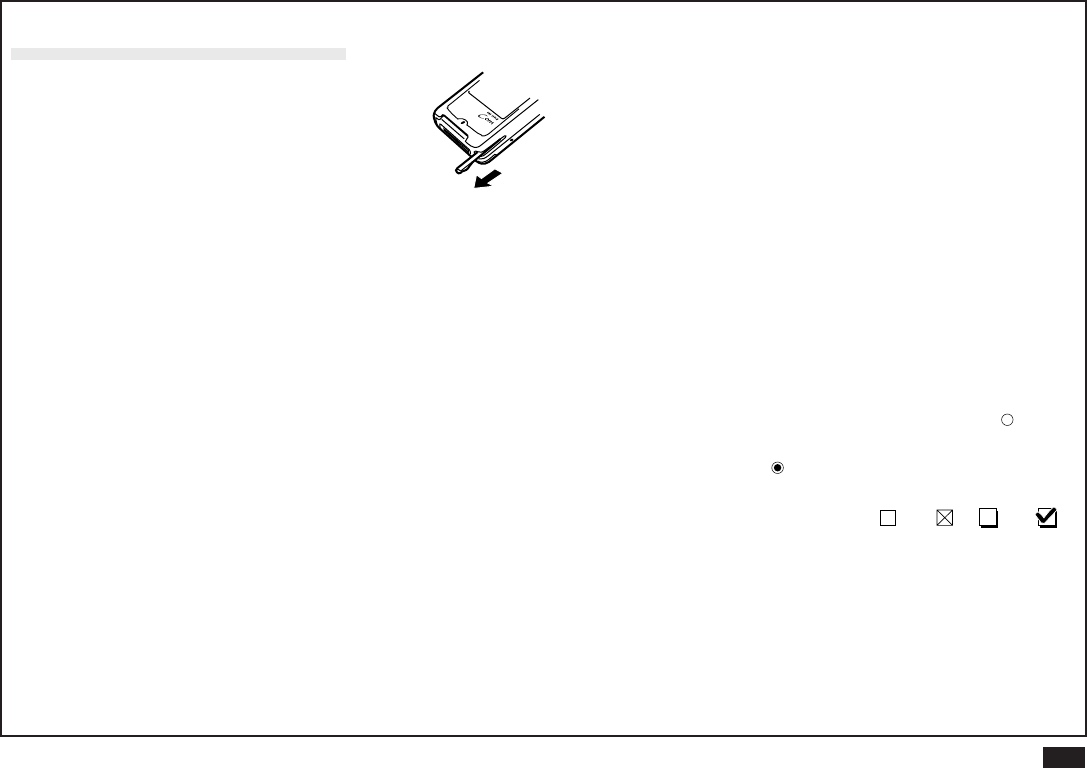
Ik wil de achterkant van mijn toestel verwijderen. Gesteld op 26-11-2020 om 12:05
Reageer op deze vraag Misbruik melden
-
Hoe krijg je een toegangscode alleen met cijfers niet letters Gesteld op 4-4-2020 om 02:07
Reageer op deze vraag Misbruik melden -
Ik heb een heel gewone mobiele telefoon staat alleen ''alcatel'' op hoe moet ik dit gebruiksklaar maken? Gesteld op 10-4-2018 om 13:31
Reageer op deze vraag Misbruik melden-
Ben de puk code kwijt Geantwoord op 18-9-2020 om 10:12
Waardeer dit antwoord (2) Misbruik melden
-
-
Hoe kan ik de alcatel onetouch ontgrendelen. Ik heb alle toetsen ingedrukt, maar krijg alleen informatie met de boodschap ontgrendelen. Gesteld op 10-11-2016 om 15:42
Reageer op deze vraag Misbruik melden-
ik kan niet meer verder met mijn toestel. ik heb iets verkeerds ingesteld en krijg nu, altijd, een stem die me alles zegt en die me meldt dat ik tweemaal moet tikken op commando van scherm maar die reageert er dan niet op. ik krijg die stem ook niet meer weg en kan niks meer intikken want een toetsenbord verschijnt er ook niet meer. Geantwoord op 20-9-2018 om 14:35
Waardeer dit antwoord (28) Misbruik melden
-
-
ik ben mijn wachtwoord vergeten, en weet hem niet meer zo kom ik er niet in
Reageer op deze vraag Misbruik melden
Gesteld op 1-11-2016 om 16:41-
BEN MIJN WACHTWOORD VAN ALCATEL 1035X VERGETEN KAN IK EEN ANDER WACHTWOORD KRIJGEN Geantwoord op 25-1-2017 om 13:31
Waardeer dit antwoord (17) Misbruik melden
-
-
Hoe kan ik het geluid van mijn telefoon harder zetten? Gesteld op 19-8-2016 om 18:46
Reageer op deze vraag Misbruik melden-
De knop rechts is voor het geluid. Deze telefoon heb ik altijd op minimaal staan kwa geluid. Erg goede boxen = ook erg harde/luide ringtone. ;) Geantwoord op 2-9-2016 om 14:16
Waardeer dit antwoord Misbruik melden
-
-
hoe stop ik een simkaart in een alcatel one touch
Reageer op deze vraag Misbruik melden
Gesteld op 11-6-2016 om 11:49-
gwn achterkant eraf hale
Waardeer dit antwoord (7) Misbruik melden
Geantwoord op 11-6-2016 om 17:59
-
-
Links zit een sleuf. Even in het game pielen met een speld (heb geduld) en hij springt open. Zowel sim als geheugenkaartje kun je erin doen. Er is plek voor max 2 kaartjes/simkaartjes Geantwoord op 2-9-2016 om 14:11
Waardeer dit antwoord (1) Misbruik melden -
Zo: Links zit een sleuf. Even in het game pielen met een speld (heb geduld) en hij springt open. Zowel sim als geheugenkaartje kun je erin doen. Er is plek voor max 2 kaartjes/simkaartje
Waardeer dit antwoord (2) Misbruik melden
PS achterkant zit vast en kun je niet zelf openen. Je kunt daar gewoon niet bij. Voordeel is misschien dat je dan ook minder gauw laat hebt van bijv waterschade. Nadeel :kunt 'm niet zelf repareren of accu vervangen. Al met al wel erg blij met dit toestel Geantwoord op 2-9-2016 om 14:13 -
Best even deze raad opvolgen van youtube. Er is een klein randje aan het toestel, haast zichtbaar, waarin je met je vingernagel de achterkant eraf kan trekken zonder probleem, en dan wordt de batterij en simkaart zichtbaar. -- Youtube clipje: Klik op deze LINK
Geantwoord op 13-4-2022 om 20:58 Waardeer dit antwoord (1) Misbruik melden -
Wanneer ik een bericht type geeft de telefoon alleen cijfers maar geen letters hoe verander ik dit
Reageer op deze vraag Misbruik melden
Gesteld op 24-4-2016 om 14:10-
Druk op het sterretje (*) links onderaan op uw telefoontoestel.
Waardeer dit antwoord Misbruik melden
Vervolgens verschijnt een groot aantal keuzemogelijkheden waaruit u kunt kiezen, bijv. kleine letters, cijfers, hoofdletter aan het begin van de zin en vervolgens kleine letters, allemaal hoofdletters enz. enz. Geantwoord op 29-12-2017 om 16:59
-
-
Hoe open ik een alcatel telefoon ik probeer hem te openen maar ik zie zelfs nergens een spleet waar hij geopend kan worden Gesteld op 12-2-2016 om 16:34
Reageer op deze vraag Misbruik melden-
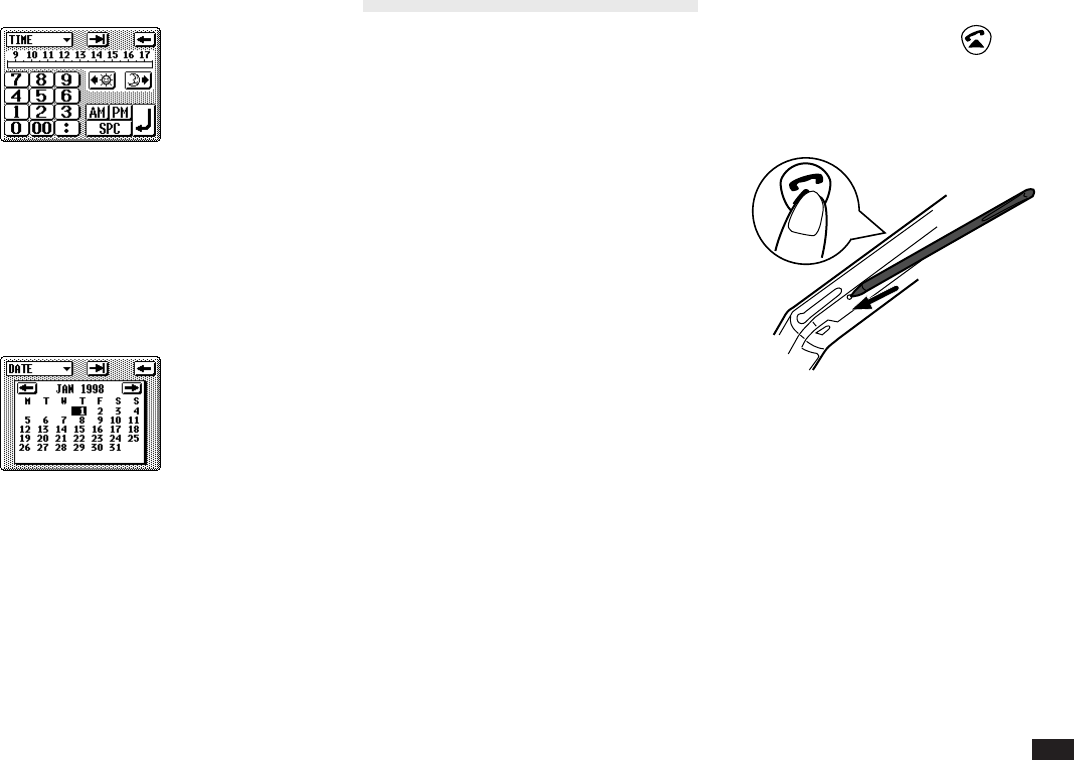
Leg het toestel met de voorkant op een vlak (zachte) oppervlak. Zet de nagel van de middelvinger in de opening van de mini-USB aansluiting. Plaats lichte druk met de duim van dezelfde hand op de achterzijde van het toestel, bijna onderaan. Aldus heeft u een hefboom (nagel en duim): wrik de achterzijde voorzichtig los. (Ja, de snelstartgids laat u in de stek op dit punt). Geantwoord op 16-2-2016 om 15:55
Waardeer dit antwoord (79) Misbruik melden
-
-
met geen mogelijkheid los te krijgen op deze manier. kost me mijn nagel ook.
Waardeer dit antwoord (8) Misbruik melden
Wat een probleem is dit zeg Geantwoord op 22-10-2021 om 16:12 -
Gooi dat pok.... ding onder de trein leg hem op de rails
Waardeer dit antwoord (2) Misbruik melden
Wat een ty...... telefoon weggegooid geld dit kost je je hart .
Ruud Boon 17-12 -2021 Geantwoord op 17-12-2021 om 18:31 -
Mijn wifi valt steeds weg, het signaal is uitstekend. Maar als ik een tijdje niets doe met mijn foon, valt die dus uit. Dus telkens aanzetten. Hoe kan ik dat instellen, om te voorkomen dat ik straks thuis op mijn data zit. Dat vindt ik gewoon zonde n.m.l. Gesteld op 11-12-2015 om 12:20
Reageer op deze vraag Misbruik melden-
Nieuw losse wifi router. Hoeft niet duur. Die u nu heeft is waarschijnlijk een provider router en heeft een energie zuinig standje daar can deze niet mee overweg.
Waardeer dit antwoord Misbruik melden
Succes Geantwoord op 20-2-2016 om 21:37
-
-
mijn alcatel one touch mini idol is helemaal vastgelopen, kan niks meer doen, aan en uitknopje werkt ook niet meer. Heb al aan oplader gelegd, sim kaart eruit gehaald, sd kaart eruit gehaald..wat moet ik doen? Gesteld op 13-11-2015 om 08:51
Reageer op deze vraag Misbruik melden-
Je moet wachten tot dat die leeg is Geantwoord op 6-1-2016 om 20:49
Waardeer dit antwoord Misbruik melden
-
-
Ik heb sinds kort de one touch idol 3. Een super mooi en snel toestel. Maar ik heb niet door mijn hele huis wifi! Terwijl dat wel he6 geval is met mijn tablet en gsm van mijn man. Help........ Gesteld op 26-10-2015 om 19:26
Reageer op deze vraag Misbruik melden-
Klopt dat probleem had ik ook, een handige vriend van mij heeft de router aangepast.
Waardeer dit antwoord Misbruik melden
Hij heeft de frequentie terug gezet naar 2.4 GHz
Je provider zal je daar zeker ook mee kunnen helpen.
Je telefoon moet je ook terg zetten naar 2.4 GHz
Ik hoop dat dit je probleem oplost. Geantwoord op 11-12-2015 om 10:52
-
-
Hoe maak je screenshot op alcatel one touch c7
Reageer op deze vraag Misbruik melden
Gesteld op 26-9-2015 om 08:31-
aan en uit knop en de volumeknop naar beneden tegelijke tijd in houden en dan maakt hij een foto van het beeld Geantwoord op 9-10-2015 om 17:44
Waardeer dit antwoord (2) Misbruik melden
-
-
kan whatsapp niet meer opdaten, zegt dat er niet genoeg ruimte is.
Reageer op deze vraag Misbruik melden
Heel veel verwijderd, maar lukt nog steeds niet Gesteld op 23-8-2015 om 22:09-
W.app verwijderen & opnieuw installeren. Dit is alleen een tijdelijke oplossing want dit zul je met elke update moeten doen, simpelweg omdat je te weinig intern geheugen hebt op je mobiel. Enige oplossing daarvoor een andere mobiel aanschaffen met meer intern geheugen Geantwoord op 24-8-2015 om 20:10
Waardeer dit antwoord (1) Misbruik melden
-
-
Hoe moet ik met mijn Alcatel one touch pop c7 een screenshot maken? Gesteld op 18-8-2015 om 20:28
Reageer op deze vraag Misbruik melden-
Knopje onder van geluid en aan/uit knopje 1 seconden indrukken tegelijk Geantwoord op 21-8-2015 om 21:20
Waardeer dit antwoord (5) Misbruik melden
-
-
Whatsapp downloaden op mijn Alcatel geeft aan dat e tijd en datum niet juist zijn ingsteld op mijn smartphone Gesteld op 5-8-2015 om 18:36
Reageer op deze vraag Misbruik melden-
Dat had ik ook ik heb gewoon watsapp op nieuw gedownload in de play store Geantwoord op 18-8-2015 om 20:26
Waardeer dit antwoord Misbruik melden
-
-
whattsapp updaten opnieuw in play store Geantwoord op 9-10-2015 om 17:48
Waardeer dit antwoord Misbruik melden -
telefoon heeft goede tijd whattsapp zegt dat de tijd niet goed is Gesteld op 18-7-2015 om 15:51
Reageer op deze vraag Misbruik melden-
He dat had ik ook je moet je mobiel helemaal opnieuw instellen je contacten krijg je weer helemaal terug alleen moet je wel je emailnopnoeuw instellen Geantwoord op 21-7-2015 om 10:58
Waardeer dit antwoord (1) Misbruik melden
-
-
Ff whatsapp eraf en weer opnieuw erop zetten Geantwoord op 10-8-2015 om 20:28
Waardeer dit antwoord Misbruik melden -
hoe moet ik mijn wifi op mijn smartmove krijgen hij geeft steeds aan ,Autenticatie fout aan Gesteld op 12-7-2015 om 18:40
Reageer op deze vraag Misbruik melden-
naar instellingen gaan , daar op data gebruik klikken heb je daar staan mobiele data met daarnaast een vakje deze naar rechts schuiven en voila Geantwoord op 29-7-2015 om 20:02
Waardeer dit antwoord Misbruik melden
-
-
Hoe kan ik het geluid uitzetten dat meld dat er maar een wimkaart inziet.
Reageer op deze vraag Misbruik melden
Gesteld op 11-7-2015 om 19:46-
Sorry het moet zijn, dat er maar een simkaart inzit. Geantwoord op 11-7-2015 om 19:47
Waardeer dit antwoord (1) Misbruik melden
-
-
wat moet je doen als die met aangaan alleen een wit scherm geeft
Reageer op deze vraag Misbruik melden
Gesteld op 16-6-2015 om 19:26-
ja dat heb ik dus ook hij blijft op wit staan en ik heb er niks mee gedaan Geantwoord op 17-7-2015 om 19:48
Waardeer dit antwoord Misbruik melden
-
-
Ik heb hetzelfde probleem met een alcatel 2.0 seniorentelefoon.
Waardeer dit antwoord Misbruik melden
heb de batterij eens goed ontladen en opnieuw opgeladen. toen ging het een tijdje goed, maar na een week begon het weer. ben benieuwd of iemand hier iets over kan zeggen. Geantwoord op 10-9-2015 om 00:11 -
Ik heb een alcatel one touch pop c7, maar hoe kun je de lettertype veranderen?? Gesteld op 9-6-2015 om 00:53
Reageer op deze vraag Misbruik melden-
Dat probleem heb ik ook
Waardeer dit antwoord (2) Misbruik melden
Geantwoord op 27-6-2015 om 12:31
-
-
hoe kan ik de achtergrond bij mijn whats app wijzigen ik heb nu per ongeluk een foto als achtergrond was niet de bedoeling maar weet niet hoe te wijzigen Gesteld op 8-6-2015 om 10:42
Reageer op deze vraag Misbruik melden-
Weet je nog wel hoe je een foto had ingesteld?
Waardeer dit antwoord Misbruik melden
Zo ja doe dan een andere foto Geantwoord op 21-7-2015 om 11:00
-
-
Heeft iemand enig idee waarom mijn pop c7 alleen maar oplaad als de telefoon compleet uitgeschakeld is? als de telefoon.aan staat.laad hij niet op Gesteld op 19-5-2015 om 23:37
Reageer op deze vraag Misbruik melden-
Sorry maar dan is je telefoon niet goed. Ik heb m ook maar doet prima Geantwoord op 27-5-2015 om 19:48
Waardeer dit antwoord Misbruik melden
-
-
Miss moet je dan een nieuwe accu kopen
Waardeer dit antwoord Misbruik melden
Geantwoord op 31-5-2015 om 10:25 -
ik wil van mijn Alcatel ontetouch 5020 het wifisignaal uitzetten. Hoe doe ik dit? Gesteld op 9-5-2015 om 15:33
Reageer op deze vraag Misbruik melden-
Ja, hier had ik ook graag antwoord op, erg irritant. Geantwoord op 11-5-2015 om 10:28
Waardeer dit antwoord (6) Misbruik melden
-
-
k heb een alcatel pop c5 en kan geen apps meer dowloden er komt steeds op onbekende foutcode tijdens instalatie van app:'-24'
Reageer op deze vraag Misbruik melden
kan iemand mij helpen Gesteld op 3-5-2015 om 20:45-
He dat heb ik ook heel irritant é?!
Waardeer dit antwoord Misbruik melden
Geantwoord op 21-7-2015 om 11:02
-
-
hoe kan ik muziek op mijn alcatel one touch c7 zetten Gesteld op 30-4-2015 om 18:42
Reageer op deze vraag Misbruik melden -
Beste, Ik had wat hulp willen hebben. Mn telefoon ligt momenteel uit, ligt op te laden, maar ik kan hem niet opgestart krijgen. Kan ik ergens een reset doen zonder dat de mobiel aanstaat?
Reageer op deze vraag Misbruik melden
mvg
Mik Gesteld op 28-4-2015 om 19:53-
houd de uitknop en de harder volume knop 10 sec ingedrukt
Waardeer dit antwoord Misbruik melden
Geantwoord op 24-10-2015 om 16:46
-
-
Ik krijg geen verbinding tussen mijn Alcatel One Touch en mijn computer. Wat doe ik verkeerd of vergeet ik?
Reageer op deze vraag Misbruik melden
Gesteld op 27-4-2015 om 15:03-
je moet eerst je pc machtigen met je mobiel Geantwoord op 24-10-2015 om 16:46
Waardeer dit antwoord Misbruik melden
-
-
Er staan 5 startpagina's op mijn telefoon, hoe kan ik dit terugbrengen naar 1? Gesteld op 16-4-2015 om 21:30
Reageer op deze vraag Misbruik melden-
op je home screen uitzoomen Geantwoord op 24-10-2015 om 16:47
Waardeer dit antwoord Misbruik melden
-
-
mijn alcatel geeft bij whatsapp aan dat de datum onjuist is terwijl deze wel goed is ingesteld
Reageer op deze vraag Misbruik melden
Gesteld op 14-4-2015 om 18:31-
dan moet je even whatsapp verwijderen en opnieuw de nieuwe versie downloaden ik had dat ook toen ik hem net had.
Waardeer dit antwoord (1) Misbruik melden
Geantwoord op 20-4-2015 om 14:40
-
-
Ja dat had ik ook precies hetzelfde Geantwoord op 9-6-2015 om 00:44
Waardeer dit antwoord Misbruik melden -
Kan je bij de alcatel c7 kleuren smileys doen? Hangt dat van de app die je hebt af? Gesteld op 14-4-2015 om 10:16
Reageer op deze vraag Misbruik melden-
Ikey toetsenbord downloaden Geantwoord op 19-5-2015 om 20:11
Waardeer dit antwoord Misbruik melden
-
-
Hoe kan je op de alcatel one touch pop c7 het lettertype veranderen? Of kan dat niet? Gesteld op 14-4-2015 om 10:14
Reageer op deze vraag Misbruik melden-
Dat weet ik ook niet, daar zit ik ook lang mee Geantwoord op 9-6-2015 om 00:46
Waardeer dit antwoord Misbruik melden
-
-
Hoe verander ik het witte ledlampje van kleur van mijn alcatel c5?? Gesteld op 9-4-2015 om 21:17
Reageer op deze vraag Misbruik melden-
dat kan jammer genoeg niet Geantwoord op 24-10-2015 om 16:48
Waardeer dit antwoord Misbruik melden
-
-
mijn telefoon is geblokkeerd hoe kan ik het open krijgen Gesteld op 2-4-2015 om 10:02
Reageer op deze vraag Misbruik melden-
Fabrieks instellingen?? Geantwoord op 9-6-2015 om 00:46
Waardeer dit antwoord (4) Misbruik melden
-
-
ik heb mijn tijd ingesteld en watsapp geeft aan dat er geen tijd is ingesteld hoe kan ik nu watsapp gebruiken Gesteld op 28-3-2015 om 17:21
Reageer op deze vraag Misbruik melden-
je huidige ,als die erop staat verwijderen en weer opnieuw wahtsapp downloaden. Geantwoord op 26-7-2015 om 14:21
Waardeer dit antwoord Misbruik melden
-
-
Mijn beeld scherm wilt niet meer aan , hoe kan dat ! Hij doet. Alles nog behalve de beelscherm blijft zwart Gesteld op 16-3-2015 om 04:44
Reageer op deze vraag Misbruik melden-
ik heb precies hetzelfde ik startte mijn mobiel opnieuw op en nu staat er een zwart scherm met alcatel onetouch pop c7 hoe kan ik dit oplossen? Geantwoord op 28-3-2015 om 12:46
Waardeer dit antwoord (2) Misbruik melden
-
-
in en uit zoemen as je een foto dichterbij wil halen Gesteld op 13-3-2015 om 16:55
Reageer op deze vraag Misbruik melden-
Als je camera opent komt er een vakje te staan (bij mij) met een plusje er in als je daar op drukt zoomt ie in Geantwoord op 18-4-2015 om 19:30
Waardeer dit antwoord (2) Misbruik melden
-
-
Of 2 keer tikken op het scherm Geantwoord op 9-6-2015 om 00:48
Waardeer dit antwoord (1) Misbruik melden -
Hoe moet ik een screenshot nemen met een alcatel one touch pop C7
Reageer op deze vraag Misbruik melden
Gesteld op 7-3-2015 om 12:13-
Geluidsknopje naar beneden tegelijkertijd aan en uit knop ingedrukt. Geantwoord op 15-3-2015 om 09:42
Waardeer dit antwoord (2) Misbruik melden
-
-
Tegelijk het aan-uit knopje en de 'geluid zachter knop' (het onderste deep van de geluidbalk) ingedrukt houden en wachten tot hij een screenshot maakt Geantwoord op 14-4-2015 om 10:21
Waardeer dit antwoord Misbruik melden -
Hoe schakel ik het alarm uit op mijn Alcatel one touch pop d5 ? Gesteld op 26-2-2015 om 16:02
Reageer op deze vraag Misbruik melden-
nou als het goed is heb je je tijd staan op je scherm klk op de tijd en daar heb je je alarm Geantwoord op 4-3-2015 om 19:57
Waardeer dit antwoord Misbruik melden
-
-
Hoe zet ik alarm volledig uit? Geantwoord op 22-6-2021 om 06:16
Waardeer dit antwoord (5) Misbruik melden -
wat betekent een rood pijltje bij inkomende gesprekken
Reageer op deze vraag Misbruik melden
Gesteld op 24-2-2015 om 00:15-
Dat betekent ophangen? Geantwoord op 24-2-2015 om 09:36
Waardeer dit antwoord (2) Misbruik melden
-
