645155
4
Verklein
Vergroot
Pagina terug
1/69
Pagina verder
ADOBE
®
SPEEDGRADE
Help and tutorials
February 2013
Contents
Getting Started tutorials 1.................................................................................................................................
Basic workflow 2.........................................................................................................................................................................
Quickstart: Color grade a clip 5..................................................................................................................................................
Quickstart: Color grade a sequence 8........................................................................................................................................
Adobe Premiere Pro and SpeedGrade workflows 10.................................................................................................................
Workspace 11...................................................................................................................................................
Desktop basics 12......................................................................................................................................................................
Timeline basics 13......................................................................................................................................................................
Playback basics 16.....................................................................................................................................................................
Adjust the display resolution for playback 18..............................................................................................................................
Compare frames with multiple playheads 19..............................................................................................................................
Set up dual displays 21...............................................................................................................................................................
Keyboard shortcuts 22................................................................................................................................................................
Crop the display frame 26...........................................................................................................................................................
Adjust the display aspect ratio 27...............................................................................................................................................
Image analysis tools 28..............................................................................................................................................................
Work with keyframes 30.............................................................................................................................................................
Loading footage 32...........................................................................................................................................
Supported file formats 33............................................................................................................................................................
Load footage 34..........................................................................................................................................................................
Conform EDLs 35.......................................................................................................................................................................
Load audio tracks 37..................................................................................................................................................................
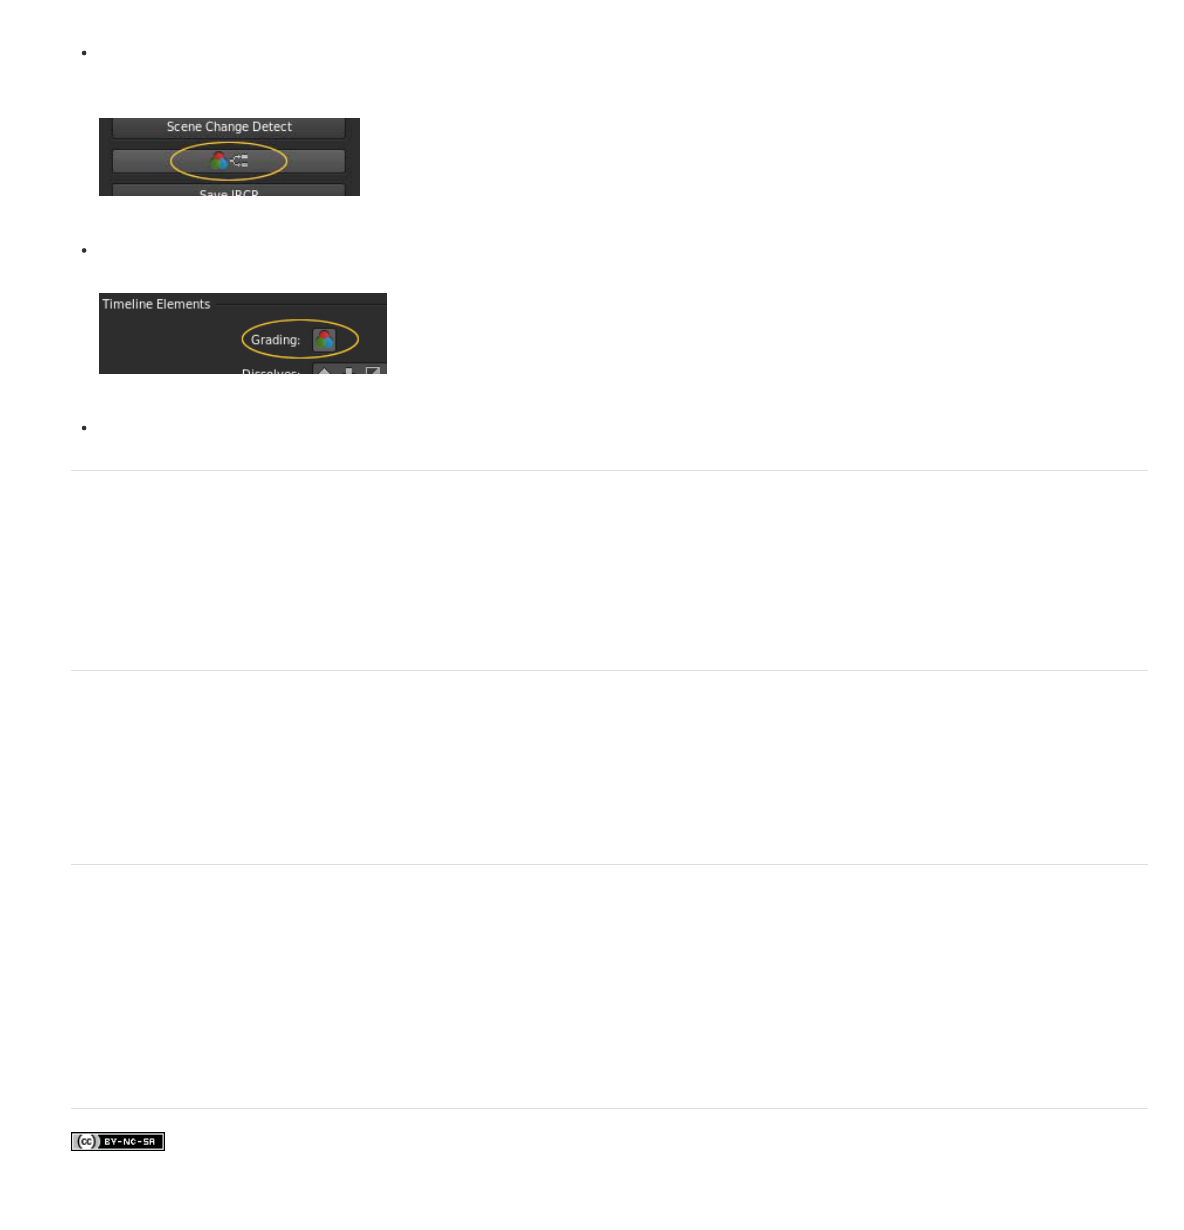
Detect scene changes 38...........................................................................................................................................................
Display burn-in information on frames 39...................................................................................................................................
Color grading 40...............................................................................................................................................
Quickstart: Color grade a clip 41................................................................................................................................................
Quickstart: Color grade a sequence 44......................................................................................................................................
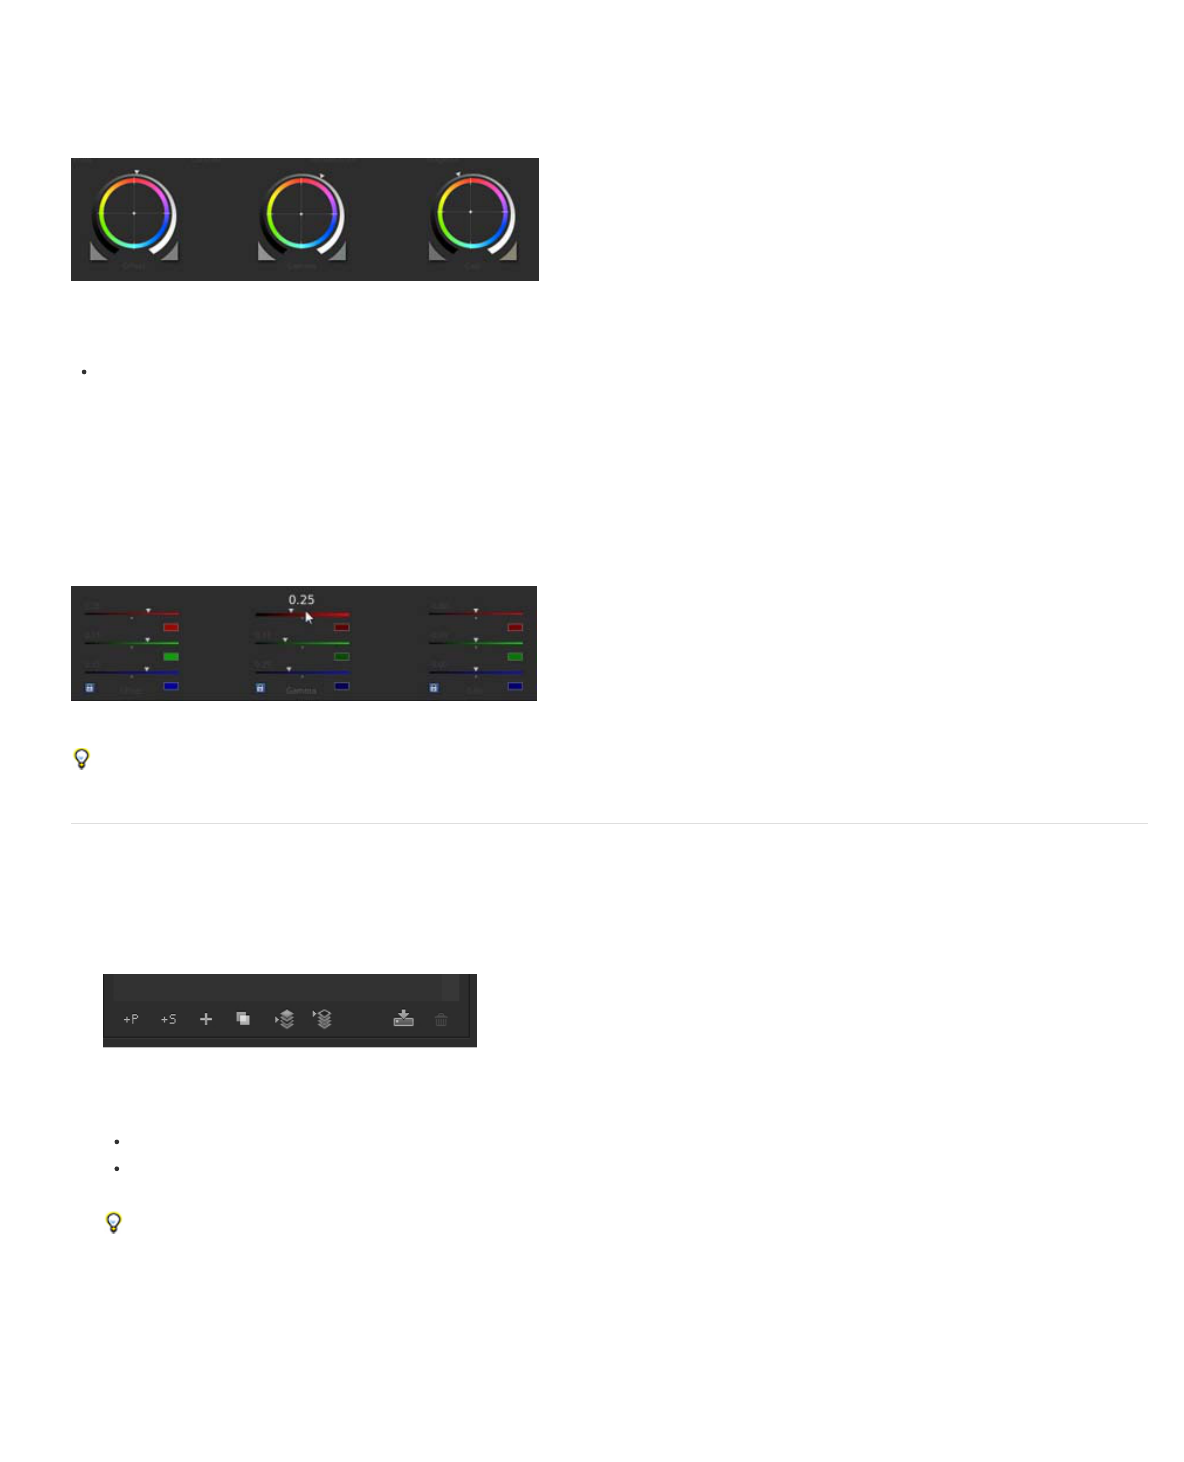
Balance blacks and whites 46....................................................................................................................................................
Adjust gamma 49........................................................................................................................................................................
Adjust color temperature 51........................................................................................................................................................
Grade a specific tonal range 52..................................................................................................................................................
Apply filters and effects 53..........................................................................................................................................................
Work with masks 54....................................................................................................................................................................
Track a masked object through a shot 55...................................................................................................................................
Adjust the framing of shots with pan and scan 57......................................................................................................................
Grade a specific color range 59..................................................................................................................................................
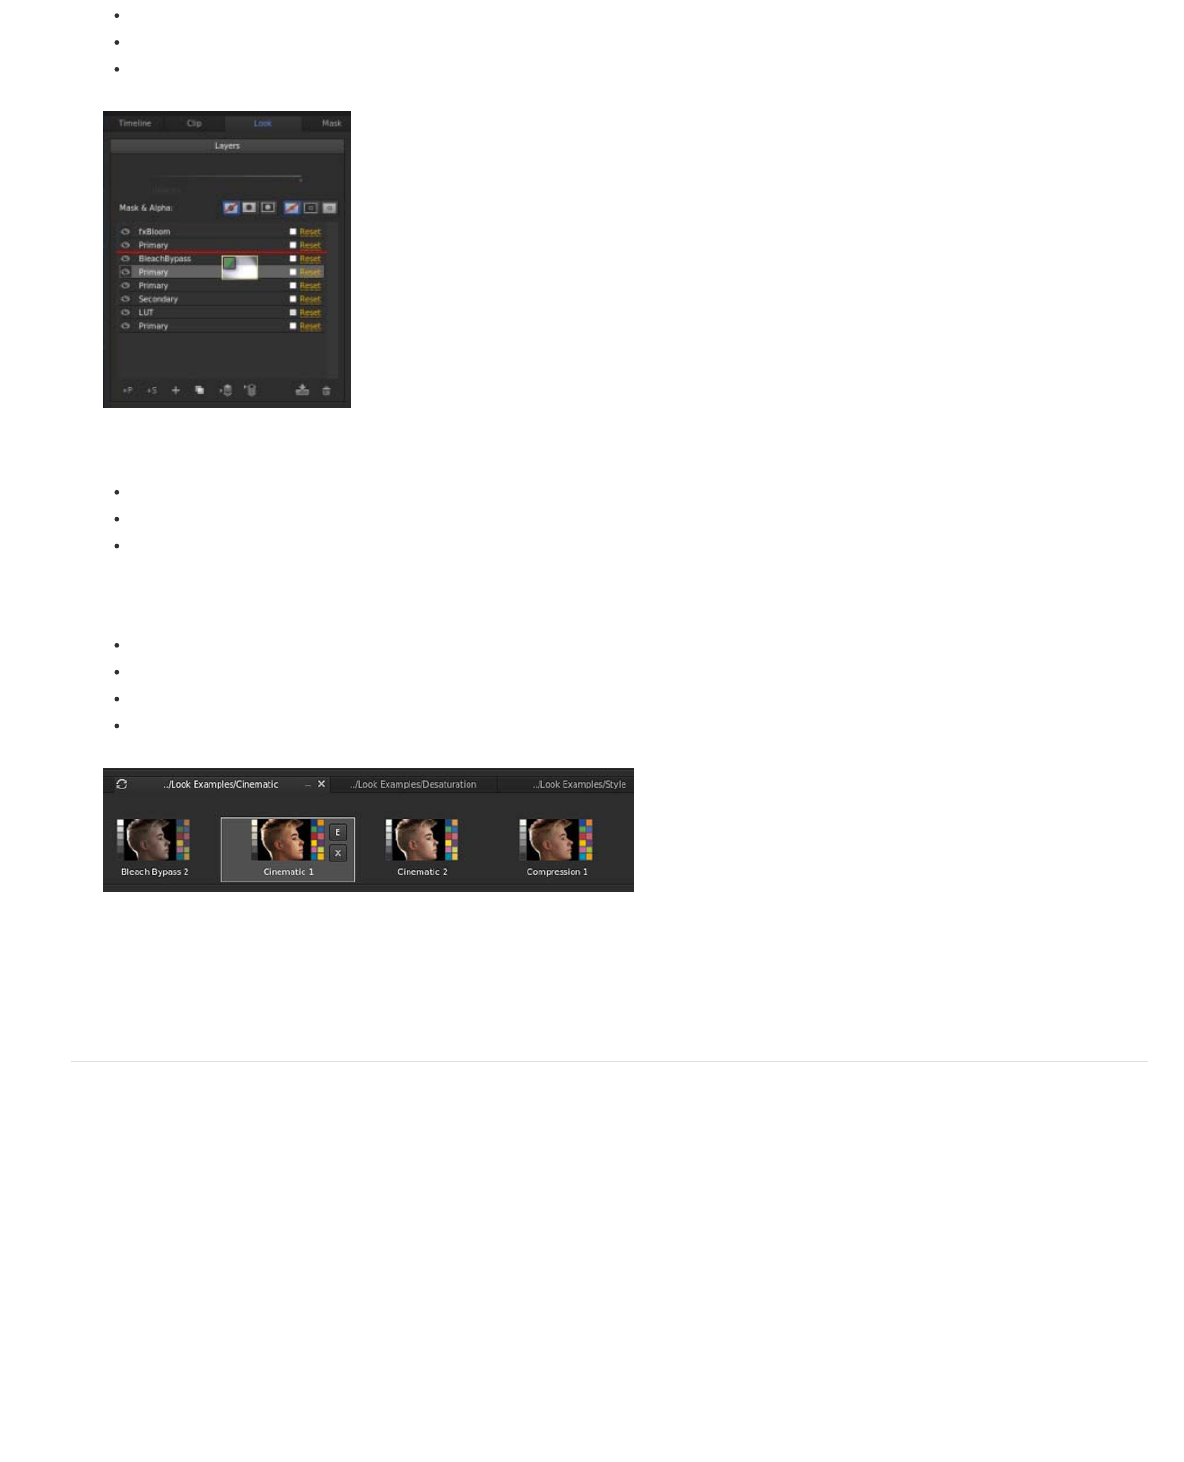
Managing looks 61............................................................................................................................................
Share and reuse looks 62...........................................................................................................................................................
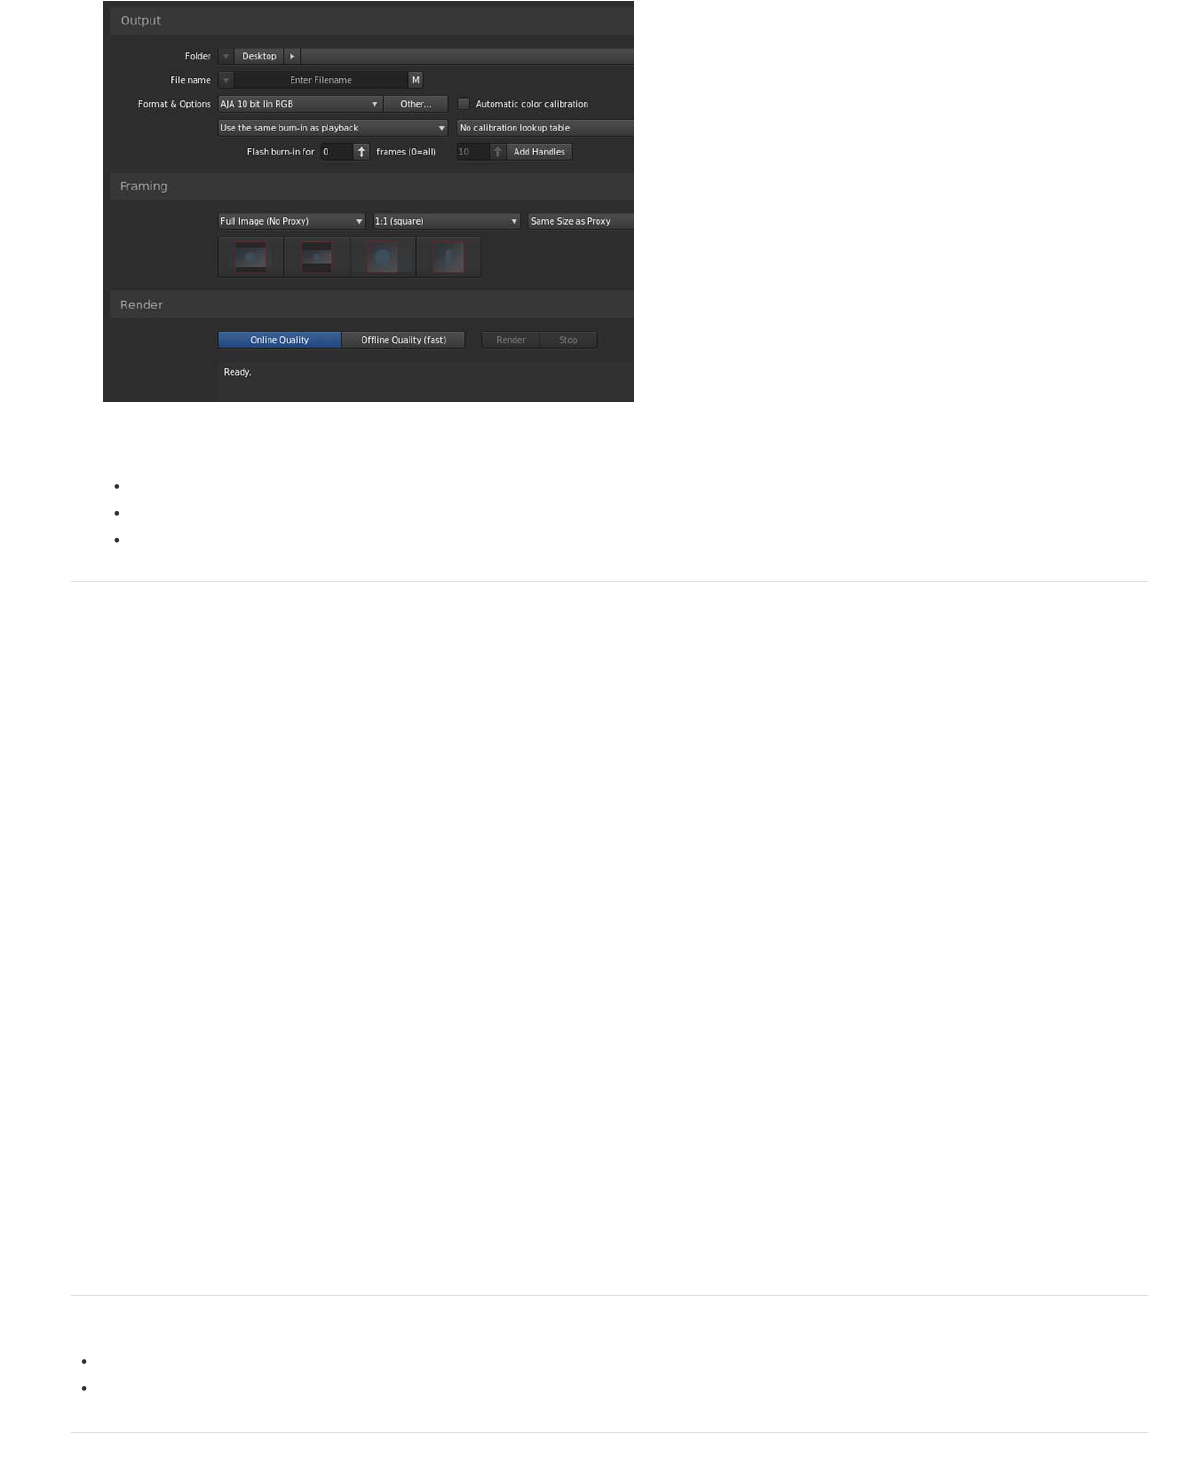
Rendering out 64..............................................................................................................................................
Create proxy files for offline editing 65.......................................................................................................................................
Save an EDL 66..........................................................................................................................................................................
Display burn-in information on frames 67...................................................................................................................................
Getting Started tutorials
To learn more, view these recommended resources online.
SpeedGrade CS6 FAQ
troubleshooting (May. 14, 2012)
What is SpeedGrade?
Video2Brain (May. 7, 2012)
video-tutorial
What's new in SpeedGrade CS6
Patrick Palmer (May. 7, 2012)
video-tutorial
Tips and tricks for using SpeedGrade CS6
Patrick Palmer (May. 7, 2012)
video-tutorial
1
Basic workflow
To the top
To the top
Load footage
Apply color grading
Render out content
Special tools and workflows
Related topics
The SpeedGrade workflow consists of three steps: load footage, color grade, and render out finished content.
Use the following views to perform the workflow:
Desktop view for loading footage
Monitor view for applying color grading
Output view for rendering out the completed project
Each view is accessible from a tab at the top of the SpeedGrade CS6 application window.
Load footage
1. Locate content in the Desktop view. Use the folder browser on the left side to navigate to the folder containing your content.
Thumbnails of the clips appear in the Desktop view.
If you have many clips, you can manage them as follows:
Sort alphabetically.
Sort by time code range, resolution, or date modified.
Filter to display only certain file types.
Search for specific filenames or filename extensions.
2. Add clips to the Timeline by double-clicking or dragging them to the Timeline.
Drag clips by their handles to reposition them on the Timeline.
Set in- and out-points and switch between Timeline views as you review or color grade your content
You can add up to nine separate playheads. See Compare shots with multiple playheads.
3. If you want, load Edit Decision Lists (EDLs) on the Timeline. See Color grade a sequence.
To add an EDL, double-click the EDL in the Desktop view.
To add the clips to the EDL, choose Reels in the Timeline panel and click Load from Desktop.
Apply color grading
1. Apply color correction to balance blacks and whites and to match shots. See Color grade a clip.
Apply primary color adjustments to the whole image, the shadows, the midtones, or the highlights.
Select color ranges to apply secondary color adjustments.
Use the waveform, histogram, and vectorscope to ensure accurate color adjustments, such as balancing blacks and
highlights.
2. Use effects, film-style filters, and masks to design creative looks.
Add new grading layers to build your look.
2
To the top
Apply masks to individual layers, for example to create a vignette.
Add unlimited layers and reorder as required. Changes are applied non-destructively.
Each layer has its own opacity slider where its influence on the overall look can be adjusted.
3. Animate masks or grades to match movement and changing light in your frames.
Add keyframes to your masks or grading tracks.
Adjust masks or grading at keyframe positions.
SpeedGrade CS6 animates transitions smoothly between keyframes.
4. Save grades as Look files and apply those looks to footage. To apply a look to footage, select the footage and then click a
Look file.
The Look file preserves all the layers and settings of the grade.
Click a Look file to apply it to selected footage on the Timeline.
Edit existing looks in the Look panel.
Export looks as LUTs for use in other applications or devices.
5. While working on a project, save your Timeline, including all clips and grading settings, as a SpeedGrade CS6 project.
Press Ctrl+S (Windows) or Cmd+S (Macintosh) to bring up the Save Timeline As dialog box.
For help and tutorials, see Color grading.
Render out content
Render out content to create digital dailies for review, proxy media for offline editing, or masters for final delivery.
1. Start with the content you want to render on the Timeline and click the Output tab to display the Output panel.
3
To the top
Color spaces
Automatically match cameras
Pan & Scan
Cropping
Dynamic Quality
Aspect ratio
Burn-in
Format defaults for Alexa and RED
Stereoscopic
Scene Detection
Consolidate Reels
Save EDL
Annotations
Audio Tracks
To the top
2. Proceed from the top to the bottom of the panel to apply settings for your render.
Select a location and create a filename for the rendered content.
Choose output format and whether to include burn-in information. See Display burn-in information on frames.
Choose Online Quality for final masters or Offline Quality for proxies and dailies.
Special tools and workflows
Use Color Space Defaults for different file formats in the Timeline panel.
Automatically calibrate cameras using Macbeth color chart test shots.
Add pan & scan tracks to your clips to reframe content. See Adjust the framing of shots with pan and scan.
Use the Crop tool to resize your frames.
Use Dynamic Quality to accommodate viewing on displays with different resolutions.
Use the Aspect Ratio tool to display anamorphic content in a 1:1 aspect ratio.
Toggle the Burn-in tool to display or hide file information in your frames. See Display burn-in information on frames.
Select Alexa or RED format settings under the Format Default tab in the Timeline panel.
Activate stereo tools by checking the Stereo checkbox in the Timeline Setup panel. See Stereoscopic Workflows in SpeedGrade
CS6 (Adobe TV video).
Use Scene Detection to identify scene changes in archived material. See Detect scene changes (Help article) or Using Scene
Change Detection in SpeedGrade CS6 (Adobe TV video).
Create copies of the clips used in your project to save active storage space.
Export an EDL from a SpeedGrade CS6 project.
Add annotations to your clips, or to individual frames.
Add audio tracks to your footage from the Desktop.
Related topics
Color grade a clip
Color grade a sequence
4
Quickstart: Color grade a clip
To the top
To the top
Select a clip
Apply a primary color grade
Apply a secondary color grade
Render a graded clip
To load an EDL and color grade a sequence, see Color grade a sequence.
Select a clip
1. In SpeedGrade, select a folder that contains video clips using the file browser in the upper-left corner of the user interface.
The Desktop window shows thumbnail versions of the content in the selected folder.
To filter the thumbnails by file type, select All Files in the upper-right corner and then select a file type.
2. Place a clip on the Timeline by double-clicking it on the Desktop.
3. Click the Monitor Tab in the upper-left corner to view the image.
The default display size is 100%. To fit the image in the monitor window, click the Zoom to Fit button below the scopes
window on the right side of the interface.
Apply a primary color grade
Make basic color changes like temperature, white point, black point, and more, to the entire image. The changes are applied to a primary grading
layer.
Access the grading controls by clicking the Look tab in the lower left, below the timeline.
Make global changes
Make global changes to the image with the sliders at the top of the Look panel.
Global adjustment sliders
To adjust a global setting, do the following:
1. Right-click the triangle icon on the slider and release the click button.
5
To the top
2. Swipe the mouse left or right to change the value.
3. Right-click the triangle icon again to accept the setting.
Make changes to specific regions
Modify color and luminance values in the image's shadow, midtone, and highlight regions using the color control wheels on the Look panel.
Color control wheels
To adjust the luminance, do the following:
Left-click the triangle icon on a wheel and drag the mouse left or right in a straight line. Don't drag the mouse in a circle. The
further left or right you drag, the larger the change.
To adjust the color, do the following:
1. Right-click inside the circle and release the click button.
2. Swipe the mouse in any direction to change the value.
3. Right-click again to accept the setting.
You can use color sliders instead of control wheels. To access the sliders, press Shift+Enter.
Color sliders
Use the zero (0) key on the numeric keypad to toggle the grade on and off for a quick before and after view. Make sure the NumLock key on
your keyboard is selected.
Apply a secondary color grade
Make targeted adjustments to a specific hue range in the image. The changes are applied to a secondary grading layer.
1. Access the secondary color grading tools by selecting the +S icon in the lower-left corner of the Layers window.
2. Select a hue range as follows:
Select a preset hue option by clicking one of the colored buttons along the top of the Hue selection tool.
Sample a hue range by clicking the eyedropper tool with the + icon and then dragging to select a portion of the image in
the Monitor window.
You may have to resize the lower border of the Desktop window to see the eyedropper tools. To resize the window, use
the drag resize tool located at the bottom center of the Timeline.
6
Twitter™ and Facebook posts are not covered under the terms of Creative Commons.
Legal Notices | Online Privacy Policy
To the top
3. View the portion of the image targeted by the hue range selection by selecting an option from the Gray-out menu at upper-
right corner of the Look tab.
4. Make adjustments and refinements to the selection using the upper triangles of the sliders. Use the lower triangles of the
sliders to adjust fall-off.
5. Make secondary corrections with the Off-set and Gain control wheels in the center of the Look window.
6. Soften and blend secondary corrections using the Denoise and Blur sliders on the right of the Look window.
7. After making secondary corrections, set Gray-out to None.
Render a graded clip
1. Click the Output tab in the upper-right corner to open the Metadata Render Engine.
2. Click the Desktop menu and select a destination folder.
3. Assign a name to the rendered file in the File Name textbox.
4. In Format & Options, select a output file format for the render.
If a desired preset doesn’t exist, create a new one by clicking Other.
5. Click Online Quality in the Render section.
6. Click Render.
7
Quickstart: Color grade a sequence
To the top
To the top
To the top
The workflow for color grading a sequence consists of the following steps:
Load an EDL
Reconnect the source clips in the reels
Create a grading clip
Apply color grades to a grading clip
Apply a grading clip to additional video clips
Render a graded sequence
Load an EDL
Edit Decision Lists (EDLs) are metadata documents used to migrate project timelines from editing tools like Adobe Premiere Pro to post-production
tools like SpeedGrade.
Tip: Before starting, place the source clips and the EDL file in a single folder. This organization makes the process quicker and more efficient.
1. In SpeedGrade, select the folder containing the EDL file with the file browser in the upper-left corner of the user interface.
2. Double-click the EDL file to load it.
Tip: If you have too many thumbnails, you can filter them for EDL files by selecting the EDL option from the All Files menu in
the upper-right corner.
SpeedGrade places placeholder thumbnails in the video track and in the Reels panel. The Reels panel is on the Timeline tab on the lower left of
the screen.
Reconnect the source clips in the reels
The Reels panel gives an overview of the reels in an EDL. When loading an EDL, SpeedGrade inserts placeholder thumbnails of the source clips
in the Reels panel. Reconnect the source clips to the placeholder thumbnails in the Reels panel as follows.
1. If not already done, display the source clips on the Desktop window by selecting the folder containing the source clips.
2. Filter the thumbnails for the media type of the source clips. Example: QuickTime movies.
3. Click the Timeline tab and then click the Reels panel to view the source clip placeholders.
4. Reconnect the source clips to the thumbnails by clicking Load from Desktop. SpeedGrade reconnects the source clips on the
Desktop and the video track.
Create a grading clip
When color grading a sequence, work in a non-destructive grading clip associated with the video clips in the sequence. Don't grade the video
clips directly. The grading clip can be saved, moved, and applied to multiple video clips. Grading clips are managed in the Timeline in a grading
track above the video track.
8
Twitter™ and Facebook posts are not covered under the terms of Creative Commons.
Legal Notices | Online Privacy Policy
To the top
To the top
To the top
To create a grading clip, click the Setup button on the Timeline tab and do one of the following:
To create a series of grading clips in the grading track, click the Extract Grade Clips button in the third column of the Setup
window.
To create a grading clip for a single video clip, drag the Grading Clip tool into the grading track above the target clip.
To add grading clips for all the video clips in the video track, drag the Grading Clip tool on a video clip in the video track.
Apply color grades to a grading clip
1. Select a grading clip in the Timeline, not a video clip.
2. Apply color grades to the selected grading clip. For more information on grading, see Color grade a clip.
The grade is applied to all the video clips sharing the grading clip.
Tip: Compare video clips for shot-to-shot color matching by using multiple playheads. For details, see Compare shots with multiple playheads.
Apply a grading clip to additional video clips
You can apply a single look to additional video clips on the Timeline.
1. Drag the Grading Clip tool from the Timeline tab into the grading track above a video clip.
2. Drag the right side of a grading clip to cover multiple clips.
Render a graded sequence
1. Click the Output tab in the upper-right corner to open the Metadata Render Engine.
2. Click the Desktop menu and select a destination folder.
3. Assign a name to the rendered file in the File Name text box.
4. In Format & Options, select an output file format for the render.
5. Click Online Quality in the Render tab.
6. Click Render.
9
Adobe Premiere Pro and SpeedGrade workflows
Twitter™ and Facebook posts are not covered under the terms of Creative Commons.
Legal Notices | Online Privacy Policy
To the top
To the top
General editing and grading workflow
Offline editing and grading workflow
The color grading process is usually the last step in the post-production workflow. If working with high-resolution material or RAW files, you can
begin your workflow by creating smaller proxy files in SpeedGrade for offline editing in Adobe Premiere Pro. After your editing is complete, you can
relink the edits to the source material in SpeedGrade for grading and finishing.
General editing and grading workflow
1. Edit in Adobe Premiere Pro.
2. Send the footage to SpeedGrade as follows:
If working with compressed files, use File > Send to Adobe SpeedGrade. Premiere Pro renders out a DPX sequence and
opens it in SpeedGrade.
Note: Because a DPX sequence is created, this option is more suitable for shorter projects where you have picture lock
and are ready for finishing.
If working with RAW files or on a larger project, export an EDL. See Export a project as an EDL file in Adobe Premiere Pro
Help.
3. Load the material in SpeedGrade and apply color corrections.
4. Render out to your final output file format.
5. Render out a DPX sequence for storage.
You can also import the DPX sequence into Premiere Pro for finishing work such as adding titles and final audio, and then
exporting a final master. Importing an uncompressed DPX sequence preserves quality in the event you want to export from
Premiere Pro again.
Offline editing and grading workflow
The offline workflow is useful when working with high-resolution material or RAW files.
1. Load the source footage into SpeedGrade.
2. Apply any basic first-light color corrections.
3. Render out proxies. See Create proxy files for offline editing.
4. Import the proxies in Premiere Pro and edit the footage.
5. From Premiere Pro, export an EDL. See Export a project as an EDL file in Adobe Premiere Pro Help.
6. In SpeedGrade, use the EDL to relink the source files. See Conform EDLs - Multiple-clip workflow.
7. Apply final color corrections to the full resolution source footage.
8. Render out to the file format for your output.
10
Workspace
11
Desktop basics
Twitter™ and Facebook posts are not covered under the terms of Creative Commons.
Legal Notices | Online Privacy Policy
To the top
To the top
To the top
To the top
Show or hide the Desktop view
Navigate to a folder
Filter the files in the Desktop view
Refresh the Desktop view
Use the Desktop view to find and load footage. You can navigate to folders with image sequences, movie files, or RAW file formats. Thumbnails of
the files are displayed in the Desktop view.
Show or hide the Desktop view
Press the D key.
Navigate to a folder
To navigate to a folder on your hard disk or network, use the breadcrumb control at the top.
Navigate with folder breadcrumbs
You can also browse to a folder with the file browser on the left.
You can adjust the size of thumbnails by dragging the Thumbnail Size slider.
Related links
Filter the files in the Desktop view
If you have many files, you can filter them to display only the files with a specific filename extension or files starting with specific characters.
To show or hide files, enter the filtering criteria in the text box in the upper right. Use the asterisk character (*) as a wildcard
character.
For example, to display only files R3D filename extensions, enter *.R3D.
Refresh the Desktop view
Click the Refresh button. Refreshing the view is useful if you updated files while SpeedGrade was running.
12
4

Hulp nodig? Stel uw vraag in het forum

Spelregels

Misbruik melden

Gebruikershandleiding.com neemt misbruik van zijn services uitermate serieus. U kunt hieronder aangeven waarom deze vraag ongepast is. Wij controleren de vraag en zonodig wordt deze verwijderd.

Product:

Bijvoorbeeld antisemitische inhoud, racistische inhoud, of materiaal dat gewelddadige fysieke handelingen tot gevolg kan hebben.

Bijvoorbeeld een creditcardnummer, een persoonlijk identificatienummer, of een geheim adres. E-mailadressen en volledige namen worden niet als privégegevens beschouwd.

Spelregels forum

Om tot zinvolle vragen te komen hanteren wij de volgende spelregels:

Belangrijk! Als er een antwoord wordt gegeven op uw vraag, dan is het voor de gever van het antwoord nuttig om te weten als u er wel (of niet) mee geholpen bent! Wij vragen u dus ook te reageren op een antwoord.

Belangrijk! Antwoorden worden ook per e-mail naar abonnees gestuurd. Laat uw emailadres achter op deze site, zodat u op de hoogte blijft. U krijgt dan ook andere vragen en antwoorden te zien.

Abonneren

Abonneer u voor het ontvangen van emails voor uw Adobe SPEEDGRADE CS6 - 2013 bij:


U ontvangt een email met instructies om u voor één of beide opties in te schrijven.


Ontvang uw handleiding per email

Vul uw emailadres in en ontvang de handleiding van Adobe SPEEDGRADE CS6 - 2013 in de taal/talen: Engels als bijlage per email.

De handleiding is 3,04 mb groot.


U ontvangt de handleiding per email binnen enkele minuten. Als u geen email heeft ontvangen, dan heeft u waarschijnlijk een verkeerd emailadres ingevuld of is uw mailbox te vol. Daarnaast kan het zijn dat uw internetprovider een maximum heeft aan de grootte per email. Omdat hier een handleiding wordt meegestuurd, kan het voorkomen dat de email groter is dan toegestaan bij uw provider.

Stel vragen via chat aan uw handleiding

Stel uw vraag over deze PDF

Uw handleiding is per email verstuurd. Controleer uw email

Als u niet binnen een kwartier uw email met handleiding ontvangen heeft, kan het zijn dat u een verkeerd emailadres heeft ingevuld of dat uw emailprovider een maximum grootte per email heeft ingesteld die kleiner is dan de grootte van de handleiding.

Er is een email naar u verstuurd om uw inschrijving definitief te maken.

Controleer uw email en volg de aanwijzingen op om uw inschrijving definitief te maken

U heeft geen emailadres opgegeven

Als u de handleiding per email wilt ontvangen, vul dan een geldig emailadres in.

Uw vraag is op deze pagina toegevoegd

Wilt u een email ontvangen bij een antwoord en/of nieuwe vragen? Vul dan hier uw emailadres in.


Info