•For Double Quotes, select a pair of quotation marks, or type the pair of characters you want to use.
•For Single Quotes, select a pair of quotation marks, or type the pair of characters you want to use.
Insert straight quotation marks
?
Do one of the following:
•Choose Type > Insert Special Character > Quotation Marks > Straight Double Quotation Marks or Straight
Single Quotation Mark (Apostrophe).
•Deselect the Use Typographer’s Quotes option in the Type section of the Preferences dialog box, and then type
the quotation mark or apostrophe.
•Press Shift+Ctrl+Alt+' (Windows) or Shift+Command+Option+' (Mac OS) to switch between turning on and
off the Use Typographer’s Quotes preferences option.
254
Tex t
Last updated 11/30/2015
The character frequently used to indicate feet, arcminutes, or minutes of time is the prime mark. It looks like a slanted
apostrophe. The character frequently used to indicate inches, arcseconds, or seconds of time is the double prime mark.
These symbols are different from apostrophes and double quotation marks. Some fonts include the prime and double prime
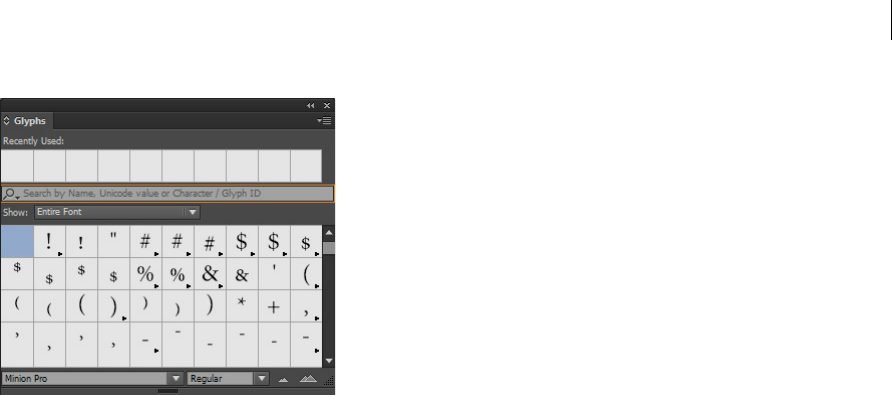
marks. Use the Glyphs panel to insert these marks. If the font doesn’t have a prime or double prime mark, insert the straight
quotation mark, and italicize it.
Insert white space characters
A white space character is a blank space that appears between characters. You can use white-space characters for many
different purposes, such as preventing two words from being broken at the end of a line.
1Using the Type tool, position the insertion point where you want to insert a certain amount of white space.
2Choose Type > Insert White Space, and then select one of the spacing options (such as Em Space) in the context
menu.
Representative symbols of the white-space characters appear when you choose Type > Show Hidden Characters.
White space options
The following options appear on the Type > Insert White Space menu:
Ideographic Space
This is a space that is based on a full-width character in Asian languages. It wraps to the next line as with other full-
width characters.
Em Space
Equal in width to the size of the type. In 12-point type, an em space is 12 points wide.
En Space
One-half the width of an em space.
Nonbreaking Space
The same flexible width as pressing the spacebar, but it prevents the line from being broken at the space character.
Nonbreaking Space (Fixed Width)
A fixed width space prevents the line from being broken at the space character, but does not expand or compress in
justified text. The fixed width space is identical to the Nonbreaking Space character inserted in InDesign CS2.
Third Space
One-third the width of an em space.
Quarter Space
One-fourth the width of an em space.
Sixth Space
One-sixth the width of an em space.
Flush Space
Adds a variable amount of space to the last line of a fully justified paragraph, useful for justifying text in the last line.
(See
Change Justification settings.)
Hair Space
255
Tex t
Last updated 11/30/2015
One-twenty-fourth the width of an em space.
Thin Space
One-eighth the width of an em space. You may want to use a thin space on either side of an em dash or en dash.
Figure Space
Same width as a number in the typeface. Use a figure space to help align numbers in financial tables.
Punctuation Space
Same width as an exclamation point, period, or colon in the typeface.
About Adobe SING Glyphlet Manager
The Adobe SING Glyphlet Manager is a utility for installing and searching for glyphlets. It is not included in Adobe
Creative Suite 5.
More Help topics
OpenType fonts
Create hanging punctuation
Formatting CJK characters
Apply shatai to text
In traditional typesetting technology, characters were slanted by using a lens to distort the glyphs when being set on
film. This oblique style is known as shatai. Shatai is distinct from a simple slant of the glyphs, because it also scales the
glyphs. You can adjust the magnification or angle of text you want to slant from the center point, without changing the
height of the glyph, using the shatai feature in InDesign.
A No scale applied B Magnification 30%, 45 shatai C Selecting the Adjust Tsume option D Selecting the Adjust Rotation option
1Select text.
2Select Shatai from the Character panel menu or Control panel menu.
3Specify the following options, and click OK:
•Specify the degree of skew in Magnification (In traditional typesetting technology terms, 10% magnification is
lens 1, and 40% magnification is lens 4).
256
Tex t
Last updated 11/30/2015
•Set the angle of obliqueness to 30, 45, or 60, in Angle.
•Select Adjust Rotation to rotate the glyphs, and display horizontal lines horizontally for horizontal text, and
vertical lines vertically for vertical text.
•Select Adjust Tsume to apply jidori.
You can fine tune the rotated oblique effect for individual characters, after applying shatai to text.
Rotate characters
1Select the characters.
2In the Character panel, type a value for Character Rotation Specify a minus value to rotate the character to the
right (clockwise).
Adjust aki before and after characters
1Select opening parenthesis or closing parenthesis with the type tool.
2Choose the amount of aki you want to add from the Mojikumi Before Character or Mojikumi After Character
pop-up menu, in the Character panel.
For example, if you specify 2bu, half a full-width space is added, and if you specify 4bu, a quarter of a full-width space
is added. This aki will not be adjusted when the line is set to full justification. Adjusting aki is especially useful to
override Mojikumi Akiryo Settings for certain characters.
Use tate-chu-yoko
Using tate-chu-yoko (also known as kumimoji or renmoji) is an option to make a part of the text horizontal, in vertical
text. It is easier to read half-width characters such as numbers, dates, and short foreign words in a vertical text frame,
by rotating the text.
257
Tex t
Last updated 11/30/2015
You can move text left, right, up, and down when you turn on the Tate-chu-yoko option. You can also set Auto Tate-
chu-yoko for special half-width characters. Auto Tate-chu-yoko is set in the paragraph attributes.
Use tsume or tracking in the Character panel to adjust the character spacing for Tate-chu-yoko.
Apply tate-chu-yoko
1Select the text to which you want to apply tate-chu-yoko.
2Do one of the following:
•Choose Tate-chu-yoko from the Character panel menu or Control panel menu.
•Choose Tate-chu-yoko Settings from the Character panel menu or Control panel menu, choose Tate-chu-yoko
in the Tate-chu-yoko dialog box, and click OK.
If multiple instances of tate-chu-yoko appear next to each other, use the Non-joiner character to keep them separate.
Choose Type > Insert Special Character > Other > Non-joiner.
Remove tate-chu-yoko
1Select the text to which you want to apply tate-chu-yoko.
2Do one of the following:
•Choose and cancel Tate-chu-yoko from the Character panel menu or Control panel menu.
•Choose Tate-chu-yoko Settings from the Character panel menu, deselect Tate-chu-yoko in the Tate-chu-yoko
dialog box, and then click OK.
Change tate-chu-yoko settings
1Choose Tate-chu-yoko Settings from the Character panel menu.
2Specify a value for moving the text up or down in X Offset. If you specify a plus value, the text will move up, and if
you specify a minus value, it will move down.
3Specify a value for moving the text left or right in Y Offset. If you specify a plus value, the text will move to the right,
and if you specify a minus value, it will move to the left.
Set Auto Tate-chu-yoko for specific paragraphs
1Select the text to be set to Auto Tate-chu-yoko, or place the text insertion point in the paragraph.
2Choose Auto Tate-chu-yoko from the Paragraph panel menu.
3In KumiNumber, specify the number of successive half-width characters that you want to rotate to vertical
orientation. For example, if this is set to 2, the character string "123" will not rotate, while "12" will.
4If you want to apply tate-chu-yoko to roman text, select Include Roman Characters, and click OK.
Add Ruby to text
In Japanese, Ruby (also known as furigana) is normally used to show the kanji yomi in hiragana. In Simplified Chinese,
Ruby is called Pinyin, while in Traditional Chinese, Ruby is called Chuyin. InDesign provides full support to Japanese
Ruby and limited support to Chinese Pinyin or Chuyin. You can adjust Ruby settings to specify Ruby location, size, or
color. Furthermore, when the ruby is longer than the parent you can specify the ruby distribution. You can also apply
tate-chu-yoko to Ruby.
258
Tex t
Last updated 11/30/2015
When the parent to which you want to attach ruby covers two lines, the ruby will follow when the parent moves to the
next line.
Note: In some instances, such as when applying a style that includes a variable, Ruby characters may be removed.
1Select the text to which you want to attach ruby. You cannot attach ruby when there are forced line breaks in the
selected text.
2Select Ruby > Ruby from the Character panel menu or Control panel menu.
3Enter the ruby characters in Ruby.
4Change Ruby settings by clicking an option on the left side of the dialog box and specifying settings.
5Click OK.
Ruby settings
The following options appear in the different panels of the Ruby dialog box.
Ruby Placement and Spacing
•From the Type menu, choose Per-Character or Group Ruby. When Per Character Ruby is selected, enter a half or
full width space when inputting Ruby characters to separate them in line with their parent characters. For
"hakunetsutou" for example, enter as "haku netsu tou" (example of a word composed of Japanese characters and its
phonetic spelling is given).
•From the Alignment menu, specify the position of the Ruby characters. You can check the position with the graphic
shown in the sample field.
•To attach ruby above horizontal text or to the right of vertical text, select Above/Right, and to attach below
horizontal text or to the left of vertical text, select Below/Left in Placement.
•Specify the spacing between the ruby and the parent in XOffset and YOffset. When you enter a minus value, the
ruby moves closer to the parent.
Ruby Font and Size
•Select a font family and font style in Font.
259
Tex t
Last updated 11/30/2015
•Specify the size of the ruby characters in Size. The default ruby size is half the size of the parent.
•Specify the scale for the height and width of the ruby characters in Horizontal Scale and Vertical Scale.
•Select Use Open Type Pro Ruby Glyphs to use alternate glyphs for ruby (when possible). Specific kana characters
are available for some Open Type Pro fonts. When you select this option, the specific font for ruby characters, and
not the standard kana font, will be used.
•In KumiNumber, specify the number of successive half-width characters that you want to rotate to vertical
orientation. For example, if this is set to 2, the character string "123" will not rotate, while "12" will.
•Select Include Roman Characters to apply tate-chu-yoko to roman text.
•Select Scale to Fit to force the tate-chu-yoko to have the same dimensions (1 em x 1 em) in the ruby string, either
using an OpenType feature or scaling the glyphs.
Adjustment When Ruby Is Longer Than Parent
•With Overhang, when the total Ruby width is greater than that of their parent characters, the specified Ruby will
overflow widthways into the space above characters either side of the parents. For Japanese, character types
compatible with Overhang comply with the JISx4051-1995 specification.
•Specify the parent character spacing necessary for attaching ruby in Spacing. When you select a different option, the
graphics displayed in the sample field are updated.
•To automatically adjust the ruby character width, select Char Width Scaling, and specify the compression scale for
the width of the ruby characters.
•Select Auto Align at Line Edges to align the parent with the start and end of the line.
Ruby Color
•Select a color swatch in the list box.
•Specify the degree of tinting and line weight, as necessary.
•Select Overprint Fill or Overprint Stroke to set filling or stroke overprint for ruby characters.
(See Determining when to overprint manually.)
Apply kenten
Kenten (also known as Boten) are points which you attach to text you want to highlight. You can select the type of points
from existing kenten forms, or specify customized kenten characters. You can also specify the position, scale, and color
by adjusting the kenten settings.
Apply kenten
1Choose the characters you want to highlight.
2Choose a kenten character, such as Fisheye or White Circle, from Kenten in the Character panel menu or Control
panel menu.
260
Tex t
Last updated 11/30/2015
Change kenten settings and color
1Choose Kenten > Kenten from the Character panel menu or Control panel menu.
2For Kenten Settings, specify the options below:
Kenten TypeSelect a kenten character, such as Fisheye or White Circ le. Choose Custom to specify a custom
character. You can enter characters directly, or you can specify a character code value for the specified character set.
PositionSpecify the spacing between the kenten and characters.
LocationSelect Above/Right to attach kenten above horizontal text or to the right of vertical text, and Below/Left
to attach below horizontal text or to the left of vertical text.
SizeSpecify the size of the kenten character.
AlignSpecify whether the kenten should be displayed in the center (Center) or to the left (Left) (above for vertical
text) of the character's embox.
H/Scale and V/ScaleSpecify the scale for the height and width of the kenten character.
3To change the color of the kenten, choose Kenten Color from the list box, and then specify the options below:
•Select a color swatch from the list box.
•Specify the degree of tinting and line weight, as necessary.
•Select Overprint Fill or Overprint Stroke to set filling or stroke overprint for kenten characters.
(See Determining when to overprint manually.)
4Click OK.
Align text of different sizes
You can specify how to align text to the largest characters in a line using the Character Alignment option, when
positioning characters of different sizes in 1 line. It is possible to align characters to the top, center or bottom of the
embox (right, center, and left for vertical frames), to the roman baseline, and to the top or bottom of the ICF box (right
or left for vertical frames). ICF (Ideographic Character Face) is the average height and width used by the font designer
to design the ideographic characters which comprise a font.
A Align different size letters above full space letters B Align different size letters in the middle of full space letters C Align different size letters
below full space letters
Note: The Character Alignment option is not effective, even if applied, when all characters are the same size in a line.
1Select a range of text or lines for the characters you want to align, or select a text frame using the selection tool.
2Choose one of the following options from Character Alignment in the Character panel menu or Control panel
menu.
•Roman Baseline aligns the small characters in a line to the large character baseline grid.
261
Tex t
Last updated 11/30/2015
•Embox Top/Right, Center, or Embox Bottom/Left align the small characters in a line to the specified position of
the large characters embox. In vertical text frames, Embox Top/Right aligns the text to the right of the embox,
and Embox Bottom/Left aligns the paragraph to the left of the embox.
•ICF Top/Right and ICF Bottom/Left align the small characters in a line to the ICF specified by the large
characters. In vertical text frames, ICF Top/Right aligns the text to the right of the ICF, and ICF Bottom/Left to
the left of the ICF.
More Help topics
Change the text direction
Align paragraphs to a baseline grid
Spell-checking and language dictionaries
Check spelling
You can spell-check a selected range of text, in all of the text in a story, in all stories in a document, or in all stories in
all open documents. Misspelled or unknown words, words typed twice in a row (such as “the the”), and words with
possible capitalization errors are highlighted. In addition to checking the spelling in a document, you can also enable
dynamic spelling so that potentially misspelled words are underlined while you type.
When you check spelling, the dictionary for the languages you assigned to the text is used. You can quickly add words
Gebruikershandleiding.com neemt misbruik van zijn services uitermate serieus. U kunt hieronder aangeven waarom deze vraag ongepast is. Wij controleren de vraag en zonodig wordt deze verwijderd.
Product:
Spelregels forum
Om tot zinvolle vragen te komen hanteren wij de volgende spelregels:
lees eerst de handleiding door;
controleer of uw vraag al eerder door iemand anders is gesteld;
probeer uw vraag zo duidelijk mogelijk te stellen;
heeft u een probleem en al geprobeerd om dit op te lossen, vermeld dit erbij aub;
heeft u een oplossing gekregen van een bezoeker dan horen wij dat graag in dit forum;
wilt u een reactie geven op een vraag of antwoord, gebruik dan niet dit formulier maar klik op de knop 'reageer op deze vraag';
uw vraag wordt direct op de website gezet; vermijd daarom persoonlijke gegevens in te vullen;
Belangrijk! Als er een antwoord wordt gegeven op uw vraag, dan is het voor de gever van het antwoord nuttig om te weten als u er wel (of niet) mee geholpen bent! Wij vragen u dus ook te reageren op een antwoord.
Belangrijk! Antwoorden worden ook per e-mail naar abonnees gestuurd. Laat uw emailadres achter op deze site, zodat u op de hoogte blijft. U krijgt dan ook andere vragen en antwoorden te zien.
Abonneren
Abonneer u voor het ontvangen van emails voor uw Adobe InDesign CC - 2015 bij:
nieuwe vragen en antwoorden
nieuwe handleidingen
U ontvangt een email met instructies om u voor één of beide opties in te schrijven.
Ontvang uw handleiding per email
Vul uw emailadres in en ontvang de handleiding van Adobe InDesign CC - 2015 in de taal/talen: Engels als bijlage per email.
De handleiding is 21 mb groot.
U ontvangt de handleiding per email binnen enkele minuten. Als u geen email heeft ontvangen, dan heeft u waarschijnlijk een verkeerd emailadres ingevuld of is uw mailbox te vol. Daarnaast kan het zijn dat uw internetprovider een maximum heeft aan de grootte per email. Omdat hier een handleiding wordt meegestuurd, kan het voorkomen dat de email groter is dan toegestaan bij uw provider.
Stel vragen via chat aan uw handleiding
Stel uw vraag over deze PDF
Andere handleiding(en) van Adobe InDesign CC - 2015
Uw handleiding is per email verstuurd. Controleer uw email
Als u niet binnen een kwartier uw email met handleiding ontvangen heeft, kan het zijn dat u een verkeerd emailadres heeft ingevuld of dat uw emailprovider een maximum grootte per email heeft ingesteld die kleiner is dan de grootte van de handleiding.
Er is een email naar u verstuurd om uw inschrijving definitief te maken.
Controleer uw email en volg de aanwijzingen op om uw inschrijving definitief te maken
U heeft geen emailadres opgegeven
Als u de handleiding per email wilt ontvangen, vul dan een geldig emailadres in.
Uw vraag is op deze pagina toegevoegd
Wilt u een email ontvangen bij een antwoord en/of nieuwe vragen? Vul dan hier uw emailadres in.