624443
22
Verklein
Vergroot
Pagina terug
1/57
Pagina verder
Acronis Backup Service
Version 5
ADMINISTRATOR'S GUIDE
Revision: 3/9/2016
2 Copyright © Acronis International GmbH, 2002-2016
Table of contents
1 Administrator's Guide ......................................................................................................4
1.1 About this document ................................................................................................................. 4
1.2 What's new in version 5............................................................................................................. 4
1.3 About the backup service .......................................................................................................... 4
1.3.1 Accounts and groups ....................................................................................................................................... 4
1.3.2 Components .................................................................................................................................................... 5
1.3.3 Supported web browsers ............................................................................................................................... 7
1.4 Step-by-step instructions ........................................................................................................... 7
1.4.1 Activating the backup service subscription ................................................................................................... 7
1.4.2 Creating a group .............................................................................................................................................. 7
1.4.3 Creating an account ........................................................................................................................................ 8
1.4.4 Accessing the web consoles ........................................................................................................................... 9
1.4.5 Creating a report about the service usage .................................................................................................... 9
1.5 Advanced scenarios .................................................................................................................10
1.5.1 Deploying agents on client machines .......................................................................................................... 10
2 User's Guide .................................................................................................................. 12
2.1 About the backup service ........................................................................................................12
2.2 What's new in version 5...........................................................................................................12
2.3 Software requirements ............................................................................................................14
2.3.1 Supported web browsers ............................................................................................................................. 14
2.3.2 Supported operating systems and environments ...................................................................................... 14
2.3.3 Supported Microsoft SQL Server versions ................................................................................................... 15
2.3.4 Supported Microsoft Exchange Server versions ......................................................................................... 15
2.4 Activating the account .............................................................................................................16
2.5 Accessing the backup service ..................................................................................................16
2.6 Installing the software .............................................................................................................16
2.6.1 Preparation .................................................................................................................................................... 16
2.6.2 Proxy server settings ..................................................................................................................................... 18
2.6.3 Linux packages ............................................................................................................................................... 19
2.6.4 Installing agents ............................................................................................................................................. 21
2.6.5 Updating agents ............................................................................................................................................ 22
2.6.6 Uninstalling agents ........................................................................................................................................ 23
2.7 Backup console views ..............................................................................................................23
2.8 Backup .....................................................................................................................................24
2.8.1 Backup plan cheat sheet ............................................................................................................................... 26
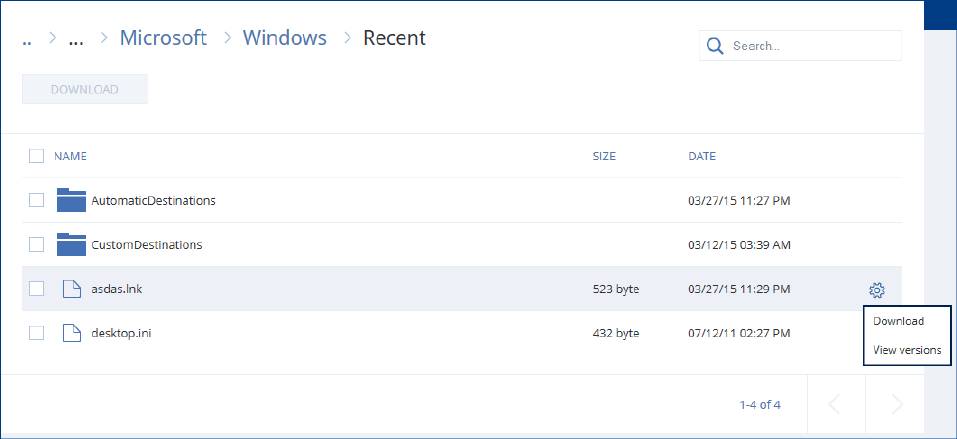
2.8.2 Selecting data to back up .............................................................................................................................. 26
2.8.3 Selecting a destination .................................................................................................................................. 31
2.8.4 Schedule ......................................................................................................................................................... 32
2.8.5 Retention rules .............................................................................................................................................. 33
2.8.6 Replication ..................................................................................................................................................... 33
2.8.7 Encryption ...................................................................................................................................................... 34
2.8.8 Starting a backup manually .......................................................................................................................... 36
2.9 Recovery ..................................................................................................................................36
2.9.1 Recovery cheat sheet .................................................................................................................................... 36
2.9.2 Creating bootable media .............................................................................................................................. 36
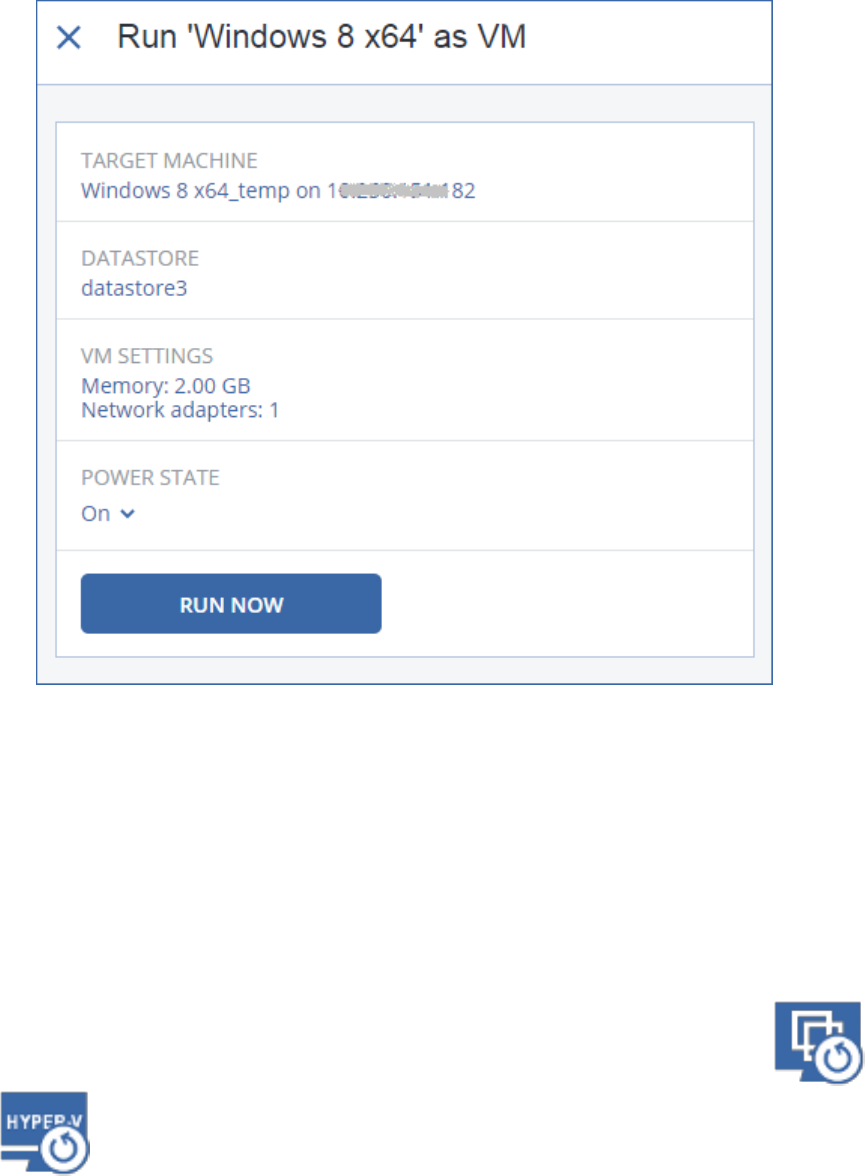
2.9.3 Recovering a machine ................................................................................................................................... 37
3 Copyright © Acronis International GmbH, 2002-2016
2.9.4 Recovering files.............................................................................................................................................. 41
2.9.5 Recovering system state ............................................................................................................................... 44
2.9.6 Recovering SQL databases ............................................................................................................................ 44
2.9.7 Recovering Exchange data ............................................................................................................................ 46
2.10 Operations with backups .........................................................................................................48
2.10.1 The Backups tab ............................................................................................................................................ 48
2.10.2 Deleting backups ........................................................................................................................................... 48
2.11 Operations with backup plans .................................................................................................49
2.12 Advanced operations with virtual machines ...........................................................................50
2.12.1 Running a virtual machine from a backup................................................................................................... 50
2.12.2 Application-aware backup ............................................................................................................................ 52
2.12.3 Managing virtualization environments........................................................................................................ 54
2.12.4 Machine migration ........................................................................................................................................ 54
2.13 Troubleshooting .......................................................................................................................55
3 Glossary ........................................................................................................................ 56
4 Copyright © Acronis International GmbH, 2002-2016
1 Administrator's Guide
1.1 About this document
This document is intended for organization administrators and end users who want to use Acronis
Backup Service.
This document describes how to quickly set up the backup service and perform backup and recovery.
1.2 What's new in version 5
Quotas for the numbers of protected machines. You can set "hard" quotas and overage for the
number of workstations, servers, and virtual machines that an account (p. 8) is allowed to back
up.
For information about new backup and recovery features, refer to the "What's new in version 5" (p.
12) section of the User's Guide.
1.3 About the backup service
The backup service management is available through a web interface.
1.3.1 Accounts and groups
There are two account types: administrator accounts and user accounts. Both the user and the
administrators can manage backups of the user's data.
Each account belongs to a group. The organization group is automatically created for your
organization. Optionally, you can create unit groups, which typically correspond to units or
departments of the organization.
An administrator can create and manage groups, administrator accounts, and user accounts on or
below their level in the hierarchy.
5 Copyright © Acronis International GmbH, 2002-2016
The following diagram illustrates two hierarchy levelsthe organization and unit groups. Optional
groups and accounts are shown by a dotted line.
The following table summarizes operations that can be performed by the administrators and users.
Operation
Administrators
Create groups
Yes
Create accounts
Yes
Download and install the backup
software
Yes
Manage backup
Yes
Manage recovery
Yes
Create reports about the service usage
Yes
1.3.2 Components
This section describes the software components utilized by the backup service.
On the end-user side
At least one of the following components must be installed on the end-user side:
Agent for Windows backs up disks, volumes, and files on a machine running Windows.
Agent for VMware backs up ESX(i) virtual machines without installing agents into the guest
systems. The agent is installed on a Windows machine that has network access to vCenter Server
and to the storage where the backed-up virtual machines are stored.
6 Copyright © Acronis International GmbH, 2002-2016
Agent for Hyper-V backs up Hyper-V virtual machines without installing agents into the guest
systems. The agent is installed on a Hyper-V host.
Agent for Virtuozzo backs up Virtuozzo virtual machines and containers without installing agents
into the guest systems. The agent is installed on a Virtuozzo host.
Agent for Exchange backs up Microsoft Exchange Server databases.
Agent for SQL backs up Microsoft SQL Server databases.
Agent for Linux backs up disks, volumes, and files on a machine running Linux.
Agent for Mac backs up disks, volumes, and files on a machine running OS X.
The agents can be installed by users or by administrators.
On the data-center side
The servers are located in Acronis data centers.
Account server stores the user account hierarchy and enables administering the backup service
from the account management console. Only administrators can access this console.
Backup management server manages the agents. It enables users and administrators to set up
and monitor backups from the backup management console.
The backup storages are located in Acronis data centers. End users have the option to store backups
either in a data center or within their local networks.
The following diagram illustrates the default backup service architecture. Blue arrows ( ) show the
software component interactions. Black arrows ( ) show how administrators and end users access
the backup service.
7 Copyright © Acronis International GmbH, 2002-2016
1.3.3 Supported web browsers
The backup service web interface supports the following web browsers:
Google Chrome 29 or later
Mozilla Firefox 23 or later
Opera 16 or later
Windows Internet Explorer 10 or later
Safari 5.1.7 or later running in the OS X and iOS operating systems
In other web browsers (including Safari browsers running in other operating systems), the user
interface might be displayed incorrectly, or some functions may be unavailable.
1.4 Step-by-step instructions
The following steps will guide you through the installation and basic use of the backup service. They
describe how to:
Activate the backup service subscription
Create a group
Create an account
Access the backup management console
Create a report about the service usage
For information about how to back up and recover data, refer to the User's Guide (p. 12).
1.4.1 Activating the backup service subscription
1. Go to http://www.acronis.com/en-us/my/backup-service/.
2. Log in to your Acronis account. If you do not have an Acronis account, create one.
3. Enter the backup service registration codes.
4. Click Register.
5. To access the account management console, click Manage your backups.
At a later time, you can access the management console at https://backup.acronis.com/.
1.4.2 Creating a group
Skip this step if you do not want to organize accounts into groups.
You may want to create a new Unit group within a EUC group when expanding the backup service to
a new organizational unit.
To create a group
1. Log in to the backup management console.
2. Click Manage accounts.
3. Select a group in which you want to create the new group.
4. On the bottom of the Groups pane, click "+".
5. In Name, specify a name for the new group.
8 Copyright © Acronis International GmbH, 2002-2016
6. [Optional] In Identifier, type a string that will act as the identifier for the group. This identifier
will appear in monthly reports, together with the group's usage data. You can use this identifier
to refer to this group in other software, such as in your billing or monitoring systems.
The identifier can consist of up to 256 Unicode characters (for example, numbers and Latin
letters). It does not need to be unique across groups.
7. In Language, select the default language of notifications, reports, and backup software that will
be used within this group.
8. [Optional] In Contact information, specify the contact information for the group.
9. Click Create.
The newly created group appears in the Groups tree.
If you want to specify the billing information for a group, select the group in the Groups list, click
Properties, and then complete the billing information section.
1.4.3 Creating an account
At least one account (either an administrator or a user) must exist within a unit. If an EUC does not
have units, at least one account must exist within the EUC.
To create an account
1. Log in to the backup management console.
2. Click Manage accounts.
3. Select a group in which you want to create the account.
4. Click the Accounts tab, and then click "+".
5. Specify the following contact information for the account.
Login
Important Each account must have a unique login. You can create multiple logins using the same
email address.
Email address
[Optional] First name
[Optional] Last name
6. If you want this account to be an administrator account, enable the Administrator privileges
switch.
7. [Optional] Specify the storage quota and the maximum number of machines the user is allowed
to back up.
Physical workstations
Physical servers
Virtual machines
Storage quota
These quotas are "soft". If any of these values are exceeded, a notification will be sent to the
email address specified in step 5. Restrictions on using the backup service are not applied.
8. [Optional] Specify the quota overages. An overage allows the user to exceed the quota by the
specified value. When the overage is exceeded, backups fail.
Important If you set both a quota and its overage to zero, the corresponding functionality will be hidden
from the user.
9 Copyright © Acronis International GmbH, 2002-2016
9. [Optional] Change the Backup notifications level. If you disable backup notifications, the
notifications about backup failures, warnings, and successful backups will not be sent to the
specified email address.
10. [Optional] Disable Business notifications. If you do this, notifications about exceeded quotas will
not be sent to the specified email address.
11. Click Add.
As a result:
A new account appears in the Accounts tab.
An email message containing the activation link is sent to the email address you specified.
1.4.4 Accessing the web consoles
To log in to the backup service
1. Go to the backup service login page. The login page address was included in the activation email
message.
2. Type the login and password of the account.
3. Click Log in.
Administrators log in directly to the backup console. To access the account management console,
they must click Manage accounts.
For information about how to back up and recover data, refer to the User's Guide (p. 12).
1.4.5 Creating a report about the service usage
Usage reports provide historical data about using the backup service.
Only administrators can create these reports. The report data differs, depending on who created the
report.
Reports created by organization administrators contain statistics for each of the units.
Reports created by unit administrators contain statistics for each of end users in the unit.
Reporting parameters
The report includes the following data about a unit and its accounts:
Size of backups by group, by account, by machine type.
Amount of protected machines by group, by account, by machine type.
Price value by group, by account, by machine type.
The total size of backups.
The total amount of protected machines.
Total price value.
Enabling or disabling scheduled usage reports
Scheduled report covers system usage data for the last full calendar month. The reports will be
generated and sent on the second day of every month to all administrators of your group.
1. In the account management console, click Reports.
2. Select the Scheduled tab.
3. In Status, enable or disable the scheduled usage reports by clicking the on/off switch.
10 Copyright © Acronis International GmbH, 2002-2016
4. [Optional] To generate a report immediately, click Send report now.
Enabling or disabling ad-hoc usage reports
Ad-hoc report covers system usage data for the specified period with one-day interval. This type of
report can be generated on demand and cannot be scheduled. The report will be sent to the email
address of your administrator account.
1. In the account management console, click Reports.
2. Select the Ad-hoc tab.
3. In Reporting period, select start and end dates of reporting period.
4. To generate a report immediately, click Send report now.
1.5 Advanced scenarios
1.5.1 Deploying agents on client machines
You can centrally install (or deploy) Agent for Windows onto machines that are members of an Active
Directory domain, by using Group Policy.
In this section, you will find out how to set up a Group Policy object to deploy agents onto machines
in an entire domain or in its organizational unit.
Every time a machine logs on to the domain, the resulting Group Policy object will ensure that the
agent is installed on the machine and the machine is registered in the backup service.
Prerequisites
Before proceeding with agent deployment, ensure that:
You have an Active Directory domain with a domain controller running Microsoft Windows
Server 2003 or later.
You are a member of the Domain Admins group in the domain.
You have downloaded the All agents for installation in Windows setup program. The download
link is available on the Add machine page in the backup console.
Step 1: Creating the .mst transform and extracting the installation package
1. Log on as an administrator on any machine in the domain.
2. Create a shared folder that will contain the installation packages. Ensure that domain users can
access the shared folderfor example, by leaving the default sharing settings for Everyone.
3. Copy the setup program to the folder you created.
4. Start the setup program.
5. Click Create .mst and .msi files for unattended installation.
6. Specify the credentials of the account to which the machines should be assigned.
7. Review or modify the installation settings that will be added to the .mst file.
8. Click Generate.
As a result, the .mst transform is generated and the .msi and .cab installation packages are extracted
to the folder you created. You can now move or delete the setup program .exe file.
11 Copyright © Acronis International GmbH, 2002-2016
Step 2: Setting up the Group Policy objects
1. Log on to the domain controller as a domain administrator; if the domain has more than one
domain controller, log on to any of them as a domain administrator.
2. If you are planning to deploy the agent in an organizational unit, ensure that the organizational
unit exists in the domain. Otherwise, skip this step.
3. In the Start menu, point to Administrative Tools, and then click Active Directory Users and
Computers (in Windows Server 2003) or Group Policy Management (in Windows Server 2008
and Windows Server 2012).
4. In Windows Server 2003:
Right-click the name of the domain or organizational unit, and then click Properties. In the
dialog box, click the Group Policy tab, and then click New.
In Windows Server 2008 and Windows Server 2012:
Right-click the name of the domain or organizational unit, and then click Create a GPO in this
domain, and Link it here.
5. Name the new Group Policy object Agent for Windows.
6. Open the Agent for Windows Group Policy object for editing, as follows:
In Windows Server 2003, click the Group Policy object, and then click Edit.
In Windows Server 2008 and Windows Server 2012, under Group Policy Objects, right-click
the Group Policy object, and then click Edit.
7. In the Group Policy object editor snap-in, expand Computer Configuration.
8. In Windows Server 2003 and Windows Server 2008:
Expand Software Settings.
In Windows Server 2012:
Expand Policies > Software Settings.
9. Right-click Software installation, then point to New, and then click Package.
10. Select the agent's .msi installation package in the shared folder that you previously created, and
then click Open.
11. In the Deploy Software dialog box, click Advanced, and then click OK.
12. On the Modifications tab, click Add, and then select the .mst transform that you previously
created.
13. Click OK to close the Deploy Software dialog box.
12 Copyright © Acronis International GmbH, 2002-2016
2 User's Guide
2.1 About the backup service
This service enables backup and recovery of physical and virtual machines, files, and databases to
local or cloud storage.
This service is available through a web interface.
2.2 What's new in version 5
Virtualization
The availability of the features listed in this section depends on the settings made by your backup
service administrator.
Recovery to a new VM. Define a new name and exact location for machines that are recovered
as VMs (p. 39) (Hyper-V and ESXi).
VM Flashback (incremental restore). The fastest possible VM recovery technology. Only the
changes between the current VM state and its state within the backup are recovered. Both
Hyper-V and ESXi platforms are supported.
New platform support: Virtuozzo. Agent-less backup and recovery (including file recovery) of
Virtuozzo virtual machines and containers.
Run a VM from a backup (instant recovery) and move it to production without downtime. The
ability to run an ESXi or Hyper-V virtual machine (p. 50) from a locally stored backup of a virtual
or physical machine, for validation or disaster-recovery purposes. An ESXi machine running from
a backup can be converted to a regular virtual machine, without downtime.
Application items recovery from a VM backup. Application-aware agent-less backup (p. 52) of
ESXi virtual machines running Microsoft SQL Server and Microsoft Exchange enables browsing
and recovery of databases without recovering the entire machine.
Application-aware backup of VMs with Microsoft Active Directory. Application-aware agent-less
backup (p. 52) of ESXi virtual machines running Microsoft Active Directory prevents the
possibility of a USN rollback after a recovery of a domain controller.
Enhanced hypervisor management. The ability to view (p. 54) vSphere and Hyper-V
environments in the native hypervisor-specific presentation.
Change vCenter/ESXi password without reinstallation. The ability to change (p. 54) the vCenter
or ESXi host connection password in the backup console.
Flexible backup configuration. More backup options:
CBT. Changed Block Tracking (CBT) for both Hyper-V and ESXi virtual machines.
Choose between crash-consistent and application-consistent snapshots. New Volume
Shadow Copy Service (VSS) for virtual machines backup option to enable or disable
quiescing by using hypervisor tools. Supports both Hyper-V and ESXi virtual machines.
Intelligent snapshot failure handling. Re-attempt, if an error occurs when creating a virtual
machine snapshot. Supports both Hyper-V and ESXi virtual machines.
More recovery options:
VM power management.
13 Copyright © Acronis International GmbH, 2002-2016
Monitoring
Centralized view for activities. The new Activities tab enables viewing and auditing activities
from all machines in a single place. Each account has a view scoped to their area of control.
Improved problem detection via alerts. The new Alerts tab was added. Alerts are raised not only
on errors or failures, but also on frozen, missed, or corrupted backups, exceeded quotas. Once a
problem is resolved, the alert is automatically dismissed.
Backup
Self-service backup monitor. Backup monitor (in a Windows taskbar or an OS X menu bar)
enables the end users to control the backup process:
Protect the machine with a single click immediately after the agent installation.
View the backup progress.
Prevent the backups from running.
Backup replication. The ability to replicate backups (p. 33) to a local folder or to a network share.
Separate retention rules can be applied to the second destination.
Advanced backup schemes. The ability to choose a backup scheme (p. 32) (Always full; Weekly
full, Daily incremental; Custom) when configuring a disk-level backup to a local or a network
folder.
Advanced scheduling options. The ability to create a backup plan without a predefined schedule
and to disable a schedule for an existing backup plan. The plans with the disabled schedule can
be run manually.
Flexible backup configuration. The new backup options give you more control over the backup
process:
Backup consolidation
Backup splitting
Compression level
Fast incremental/differential backup
File-level security
Task failure handling
Recovery
Simplified P2V and V2P migration. The ability to recover backups of physical machines as virtual
machines and vice versa (p. 54) by using the web interface.
Enhanced backups management. The new Backups tab enables browsing and management (p.
48) of locally stored backups, including backups of machines which are no longer present in the
backup console. Each account has a view scoped to their area of control.
More recovery options:
Restart the machine automatically after a recovery is finished.
Other
Backup agents (p. 18) and bootable media now support HTTP proxy servers.
It is now possible to delete a single backup (p. 48).
The backup agent setup language can now be selected in the setup program.
Usability fixes and improvements. The user interface was improved to simplify the backup and
recovery configuration.
14 Copyright © Acronis International GmbH, 2002-2016
2.3 Software requirements
2.3.1 Supported web browsers
The backup service web interface supports the following web browsers:
Google Chrome 29 or later
Mozilla Firefox 23 or later
Opera 16 or later
Windows Internet Explorer 10 or later
Safari 5.1.7 or later running in the OS X and iOS operating systems
In other web browsers (including Safari browsers running in other operating systems), the user
interface might be displayed incorrectly, or some functions may be unavailable.
2.3.2 Supported operating systems and environments
Agent for Windows
Windows XP Professional SP2+ (x86, x64)
Windows Server 2003/2003 R2 Standard and Enterprise editions (x86, x64)
Windows Small Business Server 2003/2003 R2
Windows Vista all editions
Windows Server 2008 Standard, Enterprise, Datacenter, and Web editions (x86, x64)
Windows Small Business Server 2008
Windows 7 all editions
Windows Server 2008 R2 Standard, Enterprise, Datacenter, Foundation, and Web editions
Windows MultiPoint Server 2010/2011/2012
Windows Small Business Server 2011 all editions
Windows 8/8.1 all editions except for the Windows RT editions (x86, x64)
Windows Server 2012/2012 R2 all editions
Windows Storage Server 2003/2008/2008 R2/2012/2012 R2
Windows 10 - Home, Pro, Education, Enterprise editions
Windows Server 2016 Technical Preview 4
Agent for Linux
Linux with kernel from 2.4.20 to 4.4 and glibc 2.3.2 or later
Various x86 and x86_64 Linux distributions, including:
Red Hat Enterprise Linux 4.x, 5.x, 6.x, 7.0, 7.1, and 7.2
Ubuntu 9.10, 10.04, 10.10, 11.04, 11.10, 12.04, 12.10, 13.04, 13.10, 14.04, 14.10, 15.04,
and 15.10
Fedora 11, 12, 13, 14, 15, 16, 17, 18, 19, 20, 21, 22, and 23
SUSE Linux Enterprise Server 10 and 11
SUSE Linux Enterprise Server 12 supported on file systems, except for Btrfs
Debian 4, 5, 6, 7.0, 7.2, 7.4, 7.5, 7.6, 7.7, 8.0, 8.1, and 8.2
CentOS 5.x, 6.x, and 7.0
15 Copyright © Acronis International GmbH, 2002-2016
Oracle Linux 5.x, 6.x, 7.0, 7.1, and 7.2 both Unbreakable Enterprise Kernel and Red Hat
Compatible Kernel
CloudLinux 6.x
ClearOS 5.x, 6.x, 7, and 7.1
Before installing the product on a system that does not use RPM Package Manager, such as
an Ubuntu system, you need to install this manager manually; for example, by running the
following command (as the root user): apt-get install rpm
Agent for Mac
OS X Mountain Lion 10.8
OS X Mavericks 10.9
OS X Yosemite 10.10
OS X El Capitan 10.11
Agent for VMware
This agent is delivered as a Windows application for running in any operating system listed
above for Agent for Windows.
VMware ESX(i) 4.0, 4.1, 5.0, 5.1, 5.5, and 6.0
Agent for Hyper-V
Windows Server 2008 (x64) with Hyper-V
Windows Server 2008 R2 with Hyper-V
Microsoft Hyper-V Server 2008/2008 R2
Windows Server 2012/2012 R2 with Hyper-V
Microsoft Hyper-V Server 2012/2012 R2
Windows 8, 8.1 (x64) with Hyper-V
Windows 10 Pro, Education, and Enterprise editions with Hyper-V
Windows Server 2016 with Hyper-V Technical Preview 4
Agent for Virtuozzo
Virtuozzo 6.0.10
2.3.3 Supported Microsoft SQL Server versions
Agent for SQL supports the following versions of Microsoft SQL Server:
Microsoft SQL Server 2005
Microsoft SQL Server 2008
Microsoft SQL Server 2008 R2
Microsoft SQL Server 2012
Microsoft SQL Server 2014
2.3.4 Supported Microsoft Exchange Server versions
Agent for Exchange supports the following versions of Microsoft Exchange Server:
Microsoft Exchange Server 2016 all editions
Microsoft Exchange Server 2013 all editions, Cumulative Update 1 (CU1) and later.
Microsoft Exchange Server 2007/2010 all editions, all service packs.
16 Copyright © Acronis International GmbH, 2002-2016
Microsoft Exchange Server 2003 all editions, SP2 or later.
Hotfix http://support.microsoft.com/kb/908072 must be installed.
2.4 Activating the account
When an administrator creates an account for you, an email message is sent to your email address.
The message contains the following information:
An account activation link. Сlick the link and set the password for the account. Remember your
login that is shown on the account activation page.
A link to the backup console login page. Use this link to access the console in future. The login
and password are the same as in the previous step.
2.5 Accessing the backup service
You can log in to the backup service if you activated your account.
To log in to the backup service
1. Go to the backup service login page. The login page address was included in the activation email
message.
2. Type the login and password of the account.
3. Click Log in.
2.6 Installing the software
2.6.1 Preparation
Step 1
Choose the agent, depending on what you are going to back up. The following table summarizes the
information, to help you decide.
Note that Agent for Windows is installed along with Agent for Exchange and Agent for SQL. If you
install, for example, Agent for SQL, you also will be able to back up the entire machine where the
agent is installed.
What are you going to
back up?
Which agent do I need?
Where to install it?
Physical machines
running Windows
Agent for Windows
On the machine that will be backed up.
Physical machines
running Linux
Agent for Linux
On the machine that will be backed up.
Physical machines
running OS X
Agent for Mac
On the machine that will be backed up.
VMware ESXi virtual
machines
Agent for VMware
On a Windows machine that has network access to
vCenter Server and to the virtual machine storage.*
Hyper-V virtual
machines
Agent for Hyper-V
On the Hyper-V host.
Virtuozzo virtual
machines and containers
Agent for Virtuozzo
On the Virtuozzo host.
17 Copyright © Acronis International GmbH, 2002-2016
SQL databases
Agent for SQL
On the machine running Microsoft SQL Server.
Exchange databases
Agent for Exchange
On the machine running Microsoft Exchange Server.
Virtual machines hosted
on Windows Azure
The same as for physical
machines**
On the machine that will be backed up.
*If your ESXi uses a SAN attached storage, install the agent on a machine connected to the same SAN. The
agent will back up the virtual machines directly from the storage rather than via the ESXi host and LAN.
**A virtual machine is considered virtual if it is backed up by an external agent. If an agent is installed in the
guest system, the machine appears as a physical machine.
Step 2
Review the system requirements for the agents.
Agent
Disk space occupied by the agent(s)
Agent for Windows
550 MB
Agent for Linux
500 MB
Agent for Mac
450 MB
Agent for VMware
700 MB (150 MB + 550 MB Agent for Windows)
Agent for Hyper-V
600 MB (50 MB + 550 MB Agent for Windows)
Agent for Virtuozzo
500 MB
Agent for Exchange
750 MB (200 MB + 550 MB Agent for Windows)
Agent for SQL
600 MB (50 MB + 550 MB Agent for Windows)
The typical memory consumption is 300 MB above the operating system and running applications.
The peak consumption may reach 2 GB, depending on the amount and type of data being processed
by the agents.
Step 3
Download the setup program. To find the download links, click All machines > Add.
The Add machine page provides web installers for each agent that is installed in Windows. A web
installer is a small executable file that downloads the main setup program from the Internet and
saves it as a temporary file. This file is deleted immediately after the installation.
If you want to store the setup programs locally, download a package containing all agents for
installation in Windows by using the link at the bottom of the Add machine page. Both 32-bit and
64-bit packages are available. These packages also enable unattended installation, for example, via
Group Policy. This advanced scenario is described in the Administrator's Guide (p. 10).
Installation in Linux and OS X is performed from ordinary setup programs.
All setup programs require an Internet connection to register the machine in the backup service. If
there is no Internet connection, the installation will fail.
Step 4
Before the installation, ensure that your firewalls and other components of your network security
system (such as a proxy sever) allow both inbound and outbound connections through the following
TCP ports:
18 Copyright © Acronis International GmbH, 2002-2016
443 and 8443 These ports are used for accessing the backup console, registering the agents,
downloading the certificates, user authorization, and downloading files from the cloud storage.
7770...7800 The agents use these ports to communicate with the backup management server.
44445 The agents use this port for data transfer during backup and recovery.
If a proxy server is enabled in your network, refer to the "Proxy server settings" (p. 18) section to
understand whether you need to configure these settings on each machine that runs a backup agent.
2.6.2 Proxy server settings
The backup agents can transfer data through an HTTP proxy server.
The agent installation requires an Internet connection. If a proxy server is configured in Windows
(Control panel > Internet Options > Connections), the setup program reads the proxy server settings
from the registry and uses them automatically. In Linux and OS X, you must specify the proxy settings
before the installation.
Use the procedures below to specify the proxy settings before the agent installation or to change
them at a later time.
In Linux
1. Create the file /etc/Acronis/Global.config and open it in a text editor.
2. Copy and paste the following lines into the file:
<?xml version="1.0" ?>
<registry name="Global">
<key name="HttpProxy">
<value name="Enabled" type="Tdword">"1"</value>
<value name="Host" type="TString">"proxy.company.com"</value>
<value name="Port" type="Tdword">"443"</value>
</key>
</registry>
3. Replace proxy.company.com with your proxy server host name/IP address, and 443 with the
decimal value of the port number.
4. Save the file.
5. If the backup agent is not installed yet, you can now install it. Otherwise, as the root user, restart
the agent by executing the following command in any directory:
sudo service acronis_mms restart
In OS X
1. Create the file /Library/Application Support/Acronis/Registry/Global.config and open it in a
text editor, such as Text Edit.
2. Copy and paste the following lines into the file:
<?xml version="1.0" ?>
<registry name="Global">
<key name="HttpProxy">
<value name="Enabled" type="Tdword">"1"</value>
<value name="Host" type="TString">"proxy.company.com"</value>
<value name="Port" type="Tdword">"443"</value>
</key>
</registry>
3. Replace proxy.company.com with your proxy server host name/IP address, and 443 with the
decimal value of the port number.
19 Copyright © Acronis International GmbH, 2002-2016
4. Save the file.
5. If the backup agent is not installed yet, you can now install it. Otherwise, do the following to
restart the agent:
a. Go to Applications > Utilities > Terminal
b. Run the following commands:
sudo launchctl stop acronis_mms
sudo launchctl start acronis_mms
In Windows
1. Create a new text document and open it in a text editor, such as Notepad.
2. Copy and paste the following lines into the file:
Windows Registry Editor Version 5.00
[HKEY_LOCAL_MACHINE\SOFTWARE\Acronis\Global\HttpProxy]
"Enabled"=dword:00000001
"Host"="proxy.company.com"
"Port"=dword:000001bb
3. Replace proxy.company.com with your proxy server host name/IP address, and 000001bb
with the hexadecimal value of the port number. For example, 000001bb is port 443.
4. Save the document as proxy.reg.
5. Run the file as an administrator.
6. Confirm that you want to edit the Windows registry.
7. If the backup agent is not installed yet, you can now install it. Otherwise, do the following to
restart the agent:
a. In the Start menu, click Run, and then type: cmd
b. Click OK.
c. Run the following commands:
net stop mms
net start mms
2.6.3 Linux packages
To add the necessary modules to the Linux kernel, the setup program needs the following Linux
packages:
The package with kernel headers or sources. The package version must match the kernel version.
The GNU Compiler Collection (GCC) compiler system. The GCC version must be the one with
which the kernel was compiled.
The Make tool.
The Perl interpreter.
The names of these packages vary depending on your Linux distribution.
In Red Hat Enterprise Linux, CentOS, and Fedora, the packages normally will be installed by the setup
program. In other distributions, you need to install the packages if they are not installed or do not
have the required versions.
Are the required packages already installed?
To check whether the packages are already installed, perform these steps:
20 Copyright © Acronis International GmbH, 2002-2016
1. Run the following command to find out the kernel version and the required GCC version:
cat /proc/version
This command returns lines similar to the following: Linux version 2.6.35.6 and gcc
version 4.5.1
2. Run the following command to check whether the Make tool and the GCC compiler are installed:
make -v
gcc -v
For gcc, ensure that the version returned by the command is the same as in the gcc version in
step 1. For make, just ensure that the command runs.
3. Check whether the appropriate version of the packages for building kernel modules is installed:
In Red Hat Enterprise Linux, CentOS, and Fedora, run the following command:
yum list installed | grep kernel-devel
In Ubuntu, run the following commands:
dpkg --get-selections | grep linux-headers
dpkg --get-selections | grep linux-image
In either case, ensure that the package versions are the same as in Linux version in step 1.
4. Run the following command to check whether the Perl interpreter is installed:
perl --version
If you see the information about the Perl version, the interpreter is installed.
Installing the packages from the repository
The following table lists how to install the required packages in various Linux distributions.
Linux
distribution
Package names
How to install
Red Hat
Enterprise
Linux
kernel-devel
gcc
make
The setup program will download and install the packages
automatically by using your Red Hat subscription.
perl
Run the following command:
yum install perl
CentOS
Fedora
kernel-devel
gcc
make
The setup program will download and install the packages
automatically.
perl
Run the following command:
yum install perl
Ubuntu
linux-headers
linux-image
gcc
make
perl
Run the following commands:
sudo apt-get update
sudo apt-get install linux-headers-`uname -r`
sudo apt-get install linux-image-`uname -r`
sudo apt-get install gcc-<package version>
sudo apt-get install make
sudo apt-get install perl
The packages will be downloaded from the distribution's repository and installed.
For other Linux distributions, please refer to the distribution's documentation regarding the exact
names of the required packages and the ways to install them.
21 Copyright © Acronis International GmbH, 2002-2016
Installing the packages manually
You may need to install the packages manually if:
The machine does not have an active Red Hat subscription or Internet connection.
The setup program cannot find the kernel-devel or gcc version corresponding to the kernel
version. If the available kernel-devel is more recent than your kernel, you need to either update
the kernel or install the matching kernel-devel version manually.
You have the required packages on the local network and do not want to spend time for
automatic search and downloading.
Obtain the packages from your local network or a trusted third-party website, and install them as
follows:
In Red Hat Enterprise Linux, CentOS, or Fedora, run the following command as the root user:
rpm -ivh PACKAGE_FILE1 PACKAGE_FILE2 PACKAGE_FILE3
In Ubuntu, run the following command:
sudo dpkg -i PACKAGE_FILE1 PACKAGE_FILE2 PACKAGE_FILE3
Example: Installing the packages manually in Fedora 14
Follow these steps to install the required packages in Fedora 14 on a 32-bit machine:
1. Run the following command to determine the kernel version and the required GCC version:
cat /proc/version
The output of this command includes the following:
Linux version 2.6.35.6-45.fc14.i686
gcc version 4.5.1
2. Obtain the kernel-devel and gcc packages that correspond to this kernel version:
kernel-devel-2.6.35.6-45.fc14.i686.rpm
gcc-4.5.1-4.fc14.i686.rpm
3. Obtain the make package for Fedora 14:
make-3.82-3.fc14.i686
4. Install the packages by running the following commands as the root user:
rpm -ivh kernel-devel-2.6.35.6-45.fc14.i686.rpm
rpm -ivh gcc-4.5.1.fc14.i686.rpm
rpm -ivh make-3.82-3.fc14.i686
You can specify all these packages in a single rpm command. Installing any of these packages may
require installing additional packages to resolve dependencies.
2.6.4 Installing agents
In Windows
1. Ensure that the machine is connected to the Internet.
2. Log on as an administrator and start the setup program.
3. Click Install.
4. Specify the credentials of the account to which the machine should be assigned.
5. Click Show proxy settings if you want to verify or change the proxy server host name/IP address
and port. Otherwise, skip this step. If a proxy server is enabled in Windows, it is detected and
used automatically.
22 Copyright © Acronis International GmbH, 2002-2016
6. [Only when installing Agent for VMware] Specify the address and access credentials for the
vCenter Server or standalone ESXi host whose virtual machines the agent will back up.
7. [Only when installing on a domain controller] Specify the user account under which the agent
service will run. For security reasons, the setup program does not automatically create new
accounts on a domain controller.
8. Click Start installation.
You can change the installation path and the account for the agent service by clicking Customize
installation settings on the first step of the installation wizard.
In Linux
1. Ensure that the machine is connected to the Internet.
2. As the root user, run the installation file.
3. Specify the credentials of the account to which the machine should be assigned.
4. Complete the installation procedure.
Troubleshooting information is provided in the file:
/usr/lib/Acronis/BackupAndRecovery/HOWTO.INSTALL
In OS X
1. Ensure that the machine is connected to the Internet.
2. Double-click the installation file (.dmg).
3. Wait while the operating system mounts the installation disk image.
4. Inside the image, run the .pkg file.
5. If prompted, provide administrator credentials.
6. Specify the credentials of the account to which the machine should be assigned.
7. Complete the installation procedure.
2.6.5 Updating agents
Agents starting with the following versions can be updated by using the web interface:
Agent for Windows, Agent for VMware, Agent for Hyper-V: version 11.9.191 and later
Agent for Linux: version 11.9.179 and later
Agent for Mac, Agent for SQL, Agent for Exchange, Agent for Virtuozzo: any version
To find the agent version, select the machine, and then click Info.
To update from earlier agent versions, download and install the newest agent manually. To find the
download links, click All machines > Add machine.
To update an agent by using the web interface
1. Click Updates.
The software displays the machines with outdated agent versions.
2. Select the machines on which you want to update the agents. The machines must be online.
3. Click Update agent.
The update progress is shown in the status column for each machine.
23 Copyright © Acronis International GmbH, 2002-2016
2.6.6 Uninstalling agents
If you want to modify, repair, or manually update an agent, do not uninstall it from the machine.
Instead, run the agent setup program, and then choose the corresponding option. If you remove the
agent and install it again, the machine will be duplicated in the backup service and the backups of the
old machine will not be associated with the new machine.
If you no longer want to back up a physical machine, do the following:
1. Uninstall the agent as described below. Once the agent is uninstalled, the machine is shown as
offline in the backup console.
2. In the backup console, select the machine, and then click Delete.
If you no longer want to back up virtual machines, do the following:
1. Uninstall Agent for VMware or Agent for Hyper-V as described below. Once the agent is
uninstalled, the machines are shown as offline in the backup console.
2. In the backup console, select the machine where Agent for VMware or Agent for Hyper-V was
installed, and then click Delete.
In Windows
1. Log on as an administrator.
2. Go to Control panel, and then select Programs and Features (Add or Remove Programs in
Windows XP) > Acronis Backup Client > Uninstall.
3. Confirm your decision.
In Linux
1. As the root user, run /usr/lib/Acronis/BackupAndRecovery/uninstall/uninstall
2. Confirm your decision.
In OS X
1. Double-click the installation file (.dmg).
2. Wait while the operating system mounts the installation disk image.
3. Inside the image, run the Uninstall.tool file.
4. If prompted, provide administrator credentials.
5. Confirm your decision.
2.7 Backup console views
The backup console has two views: a simple view and a table view. To switch between the views,
click the corresponding icon in the top right corner.
24 Copyright © Acronis International GmbH, 2002-2016
The simple view supports a small number of machines.
The table view is enabled automatically when the number of machines becomes large.
Both views provide access to the same features and operations. This document describes access to
operations from the table view.
2.8 Backup
A backup plan is a set of rules that specify how the given data will be protected on a given machine.
A backup plan can be applied to multiple machines at the time of its creation, or later.
To create the first backup plan
1. Select the machines that you want to back up.
2. Click Backup.
25 Copyright © Acronis International GmbH, 2002-2016
The software displays a new backup plan template.
3. [Optional] To modify the plan parameters, click the corresponding section of the backup plan
panel.
4. [Optional] To modify the backup options, click the gear icon.
5. Click Apply.
6. Specify a name for the new backup plan, and then click OK.
To apply an existing backup plan
1. Select the machines that you want to back up.
2. Click Backup. If a common backup plan is already applied to the selected machines, click Add
backup plan.
26 Copyright © Acronis International GmbH, 2002-2016
The software displays previously created backup plans.
3. Select a backup plan to apply.
4. Click Apply.
2.8.1 Backup plan cheat sheet
The following table summarizes the available backup plan parameters. Use the table to create a
backup plan that best fits your needs.
WHAT TO BACK UP
ITEMS TO BACK UP
Selection methods
WHERE TO
BACK UP
SCHEDULE
Backup schemes
(not for Cloud)
HOW LONG TO KEEP
Disks/volumes
(physical machines)
Direct selection (p. 26)
Policy rules (p. 26)
File filters (p. 30)
Cloud (p. 31)
Local folder (p.
31)
Network
folder (p. 31)
Always incremental
(Single-file) (p. 32)
Always full (p. 32)
Weekly full, daily
incremental (p. 32)
Custom (F-D-I) (p. 32)
By backup age (single
rule/per backup set)
(p. 33)
By number of
backups (p. 33)
Keep indefinitely (p.
33)
Disks/volumes (virtual
machines)
Policy rules (p. 26)
File filters (p. 30)
Files (physical
machines only)
Direct selection (p. 28)
Policy rules (p. 28)
File filters (p. 30)
Always full (p. 32)
Weekly full, daily
incremental (p. 32)
Custom (F-D-I) (p. 32)
System state
Direct selection (p. 29)
Always full (p. 32)
Weekly full, daily
incremental (p. 32)
Custom (F-I) (p. 32)
SQL databases
Direct selection (p. 29)
Exchange databases
Direct selection (p. 30)
2.8.2 Selecting data to back up
2.8.2.1 Selecting disks/volumes
A disk-level backup contains a copy of a disk or a volume in a packaged form. You can recover
individual disks, volumes, or files from a disk-level backup. A backup of an entire machine is a backup
of all its disks.
There are two ways of selecting disks/volumes: directly on each machine or by using policy rules. You
can exclude files from a disk backup by setting the file filters (p. 30).
27 Copyright © Acronis International GmbH, 2002-2016
Direct selection
Direct selection is available only for physical machines.
1. In What to back up, select Disks/volumes.
2. Click Items to back up.
3. In Select items for backup, select Directly.
4. For each of the machines included in the backup plan, select the check boxes next to the disks or
volumes to back up.
5. Click Done.
Using policy rules
1. In What to back up, select Disks/volumes.
2. Click Items to back up.
3. In Select items for backup, select Using policy rules.
4. Select any of the predefined rules, type your own rules, or combine both.
The policy rules will be applied to all of the machines included in the backup plan. If no data
meeting at least one of the rules is found on a machine when the backup starts, the backup will
fail on that machine.
5. Click Done.
Rules for Windows, Linux, and OS X
[All volumes] selects all volumes on machines running Windows and all mounted volumes on
machines running Linux or OS X.
Rules for Windows
Drive letter (for example C:\) selects the volume with the specified drive letter.
[Fixed Volumes (Physical machines)] selects all volumes of physical machines, other than
removable media. Fixed volumes include volumes on SCSI, ATAPI, ATA, SSA, SAS, and SATA
devices, and on RAID arrays.
[BOOT+SYSTEM] selects the system and boot volumes. This combination is the minimal set of
data that ensures recovery of the operating system from the backup.
[Disk 1] selects the first disk of the machine, including all volumes on that disk. To select
another disk, type the corresponding number.
Rules for Linux
/dev/hda1 selects the first volume on the first IDE hard disk.
/dev/sda1 selects the first volume on the first SCSI hard disk.
/dev/md1 selects the first software RAID hard disk.
To select other basic volumes, specify /dev/xdyN, where:
"x" corresponds to the disk type
"y" corresponds to the disk number (a for the first disk, b for the second disk, and so on)
"N" is the volume number.
To select a logical volume, specify its name along with the volume group name. For example, to back
up two logical volumes, lv_root and lv_bin, both of which belong to the volume group
vg_mymachine, specify:
/dev/vg_mymachine/lv_root
/dev/vg_mymachine/lv_bin
28 Copyright © Acronis International GmbH, 2002-2016
Rules for OS X
[Disk 1] Selects the first disk of the machine, including all volumes on that disk. To select
another disk, type the corresponding number.
2.8.2.2 Selecting files/folders
File-level backup is available only for physical machines.
A file-level backup is not sufficient for recovery of the operating system. Choose file backup if you
plan to protect only certain data (the current project, for example). This will reduce the backup size,
thus saving storage space.
There are two ways of selecting files: directly on each machine or by using policy rules. Either
method allows you to further refine the selection by setting the file filters (p. 30).
Direct selection
1. In What to back up, select Files/folders.
2. Click Items to back up.
3. In Select items for backup, select Directly.
4. For each of the machines included in the backup plan:
a. Click Select files and folders.
b. Click Local folder or Network share.
The share must be accessible from the selected machine.
c. Browse to the required files/folders or enter the path and click the arrow button. If
prompted, specify the user name and password for the shared folder.
d. Select the required files/folders.
e. Click Done.
Using policy rules
1. In What to back up, select Files/folders.
2. Click Items to back up.
3. In Select items for backup, select Using policy rules.
4. Select any of the predefined rules, type your own rules, or combine both.
The policy rules will be applied to all of the machines included in the backup plan. If no data
meeting at least one of the rules is found on a machine when the backup starts, the backup will
fail on that machine.
5. Click Done.
Selection rules for Windows
Full path to a file or folder, for example D:\Work\Text.doc or C:\Windows.
Templates:
[All Files] selects all files on all volumes of the machine.
[All Profiles Folder] selects the folder where all user profiles are located (typically,
C:\Users or C:\Documents and Settings).
Environment variables:
%ALLUSERSPROFILE% selects the folder where the common data of all user profiles is
located (typically, C:\ProgramData or C:\Documents and Settings\All Users).
%PROGRAMFILES% selects the Program Files folder (for example, C:\Program Files).
29 Copyright © Acronis International GmbH, 2002-2016
%WINDIR% selects the folder where Windows is located (for example, C:\Windows).
You can use other environment variables or a combination of environment variables and text. For
example, to select the Java folder in the Program Files folder, type: %PROGRAMFILES%\Java.
Selection rules for Linux
Full path to a file or directory. For example, to back up file.txt on the volume /dev/hda3
mounted on /home/usr/docs, specify /dev/hda3/file.txt or /home/usr/docs/file.txt.
/home selects the home directory of the common users.
/root selects the root user's home directory.
/usr selects the directory for all user-related programs.
/etc selects the directory for system configuration files.
Selection rules for OS X
Full path to a file or directory.
Examples:
To back up file.txt on your desktop, specify /Users/<username>/Desktop/file.txt, where
<username> is your user name.
To back up all users' home directories, specify /Users.
To back up the directory where the applications are installed, specify /Applications.
2.8.2.3 Selecting system state
System state backup is available for machines running Windows Vista and later.
To back up system state, in What to back up, select System state.
A system state backup is comprised of the following files:
Task scheduler configuration
VSS Metadata Store
Performance counter configuration information
MSSearch Service
Background Intelligent Transfer Service (BITS)
The registry
Windows Management Instrumentation (WMI)
Component Services Class registration database
2.8.2.4 Selecting SQL databases
A backup of an SQL database contains the database files (.mdf, .ndf), log files (.ldf), and other
associated files. The files are backed with the help of the SQL Writer service. The service must be
running at the time that the Volume Shadow Copy Service (VSS) requests a backup or recovery.
To select SQL databases
1. Click Microsoft SQL.
Machines with Agent for SQL installed are shown.
2. Browse to the data that you want to back up.
Double-click a machine to view the SQL Server instances it contains. Double-click an instance to
view the databases it contains.
30 Copyright © Acronis International GmbH, 2002-2016
3. Select the data that you want to back up. You can select entire instances or individual databases.
If you select entire SQL Server instances, all current databases and all databases that are
added to the selected instances in the future will be backed up.
If you select databases directly, only the selected databases will be backed up.
4. Click Backup. If prompted, provide credentials to access the SQL Server data. The account must
be a member of the Backup Operators or Administrators group on the machine and a member
of the sysadmin role on each of the instances that you are going to back up.
2.8.2.5 Selecting Exchange Server data
The following table summarizes the Microsoft Exchange Server data that you can select for backup
and the minimal user rights required to back up the data.
Exchange version
Data items
User rights
2003
Storage groups
Membership in the Organization Management role
group.
2007
Storage groups
Membership in the Exchange Organization
Administrators role group
2010/2013
Databases
Membership in the Organization Management role
group.
A full backup contains all of the selected Exchange Server data.
An incremental backup contains the changed blocks of the database files, the checkpoint files, and a
small number of the log files that are more recent than the corresponding database checkpoint.
Because changes to the database files are included in the backup, there is no need to back up all the
transaction log records since the previous backup. Only the log that is more recent than the
checkpoint needs to be replayed after a recovery. This makes for faster recovery and ensures
successful database backup, even with circular logging enabled.
The transaction log files are truncated after each successful backup.
To select Exchange Server data
1. Click Microsoft Exchange.
Machines with Agent for Exchange installed are shown.
2. Browse to the data that you want to back up.
Double-click a machine to view the databases (storage groups) it contains.
3. Select the data that you want to back up. If prompted, provide the credentials to access the data.
4. Click Backup.
2.8.2.6 File filters
File filters define which files and folders to skip during the backup process.
File filters are available for both disk-level and file-level backup.
To enable file filters
1. Select the data to back up.
2. Click the gear icon next to the backup plan name, and then click Backup options.
3. Select File filters.
4. Use any of the options described below.
31 Copyright © Acronis International GmbH, 2002-2016
Exclude files matching specific criteria
There are two options that function in an inverse manner.
Back up only files matching the following criteria
Example: If you select to back up the entire machine and specify C:\File.exe in the filter criteria,
only this file will be backed up.
Do not back up files matching the following criteria
Example: If you select to back up the entire machine and specify C:\File.exe in the filter criteria,
only this file will be skipped.
It is possible to use both options simultaneously. The latter option overrides the former, i.e. if you
specify C:\File.exe in both fields, this file will be skipped during a backup.
Criteria
Full path
Specify the full path to the file or folder, starting with the drive letter (when backing up
Windows) or the root directory (when backing up Linux or OS X).
Both in Windows and Linux/OS X, you can use a forward slash in the file or folder path (as in
C:/Temp/File.tmp). In Windows, you can also use the traditional backslash (as in
C:\Temp\File.tmp).
Name
Specify the name of the file or folder, such as Document.txt. All files and folders with that name
will be selected.
The criteria are not case-sensitive. For example, by specifying C:\Temp, you will also select C:\TEMP,
C:\temp, and so on.
You can use one or more wildcard characters (* and ?) in the criterion. These characters can be used
both within the full path and in the file or folder name.
The asterisk (*) substitutes for zero or more characters in a file name. For example, the criterion
Doc*.txt matches files such as Doc.txt and Document.txt
The question mark (?) substitutes for exactly one character in a file name. For example, the criterion
Doc?.txt matches files such as Doc1.txt and Docs.txt, but not the files Doc.txt or Doc11.txt
Exclude hidden files and folders
Select this check box to skip files and folders that have the Hidden attribute (for file systems that are
supported by Windows) or that start with a period (.) (for file systems in Linux, such as Ext2 and
Ext3). If a folder is hidden, all of its contents (including files that are not hidden) will be excluded.
Exclude system files and folders
This option is effective only for file systems that are supported by Windows. Select this check box to
skip files and folders with the System attribute. If a folder has the System attribute, all of its contents
(including files that do not have the System attribute) will be excluded.
Tip You can view file or folder attributes in the file/folder properties or by using the attrib command. For more
information, refer to the Help and Support Center in Windows.
2.8.3 Selecting a destination
Click Where to back up, and then select one of the following:
32 Copyright © Acronis International GmbH, 2002-2016
Cloud storage
Backups will be stored in the cloud data center.
Local folders
If a single machine is selected, browse to a folder on the selected machine or type the folder
path.
If multiple machines are selected, type the folder path. Backups will be stored in this folder on
each of the selected physical machines or on the machine where the agent for virtual machines is
installed. If the folder does not exist, it will be created.
Network folder
Browse to the required shared folder or enter the path and click the arrow button. If prompted,
specify the user name and password for the shared folder.
2.8.4 Schedule
The scheduling parameters depend on the backup destination.
When backing up to cloud storage
By default, backups are performed on a daily basis, Monday to Friday. You can select the time to run
the backup.
If you want to change the backup frequency, move the slider, and then specify the backup schedule.
Important The first backup is full, which means that it is the most time-consuming. All subsequent backups are
incremental and take significantly less time.
When backing up to a local or network folder
You can choose one of the predefined backup schemes or create a custom scheme. A backup scheme
is a part of the backup plan that includes the backup schedule and the backup methods.
In Backup scheme, select one of the following:
[Only for disk-level backups] Always incremental (single-file)
By default, backups are performed on a daily basis, Monday to Friday. You can select the time to
run the backup.
If you want to change the backup frequency, move the slider, and then specify the backup
schedule.
The backups use the new single-file backup format (p. 56).
Always full
By default, backups are performed on a daily basis, Monday to Friday. You can select the time to
run the backup.
If you want to change the backup frequency, move the slider, and then specify the backup
schedule.
All backups are full.
Weekly full, Daily incremental
By default, backups are performed on a daily basis, Monday to Friday. You can modify the days of
the week and the time to run the backup.
A full backup is created once a week. All other backups are incremental. The day on which the
full backup is created depends on the Weekly backup option (click the gear icon, then Backup
options > Weekly backup).
33 Copyright © Acronis International GmbH, 2002-2016
Custom
Specify schedules for full, differential, and incremental backups.
Differential backup is not available when backing up SQL data, Exchange data, or system state.
Additional scheduling options
With any destination, you can do the following:
Set a date range for when the schedule is effective. Select the Run backup plan within a date
range check box, and then specify the date range.
Disable the schedule. While the schedule is disabled, the retention rules are not applied unless a
backup is started manually.
Introduce a delay from the scheduled time. The delay value for each machine is selected
randomly and ranges from zero to the maximum value you specify. You may want to use this
setting when backing up multiple machines to a network location, to avoid excessive network
load.
Click the gear icon, then Backup options > Schedule. Select the Distribute backup start times
within a time window check box, and then specify the maximum delay. The delay value for each
machine is determined when the backup plan is applied to the machine and remains the same
until you edit the backup plan and change the maximum delay value.
Note This option is enabled by default, with the maximum delay set to 30 minutes.
2.8.5 Retention rules
1. Click How long to keep.
2. In Cleanup, choose one of the following:
By backup age (default)
Specify how long to keep backups created by the backup plan. By default, the retention rules
are specified for each backup set (p. 56) separately. If you want to use a single rule for all
backups, click Switch to single rule for all backup sets.
By number of backups
Specify the maximum number of backups to keep.
Keep backups indefinitely
Note A backup stored in a local or network folder cannot be deleted if it has dependent backups that are not
subject to deletion. Such backup chains are deleted only when the lifetime of all their backups expires. This
requires extra space for storing backups whose deletion is postponed. Also, the backup age and number of
backups may exceed the values you specify.
2.8.6 Replication
If you enable backup replication, each backup will be copied to a second location immediately after
creation. If earlier backups were not replicated (for example, the network connection was lost), the
software also replicates all of the backups that appeared after the last successful replication.
Replicated backups do not depend on the backups remaining in the original location and vice versa.
You can recover data from any backup, without access to other locations.
Usage examples
Reliable disaster recovery
34 Copyright © Acronis International GmbH, 2002-2016
Store your backups both on-site (for immediate recovery) and off-site (to secure the backups
from local storage failure or a natural disaster).
Using the cloud storage to protect data from a natural disaster
Replicate the backups to the cloud storage by transferring only the data changes.
Keeping only the latest recovery points
Delete older backups from a fast storage according to retention rules, in order to not overuse
expensive storage space.
Supported locations
You can replicate a backup from any of these locations:
A local folder
A network folder
You can replicate a backup to any of these locations:
A local folder
A network folder
The cloud storage
To enable backup replication
1. On the backup plan panel, enable the Replicate backups switch.
2. In Where to replicate, specify the replication destination, as described in "Selecting a
destination" (p. 31).
3. In How long to keep, specify the retention rules, as described in "Retention rules" (p. 33).
2.8.7 Encryption
We recommend that you encrypt all backups that are stored in the cloud storage, especially if your
company is subject to regulatory compliance.
Important There is no way to recover encrypted backups if you lose or forget the password.
Encryption in a backup plan
To enable encryption, specify the encryption settings when creating a backup plan. After a backup
plan is applied, the encryption settings cannot be modified. To use different encryption settings,
create a new backup plan.
To specify the encryption settings in a backup plan
1. On the backup plan panel, enable the Encryption switch.
2. Specify and confirm the encryption password.
3. Select one of the following encryption algorithms:
AES 128 the backups will be encrypted by using the Advanced Encryption Standard (AES)
algorithm with a 128-bit key.
AES 192 the backups will be encrypted by using the AES algorithm with a 192-bit key.
AES 256 the backups will be encrypted by using the AES algorithm with a 256-bit key.
4. Click OK.
35 Copyright © Acronis International GmbH, 2002-2016
Encryption as a machine property
This option is intended for administrators who handle backups of multiple machines. If you need a
unique encryption password for each machine or if you need to enforce encryption of backups
regardless of the backup plan encryption settings, save the encryption settings on each machine
individually.
Saving the encryption settings on a machine does not affect the currently applied backup plans, but
will override the encryption settings of all backup plans applied later. Any backup created by these
backup plans will be encrypted, even if encryption is disabled. After the settings are saved, they
cannot be modified, but you can reset them as described below.
This option is available for machines running Windows or Linux. It is not supported for OS X.
This option can be used on a machine running Agent for VMware. However, be careful if you have
more than one Agent for VMware connected to the same vCenter Server. It is mandatory to use the
same encryption settings for all of the agents, because there is a kind of load balancing among them.
To save the encryption settings on a machine
1. Log on as an administrator (in Windows) or the root user (in Linux).
2. Run the following script:
In Windows: <installation_path>\PyShell\bin\acropsh.exe -m manage_creds
--set-password <encryption_password>
Here, <installation_path> is the backup agent installation path. By default, it is
%ProgramFiles%\BackupClient in 32-bit Windows and %ProgramFiles(x86)%\BackupClient
in 64-bit Windows.
In Linux: /usr/sbin/acropsh -m manage_creds --set-password <encryption_password>
The backups will be encrypted using the AES algorithm with a 256-bit key.
To reset the encryption settings on a machine
1. Log on as an administrator (in Windows) or root user (in Linux).
2. Run the following script:
In Windows: <installation_path>\PyShell\bin\acropsh.exe -m manage_creds --reset
Here, <installation_path> is the backup agent installation path. By default, it is
%ProgramFiles%\BackupClient in 32-bit Windows and %ProgramFiles(x86)%\BackupClient
in 64-bit Windows.
In Linux: /usr/sbin/acropsh -m manage_creds --reset
Important After you reset the encryption settings on a machine, the backups of this machine will fail. To
continue backing up the machine, create a new backup plan.
How the encryption works
The AES cryptographic algorithm operates in the Cipher-block chaining (CBC) mode and uses a
randomly generated key with a user-defined size of 128, 192 or 256 bits. The larger the key size, the
longer it will take for the program to encrypt the backups and the more secure your data will be.
The encryption key is then encrypted with AES-256 using an SHA-256 hash of the password as a key.
The password itself is not stored anywhere on the disk or in the backups; the password hash is used
for verification purposes. With this two-level security, the backup data is protected from any
unauthorized access, but recovering a lost password is not possible.
36 Copyright © Acronis International GmbH, 2002-2016
2.8.8 Starting a backup manually
1. Select a machine that has at least one applied backup plan.
2. Click Backup.
3. If more than one backup plans are applied, select the backup plan.
4. Click Run now on the backup plan panel.
The backup progress is shown in the Status column for the machine.
2.9 Recovery
2.9.1 Recovery cheat sheet
The following table summarizes the available recovery methods. Use the table to choose a recovery
method that best fits your need.
What to recover
Recovery method
Physical machine
(Windows or Linux)
Using the web interface (p. 37)
Using bootable media (p. 41)
Physical machine (Mac)
Using bootable media (p. 41)
Virtual machine
(VMware or Hyper-V)
Using the web interface (p. 39)
Using bootable media (p. 41)
Virtual machine or
container (Virtuozzo)
Using the web interface (p. 39)
Files/Folders
Using the web interface (p. 41)
Downloading files from the cloud storage (p. 42)
Using bootable media (p. 43)
System state
Using the web interface (p. 44)
SQL databases
Using the web interface (p. 44)
Exchange databases
Using the web interface (p. 46)
SQL and Exchange
databases from
application-aware
backups
Using the web interface (p. 53)
2.9.2 Creating bootable media
Bootable media is a CD, DVD, USB flash drive, or other removable media that enables you to run the
agent without the help of an operating system. The main purpose of bootable media is to recover an
operating system that cannot start.
We highly recommend that you create and test a bootable media as soon as you start using disk-level
backup. Also, it is a good practice to re-create the media after each major update of the backup
agent.
You can recover either Windows or Linux by using the same media. To recover OS X, create a
separate media on a machine running OS X.
To create bootable media in Windows or Linux
1. Download the bootable media ISO file. To download the file, select a machine, and then click
Recover > More ways to recover... > Download ISO image.
2. Do any of the following:
Burn a CD/DVD using the ISO file.
37 Copyright © Acronis International GmbH, 2002-2016
Create a bootable USB flash drive by using the ISO file and one of the free tools available
online.
Use ISO to USB or RUFUS if you need to boot an UEFI machine, Win32DiskImager for a
BIOS machine. In Linux, using the dd utility makes sense.
Connect the ISO file as a CD/DVD drive to the virtual machine that you want to recover.
To create bootable media in OS X
1. On a machine where Agent for Mac is installed, click Rescue Media Builder on the Applications
menu.
2. The software displays the connected removable media. Select the one that you want to make
bootable.
Warning All data on the disk will be erased.
3. Click Create.
4. Wait while the software creates the bootable media.
2.9.3 Recovering a machine
2.9.3.1 Physical machine
This section describes recovery of physical machines by using the web interface.
Use bootable media instead of the web interface if you need to recover:
OS X
Any operating system to bare metal or to an offline machine
Recovery of an operating system requires a reboot. You can choose whether to restart the machine
automatically or assign it the Interaction required status. The recovered operating system goes
online automatically.
To recover a physical machine
1. Select the backed-up machine.
2. Click Recovery.
3. Select a recovery point. Note that recovery points are filtered by location.
If the machine is offline, the recovery points are not displayed. Do any of the following:
If the backup is located in the cloud storage, click Select machine, select a target machine
that is online, and then select a recovery point.
Select a recovery point on the Backups tab (p. 48).
Recover the machine as described in "Recovering disks by using bootable media" (p. 41).
4. Click Recover > Entire machine.
The software automatically maps the disks from the backup to the disks of the target machine.
To recover to another physical machine, click Target machine, and then select a target
machine that is online.
38 Copyright © Acronis International GmbH, 2002-2016
If the disk mapping fails, recover the machine as described in "Recovering disks by using
bootable media" (p. 41). The media enables you to choose disks for recovery and to map the
disks manually.
5. Click Start recovery.
6. Confirm that you want to overwrite the disks with their backed-up versions. Choose whether to
restart the machine automatically.
The recovery progress is shown on the Activities tab.
2.9.3.2 Physical machine to virtual
This section describes recovery of a physical machine as a virtual machine by using the web interface.
This operation can be performed if at least one Agent for VMware or Agent for Hyper-V is installed
and registered.
For more information about P2V migration, refer to "Machine migration" (p. 54).
To recover a physical machine as a virtual machine
1. Select the backed-up machine.
2. Click Recovery.
3. Select a recovery point. Note that recovery points are filtered by location.
If the machine is offline, the recovery points are not displayed. Do any of the following:
If the backup is located in the cloud storage, click Select machine, select a machine that is
online, and then select a recovery point.
Select a recovery point on the Backups tab (p. 48).
Recover the machine as described in "Recovering disks by using bootable media" (p. 41).
4. Click Recover > Entire machine.
5. In Recover to, select Virtual machine.
6. Click Target machine.
a. Select the hypervisor (VMware ESXi or Hyper-V).
At least one Agent for VMware or Agent for Hyper-V must be installed.
39 Copyright © Acronis International GmbH, 2002-2016
b. Select whether to recover to a new or existing machine. The new machine option is
preferable as it does not require the disk configuration of the target machine to exactly
match the disk configuration in the backup.
c. Select the host and specify the new machine name, or select an existing target machine.
d. Click OK.
7. [Optional] When recovering to a new machine, you can also do the following:
Click Datastore for ESXi or Path for Hyper-V, and then select the datastore (storage) for the
virtual machine.
Сlick VM settings to change the memory size, the number of processors, and the network
connections of the virtual machine.
8. Click Start recovery.
9. When recovering to an existing virtual machine, confirm that you want to overwrite the disks.
The recovery progress is shown on the Activities tab.
2.9.3.3 Virtual machine
A virtual machine must be stopped during the recovery to this machine. The software stops the
machine without a prompt. When the recovery is completed, you have to start the machine
manually.
This behavior can be changed by using the VM power management recovery option (click Recovery
options > VM power management).
To recover a virtual machine
1. Do one of the following:
Select a backed-up machine, click Recovery, and then select a recovery point.
40 Copyright © Acronis International GmbH, 2002-2016
Select a recovery point on the Backups tab (p. 48).
2. Click Recover > Entire machine.
3. If you want to recover to a physical machine, select Physical machine in Recover to. Otherwise,
skip this step.
Recovery to a physical machine is possible only if the disk configuration of the target machine
exactly matches the disk configuration in the backup.
If this is the case, continue to step 4 in "Physical machine" (p. 37). Otherwise, we recommend
that you perform the V2P migration by using bootable media (p. 41).
4. The software automatically selects the original machine as the target machine.
To recover to another virtual machine, click Target machine, and then do the following:
a. Select the hypervisor (VMware ESXi, Hyper-V, or Virtuozzo).
Only Virtuozzo virtual machines can be recovered to Virtuozzo. For more information about
V2V migration, refer to "Machine migration" (p. 54).
b. Select whether to recover to a new or existing machine.
c. Select the host and specify the new machine name, or select an existing target machine.
d. Click OK.
5. [Optional] When recovering to a new machine, you can also do the following:
Click Datastore for ESXi or Path for Hyper-V and Virtuozzo, and then select the datastore
(storage) for the virtual machine.
Сlick VM settings to change the memory size, the number of processors, and the network
connections of the virtual machine.
6. Click Start recovery.
7. When recovering to an existing virtual machine, confirm that you want to overwrite the disks.
The recovery progress is shown on the Activities tab.
41 Copyright © Acronis International GmbH, 2002-2016
2.9.3.4 Recovering disks by using bootable media
For information about how to create bootable media, refer to "Creating bootable media" (p. 36).
To recover disks by using bootable media
1. Boot the target machine by using bootable media.
2. Click Manage this machine locally or click Rescue Bootable Media twice, depending on the
media type you are using.
3. If a proxy server is enabled in your network, click Tools > Proxy server, and then specify the
proxy server host name/IP address and port. Otherwise, skip this step.
4. On the welcome screen, click Recover.
5. Click Select data, and then click Browse.
6. Specify the backup location:
To recover from cloud storage, select Cloud storage. Enter the credentials of the account to
which the backed up machine is assigned.
To recover from a local or a network folder, browse to the folder under Local folders or
Network folders.
Click OK to confirm your selection.
7. Select the backup from which you want to recover the data. If prompted, type the password for
the backup.
8. In Backup contents, select the disks that you want to recover. Click OK to confirm your selection.
9. Under Where to recover, the software automatically maps the selected disks to the target disks.
If the mapping is not successful or if you are unsatisfied with the mapping result, you can re-map
disks manually.
Changing disk layout may affect the operating system bootability. Please use the original machine's disk
layout unless you feel fully confident of success.
10. [When recovering Linux] If the backed-up machine had logical volumes (LVM) and you want to
reproduce the original LVM structure:
a. Ensure that the number of the target machine disks and each disk capacity are equal to or
exceed those of the original machine, and then click Apply RAID/LVM.
b. Review the volume structure, and then click Apply RAID/LVM to create it.
11. If you are recovering an operating system to dissimilar hardware, choose to use the Universal
Restore feature.
[When recovering Windows] Click Add folder and specify the path to the location where drivers
for the motherboard, mass storage, and network adapter are stored. If the target hardware has a
specific mass storage controller, such as RAID (especially NVIDIA RAID) or a fibre channel
adapter, explicitly specify the mass storage drivers for them. To do this, in Mass storage drivers
to install anyway, click Add driver, and then specify the drivers.
12. [Optional] Click Recovery options to specify additional settings.
13. Click OK to start the recovery.
2.9.4 Recovering files
2.9.4.1 Recovering files by using the web interface
1. Select the machine that originally contained the data that you want to recover.
42 Copyright © Acronis International GmbH, 2002-2016
2. Click Recovery.
3. Select the recovery point. Note that recovery points are filtered by location.
If the selected machine is physical and it is offline, recovery points are not displayed. Select a
recovery point on the Backups tab (p. 48) or use other ways to recover:
Download the files from the cloud storage (p. 42)
Use bootable media (p. 43)
4. Click Recover > Files/folders.
5. Select the files that you want to recover.
6. If you want to save the files as a .zip file, click Download, select the location to save the data to,
and click Save. Otherwise, skip this step.
7. Click Recover.
8. Select the recovery destination. You can select the original location or any local or network
folder.
Files from virtual machines can be recovered to a network folder, or to the machine where Agent
for VMware, Agent for Hyper-V, or Agent for Virtuozzo is installed. If you select a network folder,
it must be accessible from that machine.
9. Click Start recovery.
10. Select one of the file overwriting options:
Overwrite existing files
Overwrite an existing file if it is older
Do not overwrite existing files
The recovery progress is shown on the Activities tab.
2.9.4.2 Downloading files from the cloud storage
You can browse the cloud storage, view the contents of the backups, and download files that you
need.
Limitation: Backups of system state, SQL databases, and Exchange databases cannot be browsed.
To download files from the cloud storage
1. Select a machine that was backed up.
2. Click Recover > More ways to recover... > Download files.
3. Enter the credentials of the account to which the backed up machine is assigned.
4. [When browsing disk-level backups] Under Versions, click the backup from which you want to
recover the files.
[When browsing file-level backups] You can select the backup date and time in the next step,
under the gear icon located to the right of the selected file. By default, files are recovered from
the latest backup.
43 Copyright © Acronis International GmbH, 2002-2016
5. Browse to the required folder or use search to obtain the list of the required files and folders.
6. Select the check boxes for the items you need to recover, and then click Download.
If you select a single file, it will be downloaded as is. Otherwise, the selected data will be archived
into a .zip file.
7. Select the location to save the data to, and then click Save.
2.9.4.3 Recovering files by using bootable media
For information about how to create bootable media, refer to "Creating bootable media" (p. 36).
To recover files by using bootable media
1. Boot the target machine, by using the bootable media.
2. Click Manage this machine locally or click Rescue Bootable Media twice, depending on the
media type you are using.
3. If a proxy server is enabled in your network, click Tools > Proxy server, and then specify the
proxy server host name/IP address and port. Otherwise, skip this step.
4. On the welcome screen, click Recover.
5. Click Select data, and then click Browse.
6. Specify the backup location:
To recover from cloud storage, select Cloud storage. Enter the credentials of the account to
which the backed up machine is assigned.
To recover from a local or a network folder, browse to the folder under Local folders or
Network folders.
Click OK to confirm your selection.
7. Select the backup from which you want to recover the data. If prompted, type the password for
the backup.
8. In Backup contents, select Folders/files.
9. Select the data that you want to recover. Click OK to confirm your selection.
10. Under Where to recover, specify a folder. Optionally, you can prohibit overwriting of newer
versions of files or exclude some files from recovery.
11. [Optional] Click Recovery options to specify additional settings.
12. Click OK to start the recovery.
44 Copyright © Acronis International GmbH, 2002-2016
2.9.5 Recovering system state
1. Select the machine for which you want to recover the system state.
2. Click Recovery.
3. Select a system state recovery point. Note that recovery points are filtered by location.
4. Click Recover system state.
5. Confirm that you want to overwrite the system state with its backed-up version.
The recovery progress is shown on the Activities tab.
2.9.6 Recovering SQL databases
This section describes how to recover SQL databases from the backups performed by Agent for SQL.
For information about recovering SQL databases from application-aware backups of virtual machines,
refer to "Recovering databases from application-aware backups" (p. 53).
The backup service enables you to recover SQL databases to a SQL Server instance, if Agent for SQL is
installed on the machine running the instance. You will need to provide credentials for an account
that is a member of the Backup Operators or Administrators group on the machine and a member of
the sysadmin role on the target instance.
Alternatively, you can recover the databases as files. This can be useful if you need to recover
databases to a machine where Agent for SQL is not installed, or you need to extract data for data
mining, audit, or further processing by third-party tools. You can attach the SQL database files to a
SQL Server instance, as described in "Attaching SQL Server databases" (p. 46).
System databases are basically recovered in the same way as user databases. The peculiarities of
system database recovery are described in "Recovering system databases" (p. 45).
To recover SQL databases
1. Click Microsoft SQL.
Machines with Agent for SQL installed are shown.
2. Select the machine that originally contained the data that you want to recover.
3. Click Recovery.
4. Select a recovery point. Note that recovery points are filtered by location.
If the machine is offline, the recovery points are not displayed. Do one of the following:
If the backup is located in the cloud storage, click Select machine, select an online machine
that has Agent for SQL, and then select a recovery point.
Select a recovery point on the Backups tab (p. 48).
The machine chosen for browsing in either of the above actions becomes a target machine for
the SQL databases recovery.
5. Click Recover SQL databases.
6. Select the data that you want to recover. Double-click an instance to view the databases it
contains.
7. If you want to recover the databases as files, click Recover as files, select a local or a network
folder to save the files to, and then click Recover. Otherwise, skip this step.
8. Click Recover.
9. By default, the databases are recovered to the original ones. If the original database does not
exist, it will be recreated. You can select another machine or another SQL Server instance to
recover the databases to.
45 Copyright © Acronis International GmbH, 2002-2016
To recover a database as a different one to the same instance:
a. Click the database name.
b. In Recover to, select New database.
c. Specify the new database name.
d. Specify the new database path and log path. The folder you specify must not contain the
original database and log files.
10. [Optional] To change the database state after recovery, click the database name, and then
choose one of the following states:
Ready to use (RESTORE WITH RECOVERY) (default)
After the recovery completes, the database will be ready for use. Users will have full access
to it. The software will roll back all uncommitted transactions of the recovered database that
are stored in the transaction logs. You will not be able to recover additional transaction logs
from the native Microsoft SQL backups.
Non-operational (RESTORE WITH NORECOVERY)
After the recovery completes, the database will be non-operational. Users will have no
access to it. The software will keep all uncommitted transactions of the recovered database.
You will be able to recover additional transaction logs from the native Microsoft SQL backups
and thus reach the necessary recovery point.
Read-only (RESTORE WITH STANDBY)
After the recovery completes, users will have read-only access to the database. The software
will undo any uncommitted transactions. However, it will save the undo actions in a
temporary standby file so that the recovery effects can be reverted.
This value is primarily used to detect the point in time when a SQL Server error occurred.
11. Click Start recovery.
12. If the original databases were selected as the destination, confirm overwriting the databases
with their backed-up versions.
The recovery progress is shown on the Activities tab.
2.9.6.1 Recovering system databases
All system databases of an instance are recovered at once. When recovering system databases, the
software automatically restarts the destination instance in the single-user mode. After the recovery
completes, the software restarts the instance and recovers other databases (if any).
Other things to consider when recovering system databases:
System databases can only be recovered to an instance of the same version as the original
instance.
System databases are always recovered in the "ready to use" state.
Recovering the master database
System databases include the master database. The master database records information about all
databases of the instance. Hence, the master database in a backup contains information about
databases which existed in the instance at the time of the backup. After recovering the master
database, you may need to do the following:
Databases that have appeared in the instance after the backup was done are not visible by the
instance. To bring these databases back to production, attach them to the instance manually by
using SQL Server Management Studio.
46 Copyright © Acronis International GmbH, 2002-2016
Databases that have been deleted after the backup was done are displayed as offline in the
instance. Delete these databases by using SQL Server Management Studio.
2.9.6.2 Attaching SQL Server databases
This section describes how to attach a database in SQL Server by using SQL Server Management
Studio. Only one database can be attached at a time.
Attaching a database requires any of the following permissions: CREATE DATABASE, CREATE ANY
DATABASE, or ALTER ANY DATABASE. Normally, these permissions are granted to the sysadmin role
of the instance.
To attach a database
1. Run Microsoft SQL Server Management Studio.
2. Connect to the required SQL Server instance, and then expand the instance.
3. Right click Databases and click Attach.
4. Click Add.
5. In the Locate Database Files dialog box, find and select the .mdf file of the database.
6. In the Database Details section, make sure that the rest of database files (.ndf and .ldf files) are
found.
Details. SQL Server database files may not be found automatically, if:
They are not in the default location, or they are not in the same folder as the primary
database file (.mdf). Solution: Specify the path to the required files manually in the Current
File Path column.
You have recovered an incomplete set of files that make up the database. Solution: Recover
the missing SQL Server database files from the backup.
7. When all of the files are found, click OK.
2.9.7 Recovering Exchange data
This section describes how to recover Exchange databases from the backups performed by Agent for
Exchange. For information about recovering Exchange databases from application-aware backups of
virtual machines, refer to "Recovering databases from application-aware backups" (p. 53).
The backup service enables you to recover Exchange Server data to the original Exchange Server.
The following table summarizes the Exchange Server data that you can select for recovery and the
minimal user rights required to recover the data.
Exchange version
Data items
User rights
2003
Storage groups
Membership in the Organization Management
role group.
2007
Storage groups
Membership in the Exchange Organization
Administrators role group.
2010/2013
Databases
Membership in the Organization Management
role group.
Alternatively, you can recover the databases (storage groups) as files. The database files, along with
transaction log files, will be extracted from the backup to a folder that you specify. This can be useful
if you need to extract data for an audit or further processing by third-party tools, or when the
47 Copyright © Acronis International GmbH, 2002-2016
recovery fails for some reason and you are looking for a workaround to mount the databases
manually (p. 47).
To recover Exchange data
We will refer to both databases and storage groups as "databases" throughout this procedure.
1. Click Microsoft Exchange.
Machines with Agent for Exchange installed are shown.
2. Select the machine that originally contained the data that you want to recover.
3. Click Recovery.
4. Select a recovery point. Note that recovery points are filtered by location.
If the machine is offline, the recovery points are not displayed. Use other ways to recover:
If the backup is located in the cloud storage, click Select machine, select an online machine
that has Agent for Exchange, and then select a recovery point.
Select a recovery point on the Backups tab (p. 48).
The machine chosen for browsing in either of the above actions becomes a target machine for
the Exchange data recovery.
5. Click Recover Exchange databases.
6. Select the data that you want to recover.
7. If you want to recover the databases as files, click Recover as files, select a local or a network
folder to save the files to, and then click Recover. Otherwise, skip this step.
8. Click Recover. If prompted, provide credentials to access the Exchange Server.
9. By default, the databases are recovered to the original ones. If the original database does not
exist, it will be recreated.
To recover a database as a different one:
a. Click the database name.
b. In Recover to, select New database.
c. Specify the new database name.
d. Specify the new database path and log path. The folder you specify must not contain the
original database and log files.
10. Click Start recovery.
11. If the databases are recovered to the original ones, confirm overwriting the databases with their
backed-up versions.
The recovery progress is shown on the Activities tab.
2.9.7.1 Mounting Exchange Server databases
After recovering the database files, you can bring the databases online by mounting them. Mounting
is performed by using Exchange Management Console, Exchange System Manager, or Exchange
Management Shell.
The recovered databases will be in a Dirty Shutdown state. A database that is in a Dirty Shutdown
state can be mounted by the system if it is recovered to its original location (that is, information
about the original database is present in Active Directory). When recovering a database to an
alternate location (such as a new database or as the recovery database), the database cannot be
mounted until you bring it to a Clean Shutdown state by using the Eseutil /r <Enn> command.
<Enn> specifies the log file prefix for the database (or storage group that contains the database) into
which you need to apply the transaction log files.
48 Copyright © Acronis International GmbH, 2002-2016
The account you use to attach a database must be delegated an Exchange Server Administrator role
and a local Administrators group for the target server.
For details about how to mount databases, see the following articles:
Exchange 2016: http://technet.microsoft.com/en-us/library/aa998871.aspx
Exchange 2013: http://technet.microsoft.com/en-us/library/aa998871(v=EXCHG.150).aspx
Exchange 2010: http://technet.microsoft.com/en-us/library/aa998871(v=EXCHG.141).aspx
Exchange 2007: http://technet.microsoft.com/en-us/library/aa998871(v=EXCHG.80).aspx
Exchange 2003: http://technet.microsoft.com/en-us/library/bb124040.aspx
2.10 Operations with backups
2.10.1 The Backups tab
The Backups tab shows backups of all machines ever registered under a certain account. This
includes offline machines and machines that are no longer registered in the backup service.
A backup service administrator can view backups on behalf of any account that belongs to the given
unit or EUC. This account is indirectly chosen in Machine to browse from. The Backups tab shows
backups of all machines ever registered under the same account as this machine is registered.
To view the backups stored in a local or a network folder, first add this folder to the list of backup
locations. Click Browse and specify the folder path.
To select a recovery point by using the Backups tab
1. On the Backups tab, select the location where the backups are stored.
The software displays all backups that your account is allowed to view in the selected location.
The backups are combined in groups. The group names are based on the following template:
<machine name> - <backup plan name>
2. Select a group from which you want to recover the data.
3. [Optional] Click Change next to Machine to browse from, and then select another machine.
Some backups can only be browsed by specific agents. For example, you must select a machine
running Agent for SQL to browse the backups of Microsoft SQL Server databases.
Important Please be aware that the Machine to browse from is a default destination for recovery from a
physical machine backup. After you select a recovery point and click Recover, double check the Target
machine setting to ensure that you want to recover to this specific machine. To change the recovery
destination, specify another machine in Machine to browse from.
4. Click Show backups.
5. Select the recovery point.
2.10.2 Deleting backups
To delete backups of a machine that is online and present in the backup service
1. On the All machines tab, select a machine whose backups you want to delete.
2. Click Recovery.
3. Select the location to delete the backups from.
4. Do one of the following:
To delete a single backup, select the backup to delete, and then click the recycle bin icon.
49 Copyright © Acronis International GmbH, 2002-2016
To delete all backups in the selected location, click Delete all.
5. Confirm your decision.
To delete backups of any machine
1. On the Backups tab, select the location from which you want to delete the backups.
The software displays all backups that your account is allowed to view in the selected location.
The backups are combined in groups. The group names are based on the following template:
<machine name> - <backup plan name>
2. Select a group.
3. Do one of the following:
To delete a single backup, click Show backups, select the backup to delete, and then click the
recycle bin icon.
To delete the selected group, click Delete.
4. Confirm your decision.
2.11 Operations with backup plans
To edit a backup plan
1. If you want to edit the backup plan for all machines to which it is applied, select one of these
machines. Otherwise, select the machines for which you want to edit the backup plan.
2. Click Backup.
3. Select the backup plan that you want to edit.
4. Click the gear icon next to the backup plan name, and then click Edit.
5. To modify the plan parameters, click the corresponding section of the backup plan panel.
6. Click Save changes.
7. To change the backup plan for all machines to which it is applied, click Apply the changes to this
backup plan. Otherwise, click Create a new backup plan only for the selected resources.
To revoke a backup plan from machines
1. Select the machines that you want to revoke the backup plan from.
2. Click Backup.
3. If several backup plans are applied to the machines, select the backup plan that you want to
revoke.
4. Click the gear icon next to the backup plan name, and then click Revoke.
To delete a backup plan
1. Select any machine to which the backup plan that you want to delete is applied.
2. Click Backup.
3. If several backup plans are applied to the machine, select the backup plan that you want to
delete.
4. Click the gear icon next to the backup plan name, and then click Delete.
As a result, the backup plan is revoked from all of the machines and completely removed from
the web interface.
50 Copyright © Acronis International GmbH, 2002-2016
2.12 Advanced operations with virtual machines
2.12.1 Running a virtual machine from a backup
You can run a virtual machine from a disk-level backup that contains an operating system. This
operation, also known as instant recovery, enables you to spin up a virtual server in seconds. The
virtual disks are emulated directly from the backup and thus do not consume space on the datastore
(storage). The storage space is required only to keep changes to the virtual disks.
We recommend running this temporary virtual machine for up to three days. Then, you can
completely remove it or convert it to a regular virtual machine (finalize) without downtime.
As long as the temporary virtual machine exists, retention rules cannot be applied to the backup
being used by that machine. Backups of the original machine can continue to run.
Usage examples
Disaster recovery
Instantly bring a copy of a failed machine online.
Testing a backup
Run the machine from the backup and ensure that the guest OS and applications are functioning
properly.
Accessing application data
While the machine is running, use application's native management tools to access and extract
the required data.
Prerequisites
At least one Agent for VMware or Agent for Hyper-V must be registered in the backup service.
The backup must be stored in a network folder or in a local folder of the machine where Agent
for VMware or Agent for Hyper-V is installed. If you select a network folder, it must be accessible
from that machine.
Important A virtual machine cannot be run from a backup stored in the cloud storage. This is because this
operation requires intense random-access reading from the backup.
The backup must contain an entire machine or all of the volumes that are required for the
operating system to start.
Backups of both physical and virtual machines can be used. Backups of Virtuozzo containers
cannot be used.
2.12.1.1 Running the machine
1. Do one of the following:
Select a backed-up machine, click Recovery, and then select a recovery point.
Select a recovery point on the Backups tab (p. 48).
2. Click Run as VM.
51 Copyright © Acronis International GmbH, 2002-2016
The software automatically selects the host and other required parameters.
3. [Optional] Click Target machine, and then change the virtual machine type (ESXi or Hyper-V), the
host, or the virtual machine name.
4. [Optional] Click Datastore for ESXi or Path for Hyper-V, and then select the datastore for the
virtual machine.
Changes to the virtual disks accumulate while the machine is running. Ensure that the selected
datastore has enough free space.
5. [Optional] Сlick VM settings to change the memory size and network connections of the virtual
machine.
6. [Optional] Select the VM power state (On/Off).
7. Click Run now.
As a result, the machine appears in the web interface with one of the following icons: or
. Such virtual machines cannot be selected for backup.
2.12.1.2 Deleting the machine
We do not recommend to delete a temporary virtual machine directly in vSphere/Hyper-V. This may
lead to artifacts in the web interface. Also, the backup from which the machine was running may
remain locked for a while (it cannot be deleted by retention rules).
52 Copyright © Acronis International GmbH, 2002-2016
To delete a virtual machine that is running from a backup
1. On the All machines tab, select a machine that is running from a backup.
2. Click Delete.
The machine is removed from the web interface. It is also removed from the vSphere or Hyper-V
inventory and datastore (storage). All changes that occurred to the data while the machine was
running are lost.
2.12.1.3 Finalizing the machine
While a virtual machine is running from a backup, the virtual disks' content is taken directly from that
backup. Therefore, the machine will become inaccessible or even corrupted if the connection is lost
to the backup location or to the backup agent.
For an ESXi machine, you have the option to make this machine permanent, i.e. recover all of its
virtual disks, along with the changes that occurred while the machine was running, to the datastore
that stores these changes. This process is named finalization.
Finalization is performed without downtime. The virtual machine will not be powered off during
finalization.
To finalize a machine that is running from a backup
1. On the All machines tab, select a machine that is running from a backup.
2. Click Finalize.
3. [Optional] Specify a new name for the machine.
4. [Optional] Change the disk provisioning mode. The default setting is Thin.
5. Click Finalize.
The machine name changes immediately. The recovery progress is shown on the Activities tab. Once
the recovery is completed, the machine icon changes to that of a regular virtual machine.
2.12.2 Application-aware backup
When you back up an ESXi virtual machine running Microsoft SQL Server, Microsoft Exchange Server,
or Active Directory Domain Services, enable Application backup for additional protection of these
applications' data.
Why use application-aware backup?
By using application-aware backup, you ensure that:
1. The applications are backed up in a consistent state and thus will be available immediately after
the machine is recovered.
2. You can recover the SQL and Exchange databases without recovering the entire machine. Thus,
you do not need to install Agent for SQL or Agent for Exchange in the guest system and create an
additional backup plan to protect the applications.
3. The SQL and Exchange transaction logs are truncated after each successful backup. SQL log
truncation can be disabled in the backup plan options.
4. If a domain contains more than one domain controller, and you recover one of them, a
nonauthoritative restore is performed and a USN rollback will not occur after the recovery.
53 Copyright © Acronis International GmbH, 2002-2016
2.12.2.1 Prerequisites
Before enabling the application backup, ensure that:
The virtual machines being backed up meet the requirements for application-consistent
quiescing listed in the following VMware knowledge base article:
https://pubs.vmware.com/vsphere-60/index.jsp?topic=%2Fcom.vmware.vddk.pg.doc%2FvddkBk
upVadp.9.6.html
VMware Tools is installed and up-to-date on each of the virtual machines that you want to back
up.
User Account Control (UAC) is disabled on the machines. If you do not want to disable UAC, you
must provide the credentials of a built-in domain administrator (DOMAIN\Administrator) when
enabling application backup.
Entire machine is selected for backup.
The Volume Shadow Copy Service (VSS) for virtual machines backup option is enabled in the
backup plan. To find this option, click the gear icon, then Backup options > Volume Shadow
Copy Service (VSS) for virtual machines. This option is enabled by default.
For Microsoft SQL Server, also ensure that:
SQL Server Browser Service and TCP/IP protocol are enabled on the machines. For instructions on
how to start SQL Server Browser Service, refer to:
http://msdn.microsoft.com/en-us/library/ms189093.aspx. You can enable the TCP/IP protocol by
using a similar procedure.
2.12.2.2 Required user rights
An application-aware backup contains metadata of VSS-aware applications that are present on the
disk. To access this metadata within the guest system, Agent for VMware needs an account with the
appropriate rights that are listed below. You are prompted to specify this account when enabling
application backup.
For SQL Server:
The account must be a member of the Backup Operators or Administrators group on the
machine, and a member of the sysadmin role on each of the instances that you are going to back
up.
For Exchange Server:
See "Selecting Exchange Server data" (p. 30).
For Active Directory
The account must be a domain administrator.
2.12.2.3 Recovering databases from application-aware backups
You can recover SQL and Exchange databases from application-aware backups of virtual machines.
For information about creating application-aware backups, see "Application-aware backup" (p. 52).
The databases, along with their logs and other related files, will be saved as files to a folder you
specify. After that, you can attach the databases to a live SQL Server or Exchange Server. You can also
use the database files for data mining, audit, or further processing by third-party tools.
To recover databases
1. Select the machine which originally contained the data that you want to recover.
2. Click Recovery.
54 Copyright © Acronis International GmbH, 2002-2016
3. Select a recovery point. Note that recovery points are filtered by location.
4. Click Recover, and then click one of the following:
SQL databases
Exchange databases
5. Select the databases that you want to recover.
6. Click Recover as files.
7. Select the recovery destination. You can specify a network folder or a local folder of the machine
where Agent for VMware is installed. If you select a network folder, it must be accessible from
that machine.
8. Click Start recovery.
9. Select one of the file overwriting options:
Overwrite existing files
Overwrite an existing file if it is older
Do not overwrite existing files
10. You can now attach the recovered databases as described in one of the following sections:
Attaching SQL Server databases (p. 46)
Mounting Exchange Server databases (p. 47)
2.12.3 Managing virtualization environments
You can view the vSphere, Hyper-V, and Virtuozzo environments in their native presentation. Once
the corresponding agent is installed and registered, the VMware, Hyper-V, or Virtuozzo tab appears
under Resources.
The VMware tab enables you to change access credentials for the vCenter Server or standalone ESXi
host without re-installing the agent.
To change the vCenter Server or ESXi host access credentials
1. Under Resources, click VMware.
2. Click Hosts and Clusters.
3. In the Hosts and Clusters list (to the right of the Hosts and Clusters tree), select the vCenter
Server or standalone ESXi host that was specified during the Agent for VMware installation.
4. Click Overview.
5. Under Credentials, click the user name.
6. Specify the new access credentials, and then click OK.
2.12.4 Machine migration
You can perform machine migration by recovering its backup to a non-original machine.
The following table summarizes the available migration options.
Backed-up
machine type
Available recovery destinations
Physical
machine
ESXi virtual
machine
Hyper-V virtual
machine
Virtuozzo virtual
machine
Virtuozzo
container
Physical machine
+
+
+
-
-
55 Copyright © Acronis International GmbH, 2002-2016
VMware ESXi
virtual machine
+
+
+
-
-
Hyper-V virtual
machine
+
+
+
-
-
Virtuozzo virtual
machine
+
+
+
+
-
Virtuozzo
container
-
-
-
-
+
For instructions on how to perform migration, refer to the following sections:
Physical-to-virtual (P2V) - "Physical machine to virtual" (p. 38)
Virtual-to-virtual (V2V) - "Virtual machine" (p. 39)
Virtual-to-physical (V2P) - "Virtual machine" (p. 39) or "Recovering disks by using bootable
media" (p. 41)
Although it is possible to perform V2P migration in the web interface, we recommend using bootable
media in specific cases. Sometimes, you may want to use the media for migration to ESXi or Hyper-V.
The media enables you to do the following:
Choose individual disks or volumes for recovery.
Manually map the disks from the backup to the target machine disks.
Recreate logical volumes (LVM) or Linux Software RAID on the target machine.
Provide drivers for specific hardware that is critical for the system bootability.
2.13 Troubleshooting
This section describes how to save an agent log to a .zip file. If a backup fails for an unclear reason,
this file will help the technical support personnel to identify the problem.
To collect logs
1. Select the machine that you want to collect the logs from.
2. Click Activities.
3. Click Collect system information.
4. If prompted by your web browser, specify where to save the file.
56 Copyright © Acronis International GmbH, 2002-2016
3 Glossary
B
Backup set
A group of backups to which an individual retention rule can be applied.
For the Custom backup scheme, the backup sets correspond to the backup methods (Full,
Differential, and Incremental).
In all other cases, the backup sets are Monthly, Daily, Weekly, and Hourly.
A monthly backup is the first backup created after a month starts.
A weekly backup is the first backup created on the day of the week selected in the Weekly
backup option (click the gear icon, then Backup options > Weekly backup).
A daily backup is the first backup created after a day starts.
An hourly backup is the first backup created after an hour starts.
D
Differential backup
A differential backup stores changes to the data against the latest full backup (p. 56). You need
access to the corresponding full backup to recover the data from a differential backup.
F
Full backup
A self-sufficient backup containing all data chosen for backup. You do not need access to any other
backup to recover the data from a full backup.
I
Incremental backup
A backup that stores changes to the data against the latest backup. You need access to other backups
to recover data from an incremental backup.
S
Single-file backup format
A new backup format, in which the initial full and subsequent incremental backups are saved to a
single .tib file, instead of a chain of files. This format leverages the speed of the incremental backup
method, while avoiding its main disadvantagedifficult deletion of outdated backups. The software
marks the blocks used by outdated backups as "free" and writes new backups to these blocks. This
results in extremely fast cleanup, with minimal resource consumption.
57 Copyright © Acronis International GmbH, 2002-2016
Copyright Statement
Copyright © Acronis International GmbH, 2002-2016. All rights reserved.
“Acronis” and “Acronis Secure Zone” are registered trademarks of Acronis International GmbH.
"Acronis Compute with Confidence", “Acronis Startup Recovery Manager”, “Acronis Active Restore”,
“Acronis Instant Restore” and the Acronis logo are trademarks of Acronis International GmbH.
Linux is a registered trademark of Linus Torvalds.
VMware and VMware Ready are trademarks and/or registered trademarks of VMware, Inc. in the
United States and/or other jurisdictions.
Windows and MS-DOS are registered trademarks of Microsoft Corporation.
All other trademarks and copyrights referred to are the property of their respective owners.
Distribution of substantively modified versions of this document is prohibited without the explicit
permission of the copyright holder.
Distribution of this work or derivative work in any standard (paper) book form for commercial
purposes is prohibited unless prior permission is obtained from the copyright holder.
DOCUMENTATION IS PROVIDED "AS IS" AND ALL EXPRESS OR IMPLIED CONDITIONS,
REPRESENTATIONS AND WARRANTIES, INCLUDING ANY IMPLIED WARRANTY OF MERCHANTABILITY,
FITNESS FOR A PARTICULAR PURPOSE OR NON-INFRINGEMENT, ARE DISCLAIMED, EXCEPT TO THE
EXTENT THAT SUCH DISCLAIMERS ARE HELD TO BE LEGALLY INVALID.
Third party code may be provided with the Software and/or Service. The license terms for such
third-parties are detailed in the license.txt file located in the root installation directory. You can
always find the latest up-to-date list of the third party code and the associated license terms used
with the Software and/or Service at http://kb.acronis.com/content/7696
Acronis patented technologies
Technologies, used in this product, are covered and protected by one or more U.S. Patent Numbers:
7,047,380; 7,275,139; 7,281,104; 7,318,135; 7,353,355; 7,366,859; 7,475,282; 7,603,533; 7,636,824;
7,650,473; 7,721,138; 7,779,221; 7,831,789; 7,886,120; 7,895,403; 7,934,064; 7,937,612; 7,949,635;
7,953,948; 7,979,690; 8,005,797; 8,051,044; 8,069,320; 8,073,815; 8,074,035; 8,145,607; 8,180,984;
8,225,133; 8,261,035; 8,296,264; 8,312,259; 8,347,137; 8,484,427; 8,645,748; 8,732,121 and patent
pending applications.
22

Hulp nodig? Stel uw vraag in het forum

Spelregels

Misbruik melden

Gebruikershandleiding.com neemt misbruik van zijn services uitermate serieus. U kunt hieronder aangeven waarom deze vraag ongepast is. Wij controleren de vraag en zonodig wordt deze verwijderd.

Product:

Bijvoorbeeld antisemitische inhoud, racistische inhoud, of materiaal dat gewelddadige fysieke handelingen tot gevolg kan hebben.

Bijvoorbeeld een creditcardnummer, een persoonlijk identificatienummer, of een geheim adres. E-mailadressen en volledige namen worden niet als privégegevens beschouwd.

Spelregels forum

Om tot zinvolle vragen te komen hanteren wij de volgende spelregels:

Belangrijk! Als er een antwoord wordt gegeven op uw vraag, dan is het voor de gever van het antwoord nuttig om te weten als u er wel (of niet) mee geholpen bent! Wij vragen u dus ook te reageren op een antwoord.

Belangrijk! Antwoorden worden ook per e-mail naar abonnees gestuurd. Laat uw emailadres achter op deze site, zodat u op de hoogte blijft. U krijgt dan ook andere vragen en antwoorden te zien.

Abonneren

Abonneer u voor het ontvangen van emails voor uw Acronis Backup Service Version 5 bij:


U ontvangt een email met instructies om u voor één of beide opties in te schrijven.


Ontvang uw handleiding per email

Vul uw emailadres in en ontvang de handleiding van Acronis Backup Service Version 5 in de taal/talen: Engels als bijlage per email.

De handleiding is 1,34 mb groot.


U ontvangt de handleiding per email binnen enkele minuten. Als u geen email heeft ontvangen, dan heeft u waarschijnlijk een verkeerd emailadres ingevuld of is uw mailbox te vol. Daarnaast kan het zijn dat uw internetprovider een maximum heeft aan de grootte per email. Omdat hier een handleiding wordt meegestuurd, kan het voorkomen dat de email groter is dan toegestaan bij uw provider.

Stel vragen via chat aan uw handleiding

Stel uw vraag over deze PDF

Andere handleiding(en) van Acronis Backup Service Version 5

Acronis Backup Service Version 5 Gebruiksaanwijzing - Deutsch - 55 pagina's


Uw handleiding is per email verstuurd. Controleer uw email

Als u niet binnen een kwartier uw email met handleiding ontvangen heeft, kan het zijn dat u een verkeerd emailadres heeft ingevuld of dat uw emailprovider een maximum grootte per email heeft ingesteld die kleiner is dan de grootte van de handleiding.

Er is een email naar u verstuurd om uw inschrijving definitief te maken.

Controleer uw email en volg de aanwijzingen op om uw inschrijving definitief te maken

U heeft geen emailadres opgegeven

Als u de handleiding per email wilt ontvangen, vul dan een geldig emailadres in.

Uw vraag is op deze pagina toegevoegd

Wilt u een email ontvangen bij een antwoord en/of nieuwe vragen? Vul dan hier uw emailadres in.


Info