installer's information
connecting up
As a specialist, you alone are competent to install and connect up
Atag appliances.
Our guarantee therefore applies only and exclusively to
appliances which have been installed and connected up by
you in accordance with the provisions of current regulations.
Failure to meet this requirement would incur the fitter's liability and
release the Atag company from any liability.
The electrical connections are made before the oven is installed in its
housing.
• The oven must be connected using an approved 3-core cable (live,
neutral and earth) with 1.5 mm square conductors. This should be
connected via a 3- pin-socket (live, neutral, and earth to the main sup-
ply which should be should be a 220-240V, alternating single-phase cur-
rent. If the oven is not connected using a plug and socket, it must be
connected to a multi-pole switch with a minimum gap of 3 mm bet-
ween contacts. The earth wire (green and yellow) should be connected
to the terminal marked with the earth symbol
on the appliance and
to the earth in the switch.
• Where the oven is connected using a separate plug and socket this
must be accessible after the oven has been installed.
• The neutral wire (blue) of the oven must be connected to the neutral
in the main supply.
• Tighten the clamp to hold the cable.
• Close the trapdoor using the two screws.
installer's information
connecting up
• The supply cable (H05 RR-F, H05 RN-F or H05 W-F) must be long enough
to allow the oven to rest on the floor in front of its housing.
With the oven sitting on the floor and disconnected:
• Open the trapdoor at the bottom right hand side at the back of the oven
by removing the 2 screws and swinging the door away.
• Remove the sheath from each wire in the new cable up to 12 mm.
• Twist the ends carefully together.
• Unscrew the terminal screws and remove the wires that need changing.
• Pass the new cable through the wire clamp to the right of the terminals.
• Connect the wires up in accordance with the markings on the terminals.
• Make sure all wires are trapped under the screws.
• The brown wire (live) going to terminal marked L.
• The green and yellow wire (earth) going to the one marked .
• The blue wire (neutral) going to the terminal marked N.
• Tighten the screws and check, by tugging on each wire, that they are
firmly connected.
• Tighten the clamp to hold the cable.
• Close the trapdoor using the two screws.
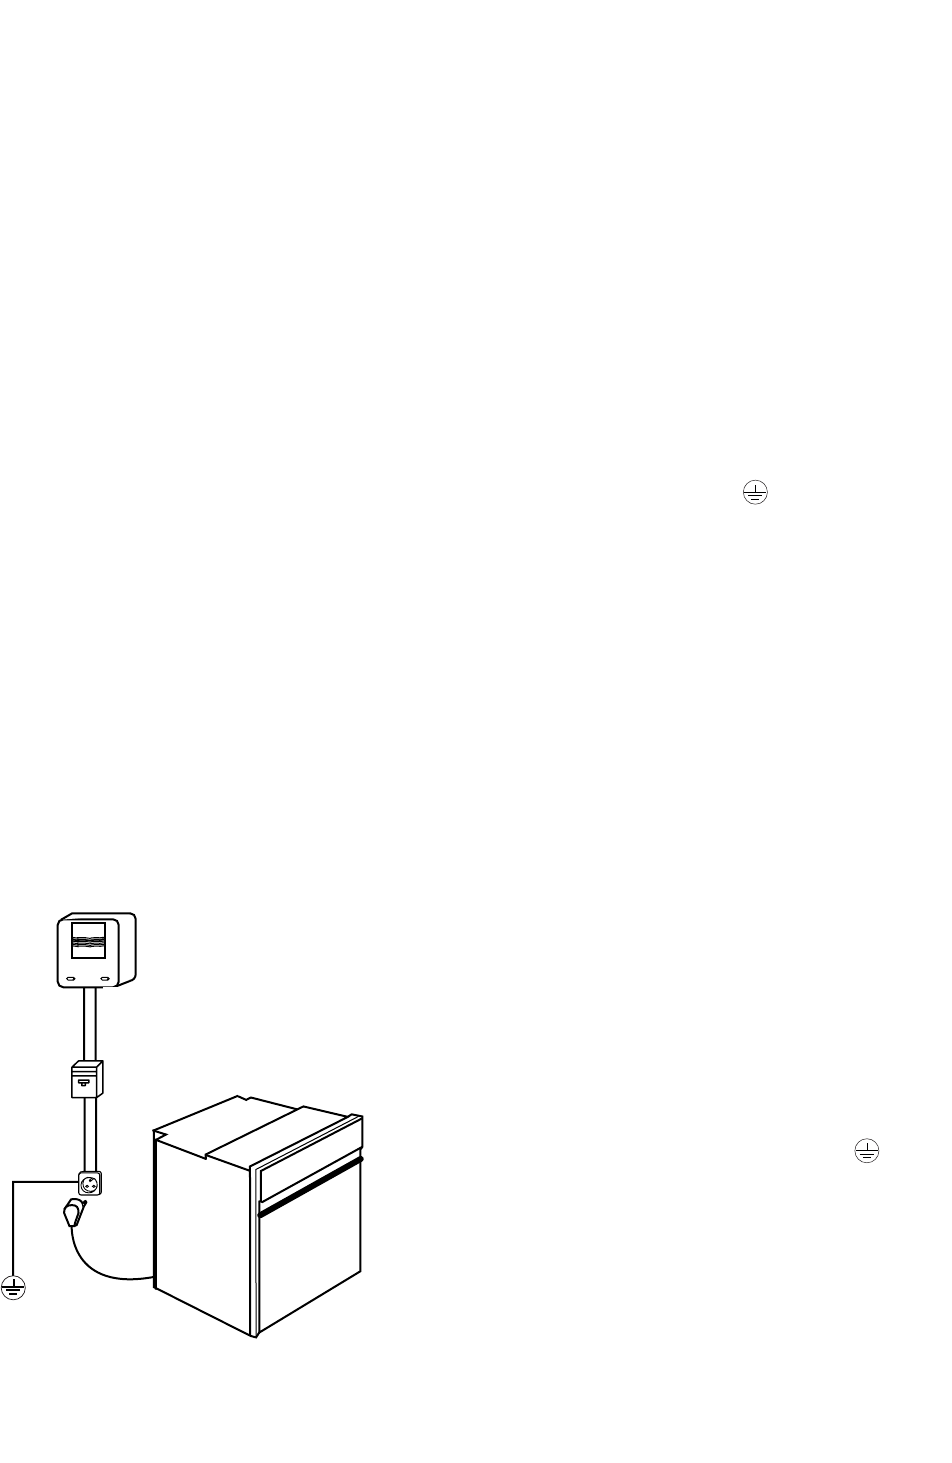
Electricity meter
(mains) (20A, single-
phase
220-240 V alternating
current 50 Hz)
Socket
2 -pin with earth
220-240 V single phase
alternating current supply
Connecting cable approx
1.50 m. long
96
Fused 16A or differential
circuit breaker