484462
268
Verklein
Vergroot
Pagina terug
1/297
Pagina verder
06 Maintenance and specifications
Wheels and tires
06
266
* Option/accessory, for more information, see Introduction.
WARNING
The jack must correctly engage the jack
attachment.
Be sure the jack is on a firm, level, non-
slippery surface.
Never allow any part of your body to be
extended under a vehicle supported by
a jack.
Use the jack intended for the vehicle
when changing a tire. For any other job,
use stands to support the vehicle.
Apply the parking brake and put the
gear selector in the Park (P) position.
Block the wheels standing on the
ground, use rigid wooden blocks or
large stones.
The jack should be kept well-greased
and clean, and should not be damaged.
No objects should be placed between
the base of jack and the ground, or
between the jack and the attachment
bar on the vehicle.
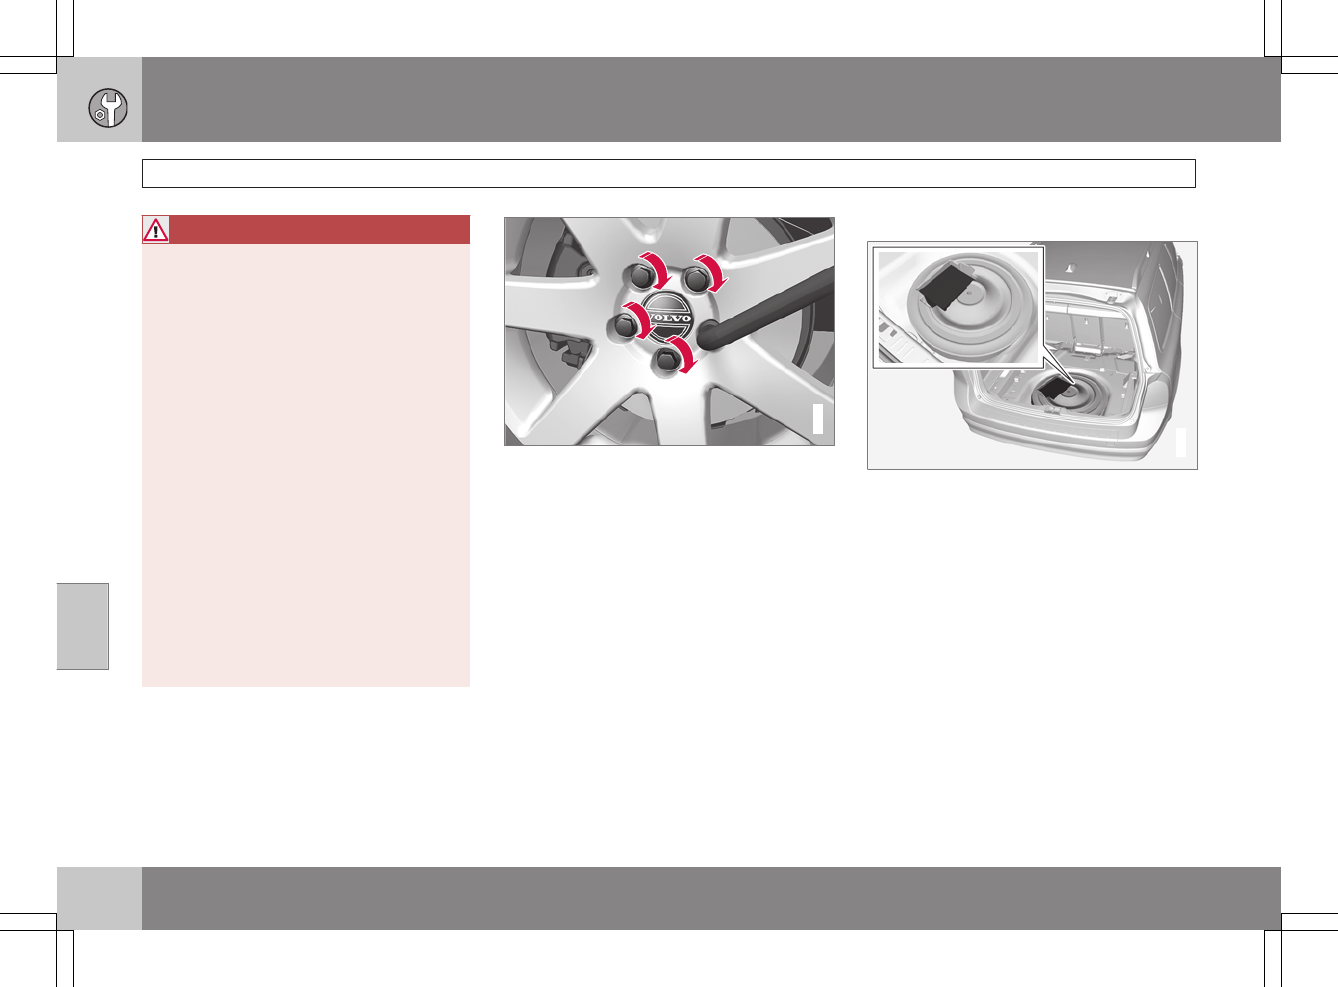
Re-installing the wheel
1. Clean the contact surfaces on the wheel
and hub.
2. Lift the wheel and place it on the hub.
G022916
Tighten the lug nuts
3. Install the wheel nuts and tighten hand-
tight. Using the lug wrench, tighten cross-
wise until all nuts are snug.
4. Lower the vehicle to the ground and alter-
nately tighten the bolts crosswise to
102 ft. lbs. (140 Nm).
5. Install the wheel cap (where applicable).
Tire Sealing System
G023309
Introduction
Certain models are equipped with a tire sealing
system that enables you to temporarily seal a
hole in the tread surface and re-inflate a flat tire,
or to adjust a tire’s inflation pressure.
The system consists of an air compressor, a
container for the sealing compound, wiring to
connect the system to the vehicle’s electrical
system via one of the 12-volt sockets, and a
hose used to connect the system to the tire’s
inflation valve.
The 12-volt sockets are located in the front
tunnel console, on the rear side of the center
console in the rear seat, and in the cargo com-
partment*.See page 199.
268

Hulp nodig? Stel uw vraag in het forum

Spelregels

Misbruik melden

Gebruikershandleiding.com neemt misbruik van zijn services uitermate serieus. U kunt hieronder aangeven waarom deze vraag ongepast is. Wij controleren de vraag en zonodig wordt deze verwijderd.

Product:

Bijvoorbeeld antisemitische inhoud, racistische inhoud, of materiaal dat gewelddadige fysieke handelingen tot gevolg kan hebben.

Bijvoorbeeld een creditcardnummer, een persoonlijk identificatienummer, of een geheim adres. E-mailadressen en volledige namen worden niet als privégegevens beschouwd.

Spelregels forum

Om tot zinvolle vragen te komen hanteren wij de volgende spelregels:

Belangrijk! Als er een antwoord wordt gegeven op uw vraag, dan is het voor de gever van het antwoord nuttig om te weten als u er wel (of niet) mee geholpen bent! Wij vragen u dus ook te reageren op een antwoord.

Belangrijk! Antwoorden worden ook per e-mail naar abonnees gestuurd. Laat uw emailadres achter op deze site, zodat u op de hoogte blijft. U krijgt dan ook andere vragen en antwoorden te zien.

Abonneren

Abonneer u voor het ontvangen van emails voor uw Volvo XC60 - 2009 bij:


U ontvangt een email met instructies om u voor één of beide opties in te schrijven.


Ontvang uw handleiding per email

Vul uw emailadres in en ontvang de handleiding van Volvo XC60 - 2009 in de taal/talen: Engels als bijlage per email.

De handleiding is 22,19 mb groot.


U ontvangt de handleiding per email binnen enkele minuten. Als u geen email heeft ontvangen, dan heeft u waarschijnlijk een verkeerd emailadres ingevuld of is uw mailbox te vol. Daarnaast kan het zijn dat uw internetprovider een maximum heeft aan de grootte per email. Omdat hier een handleiding wordt meegestuurd, kan het voorkomen dat de email groter is dan toegestaan bij uw provider.

Stel vragen via chat aan uw handleiding

Stel uw vraag over deze PDF

loading

Andere handleiding(en) van Volvo XC60 - 2009

Volvo XC60 - 2009 Gebruiksaanwijzing - Nederlands - 306 pagina's

Volvo XC60 - 2009 Gebruiksaanwijzing - Deutsch - 322 pagina's

Volvo XC60 - 2009 Gebruiksaanwijzing - Français - 322 pagina's


Uw handleiding is per email verstuurd. Controleer uw email

Als u niet binnen een kwartier uw email met handleiding ontvangen heeft, kan het zijn dat u een verkeerd emailadres heeft ingevuld of dat uw emailprovider een maximum grootte per email heeft ingesteld die kleiner is dan de grootte van de handleiding.

Er is een email naar u verstuurd om uw inschrijving definitief te maken.

Controleer uw email en volg de aanwijzingen op om uw inschrijving definitief te maken

U heeft geen emailadres opgegeven

Als u de handleiding per email wilt ontvangen, vul dan een geldig emailadres in.

Uw vraag is op deze pagina toegevoegd

Wilt u een email ontvangen bij een antwoord en/of nieuwe vragen? Vul dan hier uw emailadres in.


Info