Step 2
When the "Channel" is set as "1", it is to set the record schedule of tracking speed dome.
When the "Channel" is set as "2", it is to set the record schedule of panorama camera.
Step 3
Select record type and set period.
Note
You can select record type by pressing the left button and dragging on the time line of the
corresponding day on the interface of record schedule, and then you can set the period of different
record types.
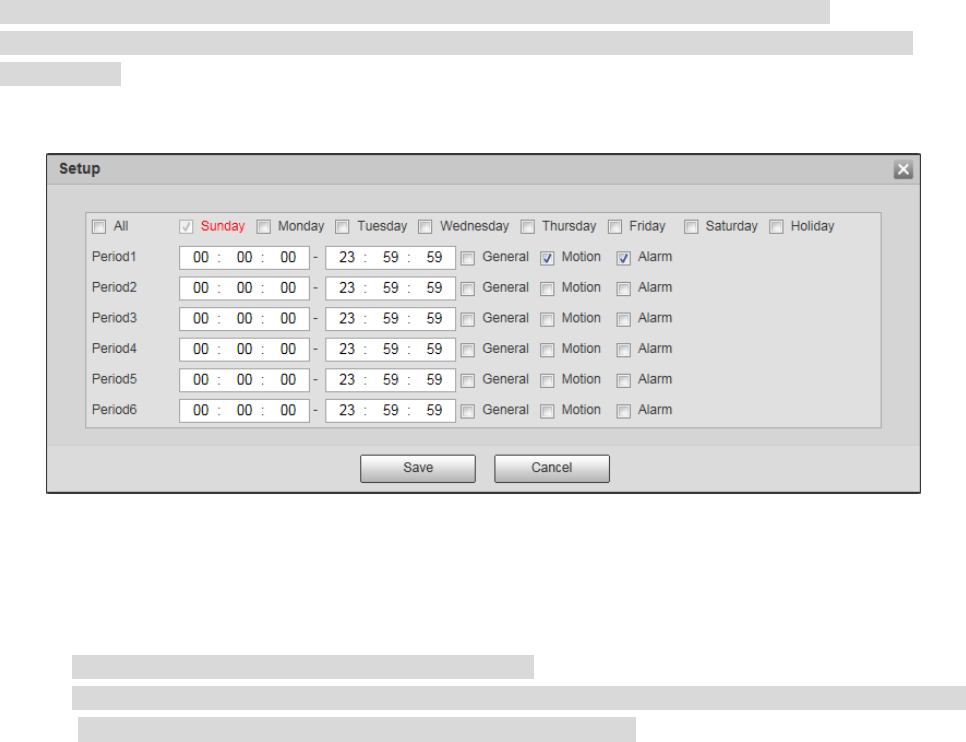
1. Click the "Setup" of corresponding day and the system will pop out the dialogue box of "Setup",
which is shown in Figure 4-85.
Figure 4-85
2. Select day and the check box in front of the period, and set period.
Note
There are six periods which can be set every day.
The setting will be applied to the whole week if it selects all, you can also select the check box in
front of the day to make separate setting upon several days.
3. Select the record type of corresponding period.
4. Click "Save" and the system will return to the interface of "Record Schedule". Different colors means
different types of record schedule. Green means general record schedule, yellow means motion
record schedule and red means alarm record schedule.
Step 4
Click "Save" to complete setting.
4.5.1.2 Set Snapshot Schedule

